Compare commits

@@ -5,30 +5,36 @@ common --experimental_repo_remote_exec
|
||||
|
||||
# Basic build settings
|
||||
build --jobs 128
|
||||
build --define='absl=1'
|
||||
build --define='absl=1' # for gtest
|
||||
build --enable_platform_specific_config
|
||||
|
||||
# Enable stack traces
|
||||
test --test_env="GTEST_INSTALL_FAILURE_SIGNAL_HANDLER=1"
|
||||
|
||||
# Linux
|
||||
build:linux --cxxopt=-std=c++14
|
||||
build:linux --host_cxxopt=-std=c++14
|
||||
build:linux --cxxopt=-std=c++17
|
||||
build:linux --host_cxxopt=-std=c++17
|
||||
build:linux --copt=-w
|
||||
|
||||
# windows
|
||||
build:windows --cxxopt=/std:c++14
|
||||
build:windows --host_cxxopt=/std:c++14
|
||||
build:windows --cxxopt=/std:c++17
|
||||
build:windows --host_cxxopt=/std:c++17
|
||||
build:windows --copt=/w
|
||||
# For using M_* math constants on Windows with MSVC.
|
||||
build:windows --copt=/D_USE_MATH_DEFINES
|
||||
build:windows --host_copt=/D_USE_MATH_DEFINES
|
||||
|
||||
# macOS
|
||||
build:macos --cxxopt=-std=c++14
|
||||
build:macos --host_cxxopt=-std=c++14
|
||||
build:macos --cxxopt=-std=c++17
|
||||
build:macos --host_cxxopt=-std=c++17
|
||||
build:macos --copt=-w
|
||||
|
||||
# Sets the default Apple platform to macOS.
|
||||
build --apple_platform_type=macos
|
||||
|
||||
# Compile ObjC++ files with C++17
|
||||
build --per_file_copt=.*\.mm\$@-std=c++17
|
||||
|
||||
# Allow debugging with XCODE
|
||||
build --apple_generate_dsym
|
||||
|
||||
@@ -55,6 +61,7 @@ build:android_arm64 --fat_apk_cpu=arm64-v8a
|
||||
|
||||
# iOS configs.
|
||||
build:ios --apple_platform_type=ios
|
||||
build:ios --copt=-fno-aligned-allocation
|
||||
|
||||
build:ios_i386 --config=ios
|
||||
build:ios_i386 --cpu=ios_i386
|
||||
@@ -83,3 +90,13 @@ build:ios_fat --watchos_cpus=armv7k
|
||||
build:darwin_x86_64 --apple_platform_type=macos
|
||||
build:darwin_x86_64 --macos_minimum_os=10.12
|
||||
build:darwin_x86_64 --cpu=darwin_x86_64
|
||||
|
||||
build:darwin_arm64 --apple_platform_type=macos
|
||||
build:darwin_arm64 --macos_minimum_os=10.16
|
||||
build:darwin_arm64 --cpu=darwin_arm64
|
||||
|
||||
# This bazelrc file is meant to be written by a setup script.
|
||||
try-import %workspace%/.configure.bazelrc
|
||||
|
||||
# This bazelrc file can be used for user-specific custom build settings.
|
||||
try-import %workspace%/.user.bazelrc
|
||||
|
||||
@@ -0,0 +1 @@
|
||||
5.2.0
|
||||
@@ -0,0 +1,27 @@
|
||||
---
|
||||
name: "Build/Installation Issue"
|
||||
about: Use this template for build/installation issues
|
||||
labels: type:build/install
|
||||
|
||||
---
|
||||
<em>Please make sure that this is a build/installation issue and also refer to the [troubleshooting](https://google.github.io/mediapipe/getting_started/troubleshooting.html) documentation before raising any issues.</em>
|
||||
|
||||
**System information** (Please provide as much relevant information as possible)
|
||||
- OS Platform and Distribution (e.g. Linux Ubuntu 16.04, Android 11, iOS 14.4):
|
||||
- Compiler version (e.g. gcc/g++ 8 /Apple clang version 12.0.0):
|
||||
- Programming Language and version ( e.g. C++ 14, Python 3.6, Java ):
|
||||
- Installed using virtualenv? pip? Conda? (if python):
|
||||
- [MediaPipe version](https://github.com/google/mediapipe/releases):
|
||||
- Bazel version:
|
||||
- XCode and Tulsi versions (if iOS):
|
||||
- Android SDK and NDK versions (if android):
|
||||
- Android [AAR](https://google.github.io/mediapipe/getting_started/android_archive_library.html) ( if android):
|
||||
- OpenCV version (if running on desktop):
|
||||
|
||||
**Describe the problem**:
|
||||
|
||||
|
||||
**[Provide the exact sequence of commands / steps that you executed before running into the problem](https://google.github.io/mediapipe/getting_started/getting_started.html):**
|
||||
|
||||
**Complete Logs:**
|
||||
Include Complete Log information or source code that would be helpful to diagnose the problem. If including tracebacks, please include the full traceback. Large logs and files should be attached:
|
||||
@@ -0,0 +1,26 @@
|
||||
---
|
||||
name: "Solution Issue"
|
||||
about: Use this template for assistance with a specific mediapipe solution, such as "Pose" or "Iris", including inference model usage/training, solution-specific calculators, etc.
|
||||
labels: type:support
|
||||
|
||||
---
|
||||
<em>Please make sure that this is a [solution](https://google.github.io/mediapipe/solutions/solutions.html) issue.<em>
|
||||
|
||||
**System information** (Please provide as much relevant information as possible)
|
||||
- Have I written custom code (as opposed to using a stock example script provided in Mediapipe):
|
||||
- OS Platform and Distribution (e.g., Linux Ubuntu 16.04, Android 11, iOS 14.4):
|
||||
- [MediaPipe version](https://github.com/google/mediapipe/releases):
|
||||
- Bazel version:
|
||||
- Solution (e.g. FaceMesh, Pose, Holistic):
|
||||
- Programming Language and version ( e.g. C++, Python, Java):
|
||||
|
||||
**Describe the expected behavior:**
|
||||
|
||||
**Standalone code you may have used to try to get what you need :**
|
||||
|
||||
If there is a problem, provide a reproducible test case that is the bare minimum necessary to generate the problem. If possible, please share a link to Colab/repo link /any notebook:
|
||||
|
||||
**Other info / Complete Logs :**
|
||||
Include any logs or source code that would be helpful to
|
||||
diagnose the problem. If including tracebacks, please include the full
|
||||
traceback. Large logs and files should be attached:
|
||||
@@ -0,0 +1,51 @@
|
||||
---
|
||||
name: "Documentation Issue"
|
||||
about: Use this template for documentation related issues
|
||||
labels: type:docs
|
||||
|
||||
---
|
||||
Thank you for submitting a MediaPipe documentation issue.
|
||||
The MediaPipe docs are open source! To get involved, read the documentation Contributor Guide
|
||||
## URL(s) with the issue:
|
||||
|
||||
Please provide a link to the documentation entry, for example: https://github.com/google/mediapipe/blob/master/docs/solutions/face_mesh.md#models
|
||||
|
||||
## Description of issue (what needs changing):
|
||||
|
||||
Kinds of documentation problems:
|
||||
|
||||
### Clear description
|
||||
|
||||
For example, why should someone use this method? How is it useful?
|
||||
|
||||
### Correct links
|
||||
|
||||
Is the link to the source code correct?
|
||||
|
||||
### Parameters defined
|
||||
Are all parameters defined and formatted correctly?
|
||||
|
||||
### Returns defined
|
||||
|
||||
Are return values defined?
|
||||
|
||||
### Raises listed and defined
|
||||
|
||||
Are the errors defined? For example,
|
||||
|
||||
### Usage example
|
||||
|
||||
Is there a usage example?
|
||||
|
||||
See the API guide:
|
||||
on how to write testable usage examples.
|
||||
|
||||
### Request visuals, if applicable
|
||||
|
||||
Are there currently visuals? If not, will it clarify the content?
|
||||
|
||||
### Submit a pull request?
|
||||
|
||||
Are you planning to also submit a pull request to fix the issue? See the docs
|
||||
https://github.com/google/mediapipe/blob/master/CONTRIBUTING.md
|
||||
|
||||
@@ -0,0 +1,32 @@
|
||||
---
|
||||
name: "Bug Issue"
|
||||
about: Use this template for reporting a bug
|
||||
labels: type:bug
|
||||
|
||||
---
|
||||
<em>Please make sure that this is a bug and also refer to the [troubleshooting](https://google.github.io/mediapipe/getting_started/troubleshooting.html), FAQ documentation before raising any issues.</em>
|
||||
|
||||
**System information** (Please provide as much relevant information as possible)
|
||||
|
||||
- Have I written custom code (as opposed to using a stock example script provided in MediaPipe):
|
||||
- OS Platform and Distribution (e.g., Linux Ubuntu 16.04, Android 11, iOS 14.4):
|
||||
- Mobile device (e.g. iPhone 8, Pixel 2, Samsung Galaxy) if the issue happens on mobile device:
|
||||
- Browser and version (e.g. Google Chrome, Safari) if the issue happens on browser:
|
||||
- Programming Language and version ( e.g. C++, Python, Java):
|
||||
- [MediaPipe version](https://github.com/google/mediapipe/releases):
|
||||
- Bazel version (if compiling from source):
|
||||
- Solution ( e.g. FaceMesh, Pose, Holistic ):
|
||||
- Android Studio, NDK, SDK versions (if issue is related to building in Android environment):
|
||||
- Xcode & Tulsi version (if issue is related to building for iOS):
|
||||
|
||||
**Describe the current behavior:**
|
||||
|
||||
**Describe the expected behavior:**
|
||||
|
||||
**Standalone code to reproduce the issue:**
|
||||
Provide a reproducible test case that is the bare minimum necessary to replicate the problem. If possible, please share a link to Colab/repo link /any notebook:
|
||||
|
||||
**Other info / Complete Logs :**
|
||||
Include any logs or source code that would be helpful to
|
||||
diagnose the problem. If including tracebacks, please include the full
|
||||
traceback. Large logs and files should be attached
|
||||
@@ -0,0 +1,24 @@
|
||||
---
|
||||
name: "Feature Request"
|
||||
about: Use this template for raising a feature request
|
||||
labels: type:feature
|
||||
|
||||
---
|
||||
<em>Please make sure that this is a feature request.</em>
|
||||
|
||||
**System information** (Please provide as much relevant information as possible)
|
||||
|
||||
- MediaPipe Solution (you are using):
|
||||
- Programming language : C++/typescript/Python/Objective C/Android Java
|
||||
- Are you willing to contribute it (Yes/No):
|
||||
|
||||
|
||||
**Describe the feature and the current behavior/state:**
|
||||
|
||||
**Will this change the current api? How?**
|
||||
|
||||
**Who will benefit with this feature?**
|
||||
|
||||
**Please specify the use cases for this feature:**
|
||||
|
||||
**Any Other info:**
|
||||
@@ -0,0 +1,12 @@
|
||||
---
|
||||
name: "Other Issue"
|
||||
about: Use this template for any other non-support related issues.
|
||||
labels: type:others
|
||||
|
||||
---
|
||||
This template is for miscellaneous issues not covered by the other issue categories
|
||||
|
||||
For questions on how to work with MediaPipe, or support for problems that are not verified bugs in MediaPipe, please go to [StackOverflow](https://stackoverflow.com/questions/tagged/mediapipe) and [Slack](https://mediapipe.page.link/joinslack) communities.
|
||||
|
||||
If you are reporting a vulnerability, please use the [dedicated reporting process](https://github.com/google/mediapipe/security).
|
||||
|
||||
@@ -0,0 +1,18 @@
|
||||
# Copyright 2021 The MediaPipe Authors.
|
||||
#
|
||||
# Licensed under the Apache License, Version 2.0 (the "License");
|
||||
# you may not use this file except in compliance with the License.
|
||||
# You may obtain a copy of the License at
|
||||
#
|
||||
# http://www.apache.org/licenses/LICENSE-2.0
|
||||
#
|
||||
# Unless required by applicable law or agreed to in writing, software
|
||||
# distributed under the License is distributed on an "AS IS" BASIS,
|
||||
# WITHOUT WARRANTIES OR CONDITIONS OF ANY KIND, either express or implied.
|
||||
# See the License for the specific language governing permissions and
|
||||
# limitations under the License.
|
||||
# ============================================================================
|
||||
|
||||
# A list of assignees
|
||||
assignees:
|
||||
- sureshdagooglecom
|
||||
@@ -0,0 +1,34 @@
|
||||
# Copyright 2021 The MediaPipe Authors.
|
||||
#
|
||||
# Licensed under the Apache License, Version 2.0 (the "License");
|
||||
# you may not use this file except in compliance with the License.
|
||||
# You may obtain a copy of the License at
|
||||
#
|
||||
# http://www.apache.org/licenses/LICENSE-2.0
|
||||
#
|
||||
# Unless required by applicable law or agreed to in writing, software
|
||||
# distributed under the License is distributed on an "AS IS" BASIS,
|
||||
# WITHOUT WARRANTIES OR CONDITIONS OF ANY KIND, either express or implied.
|
||||
# See the License for the specific language governing permissions and
|
||||
# limitations under the License.
|
||||
# ============================================================================
|
||||
#
|
||||
# This file was assembled from multiple pieces, whose use is documented
|
||||
# throughout. Please refer to the TensorFlow dockerfiles documentation
|
||||
# for more information.
|
||||
|
||||
# Number of days of inactivity before an Issue or Pull Request becomes stale
|
||||
daysUntilStale: 7
|
||||
# Number of days of inactivity before a stale Issue or Pull Request is closed
|
||||
daysUntilClose: 7
|
||||
# Only issues or pull requests with all of these labels are checked if stale. Defaults to `[]` (disabled)
|
||||
onlyLabels:
|
||||
- stat:awaiting response
|
||||
# Comment to post when marking as stale. Set to `false` to disable
|
||||
markComment: >
|
||||
This issue has been automatically marked as stale because it has not had
|
||||
recent activity. It will be closed if no further activity occurs. Thank you.
|
||||
# Comment to post when removing the stale label. Set to `false` to disable
|
||||
unmarkComment: false
|
||||
closeComment: >
|
||||
Closing as stale. Please reopen if you'd like to work on this further.
|
||||
@@ -2,3 +2,5 @@ bazel-*
|
||||
mediapipe/MediaPipe.xcodeproj
|
||||
mediapipe/MediaPipe.tulsiproj/*.tulsiconf-user
|
||||
mediapipe/provisioning_profile.mobileprovision
|
||||
.configure.bazelrc
|
||||
.user.bazelrc
|
||||
|
||||
@@ -12,6 +12,6 @@
|
||||
# See the License for the specific language governing permissions and
|
||||
# limitations under the License.
|
||||
|
||||
licenses(["notice"]) # Apache 2.0
|
||||
licenses(["notice"])
|
||||
|
||||
exports_files(["LICENSE"])
|
||||
@@ -1,15 +1,17 @@
|
||||
# Contributing guidelines
|
||||
|
||||
## Pull Request Checklist
|
||||
## What type of pull request do we accept into MediaPipe repository?
|
||||
|
||||
* Bug fixes
|
||||
* Documentation fixes
|
||||
|
||||
For new feature additions (e.g., new graphs and calculators), we are currently not planning to accept new feature pull requests into the MediaPipe repository. Instead, we like to get contributors to create their own repositories of the new feature and list it at [Awesome MediaPipe](https://mediapipe.page.link/awesome-mediapipe). This will allow contributors to more quickly get their code out to the community.
|
||||
|
||||
Before sending your pull requests, make sure you followed this list.
|
||||
|
||||
- Read [contributing guidelines](CONTRIBUTING.md).
|
||||
- Read [Code of Conduct](CODE_OF_CONDUCT.md).
|
||||
- Ensure you have signed the [Contributor License Agreement (CLA)](https://cla.developers.google.com/).
|
||||
- Check if my changes are consistent with the [guidelines](https://github.com/google/mediapipe/blob/master/CONTRIBUTING.md#general-guidelines-and-philosophy-for-contribution).
|
||||
- Changes are consistent with the [Coding Style](https://github.com/google/mediapipe/blob/master/CONTRIBUTING.md#c-coding-style).
|
||||
- Run [Unit Tests](https://github.com/google/mediapipe/blob/master/CONTRIBUTING.md#running-unit-tests).
|
||||
|
||||
## How to become a contributor and submit your own code
|
||||
|
||||
@@ -28,100 +30,7 @@ Follow either of the two links above to access the appropriate CLA and instructi
|
||||
|
||||
### Contributing code
|
||||
|
||||
If you have improvements to MediaPipe, send us your pull requests! For those
|
||||
If you have bug fixes and documentation fixes to MediaPipe, send us your pull requests! For those
|
||||
just getting started, GitHub has a [howto](https://help.github.com/articles/using-pull-requests/).
|
||||
|
||||
MediaPipe team members will be assigned to review your pull requests. Once the
|
||||
pull requests are approved and pass continuous integration checks, a MediaPipe
|
||||
team member will apply `ready to pull` label to your change. This means we are
|
||||
working on getting your pull request submitted to our internal repository. After
|
||||
the change has been submitted internally, your pull request will be merged
|
||||
automatically on GitHub.
|
||||
|
||||
If you want to contribute but you're not sure where to start, take a look at the
|
||||
[issues with the "contributions welcome" label](https://github.com/google/mediapipe/labels/stat%3Acontributions%20welcome).
|
||||
These are issues that we believe are particularly well suited for outside
|
||||
contributions, often because we probably won't get to them right now. If you
|
||||
decide to start on an issue, leave a comment so that other people know that
|
||||
you're working on it. If you want to help out, but not alone, use the issue
|
||||
comment thread to coordinate.
|
||||
|
||||
### Contribution guidelines and standards
|
||||
|
||||
Before sending your pull request for
|
||||
[review](https://github.com/google/mediapipe/pulls),
|
||||
make sure your changes are consistent with the guidelines and follow the
|
||||
MediaPipe coding style.
|
||||
|
||||
#### General guidelines and philosophy for contribution
|
||||
|
||||
* Include unit tests when you contribute new features, as they help to a)
|
||||
prove that your code works correctly, and b) guard against future breaking
|
||||
changes to lower the maintenance cost.
|
||||
* Bug fixes also generally require unit tests, because the presence of bugs
|
||||
usually indicates insufficient test coverage.
|
||||
* Keep API compatibility in mind when you change code in MediaPipe framework
|
||||
e.g., code in
|
||||
[mediapipe/framework](https://github.com/google/mediapipe/tree/master/mediapipe/framework)
|
||||
and
|
||||
[mediapipe/calculators](https://github.com/google/mediapipe/tree/master/mediapipe/calculators).
|
||||
Once MediaPipe has reached version 1 and we will not make
|
||||
non-backward-compatible API changes without a major release. Reviewers of
|
||||
your pull request will comment on any API compatibility issues.
|
||||
* When you contribute a new feature to MediaPipe, the maintenance burden is
|
||||
(by default) transferred to the MediaPipe team. This means that benefit of
|
||||
the contribution must be compared against the cost of maintaining the
|
||||
feature.
|
||||
* Full new features (e.g., a new op implementing a cutting-edge algorithm)
|
||||
typically will live in
|
||||
[mediapipe/addons](https://github.com/google/mediapipe/addons) to get some
|
||||
airtime before decision is made regarding whether they are to be migrated to
|
||||
the core.
|
||||
|
||||
#### License
|
||||
|
||||
Include a license at the top of new files.
|
||||
|
||||
* [C/C++ license example](https://github.com/google/mediapipe/blob/master/mediapipe/framework/calculator_base.cc#L1)
|
||||
* [Java license example](https://github.com/google/mediapipe/blob/master/mediapipe/java/com/google/mediapipe/components/CameraHelper.java)
|
||||
|
||||
Bazel BUILD files also need to include a license section, e.g.,
|
||||
[BUILD example](https://github.com/google/mediapipe/blob/master/mediapipe/framework/BUILD#L61).
|
||||
|
||||
#### C++ coding style
|
||||
|
||||
Changes to MediaPipe C++ code should conform to
|
||||
[Google C++ Style Guide](https://google.github.io/styleguide/cppguide.html).
|
||||
|
||||
Use `clang-tidy` to check your C/C++ changes. To install `clang-tidy` on ubuntu:16.04, do:
|
||||
|
||||
```bash
|
||||
apt-get install -y clang-tidy
|
||||
```
|
||||
|
||||
You can check a C/C++ file by doing:
|
||||
|
||||
|
||||
```bash
|
||||
clang-format <my_cc_file> --style=google > /tmp/my_cc_file.cc
|
||||
diff <my_cc_file> /tmp/my_cc_file.cc
|
||||
```
|
||||
|
||||
#### Coding style for other languages
|
||||
|
||||
* [Google Java Style Guide](https://google.github.io/styleguide/javaguide.html)
|
||||
* [Google JavaScript Style Guide](https://google.github.io/styleguide/jsguide.html)
|
||||
* [Google Shell Style Guide](https://google.github.io/styleguide/shell.xml)
|
||||
* [Google Objective-C Style Guide](https://google.github.io/styleguide/objcguide.html)
|
||||
|
||||
#### Running sanity check
|
||||
|
||||
If you have Docker installed on your system, you can perform a sanity check on
|
||||
your changes by running the command:
|
||||
|
||||
```bash
|
||||
mediapipe/tools/ci_build/ci_build.sh CPU mediapipe/tools/ci_build/ci_sanity.sh
|
||||
```
|
||||
|
||||
This will catch most license, Python coding style and BUILD file issues that
|
||||
may exist in your changes.
|
||||
MediaPipe team members will be assigned to review your pull requests. Once the bug/documentation fixes are verified, a MediaPipe team member will acknowledge your contribution in the pull request comments, manually merge the fixes into our internal codebase upstream, and apply the `to be closed` label to the pull request. These fixes will later be pushed to GitHub in the next release, and a MediaPipe team member will then close the pull request.
|
||||
|
||||
@@ -12,7 +12,7 @@
|
||||
# See the License for the specific language governing permissions and
|
||||
# limitations under the License.
|
||||
|
||||
FROM ubuntu:18.04
|
||||
FROM ubuntu:20.04
|
||||
|
||||
MAINTAINER <[email protected]>
|
||||
|
||||
@@ -23,6 +23,7 @@ ENV DEBIAN_FRONTEND=noninteractive
|
||||
|
||||
RUN apt-get update && apt-get install -y --no-install-recommends \
|
||||
build-essential \
|
||||
gcc-8 g++-8 \
|
||||
ca-certificates \
|
||||
curl \
|
||||
ffmpeg \
|
||||
@@ -41,20 +42,24 @@ RUN apt-get update && apt-get install -y --no-install-recommends \
|
||||
software-properties-common && \
|
||||
add-apt-repository -y ppa:openjdk-r/ppa && \
|
||||
apt-get update && apt-get install -y openjdk-8-jdk && \
|
||||
apt-get install -y mesa-common-dev libegl1-mesa-dev libgles2-mesa-dev && \
|
||||
apt-get install -y mesa-utils && \
|
||||
apt-get clean && \
|
||||
rm -rf /var/lib/apt/lists/*
|
||||
|
||||
RUN update-alternatives --install /usr/bin/gcc gcc /usr/bin/gcc-8 100 --slave /usr/bin/g++ g++ /usr/bin/g++-8
|
||||
RUN pip3 install --upgrade setuptools
|
||||
RUN pip3 install wheel
|
||||
RUN pip3 install future
|
||||
RUN pip3 install absl-py numpy opencv-contrib-python protobuf==3.20.1
|
||||
RUN pip3 install six==1.14.0
|
||||
RUN pip3 install tensorflow==1.14.0
|
||||
RUN pip3 install tensorflow==2.2.0
|
||||
RUN pip3 install tf_slim
|
||||
|
||||
RUN ln -s /usr/bin/python3 /usr/bin/python
|
||||
|
||||
# Install bazel
|
||||
ARG BAZEL_VERSION=2.0.0
|
||||
ARG BAZEL_VERSION=5.2.0
|
||||
RUN mkdir /bazel && \
|
||||
wget --no-check-certificate -O /bazel/installer.sh "https://github.com/bazelbuild/bazel/releases/download/${BAZEL_VERSION}/b\
|
||||
azel-${BAZEL_VERSION}-installer-linux-x86_64.sh" && \
|
||||
|
||||
@@ -0,0 +1,10 @@
|
||||
global-exclude .git*
|
||||
global-exclude *_test.py
|
||||
|
||||
include CONTRIBUTING.md
|
||||
include LICENSE
|
||||
include MANIFEST.in
|
||||
include README.md
|
||||
include requirements.txt
|
||||
|
||||
recursive-include mediapipe/modules *.txt
|
||||
@@ -4,77 +4,73 @@ title: Home
|
||||
nav_order: 1
|
||||
---
|
||||
|
||||

|
||||

|
||||
|
||||
--------------------------------------------------------------------------------
|
||||
|
||||
## Cross-platform ML solutions made simple
|
||||
## Live ML anywhere
|
||||
|
||||
[MediaPipe](https://google.github.io/mediapipe/) is the simplest way for researchers
|
||||
and developers to build world-class ML solutions and applications for mobile,
|
||||
desktop/cloud, web and IoT devices.
|
||||
[MediaPipe](https://google.github.io/mediapipe/) offers cross-platform, customizable
|
||||
ML solutions for live and streaming media.
|
||||
|
||||
 | 
|
||||
 | 
|
||||
:------------------------------------------------------------------------------------------------------------: | :----------------------------------------------------:
|
||||
***End-to-End acceleration***: *built-in fast ML inference and processing accelerated even on common hardware* | ***Build one, deploy anywhere***: *Unified solution works across Android, iOS, desktop/cloud, web and IoT*
|
||||
 | 
|
||||
***End-to-End acceleration***: *Built-in fast ML inference and processing accelerated even on common hardware* | ***Build once, deploy anywhere***: *Unified solution works across Android, iOS, desktop/cloud, web and IoT*
|
||||
 | 
|
||||
***Ready-to-use solutions***: *Cutting-edge ML solutions demonstrating full power of the framework* | ***Free and open source***: *Framework and solutions both under Apache 2.0, fully extensible and customizable*
|
||||
|
||||
## ML solutions in MediaPipe
|
||||
|
||||
Face Detection | Face Mesh | Hands | Hair Segmentation
|
||||
:----------------------------------------------------------------------------------------------------------------------------: | :-------------------------------------------------------------------------------------------------------------: | :--------------------------------------------------------------------------------------------------------: | :---------------:
|
||||
[](https://google.github.io/mediapipe/solutions/face_detection) | [](https://google.github.io/mediapipe/solutions/face_mesh) | [](https://google.github.io/mediapipe/solutions/hands) | [](https://google.github.io/mediapipe/solutions/hair_segmentation)
|
||||
Face Detection | Face Mesh | Iris | Hands | Pose | Holistic
|
||||
:----------------------------------------------------------------------------------------------------------------------------: | :-------------------------------------------------------------------------------------------------------------: | :-------------------------------------------------------------------------------------------------------: | :--------------------------------------------------------------------------------------------------------: | :-------------------------------------------------------------------------------------------------------: | :------:
|
||||
[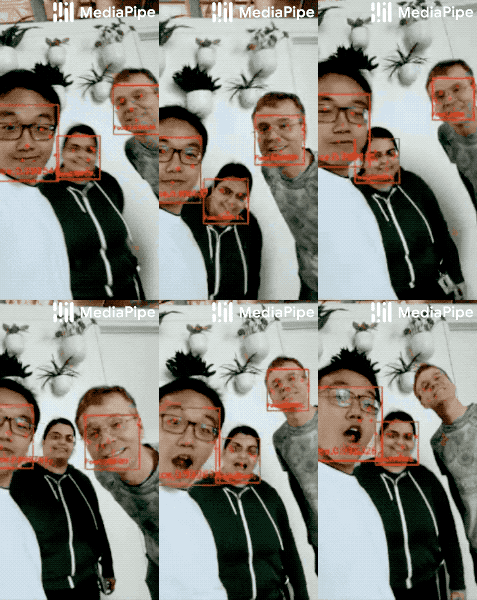](https://google.github.io/mediapipe/solutions/face_detection) | [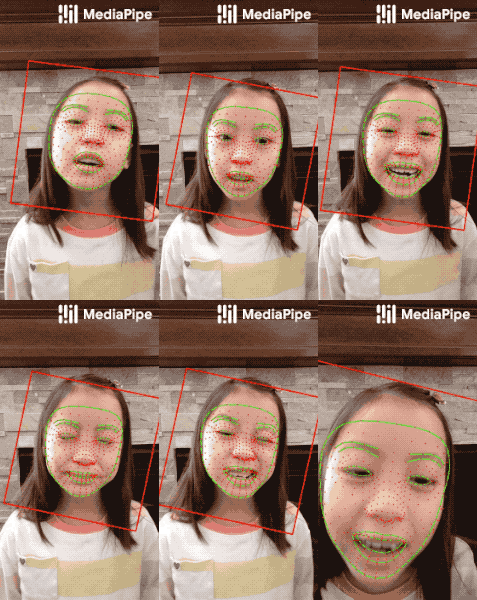](https://google.github.io/mediapipe/solutions/face_mesh) | [](https://google.github.io/mediapipe/solutions/iris) | [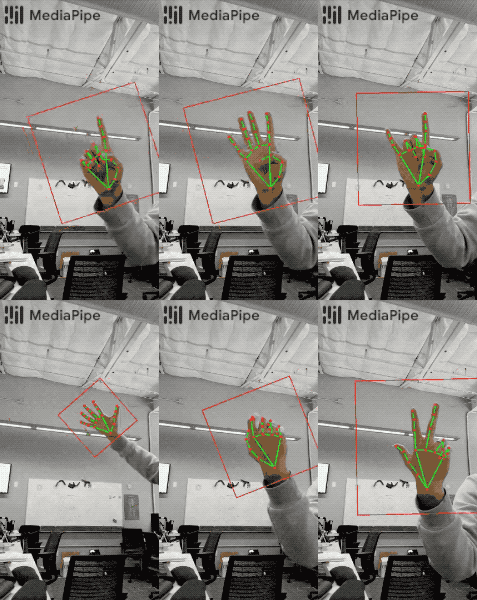](https://google.github.io/mediapipe/solutions/hands) | [](https://google.github.io/mediapipe/solutions/pose) | [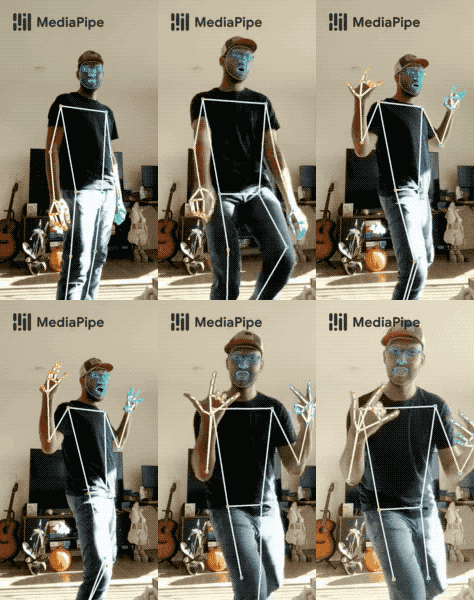](https://google.github.io/mediapipe/solutions/holistic)
|
||||
|
||||
Object Detection | Box Tracking | Objectron | KNIFT
|
||||
:----------------------------------------------------------------------------------------------------------------------------------: | :-------------------------------------------------------------------------------------------------------------------------: | :-------------------------------------------------------------------------------------------------------------------: | :---:
|
||||
[](https://google.github.io/mediapipe/solutions/object_detection) | [](https://google.github.io/mediapipe/solutions/box_tracking) | [](https://google.github.io/mediapipe/solutions/objectron) | [](https://google.github.io/mediapipe/solutions/knift)
|
||||
Hair Segmentation | Object Detection | Box Tracking | Instant Motion Tracking | Objectron | KNIFT
|
||||
:-------------------------------------------------------------------------------------------------------------------------------------: | :----------------------------------------------------------------------------------------------------------------------------------: | :-------------------------------------------------------------------------------------------------------------------------: | :---------------------------------------------------------------------------------------------------------------------------------------------------: | :-------------------------------------------------------------------------------------------------------------------: | :---:
|
||||
[](https://google.github.io/mediapipe/solutions/hair_segmentation) | [](https://google.github.io/mediapipe/solutions/object_detection) | [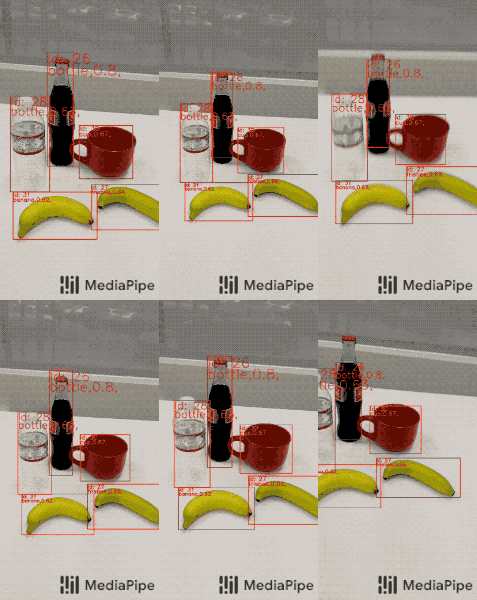](https://google.github.io/mediapipe/solutions/box_tracking) | [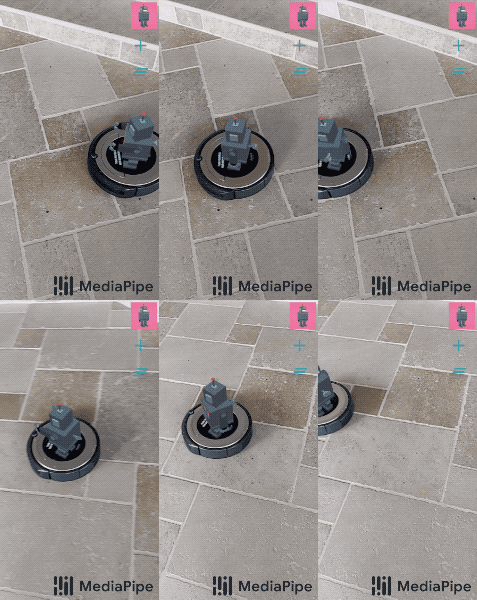](https://google.github.io/mediapipe/solutions/instant_motion_tracking) | [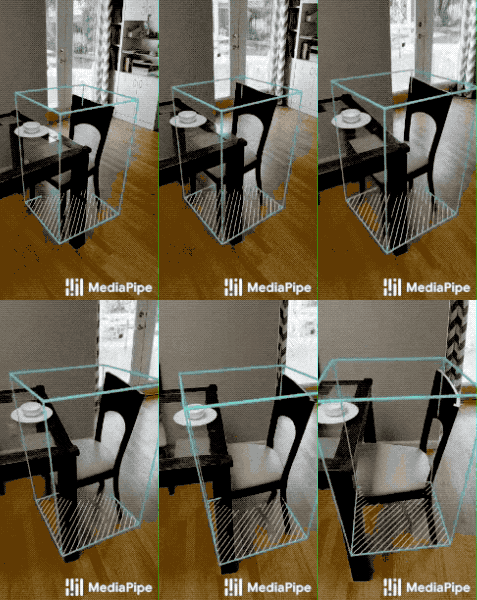](https://google.github.io/mediapipe/solutions/objectron) | [](https://google.github.io/mediapipe/solutions/knift)
|
||||
|
||||
<!-- []() in the first cell is needed to preserve table formatting in GitHub Pages. -->
|
||||
<!-- Whenever this table is updated, paste a copy to solutions/solutions.md. -->
|
||||
|
||||
[]() | Android | iOS | Desktop | Web | Coral
|
||||
:---------------------------------------------------------------------------- | :-----: | :-: | :-----: | :-: | :---:
|
||||
[Face Detection](https://google.github.io/mediapipe/solutions/face_detection) | ✅ | ✅ | ✅ | ✅ | ✅
|
||||
[Face Mesh](https://google.github.io/mediapipe/solutions/face_mesh) | ✅ | ✅ | ✅ | |
|
||||
[Hands](https://google.github.io/mediapipe/solutions/hands) | ✅ | ✅ | ✅ | ✅ |
|
||||
[Hair Segmentation](https://google.github.io/mediapipe/solutions/hair_segmentation) | ✅ | | ✅ | ✅ |
|
||||
[Object Detection](https://google.github.io/mediapipe/solutions/object_detection) | ✅ | ✅ | ✅ | | ✅
|
||||
[Box Tracking](https://google.github.io/mediapipe/solutions/box_tracking) | ✅ | ✅ | ✅ | |
|
||||
[Objectron](https://google.github.io/mediapipe/solutions/objectron) | ✅ | | | |
|
||||
[KNIFT](https://google.github.io/mediapipe/solutions/knift) | ✅ | | | |
|
||||
[AutoFlip](https://google.github.io/mediapipe/solutions/autoflip) | | | ✅ | |
|
||||
[MediaSequence](https://google.github.io/mediapipe/solutions/media_sequence) | | | ✅ | |
|
||||
[YouTube 8M](https://google.github.io/mediapipe/solutions/youtube_8m) | | | ✅ | |
|
||||
[]() | [Android](https://google.github.io/mediapipe/getting_started/android) | [iOS](https://google.github.io/mediapipe/getting_started/ios) | [C++](https://google.github.io/mediapipe/getting_started/cpp) | [Python](https://google.github.io/mediapipe/getting_started/python) | [JS](https://google.github.io/mediapipe/getting_started/javascript) | [Coral](https://github.com/google/mediapipe/tree/master/mediapipe/examples/coral/README.md)
|
||||
:---------------------------------------------------------------------------------------- | :-------------------------------------------------------------: | :-----------------------------------------------------: | :-----------------------------------------------------: | :-----------------------------------------------------------: | :-----------------------------------------------------------: | :--------------------------------------------------------------------:
|
||||
[Face Detection](https://google.github.io/mediapipe/solutions/face_detection) | ✅ | ✅ | ✅ | ✅ | ✅ | ✅
|
||||
[Face Mesh](https://google.github.io/mediapipe/solutions/face_mesh) | ✅ | ✅ | ✅ | ✅ | ✅ |
|
||||
[Iris](https://google.github.io/mediapipe/solutions/iris) | ✅ | ✅ | ✅ | | |
|
||||
[Hands](https://google.github.io/mediapipe/solutions/hands) | ✅ | ✅ | ✅ | ✅ | ✅ |
|
||||
[Pose](https://google.github.io/mediapipe/solutions/pose) | ✅ | ✅ | ✅ | ✅ | ✅ |
|
||||
[Holistic](https://google.github.io/mediapipe/solutions/holistic) | ✅ | ✅ | ✅ | ✅ | ✅ |
|
||||
[Selfie Segmentation](https://google.github.io/mediapipe/solutions/selfie_segmentation) | ✅ | ✅ | ✅ | ✅ | ✅ |
|
||||
[Hair Segmentation](https://google.github.io/mediapipe/solutions/hair_segmentation) | ✅ | | ✅ | | |
|
||||
[Object Detection](https://google.github.io/mediapipe/solutions/object_detection) | ✅ | ✅ | ✅ | | | ✅
|
||||
[Box Tracking](https://google.github.io/mediapipe/solutions/box_tracking) | ✅ | ✅ | ✅ | | |
|
||||
[Instant Motion Tracking](https://google.github.io/mediapipe/solutions/instant_motion_tracking) | ✅ | | | | |
|
||||
[Objectron](https://google.github.io/mediapipe/solutions/objectron) | ✅ | | ✅ | ✅ | ✅ |
|
||||
[KNIFT](https://google.github.io/mediapipe/solutions/knift) | ✅ | | | | |
|
||||
[AutoFlip](https://google.github.io/mediapipe/solutions/autoflip) | | | ✅ | | |
|
||||
[MediaSequence](https://google.github.io/mediapipe/solutions/media_sequence) | | | ✅ | | |
|
||||
[YouTube 8M](https://google.github.io/mediapipe/solutions/youtube_8m) | | | ✅ | | |
|
||||
|
||||
## MediaPipe on the Web
|
||||
|
||||
MediaPipe on the Web is an effort to run the same ML solutions built for mobile
|
||||
and desktop also in web browsers. The official API is under construction, but
|
||||
the core technology has been proven effective. Please see
|
||||
[MediaPipe on the Web](https://developers.googleblog.com/2020/01/mediapipe-on-web.html)
|
||||
in Google Developers Blog for details.
|
||||
|
||||
You can use the following links to load a demo in the MediaPipe Visualizer, and
|
||||
over there click the "Runner" icon in the top bar like shown below. The demos
|
||||
use your webcam video as input, which is processed all locally in real-time and
|
||||
never leaves your device.
|
||||
|
||||

|
||||
|
||||
* [MediaPipe Face Detection](https://viz.mediapipe.dev/demo/face_detection)
|
||||
* [MediaPipe Hands](https://viz.mediapipe.dev/demo/hand_tracking)
|
||||
* [MediaPipe Hands (palm/hand detection only)](https://viz.mediapipe.dev/demo/hand_detection)
|
||||
* [MediaPipe Hair Segmentation](https://viz.mediapipe.dev/demo/hair_segmentation)
|
||||
See also
|
||||
[MediaPipe Models and Model Cards](https://google.github.io/mediapipe/solutions/models)
|
||||
for ML models released in MediaPipe.
|
||||
|
||||
## Getting started
|
||||
|
||||
Learn how to [install](https://google.github.io/mediapipe/getting_started/install)
|
||||
MediaPipe and
|
||||
[build example applications](https://google.github.io/mediapipe/getting_started/building_examples),
|
||||
and start exploring our ready-to-use
|
||||
[solutions](https://google.github.io/mediapipe/solutions/solutions) that you can
|
||||
further extend and customize.
|
||||
To start using MediaPipe
|
||||
[solutions](https://google.github.io/mediapipe/solutions/solutions) with only a few
|
||||
lines code, see example code and demos in
|
||||
[MediaPipe in Python](https://google.github.io/mediapipe/getting_started/python) and
|
||||
[MediaPipe in JavaScript](https://google.github.io/mediapipe/getting_started/javascript).
|
||||
|
||||
To use MediaPipe in C++, Android and iOS, which allow further customization of
|
||||
the [solutions](https://google.github.io/mediapipe/solutions/solutions) as well as
|
||||
building your own, learn how to
|
||||
[install](https://google.github.io/mediapipe/getting_started/install) MediaPipe and
|
||||
start building example applications in
|
||||
[C++](https://google.github.io/mediapipe/getting_started/cpp),
|
||||
[Android](https://google.github.io/mediapipe/getting_started/android) and
|
||||
[iOS](https://google.github.io/mediapipe/getting_started/ios).
|
||||
|
||||
The source code is hosted in the
|
||||
[MediaPipe Github repository](https://github.com/google/mediapipe), and you can
|
||||
@@ -83,6 +79,25 @@ run code search using
|
||||
|
||||
## Publications
|
||||
|
||||
* [Bringing artworks to life with AR](https://developers.googleblog.com/2021/07/bringing-artworks-to-life-with-ar.html)
|
||||
in Google Developers Blog
|
||||
* [Prosthesis control via Mirru App using MediaPipe hand tracking](https://developers.googleblog.com/2021/05/control-your-mirru-prosthesis-with-mediapipe-hand-tracking.html)
|
||||
in Google Developers Blog
|
||||
* [SignAll SDK: Sign language interface using MediaPipe is now available for
|
||||
developers](https://developers.googleblog.com/2021/04/signall-sdk-sign-language-interface-using-mediapipe-now-available.html)
|
||||
in Google Developers Blog
|
||||
* [MediaPipe Holistic - Simultaneous Face, Hand and Pose Prediction, on Device](https://ai.googleblog.com/2020/12/mediapipe-holistic-simultaneous-face.html)
|
||||
in Google AI Blog
|
||||
* [Background Features in Google Meet, Powered by Web ML](https://ai.googleblog.com/2020/10/background-features-in-google-meet.html)
|
||||
in Google AI Blog
|
||||
* [MediaPipe 3D Face Transform](https://developers.googleblog.com/2020/09/mediapipe-3d-face-transform.html)
|
||||
in Google Developers Blog
|
||||
* [Instant Motion Tracking With MediaPipe](https://developers.googleblog.com/2020/08/instant-motion-tracking-with-mediapipe.html)
|
||||
in Google Developers Blog
|
||||
* [BlazePose - On-device Real-time Body Pose Tracking](https://ai.googleblog.com/2020/08/on-device-real-time-body-pose-tracking.html)
|
||||
in Google AI Blog
|
||||
* [MediaPipe Iris: Real-time Eye Tracking and Depth Estimation](https://ai.googleblog.com/2020/08/mediapipe-iris-real-time-iris-tracking.html)
|
||||
in Google AI Blog
|
||||
* [MediaPipe KNIFT: Template-based feature matching](https://developers.googleblog.com/2020/04/mediapipe-knift-template-based-feature-matching.html)
|
||||
in Google Developers Blog
|
||||
* [Alfred Camera: Smart camera features using MediaPipe](https://developers.googleblog.com/2020/03/alfred-camera-smart-camera-features-using-mediapipe.html)
|
||||
@@ -121,9 +136,9 @@ run code search using
|
||||
|
||||
## Community
|
||||
|
||||
* [Awesome MediaPipe](https://mediapipe.org) - A curated list of awesome
|
||||
MediaPipe related frameworks, libraries and software
|
||||
* [Slack community](https://https://mediapipe.page.link/joinslack) for MediaPipe users
|
||||
* [Awesome MediaPipe](https://mediapipe.page.link/awesome-mediapipe) - A
|
||||
curated list of awesome MediaPipe related frameworks, libraries and software
|
||||
* [Slack community](https://mediapipe.page.link/joinslack) for MediaPipe users
|
||||
* [Discuss](https://groups.google.com/forum/#!forum/mediapipe) - General
|
||||
community discussion around MediaPipe
|
||||
|
||||
|
||||
@@ -2,22 +2,31 @@ workspace(name = "mediapipe")
|
||||
|
||||
load("@bazel_tools//tools/build_defs/repo:http.bzl", "http_archive")
|
||||
|
||||
skylib_version = "0.9.0"
|
||||
# Protobuf expects an //external:python_headers target
|
||||
bind(
|
||||
name = "python_headers",
|
||||
actual = "@local_config_python//:python_headers",
|
||||
)
|
||||
|
||||
http_archive(
|
||||
name = "bazel_skylib",
|
||||
type = "tar.gz",
|
||||
url = "https://github.com/bazelbuild/bazel-skylib/releases/download/{}/bazel_skylib-{}.tar.gz".format (skylib_version, skylib_version),
|
||||
sha256 = "1dde365491125a3db70731e25658dfdd3bc5dbdfd11b840b3e987ecf043c7ca0",
|
||||
urls = [
|
||||
"https://github.com/bazelbuild/bazel-skylib/releases/download/1.0.3/bazel-skylib-1.0.3.tar.gz",
|
||||
"https://mirror.bazel.build/github.com/bazelbuild/bazel-skylib/releases/download/1.0.3/bazel-skylib-1.0.3.tar.gz",
|
||||
],
|
||||
sha256 = "1c531376ac7e5a180e0237938a2536de0c54d93f5c278634818e0efc952dd56c",
|
||||
)
|
||||
load("@bazel_skylib//:workspace.bzl", "bazel_skylib_workspace")
|
||||
bazel_skylib_workspace()
|
||||
load("@bazel_skylib//lib:versions.bzl", "versions")
|
||||
versions.check(minimum_bazel_version = "2.0.0")
|
||||
versions.check(minimum_bazel_version = "3.7.2")
|
||||
|
||||
|
||||
# ABSL cpp library lts_2020_02_25
|
||||
# ABSL cpp library lts_2021_03_24, patch 2.
|
||||
http_archive(
|
||||
name = "com_google_absl",
|
||||
urls = [
|
||||
"https://github.com/abseil/abseil-cpp/archive/20200225.tar.gz",
|
||||
"https://github.com/abseil/abseil-cpp/archive/refs/tags/20210324.2.tar.gz",
|
||||
],
|
||||
# Remove after https://github.com/abseil/abseil-cpp/issues/326 is solved.
|
||||
patches = [
|
||||
@@ -26,37 +35,45 @@ http_archive(
|
||||
patch_args = [
|
||||
"-p1",
|
||||
],
|
||||
strip_prefix = "abseil-cpp-20200225",
|
||||
sha256 = "728a813291bdec2aa46eab8356ace9f75ac2ed9dfe2df5ab603c4e6c09f1c353"
|
||||
strip_prefix = "abseil-cpp-20210324.2",
|
||||
sha256 = "59b862f50e710277f8ede96f083a5bb8d7c9595376146838b9580be90374ee1f"
|
||||
)
|
||||
|
||||
http_archive(
|
||||
name = "rules_cc",
|
||||
strip_prefix = "rules_cc-master",
|
||||
urls = ["https://github.com/bazelbuild/rules_cc/archive/master.zip"],
|
||||
strip_prefix = "rules_cc-2f8c04c04462ab83c545ab14c0da68c3b4c96191",
|
||||
# The commit can be updated if the build passes. Last updated 6/23/22.
|
||||
urls = ["https://github.com/bazelbuild/rules_cc/archive/2f8c04c04462ab83c545ab14c0da68c3b4c96191.zip"],
|
||||
)
|
||||
|
||||
http_archive(
|
||||
name = "rules_foreign_cc",
|
||||
strip_prefix = "rules_foreign_cc-0.1.0",
|
||||
url = "https://github.com/bazelbuild/rules_foreign_cc/archive/0.1.0.zip",
|
||||
)
|
||||
|
||||
load("@rules_foreign_cc//:workspace_definitions.bzl", "rules_foreign_cc_dependencies")
|
||||
|
||||
rules_foreign_cc_dependencies()
|
||||
|
||||
# This is used to select all contents of the archives for CMake-based packages to give CMake access to them.
|
||||
all_content = """filegroup(name = "all", srcs = glob(["**"]), visibility = ["//visibility:public"])"""
|
||||
|
||||
# GoogleTest/GoogleMock framework. Used by most unit-tests.
|
||||
# Last updated 2020-06-30.
|
||||
# Last updated 2021-07-02.
|
||||
http_archive(
|
||||
name = "com_google_googletest",
|
||||
urls = ["https://github.com/google/googletest/archive/aee0f9d9b5b87796ee8a0ab26b7587ec30e8858e.zip"],
|
||||
patches = [
|
||||
# fix for https://github.com/google/googletest/issues/2817
|
||||
"@//third_party:com_google_googletest_9d580ea80592189e6d44fa35bcf9cdea8bf620d6.diff"
|
||||
],
|
||||
patch_args = [
|
||||
"-p1",
|
||||
],
|
||||
strip_prefix = "googletest-aee0f9d9b5b87796ee8a0ab26b7587ec30e8858e",
|
||||
sha256 = "04a1751f94244307cebe695a69cc945f9387a80b0ef1af21394a490697c5c895",
|
||||
urls = ["https://github.com/google/googletest/archive/4ec4cd23f486bf70efcc5d2caa40f24368f752e3.zip"],
|
||||
strip_prefix = "googletest-4ec4cd23f486bf70efcc5d2caa40f24368f752e3",
|
||||
sha256 = "de682ea824bfffba05b4e33b67431c247397d6175962534305136aa06f92e049",
|
||||
)
|
||||
|
||||
# Google Benchmark library.
|
||||
# Google Benchmark library v1.6.1 released on 2022-01-10.
|
||||
http_archive(
|
||||
name = "com_google_benchmark",
|
||||
urls = ["https://github.com/google/benchmark/archive/master.zip"],
|
||||
strip_prefix = "benchmark-master",
|
||||
urls = ["https://github.com/google/benchmark/archive/refs/tags/v1.6.1.tar.gz"],
|
||||
strip_prefix = "benchmark-1.6.1",
|
||||
sha256 = "6132883bc8c9b0df5375b16ab520fac1a85dc9e4cf5be59480448ece74b278d4",
|
||||
build_file = "@//third_party:benchmark.BUILD",
|
||||
)
|
||||
|
||||
@@ -68,32 +85,31 @@ http_archive(
|
||||
url = "https://github.com/gflags/gflags/archive/v2.2.2.zip",
|
||||
)
|
||||
|
||||
# glog v0.3.5
|
||||
# TODO: Migrate MediaPipe to use com_github_glog_glog on all platforms.
|
||||
# 2020-08-21
|
||||
http_archive(
|
||||
name = "com_github_glog_glog_v_0_3_5",
|
||||
url = "https://github.com/google/glog/archive/v0.3.5.zip",
|
||||
sha256 = "267103f8a1e9578978aa1dc256001e6529ef593e5aea38193d31c2872ee025e8",
|
||||
strip_prefix = "glog-0.3.5",
|
||||
build_file = "@//third_party:glog.BUILD",
|
||||
name = "com_github_glog_glog",
|
||||
strip_prefix = "glog-0a2e5931bd5ff22fd3bf8999eb8ce776f159cda6",
|
||||
sha256 = "58c9b3b6aaa4dd8b836c0fd8f65d0f941441fb95e27212c5eeb9979cfd3592ab",
|
||||
urls = [
|
||||
"https://github.com/google/glog/archive/0a2e5931bd5ff22fd3bf8999eb8ce776f159cda6.zip",
|
||||
],
|
||||
)
|
||||
http_archive(
|
||||
name = "com_github_glog_glog_no_gflags",
|
||||
strip_prefix = "glog-0a2e5931bd5ff22fd3bf8999eb8ce776f159cda6",
|
||||
sha256 = "58c9b3b6aaa4dd8b836c0fd8f65d0f941441fb95e27212c5eeb9979cfd3592ab",
|
||||
build_file = "@//third_party:glog_no_gflags.BUILD",
|
||||
urls = [
|
||||
"https://github.com/google/glog/archive/0a2e5931bd5ff22fd3bf8999eb8ce776f159cda6.zip",
|
||||
],
|
||||
patches = [
|
||||
"@//third_party:com_github_glog_glog_9779e5ea6ef59562b030248947f787d1256132ae.diff"
|
||||
"@//third_party:com_github_glog_glog_9779e5ea6ef59562b030248947f787d1256132ae.diff",
|
||||
],
|
||||
patch_args = [
|
||||
"-p1",
|
||||
],
|
||||
)
|
||||
|
||||
# 2020-02-16
|
||||
http_archive(
|
||||
name = "com_github_glog_glog",
|
||||
strip_prefix = "glog-3ba8976592274bc1f907c402ce22558011d6fc5e",
|
||||
sha256 = "feca3c7e29a693cab7887409756d89d342d4a992d54d7c5599bebeae8f7b50be",
|
||||
urls = [
|
||||
"https://github.com/google/glog/archive/3ba8976592274bc1f907c402ce22558011d6fc5e.zip",
|
||||
],
|
||||
)
|
||||
|
||||
# easyexif
|
||||
http_archive(
|
||||
name = "easyexif",
|
||||
@@ -105,7 +121,8 @@ http_archive(
|
||||
# libyuv
|
||||
http_archive(
|
||||
name = "libyuv",
|
||||
urls = ["https://chromium.googlesource.com/libyuv/libyuv/+archive/refs/heads/master.tar.gz"],
|
||||
# Error: operand type mismatch for `vbroadcastss' caused by commit 8a13626e42f7fdcf3a6acbb0316760ee54cda7d8.
|
||||
urls = ["https://chromium.googlesource.com/libyuv/libyuv/+archive/2525698acba9bf9b701ba6b4d9584291a1f62257.tar.gz"],
|
||||
build_file = "@//third_party:libyuv.BUILD",
|
||||
)
|
||||
|
||||
@@ -113,16 +130,16 @@ http_archive(
|
||||
# ...but the Java download is currently broken, so we use the "source" download.
|
||||
http_archive(
|
||||
name = "com_google_protobuf_javalite",
|
||||
sha256 = "a79d19dcdf9139fa4b81206e318e33d245c4c9da1ffed21c87288ed4380426f9",
|
||||
strip_prefix = "protobuf-3.11.4",
|
||||
urls = ["https://github.com/protocolbuffers/protobuf/archive/v3.11.4.tar.gz"],
|
||||
sha256 = "87407cd28e7a9c95d9f61a098a53cf031109d451a7763e7dd1253abf8b4df422",
|
||||
strip_prefix = "protobuf-3.19.1",
|
||||
urls = ["https://github.com/protocolbuffers/protobuf/archive/v3.19.1.tar.gz"],
|
||||
)
|
||||
|
||||
http_archive(
|
||||
name = "com_google_protobuf",
|
||||
sha256 = "a79d19dcdf9139fa4b81206e318e33d245c4c9da1ffed21c87288ed4380426f9",
|
||||
strip_prefix = "protobuf-3.11.4",
|
||||
urls = ["https://github.com/protocolbuffers/protobuf/archive/v3.11.4.tar.gz"],
|
||||
sha256 = "87407cd28e7a9c95d9f61a098a53cf031109d451a7763e7dd1253abf8b4df422",
|
||||
strip_prefix = "protobuf-3.19.1",
|
||||
urls = ["https://github.com/protocolbuffers/protobuf/archive/v3.19.1.tar.gz"],
|
||||
patches = [
|
||||
"@//third_party:com_google_protobuf_fixes.diff"
|
||||
],
|
||||
@@ -131,23 +148,97 @@ http_archive(
|
||||
],
|
||||
)
|
||||
|
||||
load("//third_party/flatbuffers:workspace.bzl", flatbuffers = "repo")
|
||||
flatbuffers()
|
||||
|
||||
http_archive(
|
||||
name = "com_google_audio_tools",
|
||||
strip_prefix = "multichannel-audio-tools-master",
|
||||
urls = ["https://github.com/google/multichannel-audio-tools/archive/master.zip"],
|
||||
)
|
||||
|
||||
# sentencepiece
|
||||
http_archive(
|
||||
name = "com_google_sentencepiece",
|
||||
strip_prefix = "sentencepiece-1.0.0",
|
||||
sha256 = "c05901f30a1d0ed64cbcf40eba08e48894e1b0e985777217b7c9036cac631346",
|
||||
urls = [
|
||||
"https://github.com/google/sentencepiece/archive/1.0.0.zip",
|
||||
],
|
||||
repo_mapping = {"@com_google_glog" : "@com_github_glog_glog"},
|
||||
)
|
||||
|
||||
http_archive(
|
||||
name = "org_tensorflow_text",
|
||||
sha256 = "f64647276f7288d1b1fe4c89581d51404d0ce4ae97f2bcc4c19bd667549adca8",
|
||||
strip_prefix = "text-2.2.0",
|
||||
urls = [
|
||||
"https://github.com/tensorflow/text/archive/v2.2.0.zip",
|
||||
],
|
||||
patches = [
|
||||
"//third_party:tensorflow_text_remove_tf_deps.diff",
|
||||
"//third_party:tensorflow_text_a0f49e63.diff",
|
||||
],
|
||||
patch_args = ["-p1"],
|
||||
repo_mapping = {"@com_google_re2": "@com_googlesource_code_re2"},
|
||||
)
|
||||
|
||||
http_archive(
|
||||
name = "com_googlesource_code_re2",
|
||||
sha256 = "e06b718c129f4019d6e7aa8b7631bee38d3d450dd980246bfaf493eb7db67868",
|
||||
strip_prefix = "re2-fe4a310131c37f9a7e7f7816fa6ce2a8b27d65a8",
|
||||
urls = [
|
||||
"https://github.com/google/re2/archive/fe4a310131c37f9a7e7f7816fa6ce2a8b27d65a8.tar.gz",
|
||||
],
|
||||
)
|
||||
|
||||
# 2020-07-09
|
||||
http_archive(
|
||||
name = "pybind11_bazel",
|
||||
strip_prefix = "pybind11_bazel-203508e14aab7309892a1c5f7dd05debda22d9a5",
|
||||
urls = ["https://github.com/pybind/pybind11_bazel/archive/203508e14aab7309892a1c5f7dd05debda22d9a5.zip"],
|
||||
sha256 = "75922da3a1bdb417d820398eb03d4e9bd067c4905a4246d35a44c01d62154d91",
|
||||
)
|
||||
|
||||
# Point to the commit that deprecates the usage of Eigen::MappedSparseMatrix.
|
||||
http_archive(
|
||||
name = "pybind11",
|
||||
urls = [
|
||||
"https://github.com/pybind/pybind11/archive/70a58c577eaf067748c2ec31bfd0b0a614cffba6.zip",
|
||||
],
|
||||
sha256 = "b971842fab1b5b8f3815a2302331782b7d137fef0e06502422bc4bc360f4956c",
|
||||
strip_prefix = "pybind11-70a58c577eaf067748c2ec31bfd0b0a614cffba6",
|
||||
build_file = "@pybind11_bazel//:pybind11.BUILD",
|
||||
)
|
||||
|
||||
http_archive(
|
||||
name = "pybind11_protobuf",
|
||||
sha256 = "baa1f53568283630a5055c85f0898b8810f7a6431bd01bbaedd32b4c1defbcb1",
|
||||
strip_prefix = "pybind11_protobuf-3594106f2df3d725e65015ffb4c7886d6eeee683",
|
||||
urls = [
|
||||
"https://github.com/pybind/pybind11_protobuf/archive/3594106f2df3d725e65015ffb4c7886d6eeee683.tar.gz",
|
||||
],
|
||||
)
|
||||
|
||||
# Point to the commit that deprecates the usage of Eigen::MappedSparseMatrix.
|
||||
http_archive(
|
||||
name = "ceres_solver",
|
||||
url = "https://github.com/ceres-solver/ceres-solver/archive/1.14.0.zip",
|
||||
url = "https://github.com/ceres-solver/ceres-solver/archive/123fba61cf2611a3c8bddc9d91416db26b10b558.zip",
|
||||
patches = [
|
||||
"@//third_party:ceres_solver_compatibility_fixes.diff"
|
||||
],
|
||||
patch_args = [
|
||||
"-p1",
|
||||
],
|
||||
strip_prefix = "ceres-solver-1.14.0",
|
||||
sha256 = "5ba6d0db4e784621fda44a50c58bb23b0892684692f0c623e2063f9c19f192f1"
|
||||
strip_prefix = "ceres-solver-123fba61cf2611a3c8bddc9d91416db26b10b558",
|
||||
sha256 = "8b7b16ceb363420e0fd499576daf73fa338adb0b1449f58bea7862766baa1ac7"
|
||||
)
|
||||
|
||||
http_archive(
|
||||
name = "opencv",
|
||||
build_file_content = all_content,
|
||||
strip_prefix = "opencv-3.4.10",
|
||||
urls = ["https://github.com/opencv/opencv/archive/3.4.10.tar.gz"],
|
||||
)
|
||||
|
||||
new_local_repository(
|
||||
@@ -165,13 +256,16 @@ new_local_repository(
|
||||
new_local_repository(
|
||||
name = "macos_opencv",
|
||||
build_file = "@//third_party:opencv_macos.BUILD",
|
||||
path = "/usr",
|
||||
# For local MacOS builds, the path should point to an opencv@3 installation.
|
||||
# If you edit the path here, you will also need to update the corresponding
|
||||
# prefix in "opencv_macos.BUILD".
|
||||
path = "/usr/local",
|
||||
)
|
||||
|
||||
new_local_repository(
|
||||
name = "macos_ffmpeg",
|
||||
build_file = "@//third_party:ffmpeg_macos.BUILD",
|
||||
path = "/usr",
|
||||
path = "/usr/local/opt/ffmpeg",
|
||||
)
|
||||
|
||||
new_local_repository(
|
||||
@@ -200,21 +294,26 @@ http_archive(
|
||||
url = "https://github.com/opencv/opencv/releases/download/3.2.0/opencv-3.2.0-ios-framework.zip",
|
||||
)
|
||||
|
||||
# You may run setup_android.sh to install Android SDK and NDK.
|
||||
android_ndk_repository(
|
||||
name = "androidndk",
|
||||
)
|
||||
|
||||
android_sdk_repository(
|
||||
name = "androidsdk",
|
||||
http_archive(
|
||||
name = "stblib",
|
||||
strip_prefix = "stb-b42009b3b9d4ca35bc703f5310eedc74f584be58",
|
||||
sha256 = "13a99ad430e930907f5611325ec384168a958bf7610e63e60e2fd8e7b7379610",
|
||||
urls = ["https://github.com/nothings/stb/archive/b42009b3b9d4ca35bc703f5310eedc74f584be58.tar.gz"],
|
||||
build_file = "@//third_party:stblib.BUILD",
|
||||
patches = [
|
||||
"@//third_party:stb_image_impl.diff"
|
||||
],
|
||||
patch_args = [
|
||||
"-p1",
|
||||
],
|
||||
)
|
||||
|
||||
# iOS basic build deps.
|
||||
|
||||
http_archive(
|
||||
name = "build_bazel_rules_apple",
|
||||
sha256 = "7a7afdd4869bb201c9352eed2daf37294d42b093579b70423490c1b4d4f6ce42",
|
||||
url = "https://github.com/bazelbuild/rules_apple/releases/download/0.19.0/rules_apple.0.19.0.tar.gz",
|
||||
sha256 = "77e8bf6fda706f420a55874ae6ee4df0c9d95da6c7838228b26910fc82eea5a2",
|
||||
url = "https://github.com/bazelbuild/rules_apple/releases/download/0.32.0/rules_apple.0.32.0.tar.gz",
|
||||
patches = [
|
||||
# Bypass checking ios unit test runner when building MP ios applications.
|
||||
"@//third_party:build_bazel_rules_apple_bypass_test_runner_check.diff"
|
||||
@@ -240,10 +339,9 @@ swift_rules_dependencies()
|
||||
|
||||
http_archive(
|
||||
name = "build_bazel_apple_support",
|
||||
sha256 = "122ebf7fe7d1c8e938af6aeaee0efe788a3a2449ece5a8d6a428cb18d6f88033",
|
||||
sha256 = "741366f79d900c11e11d8efd6cc6c66a31bfb2451178b58e0b5edc6f1db17b35",
|
||||
urls = [
|
||||
"https://storage.googleapis.com/mirror.tensorflow.org/github.com/bazelbuild/apple_support/releases/download/0.7.1/apple_support.0.7.1.tar.gz",
|
||||
"https://github.com/bazelbuild/apple_support/releases/download/0.7.1/apple_support.0.7.1.tar.gz",
|
||||
"https://github.com/bazelbuild/apple_support/releases/download/0.10.0/apple_support.0.10.0.tar.gz"
|
||||
],
|
||||
)
|
||||
|
||||
@@ -266,8 +364,8 @@ http_archive(
|
||||
|
||||
# Maven dependencies.
|
||||
|
||||
RULES_JVM_EXTERNAL_TAG = "3.2"
|
||||
RULES_JVM_EXTERNAL_SHA = "82262ff4223c5fda6fb7ff8bd63db8131b51b413d26eb49e3131037e79e324af"
|
||||
RULES_JVM_EXTERNAL_TAG = "4.0"
|
||||
RULES_JVM_EXTERNAL_SHA = "31701ad93dbfe544d597dbe62c9a1fdd76d81d8a9150c2bf1ecf928ecdf97169"
|
||||
|
||||
http_archive(
|
||||
name = "rules_jvm_external",
|
||||
@@ -280,32 +378,42 @@ load("@rules_jvm_external//:defs.bzl", "maven_install")
|
||||
|
||||
# Important: there can only be one maven_install rule. Add new maven deps here.
|
||||
maven_install(
|
||||
name = "maven",
|
||||
artifacts = [
|
||||
"junit:junit:4.12",
|
||||
"androidx.test.espresso:espresso-core:3.1.1",
|
||||
"org.hamcrest:hamcrest-library:1.3",
|
||||
"androidx.concurrent:concurrent-futures:1.0.0-alpha03",
|
||||
"androidx.lifecycle:lifecycle-common:2.2.0",
|
||||
"androidx.lifecycle:lifecycle-common:2.3.1",
|
||||
"androidx.activity:activity:1.2.2",
|
||||
"androidx.exifinterface:exifinterface:1.3.3",
|
||||
"androidx.fragment:fragment:1.3.4",
|
||||
"androidx.annotation:annotation:aar:1.1.0",
|
||||
"androidx.appcompat:appcompat:aar:1.1.0-rc01",
|
||||
"androidx.camera:camera-core:aar:1.0.0-alpha06",
|
||||
"androidx.camera:camera-camera2:aar:1.0.0-alpha06",
|
||||
"androidx.camera:camera-core:1.0.0-beta10",
|
||||
"androidx.camera:camera-camera2:1.0.0-beta10",
|
||||
"androidx.camera:camera-lifecycle:1.0.0-beta10",
|
||||
"androidx.constraintlayout:constraintlayout:aar:1.1.3",
|
||||
"androidx.core:core:aar:1.1.0-rc03",
|
||||
"androidx.legacy:legacy-support-v4:aar:1.0.0",
|
||||
"androidx.recyclerview:recyclerview:aar:1.1.0-beta02",
|
||||
"androidx.test.espresso:espresso-core:3.1.1",
|
||||
"com.github.bumptech.glide:glide:4.11.0",
|
||||
"com.google.android.material:material:aar:1.0.0-rc01",
|
||||
"com.google.code.findbugs:jsr305:3.0.2",
|
||||
"com.google.flogger:flogger-system-backend:0.3.1",
|
||||
"com.google.flogger:flogger:0.3.1",
|
||||
"com.google.auto.value:auto-value:1.8.1",
|
||||
"com.google.auto.value:auto-value-annotations:1.8.1",
|
||||
"com.google.code.findbugs:jsr305:latest.release",
|
||||
"com.google.android.datatransport:transport-api:3.0.0",
|
||||
"com.google.android.datatransport:transport-backend-cct:3.1.0",
|
||||
"com.google.android.datatransport:transport-runtime:3.1.0",
|
||||
"com.google.flogger:flogger-system-backend:0.6",
|
||||
"com.google.flogger:flogger:0.6",
|
||||
"com.google.guava:guava:27.0.1-android",
|
||||
"com.google.guava:listenablefuture:1.0",
|
||||
"junit:junit:4.12",
|
||||
"org.hamcrest:hamcrest-library:1.3",
|
||||
],
|
||||
repositories = [
|
||||
"https://jcenter.bintray.com",
|
||||
"https://maven.google.com",
|
||||
"https://dl.google.com/dl/android/maven2",
|
||||
"https://repo1.maven.org/maven2",
|
||||
"https://jcenter.bintray.com",
|
||||
],
|
||||
fetch_sources = True,
|
||||
version_conflict_policy = "pinned",
|
||||
@@ -322,18 +430,38 @@ http_archive(
|
||||
],
|
||||
)
|
||||
|
||||
#Tensorflow repo should always go after the other external dependencies.
|
||||
# 2020-05-11
|
||||
_TENSORFLOW_GIT_COMMIT = "7c09d15f9fcc14343343c247ebf5b8e0afe3e4aa"
|
||||
_TENSORFLOW_SHA256= "673d00cbd2676ae43df1993e0d28c10b5ffbe96d9e2ab29f88a77b43c0211299"
|
||||
# Load Zlib before initializing TensorFlow to guarantee that the target
|
||||
# @zlib//:mini_zlib is available
|
||||
http_archive(
|
||||
name = "zlib",
|
||||
build_file = "//third_party:zlib.BUILD",
|
||||
sha256 = "c3e5e9fdd5004dcb542feda5ee4f0ff0744628baf8ed2dd5d66f8ca1197cb1a1",
|
||||
strip_prefix = "zlib-1.2.11",
|
||||
urls = [
|
||||
"http://mirror.bazel.build/zlib.net/fossils/zlib-1.2.11.tar.gz",
|
||||
"http://zlib.net/fossils/zlib-1.2.11.tar.gz", # 2017-01-15
|
||||
],
|
||||
patches = [
|
||||
"@//third_party:zlib.diff",
|
||||
],
|
||||
patch_args = [
|
||||
"-p1",
|
||||
],
|
||||
)
|
||||
|
||||
# TensorFlow repo should always go after the other external dependencies.
|
||||
# TF on 2022-08-10.
|
||||
_TENSORFLOW_GIT_COMMIT = "af1d5bc4fbb66d9e6cc1cf89503014a99233583b"
|
||||
_TENSORFLOW_SHA256 = "f85a5443264fc58a12d136ca6a30774b5bc25ceaf7d114d97f252351b3c3a2cb"
|
||||
http_archive(
|
||||
name = "org_tensorflow",
|
||||
urls = [
|
||||
"https://mirror.bazel.build/github.com/tensorflow/tensorflow/archive/%s.tar.gz" % _TENSORFLOW_GIT_COMMIT,
|
||||
"https://github.com/tensorflow/tensorflow/archive/%s.tar.gz" % _TENSORFLOW_GIT_COMMIT,
|
||||
],
|
||||
patches = [
|
||||
"@//third_party:org_tensorflow_compatibility_fixes.diff",
|
||||
# Diff is generated with a script, don't update it manually.
|
||||
"@//third_party:org_tensorflow_custom_ops.diff",
|
||||
],
|
||||
patch_args = [
|
||||
"-p1",
|
||||
@@ -342,5 +470,25 @@ http_archive(
|
||||
sha256 = _TENSORFLOW_SHA256,
|
||||
)
|
||||
|
||||
load("@org_tensorflow//tensorflow:workspace.bzl", "tf_workspace")
|
||||
tf_workspace(tf_repo_name = "org_tensorflow")
|
||||
load("@org_tensorflow//tensorflow:workspace3.bzl", "tf_workspace3")
|
||||
tf_workspace3()
|
||||
load("@org_tensorflow//tensorflow:workspace2.bzl", "tf_workspace2")
|
||||
tf_workspace2()
|
||||
|
||||
# Edge TPU
|
||||
http_archive(
|
||||
name = "libedgetpu",
|
||||
sha256 = "14d5527a943a25bc648c28a9961f954f70ba4d79c0a9ca5ae226e1831d72fe80",
|
||||
strip_prefix = "libedgetpu-3164995622300286ef2bb14d7fdc2792dae045b7",
|
||||
urls = [
|
||||
"https://github.com/google-coral/libedgetpu/archive/3164995622300286ef2bb14d7fdc2792dae045b7.tar.gz"
|
||||
],
|
||||
)
|
||||
load("@libedgetpu//:workspace.bzl", "libedgetpu_dependencies")
|
||||
libedgetpu_dependencies()
|
||||
|
||||
load("@coral_crosstool//:configure.bzl", "cc_crosstool")
|
||||
cc_crosstool(name = "crosstool")
|
||||
|
||||
load("//third_party:external_files.bzl", "external_files")
|
||||
external_files()
|
||||
|
||||
@@ -89,7 +89,6 @@ for app in ${apps}; do
|
||||
fi
|
||||
target="${app}:${target_name}"
|
||||
bin="${bin_dir}/${app}/${target_name}.apk"
|
||||
apk="${out_dir}/${target_name}.apk"
|
||||
|
||||
echo "=== Target: ${target}"
|
||||
|
||||
@@ -99,32 +98,36 @@ for app in ${apps}; do
|
||||
if [[ $strip == true ]]; then
|
||||
bazel_flags+=(--linkopt=-s)
|
||||
fi
|
||||
|
||||
if [[ ${app_name} == "templatematchingcpu" ]]; then
|
||||
switch_to_opencv_4
|
||||
fi
|
||||
bazel "${bazel_flags[@]}"
|
||||
cp -f "${bin}" "${apk}"
|
||||
if [[ ${app_name} == "templatematchingcpu" ]]; then
|
||||
switch_to_opencv_3
|
||||
fi
|
||||
fi
|
||||
|
||||
if [[ ${app_name} == "objectdetection3d" ]]; then
|
||||
orig_apk=${apk}
|
||||
apk="${out_dir}/${target_name}_shoes.apk"
|
||||
cp -f "${orig_apk}" "${apk}"
|
||||
apks+=(${apk})
|
||||
|
||||
apk="${out_dir}/${target_name}_chairs.apk"
|
||||
categories=("shoe" "chair" "cup" "camera" "shoe_1stage" "chair_1stage")
|
||||
for category in "${categories[@]}"; do
|
||||
apk="${out_dir}/${target_name}_${category}.apk"
|
||||
if [[ $install_only == false ]]; then
|
||||
bazel_flags_extended=("${bazel_flags[@]}")
|
||||
if [[ ${category} != "shoe" ]]; then
|
||||
bazel_flags_extended+=(--define ${category}=true)
|
||||
fi
|
||||
bazelisk "${bazel_flags_extended[@]}"
|
||||
cp -f "${bin}" "${apk}"
|
||||
fi
|
||||
apks+=(${apk})
|
||||
done
|
||||
else
|
||||
apk="${out_dir}/${target_name}.apk"
|
||||
if [[ $install_only == false ]]; then
|
||||
bazel_flags+=(--define chair=true)
|
||||
bazel "${bazel_flags[@]}"
|
||||
if [[ ${app_name} == "templatematchingcpu" ]]; then
|
||||
switch_to_opencv_4
|
||||
fi
|
||||
bazelisk "${bazel_flags[@]}"
|
||||
cp -f "${bin}" "${apk}"
|
||||
if [[ ${app_name} == "templatematchingcpu" ]]; then
|
||||
switch_to_opencv_3
|
||||
fi
|
||||
fi
|
||||
apks+=(${apk})
|
||||
fi
|
||||
|
||||
apks+=(${apk})
|
||||
fi
|
||||
done
|
||||
|
||||
|
||||
@@ -0,0 +1,110 @@
|
||||
#!/bin/bash
|
||||
# Copyright 2020 The MediaPipe Authors.
|
||||
#
|
||||
# Licensed under the Apache License, Version 2.0 (the "License");
|
||||
# you may not use this file except in compliance with the License.
|
||||
# You may obtain a copy of the License at
|
||||
#
|
||||
# http://www.apache.org/licenses/LICENSE-2.0
|
||||
#
|
||||
# Unless required by applicable law or agreed to in writing, software
|
||||
# distributed under the License is distributed on an "AS IS" BASIS,
|
||||
# WITHOUT WARRANTIES OR CONDITIONS OF ANY KIND, either express or implied.
|
||||
# See the License for the specific language governing permissions and
|
||||
# limitations under the License.
|
||||
# =========================================================================
|
||||
#
|
||||
# Script to build/run all MediaPipe desktop example apps (with webcam input).
|
||||
#
|
||||
# To build and run all apps and store them in out_dir:
|
||||
# $ ./build_desktop_examples.sh -d out_dir
|
||||
# Omitting -d and the associated directory saves all generated apps in the
|
||||
# current directory.
|
||||
# To build all apps and store them in out_dir:
|
||||
# $ ./build_desktop_examples.sh -d out_dir -b
|
||||
# Omitting -d and the associated directory saves all generated apps in the
|
||||
# current directory.
|
||||
# To run all apps already stored in out_dir:
|
||||
# $ ./build_desktop_examples.sh -d out_dir -r
|
||||
# Omitting -d and the associated directory assumes all apps are in the current
|
||||
# directory.
|
||||
|
||||
set -e
|
||||
|
||||
out_dir="."
|
||||
build_only=false
|
||||
run_only=false
|
||||
app_dir="mediapipe/examples/desktop"
|
||||
bin_dir="bazel-bin"
|
||||
declare -a default_bazel_flags=(build -c opt --define MEDIAPIPE_DISABLE_GPU=1)
|
||||
|
||||
while [[ -n $1 ]]; do
|
||||
case $1 in
|
||||
-d)
|
||||
shift
|
||||
out_dir=$1
|
||||
;;
|
||||
-b)
|
||||
build_only=true
|
||||
;;
|
||||
-r)
|
||||
run_only=true
|
||||
;;
|
||||
*)
|
||||
echo "Unsupported input argument $1."
|
||||
exit 1
|
||||
;;
|
||||
esac
|
||||
shift
|
||||
done
|
||||
|
||||
echo "app_dir: $app_dir"
|
||||
echo "out_dir: $out_dir"
|
||||
|
||||
declare -a bazel_flags
|
||||
|
||||
apps="${app_dir}/*"
|
||||
for app in ${apps}; do
|
||||
if [[ -d "${app}" ]]; then
|
||||
target_name=${app##*/}
|
||||
if [[ "${target_name}" == "autoflip" ||
|
||||
"${target_name}" == "hello_world" ||
|
||||
"${target_name}" == "media_sequence" ||
|
||||
"${target_name}" == "object_detection_3d" ||
|
||||
"${target_name}" == "template_matching" ||
|
||||
"${target_name}" == "youtube8m" ]]; then
|
||||
continue
|
||||
fi
|
||||
target="${app}:${target_name}_cpu"
|
||||
|
||||
echo "=== Target: ${target}"
|
||||
|
||||
if [[ $run_only == false ]]; then
|
||||
bazel_flags=("${default_bazel_flags[@]}")
|
||||
bazel_flags+=(${target})
|
||||
|
||||
bazelisk "${bazel_flags[@]}"
|
||||
cp -f "${bin_dir}/${app}/"*"_cpu" "${out_dir}"
|
||||
fi
|
||||
if [[ $build_only == false ]]; then
|
||||
if [[ ${target_name} == "object_tracking" ]]; then
|
||||
graph_name="tracking/object_detection_tracking"
|
||||
elif [[ ${target_name} == "upper_body_pose_tracking" ]]; then
|
||||
graph_name="pose_tracking/upper_body_pose_tracking"
|
||||
else
|
||||
graph_name="${target_name}/${target_name}"
|
||||
fi
|
||||
if [[ ${target_name} == "holistic_tracking" ||
|
||||
${target_name} == "iris_tracking" ||
|
||||
${target_name} == "pose_tracking" ||
|
||||
${target_name} == "selfie_segmentation" ||
|
||||
${target_name} == "upper_body_pose_tracking" ]]; then
|
||||
graph_suffix="cpu"
|
||||
else
|
||||
graph_suffix="desktop_live"
|
||||
fi
|
||||
GLOG_logtostderr=1 "${out_dir}/${target_name}_cpu" \
|
||||
--calculator_graph_config_file=mediapipe/graphs/"${graph_name}_${graph_suffix}.pbtxt"
|
||||
fi
|
||||
fi
|
||||
done
|
||||
@@ -58,6 +58,9 @@ apps="${app_dir}/*"
|
||||
for app in ${apps}; do
|
||||
if [[ -d "${app}" ]]; then
|
||||
target_name=${app##*/}
|
||||
if [[ "${target_name}" == "common" ]]; then
|
||||
continue
|
||||
fi
|
||||
target="${app}:${target_name}"
|
||||
|
||||
echo "=== Target: ${target}"
|
||||
@@ -68,7 +71,7 @@ for app in ${apps}; do
|
||||
bazel_flags+=(--linkopt=-s)
|
||||
fi
|
||||
|
||||
bazel "${bazel_flags[@]}"
|
||||
bazelisk "${bazel_flags[@]}"
|
||||
cp -f "${bin_dir}/${app}/"*".ipa" "${out_dir}"
|
||||
fi
|
||||
done
|
||||
|
||||
@@ -20,10 +20,10 @@ aux_links:
|
||||
- "//github.com/google/mediapipe"
|
||||
|
||||
# Footer content appears at the bottom of every page's main content
|
||||
footer_content: "© 2020 GOOGLE LLC | <a href=\"https://policies.google.com/privacy\">PRIVACY POLICY</a> | <a href=\"https://policies.google.com/terms\">TERMS OF SERVICE</a>"
|
||||
footer_content: "© GOOGLE LLC | <a href=\"https://policies.google.com/privacy\">PRIVACY POLICY</a> | <a href=\"https://policies.google.com/terms\">TERMS OF SERVICE</a>"
|
||||
|
||||
# Color scheme currently only supports "dark" or nil (default)
|
||||
color_scheme: nil
|
||||
# Color scheme currently only supports "dark", "light"/nil (default), or a custom scheme that you define
|
||||
color_scheme: mediapipe
|
||||
|
||||
# Google Analytics Tracking (optional)
|
||||
ga_tracking: UA-140696581-2
|
||||
|
||||
@@ -0,0 +1 @@
|
||||
$link-color: #0097A7;
|
||||
@@ -67,26 +67,26 @@ class CalculatorBase {
|
||||
|
||||
// The subclasses of CalculatorBase must implement GetContract.
|
||||
// ...
|
||||
static ::MediaPipe::Status GetContract(CalculatorContract* cc);
|
||||
static absl::Status GetContract(CalculatorContract* cc);
|
||||
|
||||
// Open is called before any Process() calls, on a freshly constructed
|
||||
// calculator. Subclasses may override this method to perform necessary
|
||||
// setup, and possibly output Packets and/or set output streams' headers.
|
||||
// ...
|
||||
virtual ::MediaPipe::Status Open(CalculatorContext* cc) {
|
||||
return ::MediaPipe::OkStatus();
|
||||
virtual absl::Status Open(CalculatorContext* cc) {
|
||||
return absl::OkStatus();
|
||||
}
|
||||
|
||||
// Processes the incoming inputs. May call the methods on cc to access
|
||||
// inputs and produce outputs.
|
||||
// ...
|
||||
virtual ::MediaPipe::Status Process(CalculatorContext* cc) = 0;
|
||||
virtual absl::Status Process(CalculatorContext* cc) = 0;
|
||||
|
||||
// Is called if Open() was called and succeeded. Is called either
|
||||
// immediately after processing is complete or after a graph run has ended
|
||||
// (if an error occurred in the graph). ...
|
||||
virtual ::MediaPipe::Status Close(CalculatorContext* cc) {
|
||||
return ::MediaPipe::OkStatus();
|
||||
virtual absl::Status Close(CalculatorContext* cc) {
|
||||
return absl::OkStatus();
|
||||
}
|
||||
|
||||
...
|
||||
@@ -133,7 +133,7 @@ write outputs. After Close returns, the calculator is destroyed.
|
||||
Calculators with no inputs are referred to as sources. A source calculator
|
||||
continues to have `Process()` called as long as it returns an `Ok` status. A
|
||||
source calculator indicates that it is exhausted by returning a stop status
|
||||
(i.e. MediaPipe::tool::StatusStop).
|
||||
(i.e. [`mediaPipe::tool::StatusStop()`](https://github.com/google/mediapipe/tree/master/mediapipe/framework/tool/status_util.cc).).
|
||||
|
||||
## Identifying inputs and outputs
|
||||
|
||||
@@ -187,7 +187,7 @@ node {
|
||||
```
|
||||
|
||||
In the calculator implementation, inputs and outputs are also identified by tag
|
||||
name and index number. In the function below input are output are identified:
|
||||
name and index number. In the function below input and output are identified:
|
||||
|
||||
* By index number: The combined input stream is identified simply by index
|
||||
`0`.
|
||||
@@ -199,7 +199,7 @@ name and index number. In the function below input are output are identified:
|
||||
// c++ Code snippet describing the SomeAudioVideoCalculator GetContract() method
|
||||
class SomeAudioVideoCalculator : public CalculatorBase {
|
||||
public:
|
||||
static ::mediapipe::Status GetContract(CalculatorContract* cc) {
|
||||
static absl::Status GetContract(CalculatorContract* cc) {
|
||||
cc->Inputs().Index(0).SetAny();
|
||||
// SetAny() is used to specify that whatever the type of the
|
||||
// stream is, it's acceptable. This does not mean that any
|
||||
@@ -207,15 +207,15 @@ class SomeAudioVideoCalculator : public CalculatorBase {
|
||||
// particular type. SetAny() has the same effect as explicitly
|
||||
// setting the type to be the stream's type.
|
||||
cc->Outputs().Tag("VIDEO").Set<ImageFrame>();
|
||||
cc->Outputs().Get("AUDIO", 0).Set<Matrix>;
|
||||
cc->Outputs().Get("AUDIO", 1).Set<Matrix>;
|
||||
return ::mediapipe::OkStatus();
|
||||
cc->Outputs().Get("AUDIO", 0).Set<Matrix>();
|
||||
cc->Outputs().Get("AUDIO", 1).Set<Matrix>();
|
||||
return absl::OkStatus();
|
||||
}
|
||||
```
|
||||
|
||||
## Processing
|
||||
|
||||
`Process()` called on a non-source node must return `::mediapipe::OkStatus()` to
|
||||
`Process()` called on a non-source node must return `absl::OkStatus()` to
|
||||
indicate that all went well, or any other status code to signal an error
|
||||
|
||||
If a non-source calculator returns `tool::StatusStop()`, then this signals the
|
||||
@@ -224,12 +224,12 @@ input streams will be closed (and remaining Packets will propagate through the
|
||||
graph).
|
||||
|
||||
A source node in a graph will continue to have `Process()` called on it as long
|
||||
as it returns `::mediapipe::OkStatus(`). To indicate that there is no more data
|
||||
to be generated return `tool::StatusStop()`. Any other status indicates an error
|
||||
has occurred.
|
||||
as it returns `absl::OkStatus(`). To indicate that there is no more data to be
|
||||
generated return `tool::StatusStop()`. Any other status indicates an error has
|
||||
occurred.
|
||||
|
||||
`Close()` returns `::mediapipe::OkStatus()` to indicate success. Any other
|
||||
status indicates a failure.
|
||||
`Close()` returns `absl::OkStatus()` to indicate success. Any other status
|
||||
indicates a failure.
|
||||
|
||||
Here is the basic `Process()` function. It uses the `Input()` method (which can
|
||||
be used only if the calculator has a single input) to request its input data. It
|
||||
@@ -238,22 +238,80 @@ and does the calculations. When done it releases the pointer when adding it to
|
||||
the output stream.
|
||||
|
||||
```c++
|
||||
::util::Status MyCalculator::Process() {
|
||||
absl::Status MyCalculator::Process() {
|
||||
const Matrix& input = Input()->Get<Matrix>();
|
||||
std::unique_ptr<Matrix> output(new Matrix(input.rows(), input.cols()));
|
||||
// do your magic here....
|
||||
// output->row(n) = ...
|
||||
Output()->Add(output.release(), InputTimestamp());
|
||||
return ::mediapipe::OkStatus();
|
||||
return absl::OkStatus();
|
||||
}
|
||||
```
|
||||
|
||||
## Calculator options
|
||||
|
||||
Calculators accept processing parameters through (1) input stream packets (2)
|
||||
input side packets, and (3) calculator options. Calculator options, if
|
||||
specified, appear as literal values in the `node_options` field of the
|
||||
`CalculatorGraphConfiguration.Node` message.
|
||||
|
||||
```
|
||||
node {
|
||||
calculator: "TfLiteInferenceCalculator"
|
||||
input_stream: "TENSORS:main_model_input"
|
||||
output_stream: "TENSORS:main_model_output"
|
||||
node_options: {
|
||||
[type.googleapis.com/mediapipe.TfLiteInferenceCalculatorOptions] {
|
||||
model_path: "mediapipe/models/detection_model.tflite"
|
||||
}
|
||||
}
|
||||
}
|
||||
```
|
||||
|
||||
The `node_options` field accepts the proto3 syntax. Alternatively, calculator
|
||||
options can be specified in the `options` field using proto2 syntax.
|
||||
|
||||
```
|
||||
node {
|
||||
calculator: "TfLiteInferenceCalculator"
|
||||
input_stream: "TENSORS:main_model_input"
|
||||
output_stream: "TENSORS:main_model_output"
|
||||
node_options: {
|
||||
[type.googleapis.com/mediapipe.TfLiteInferenceCalculatorOptions] {
|
||||
model_path: "mediapipe/models/detection_model.tflite"
|
||||
}
|
||||
}
|
||||
}
|
||||
```
|
||||
|
||||
Not all calculators accept calcuator options. In order to accept options, a
|
||||
calculator will normally define a new protobuf message type to represent its
|
||||
options, such as `PacketClonerCalculatorOptions`. The calculator will then
|
||||
read that protobuf message in its `CalculatorBase::Open` method, and possibly
|
||||
also in its `CalculatorBase::GetContract` function or its
|
||||
`CalculatorBase::Process` method. Normally, the new protobuf message type will
|
||||
be defined as a protobuf schema using a ".proto" file and a
|
||||
`mediapipe_proto_library()` build rule.
|
||||
|
||||
```
|
||||
mediapipe_proto_library(
|
||||
name = "packet_cloner_calculator_proto",
|
||||
srcs = ["packet_cloner_calculator.proto"],
|
||||
visibility = ["//visibility:public"],
|
||||
deps = [
|
||||
"//mediapipe/framework:calculator_options_proto",
|
||||
"//mediapipe/framework:calculator_proto",
|
||||
],
|
||||
)
|
||||
```
|
||||
|
||||
|
||||
## Example calculator
|
||||
|
||||
This section discusses the implementation of `PacketClonerCalculator`, which
|
||||
does a relatively simple job, and is used in many calculator graphs.
|
||||
`PacketClonerCalculator` simply produces a copy of its most recent input
|
||||
packets on demand.
|
||||
`PacketClonerCalculator` simply produces a copy of its most recent input packets
|
||||
on demand.
|
||||
|
||||
`PacketClonerCalculator` is useful when the timestamps of arriving data packets
|
||||
are not aligned perfectly. Suppose we have a room with a microphone, light
|
||||
@@ -279,8 +337,8 @@ input streams:
|
||||
imageframe of video data representing video collected from camera in the
|
||||
room with timestamp.
|
||||
|
||||
Below is the implementation of the `PacketClonerCalculator`. You can see
|
||||
the `GetContract()`, `Open()`, and `Process()` methods as well as the instance
|
||||
Below is the implementation of the `PacketClonerCalculator`. You can see the
|
||||
`GetContract()`, `Open()`, and `Process()` methods as well as the instance
|
||||
variable `current_` which holds the most recent input packets.
|
||||
|
||||
```c++
|
||||
@@ -312,7 +370,7 @@ namespace mediapipe {
|
||||
//
|
||||
class PacketClonerCalculator : public CalculatorBase {
|
||||
public:
|
||||
static ::mediapipe::Status GetContract(CalculatorContract* cc) {
|
||||
static absl::Status GetContract(CalculatorContract* cc) {
|
||||
const int tick_signal_index = cc->Inputs().NumEntries() - 1;
|
||||
// cc->Inputs().NumEntries() returns the number of input streams
|
||||
// for the PacketClonerCalculator
|
||||
@@ -322,10 +380,10 @@ class PacketClonerCalculator : public CalculatorBase {
|
||||
cc->Outputs().Index(i).SetSameAs(&cc->Inputs().Index(i));
|
||||
}
|
||||
cc->Inputs().Index(tick_signal_index).SetAny();
|
||||
return ::mediapipe::OkStatus();
|
||||
return absl::OkStatus();
|
||||
}
|
||||
|
||||
::mediapipe::Status Open(CalculatorContext* cc) final {
|
||||
absl::Status Open(CalculatorContext* cc) final {
|
||||
tick_signal_index_ = cc->Inputs().NumEntries() - 1;
|
||||
current_.resize(tick_signal_index_);
|
||||
// Pass along the header for each stream if present.
|
||||
@@ -336,10 +394,10 @@ class PacketClonerCalculator : public CalculatorBase {
|
||||
// the header for the input stream of index i
|
||||
}
|
||||
}
|
||||
return ::mediapipe::OkStatus();
|
||||
return absl::OkStatus();
|
||||
}
|
||||
|
||||
::mediapipe::Status Process(CalculatorContext* cc) final {
|
||||
absl::Status Process(CalculatorContext* cc) final {
|
||||
// Store input signals.
|
||||
for (int i = 0; i < tick_signal_index_; ++i) {
|
||||
if (!cc->Inputs().Index(i).Value().IsEmpty()) {
|
||||
@@ -355,7 +413,6 @@ class PacketClonerCalculator : public CalculatorBase {
|
||||
current_[i].At(cc->InputTimestamp()));
|
||||
// Add a packet to output stream of index i a packet from inputstream i
|
||||
// with timestamp common to all present inputs
|
||||
//
|
||||
} else {
|
||||
cc->Outputs().Index(i).SetNextTimestampBound(
|
||||
cc->InputTimestamp().NextAllowedInStream());
|
||||
@@ -364,7 +421,7 @@ class PacketClonerCalculator : public CalculatorBase {
|
||||
}
|
||||
}
|
||||
}
|
||||
return ::mediapipe::OkStatus();
|
||||
return absl::OkStatus();
|
||||
}
|
||||
|
||||
private:
|
||||
@@ -382,7 +439,7 @@ defined your calculator class, register it with a macro invocation
|
||||
REGISTER_CALCULATOR(calculator_class_name).
|
||||
|
||||
Below is a trivial MediaPipe graph that has 3 input streams, 1 node
|
||||
(PacketClonerCalculator) and 3 output streams.
|
||||
(PacketClonerCalculator) and 2 output streams.
|
||||
|
||||
```proto
|
||||
input_stream: "room_mic_signal"
|
||||
@@ -400,13 +457,8 @@ node {
|
||||
```
|
||||
|
||||
The diagram below shows how the `PacketClonerCalculator` defines its output
|
||||
packets based on its series of input packets.
|
||||
packets (bottom) based on its series of input packets (top).
|
||||
|
||||
|  :
|
||||
| :--------------------------------------------------------------------------: |
|
||||
| *Each time it receives a packet on its TICK input stream, the |
|
||||
: PacketClonerCalculator outputs the most recent packet from each of its input :
|
||||
: streams. The sequence of output packets is determined by the sequene of :
|
||||
: input packets and their timestamps. The timestamps are shows along the right :
|
||||
: side of the diagram.* :
|
||||
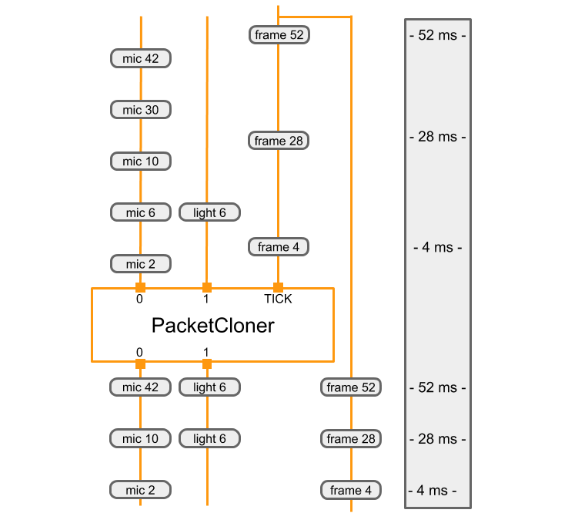 |
|
||||
:--------------------------------------------------------------------------: |
|
||||
*Each time it receives a packet on its TICK input stream, the PacketClonerCalculator outputs the most recent packet from each of its input streams. The sequence of output packets (bottom) is determined by the sequence of input packets (top) and their timestamps. The timestamps are shown along the right side of the diagram.* |
|
||||
|
||||
@@ -110,3 +110,12 @@ Other policies are also available, implemented using a separate kind of
|
||||
component known as an InputStreamHandler.
|
||||
|
||||
See [Synchronization](synchronization.md) for more details.
|
||||
|
||||
### Real-time streams
|
||||
|
||||
MediaPipe calculator graphs are often used to process streams of video or audio
|
||||
frames for interactive applications. Normally, each Calculator runs as soon as
|
||||
all of its input packets for a given timestamp become available. Calculators
|
||||
used in real-time graphs need to define output timestamp bounds based on input
|
||||
timestamp bounds in order to allow downstream calculators to be scheduled
|
||||
promptly. See [Real-time Streams](realtime_streams.md) for details.
|
||||
|
||||
@@ -66,10 +66,10 @@ calculator derived from base class GlSimpleCalculator. The GPU calculator
|
||||
// See GlSimpleCalculator for inputs, outputs and input side packets.
|
||||
class LuminanceCalculator : public GlSimpleCalculator {
|
||||
public:
|
||||
::mediapipe::Status GlSetup() override;
|
||||
::mediapipe::Status GlRender(const GlTexture& src,
|
||||
const GlTexture& dst) override;
|
||||
::mediapipe::Status GlTeardown() override;
|
||||
absl::Status GlSetup() override;
|
||||
absl::Status GlRender(const GlTexture& src,
|
||||
const GlTexture& dst) override;
|
||||
absl::Status GlTeardown() override;
|
||||
|
||||
private:
|
||||
GLuint program_ = 0;
|
||||
@@ -77,8 +77,8 @@ class LuminanceCalculator : public GlSimpleCalculator {
|
||||
};
|
||||
REGISTER_CALCULATOR(LuminanceCalculator);
|
||||
|
||||
::mediapipe::Status LuminanceCalculator::GlRender(const GlTexture& src,
|
||||
const GlTexture& dst) {
|
||||
absl::Status LuminanceCalculator::GlRender(const GlTexture& src,
|
||||
const GlTexture& dst) {
|
||||
static const GLfloat square_vertices[] = {
|
||||
-1.0f, -1.0f, // bottom left
|
||||
1.0f, -1.0f, // bottom right
|
||||
@@ -128,7 +128,7 @@ REGISTER_CALCULATOR(LuminanceCalculator);
|
||||
glDeleteVertexArrays(1, &vao);
|
||||
glDeleteBuffers(2, vbo);
|
||||
|
||||
return ::mediapipe::OkStatus();
|
||||
return absl::OkStatus();
|
||||
}
|
||||
```
|
||||
|
||||
@@ -149,7 +149,7 @@ When possible, these calculators use platform-specific functionality to share da
|
||||
|
||||
The below diagram shows the data flow in a mobile application that captures video from the camera, runs it through a MediaPipe graph, and renders the output on the screen in real time. The dashed line indicates which parts are inside the MediaPipe graph proper. This application runs a Canny edge-detection filter on the CPU using OpenCV, and overlays it on top of the original video using the GPU.
|
||||
|
||||

|
||||
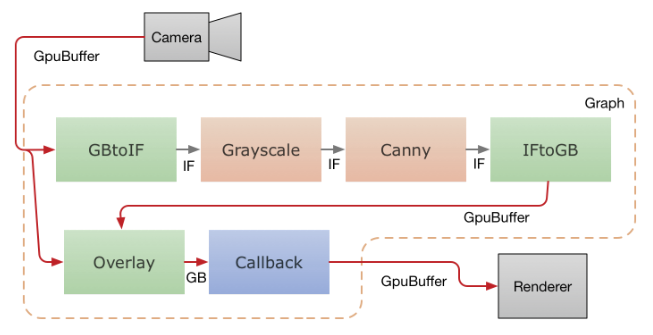
|
||||
|
||||
Video frames from the camera are fed into the graph as `GpuBuffer` packets. The
|
||||
input stream is accessed by two calculators in parallel.
|
||||
|
||||
@@ -83,12 +83,12 @@ Below is an example of how to create a subgraph named `TwoPassThroughSubgraph`.
|
||||
output_stream: "out3"
|
||||
|
||||
node {
|
||||
calculator: "PassThroughculator"
|
||||
calculator: "PassThroughCalculator"
|
||||
input_stream: "out1"
|
||||
output_stream: "out2"
|
||||
}
|
||||
node {
|
||||
calculator: "PassThroughculator"
|
||||
calculator: "PassThroughCalculator"
|
||||
input_stream: "out2"
|
||||
output_stream: "out3"
|
||||
}
|
||||
@@ -159,7 +159,7 @@ Please use the `CalculatorGraphTest.Cycle` unit test in
|
||||
below is the cyclic graph in the test. The `sum` output of the adder is the sum
|
||||
of the integers generated by the integer source calculator.
|
||||
|
||||

|
||||
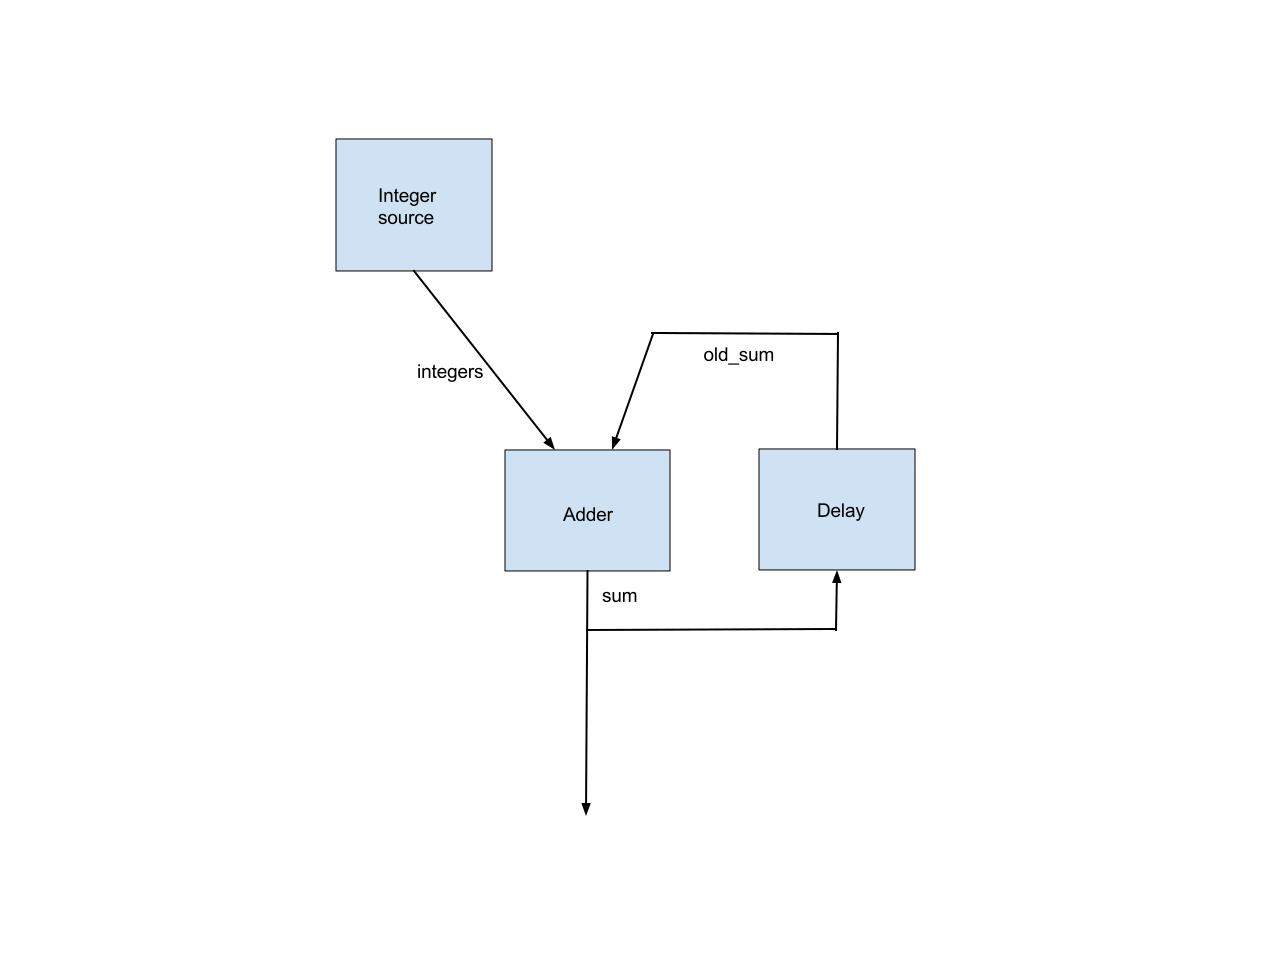
|
||||
|
||||
This simple graph illustrates all the issues in supporting cyclic graphs.
|
||||
|
||||
@@ -219,23 +219,23 @@ packet timestamps 0, 1, 2, 3, ...
|
||||
```c++
|
||||
class UnitDelayCalculator : public Calculator {
|
||||
public:
|
||||
static ::util::Status FillExpectations(
|
||||
static absl::Status FillExpectations(
|
||||
const CalculatorOptions& extendable_options, PacketTypeSet* inputs,
|
||||
PacketTypeSet* outputs, PacketTypeSet* input_side_packets) {
|
||||
inputs->Index(0)->Set<int>("An integer.");
|
||||
outputs->Index(0)->Set<int>("The input delayed by one time unit.");
|
||||
return ::mediapipe::OkStatus();
|
||||
return absl::OkStatus();
|
||||
}
|
||||
|
||||
::util::Status Open() final {
|
||||
absl::Status Open() final {
|
||||
Output()->Add(new int(0), Timestamp(0));
|
||||
return ::mediapipe::OkStatus();
|
||||
return absl::OkStatus();
|
||||
}
|
||||
|
||||
::util::Status Process() final {
|
||||
absl::Status Process() final {
|
||||
const Packet& packet = Input()->Value();
|
||||
Output()->AddPacket(packet.At(packet.Timestamp().NextAllowedInStream()));
|
||||
return ::mediapipe::OkStatus();
|
||||
return absl::OkStatus();
|
||||
}
|
||||
};
|
||||
```
|
||||
|
||||
@@ -12,19 +12,30 @@ nav_order: 3
|
||||
{:toc}
|
||||
---
|
||||
|
||||
Each calculator is a node of of a graph. We describe how to create a new calculator, how to initialize a calculator, how to perform its calculations, input and output streams, timestamps, and options
|
||||
Calculators communicate by sending and receiving packets. Typically a single
|
||||
packet is sent along each input stream at each input timestamp. A packet can
|
||||
contain any kind of data, such as a single frame of video or a single integer
|
||||
detection count.
|
||||
|
||||
## Creating a packet
|
||||
|
||||
Packets are generally created with `MediaPipe::Adopt()` (from packet.h).
|
||||
Packets are generally created with `mediapipe::MakePacket<T>()` or
|
||||
`mediapipe::Adopt()` (from packet.h).
|
||||
|
||||
```c++
|
||||
// Create some data.
|
||||
auto data = gtl::MakeUnique<MyDataClass>("constructor_argument");
|
||||
// Create a packet to own the data.
|
||||
Packet p = Adopt(data.release());
|
||||
// Create a packet containing some new data.
|
||||
Packet p = MakePacket<MyDataClass>("constructor_argument");
|
||||
// Make a new packet with the same data and a different timestamp.
|
||||
Packet p2 = p.At(Timestamp::PostStream());
|
||||
```
|
||||
|
||||
or:
|
||||
|
||||
```c++
|
||||
// Create some new data.
|
||||
auto data = absl::make_unique<MyDataClass>("constructor_argument");
|
||||
// Create a packet to own the data.
|
||||
Packet p = Adopt(data.release()).At(Timestamp::PostStream());
|
||||
```
|
||||
|
||||
Data within a packet is accessed with `Packet::Get<T>()`
|
||||
|
||||
@@ -0,0 +1,186 @@
|
||||
---
|
||||
layout: default
|
||||
title: Real-time Streams
|
||||
parent: Framework Concepts
|
||||
nav_order: 6
|
||||
---
|
||||
|
||||
# Real-time Streams
|
||||
{: .no_toc }
|
||||
|
||||
1. TOC
|
||||
{:toc}
|
||||
---
|
||||
|
||||
## Real-time timestamps
|
||||
|
||||
MediaPipe calculator graphs are often used to process streams of video or audio
|
||||
frames for interactive applications. The MediaPipe framework requires only that
|
||||
successive packets be assigned monotonically increasing timestamps. By
|
||||
convention, real-time calculators and graphs use the recording time or the
|
||||
presentation time of each frame as its timestamp, with each timestamp indicating
|
||||
the microseconds since `Jan/1/1970:00:00:00`. This allows packets from various
|
||||
sources to be processed in a globally consistent sequence.
|
||||
|
||||
## Real-time scheduling
|
||||
|
||||
Normally, each Calculator runs as soon as all of its input packets for a given
|
||||
timestamp become available. Normally, this happens when the calculator has
|
||||
finished processing the previous frame, and each of the calculators producing
|
||||
its inputs have finished processing the current frame. The MediaPipe scheduler
|
||||
invokes each calculator as soon as these conditions are met. See
|
||||
[Synchronization](synchronization.md) for more details.
|
||||
|
||||
## Timestamp bounds
|
||||
|
||||
When a calculator does not produce any output packets for a given timestamp, it
|
||||
can instead output a "timestamp bound" indicating that no packet will be
|
||||
produced for that timestamp. This indication is necessary to allow downstream
|
||||
calculators to run at that timestamp, even though no packet has arrived for
|
||||
certain streams for that timestamp. This is especially important for real-time
|
||||
graphs in interactive applications, where it is crucial that each calculator
|
||||
begin processing as soon as possible.
|
||||
|
||||
Consider a graph like the following:
|
||||
|
||||
```
|
||||
node {
|
||||
calculator: "A"
|
||||
input_stream: "alpha_in"
|
||||
output_stream: "alpha"
|
||||
}
|
||||
node {
|
||||
calculator: "B"
|
||||
input_stream: "alpha"
|
||||
input_stream: "foo"
|
||||
output_stream: "beta"
|
||||
}
|
||||
```
|
||||
|
||||
Suppose: at timestamp `T`, node `A` doesn't send a packet in its output stream
|
||||
`alpha`. Node `B` gets a packet in `foo` at timestamp `T` and is waiting for a
|
||||
packet in `alpha` at timestamp `T`. If `A` doesn't send `B` a timestamp bound
|
||||
update for `alpha`, `B` will keep waiting for a packet to arrive in `alpha`.
|
||||
Meanwhile, the packet queue of `foo` will accumulate packets at `T`, `T+1` and
|
||||
so on.
|
||||
|
||||
To output a packet on a stream, a calculator uses the API functions
|
||||
`CalculatorContext::Outputs` and `OutputStream::Add`. To instead output a
|
||||
timestamp bound on a stream, a calculator can use the API functions
|
||||
`CalculatorContext::Outputs` and `CalculatorContext::SetNextTimestampBound`. The
|
||||
specified bound is the lowest allowable timestamp for the next packet on the
|
||||
specified output stream. When no packet is output, a calculator will typically
|
||||
do something like:
|
||||
|
||||
```
|
||||
cc->Outputs().Tag("output_frame").SetNextTimestampBound(
|
||||
cc->InputTimestamp().NextAllowedInStream());
|
||||
```
|
||||
|
||||
The function `Timestamp::NextAllowedInStream` returns the successive timestamp.
|
||||
For example, `Timestamp(1).NextAllowedInStream() == Timestamp(2)`.
|
||||
|
||||
## Propagating timestamp bounds
|
||||
|
||||
Calculators that will be used in real-time graphs need to define output
|
||||
timestamp bounds based on input timestamp bounds in order to allow downstream
|
||||
calculators to be scheduled promptly. A common pattern is for calculators to
|
||||
output packets with the same timestamps as their input packets. In this case,
|
||||
simply outputting a packet on every call to `Calculator::Process` is sufficient
|
||||
to define output timestamp bounds.
|
||||
|
||||
However, calculators are not required to follow this common pattern for output
|
||||
timestamps, they are only required to choose monotonically increasing output
|
||||
timestamps. As a result, certain calculators must calculate timestamp bounds
|
||||
explicitly. MediaPipe provides several tools for computing appropriate timestamp
|
||||
bound for each calculator.
|
||||
|
||||
1\. **SetNextTimestampBound()** can be used to specify the timestamp bound, `t +
|
||||
1`, for an output stream.
|
||||
|
||||
```
|
||||
cc->Outputs.Tag("OUT").SetNextTimestampBound(t.NextAllowedInStream());
|
||||
```
|
||||
|
||||
Alternatively, an empty packet with timestamp `t` can be produced to specify the
|
||||
timestamp bound `t + 1`.
|
||||
|
||||
```
|
||||
cc->Outputs.Tag("OUT").Add(Packet(), t);
|
||||
```
|
||||
|
||||
The timestamp bound of an input stream is indicated by the packet or the empty
|
||||
packet on the input stream.
|
||||
|
||||
```
|
||||
Timestamp bound = cc->Inputs().Tag("IN").Value().Timestamp();
|
||||
```
|
||||
|
||||
2\. **TimestampOffset()** can be specified in order to automatically copy the
|
||||
timestamp bound from input streams to output streams.
|
||||
|
||||
```
|
||||
cc->SetTimestampOffset(0);
|
||||
```
|
||||
|
||||
This setting has the advantage of propagating timestamp bounds automatically,
|
||||
even when only timestamp bounds arrive and Calculator::Process is not invoked.
|
||||
|
||||
3\. **ProcessTimestampBounds()** can be specified in order to invoke
|
||||
`Calculator::Process` for each new "settled timestamp", where the "settled
|
||||
timestamp" is the new highest timestamp below the current timestamp bounds.
|
||||
Without `ProcessTimestampBounds()`, `Calculator::Process` is invoked only with
|
||||
one or more arriving packets.
|
||||
|
||||
```
|
||||
cc->SetProcessTimestampBounds(true);
|
||||
```
|
||||
|
||||
This setting allows a calculator to perform its own timestamp bounds calculation
|
||||
and propagation, even when only input timestamps are updated. It can be used to
|
||||
replicate the effect of `TimestampOffset()`, but it can also be used to
|
||||
calculate a timestamp bound that takes into account additional factors.
|
||||
|
||||
For example, in order to replicate `SetTimestampOffset(0)`, a calculator could
|
||||
do the following:
|
||||
|
||||
```
|
||||
absl::Status Open(CalculatorContext* cc) {
|
||||
cc->SetProcessTimestampBounds(true);
|
||||
}
|
||||
|
||||
absl::Status Process(CalculatorContext* cc) {
|
||||
cc->Outputs.Tag("OUT").SetNextTimestampBound(
|
||||
cc->InputTimestamp().NextAllowedInStream());
|
||||
}
|
||||
```
|
||||
|
||||
## Scheduling of Calculator::Open and Calculator::Close
|
||||
|
||||
`Calculator::Open` is invoked when all required input side-packets have been
|
||||
produced. Input side-packets can be provided by the enclosing application or by
|
||||
"side-packet calculators" inside the graph. Side-packets can be specified from
|
||||
outside the graph using the API's `CalculatorGraph::Initialize` and
|
||||
`CalculatorGraph::StartRun`. Side packets can be specified by calculators within
|
||||
the graph using `CalculatorGraphConfig::OutputSidePackets` and
|
||||
`OutputSidePacket::Set`.
|
||||
|
||||
Calculator::Close is invoked when all of the input streams have become `Done` by
|
||||
being closed or reaching timestamp bound `Timestamp::Done`.
|
||||
|
||||
**Note:** If the graph finishes all pending calculator execution and becomes
|
||||
`Done`, before some streams become `Done`, then MediaPipe will invoke the
|
||||
remaining calls to `Calculator::Close`, so that every calculator can produce its
|
||||
final outputs.
|
||||
|
||||
The use of `TimestampOffset` has some implications for `Calculator::Close`. A
|
||||
calculator specifying `SetTimestampOffset(0)` will by design signal that all of
|
||||
its output streams have reached `Timestamp::Done` when all of its input streams
|
||||
have reached `Timestamp::Done`, and therefore no further outputs are possible.
|
||||
This prevents such a calculator from emitting any packets during
|
||||
`Calculator::Close`. If a calculator needs to produce a summary packet during
|
||||
`Calculator::Close`, `Calculator::Process` must specify timestamp bounds such
|
||||
that at least one timestamp (such as `Timestamp::Max`) remains available during
|
||||
`Calculator::Close`. This means that such a calculator normally cannot rely upon
|
||||
`SetTimestampOffset(0)` and must instead specify timestamp bounds explicitly
|
||||
using `SetNextTimestampBounds()`.
|
||||
@@ -169,7 +169,7 @@ behavior depending on resource constraints.
|
||||
|
||||
[`CalculatorBase`]: https://github.com/google/mediapipe/tree/master/mediapipe/framework/calculator_base.h
|
||||
[`DefaultInputStreamHandler`]: https://github.com/google/mediapipe/tree/master/mediapipe/framework/stream_handler/default_input_stream_handler.h
|
||||
[`SyncSetInputStreamHandler`]: https://github.com/google/mediapipe/tree/master/mediapipe/framework/stream_handler/sync_set_input_stream_handler.h
|
||||
[`ImmediateInputStreamHandler`]: https://github.com/google/mediapipe/tree/master/mediapipe/framework/stream_handler/immediate_input_stream_handler.h
|
||||
[`SyncSetInputStreamHandler`]: https://github.com/google/mediapipe/tree/master/mediapipe/framework/stream_handler/sync_set_input_stream_handler.cc
|
||||
[`ImmediateInputStreamHandler`]: https://github.com/google/mediapipe/tree/master/mediapipe/framework/stream_handler/immediate_input_stream_handler.cc
|
||||
[`CalculatorGraphConfig::max_queue_size`]: https://github.com/google/mediapipe/tree/master/mediapipe/framework/calculator.proto
|
||||
[`FlowLimiterCalculator`]: https://github.com/google/mediapipe/tree/master/mediapipe/calculators/core/flow_limiter_calculator.cc
|
||||
|
||||
@@ -0,0 +1,87 @@
|
||||
---
|
||||
layout: default
|
||||
title: MediaPipe on Android
|
||||
parent: Getting Started
|
||||
has_children: true
|
||||
has_toc: false
|
||||
nav_order: 1
|
||||
---
|
||||
|
||||
# MediaPipe on Android
|
||||
{: .no_toc }
|
||||
|
||||
1. TOC
|
||||
{:toc}
|
||||
---
|
||||
|
||||
Please follow instructions below to build Android example apps in the supported
|
||||
MediaPipe [solutions](../solutions/solutions.md). To learn more about these
|
||||
example apps, start from [Hello World! on Android](./hello_world_android.md).
|
||||
|
||||
To incorporate MediaPipe into Android Studio projects, see these
|
||||
[instructions](./android_solutions.md) to use the MediaPipe Android Solution
|
||||
APIs (currently in alpha) that are now available in
|
||||
[Google's Maven Repository](https://maven.google.com/web/index.html?#com.google.mediapipe).
|
||||
|
||||
## Building Android example apps with Bazel
|
||||
|
||||
### Prerequisite
|
||||
|
||||
* Install MediaPipe following these [instructions](./install.md).
|
||||
* Setup Java Runtime.
|
||||
* Setup Android SDK release 30.0.0 and above.
|
||||
* Setup Android NDK version between 18 and 21.
|
||||
|
||||
MediaPipe recommends setting up Android SDK and NDK via Android Studio (and see
|
||||
below for Android Studio setup). However, if you prefer using MediaPipe without
|
||||
Android Studio, please run
|
||||
[`setup_android_sdk_and_ndk.sh`](https://github.com/google/mediapipe/blob/master/setup_android_sdk_and_ndk.sh)
|
||||
to download and setup Android SDK and NDK before building any Android example
|
||||
apps.
|
||||
|
||||
If Android SDK and NDK are already installed (e.g., by Android Studio), set
|
||||
$ANDROID_HOME and $ANDROID_NDK_HOME to point to the installed SDK and NDK.
|
||||
|
||||
```bash
|
||||
export ANDROID_HOME=<path to the Android SDK>
|
||||
export ANDROID_NDK_HOME=<path to the Android NDK>
|
||||
```
|
||||
|
||||
and add android_ndk_repository() and android_sdk_repository() rules into the
|
||||
[`WORKSPACE`](https://github.com/google/mediapipe/blob/master/WORKSPACE) file as
|
||||
the following:
|
||||
|
||||
```bash
|
||||
$ echo "android_sdk_repository(name = \"androidsdk\")" >> WORKSPACE
|
||||
$ echo "android_ndk_repository(name = \"androidndk\", api_level=21)" >> WORKSPACE
|
||||
```
|
||||
|
||||
In order to use MediaPipe on earlier Android versions, MediaPipe needs to switch
|
||||
to a lower Android API level. You can achieve this by specifying `api_level =
|
||||
$YOUR_INTENDED_API_LEVEL` in android_ndk_repository() and/or
|
||||
android_sdk_repository() in the
|
||||
[`WORKSPACE`](https://github.com/google/mediapipe/blob/master/WORKSPACE) file.
|
||||
|
||||
Tip: You can run this
|
||||
[script](https://github.com/google/mediapipe/blob/master/build_android_examples.sh)
|
||||
to build (and install) all MediaPipe Android example apps.
|
||||
|
||||
1. To build an Android example app, build against the corresponding
|
||||
`android_binary` build target. For instance, for
|
||||
[MediaPipe Hands](../solutions/hands.md) the target is `handtrackinggpu` in
|
||||
the
|
||||
[BUILD](https://github.com/google/mediapipe/tree/master/mediapipe/examples/android/src/java/com/google/mediapipe/apps/handtrackinggpu/BUILD)
|
||||
file:
|
||||
|
||||
Note: To reduce the binary size, consider appending `--linkopt="-s"` to the
|
||||
command below to strip symbols.
|
||||
|
||||
```bash
|
||||
bazel build -c opt --config=android_arm64 mediapipe/examples/android/src/java/com/google/mediapipe/apps/handtrackinggpu:handtrackinggpu
|
||||
```
|
||||
|
||||
2. Install it on a device with:
|
||||
|
||||
```bash
|
||||
adb install bazel-bin/mediapipe/examples/android/src/java/com/google/mediapipe/apps/handtrackinggpu/handtrackinggpu.apk
|
||||
```
|
||||
@@ -1,8 +1,9 @@
|
||||
---
|
||||
layout: default
|
||||
title: MediaPipe Android Archive
|
||||
parent: Getting Started
|
||||
nav_order: 7
|
||||
parent: MediaPipe on Android
|
||||
grand_parent: Getting Started
|
||||
nav_order: 3
|
||||
---
|
||||
|
||||
# MediaPipe Android Archive
|
||||
@@ -36,7 +37,7 @@ each project.
|
||||
load("//mediapipe/java/com/google/mediapipe:mediapipe_aar.bzl", "mediapipe_aar")
|
||||
|
||||
mediapipe_aar(
|
||||
name = "mp_face_detection_aar",
|
||||
name = "mediapipe_face_detection",
|
||||
calculators = ["//mediapipe/graphs/face_detection:mobile_calculators"],
|
||||
)
|
||||
```
|
||||
@@ -44,25 +45,49 @@ each project.
|
||||
2. Run the Bazel build command to generate the AAR.
|
||||
|
||||
```bash
|
||||
bazel build -c opt --host_crosstool_top=@bazel_tools//tools/cpp:toolchain --fat_apk_cpu=arm64-v8a,armeabi-v7a \
|
||||
//path/to/the/aar/build/file:aar_name
|
||||
bazel build -c opt --strip=ALWAYS \
|
||||
--host_crosstool_top=@bazel_tools//tools/cpp:toolchain \
|
||||
--fat_apk_cpu=arm64-v8a,armeabi-v7a \
|
||||
--legacy_whole_archive=0 \
|
||||
--features=-legacy_whole_archive \
|
||||
--copt=-fvisibility=hidden \
|
||||
--copt=-ffunction-sections \
|
||||
--copt=-fdata-sections \
|
||||
--copt=-fstack-protector \
|
||||
--copt=-Oz \
|
||||
--copt=-fomit-frame-pointer \
|
||||
--copt=-DABSL_MIN_LOG_LEVEL=2 \
|
||||
--linkopt=-Wl,--gc-sections,--strip-all \
|
||||
//path/to/the/aar/build/file:aar_name.aar
|
||||
```
|
||||
|
||||
For the face detection AAR target we made in the step 1, run:
|
||||
For the face detection AAR target we made in step 1, run:
|
||||
|
||||
```bash
|
||||
bazel build -c opt --host_crosstool_top=@bazel_tools//tools/cpp:toolchain --fat_apk_cpu=arm64-v8a,armeabi-v7a \
|
||||
//mediapipe/examples/android/src/java/com/google/mediapipe/apps/aar_example:mp_face_detection_aar
|
||||
bazel build -c opt --strip=ALWAYS \
|
||||
--host_crosstool_top=@bazel_tools//tools/cpp:toolchain \
|
||||
--fat_apk_cpu=arm64-v8a,armeabi-v7a \
|
||||
--legacy_whole_archive=0 \
|
||||
--features=-legacy_whole_archive \
|
||||
--copt=-fvisibility=hidden \
|
||||
--copt=-ffunction-sections \
|
||||
--copt=-fdata-sections \
|
||||
--copt=-fstack-protector \
|
||||
--copt=-Oz \
|
||||
--copt=-fomit-frame-pointer \
|
||||
--copt=-DABSL_MIN_LOG_LEVEL=2 \
|
||||
--linkopt=-Wl,--gc-sections,--strip-all \
|
||||
//mediapipe/examples/android/src/java/com/google/mediapipe/apps/aar_example:mediapipe_face_detection.aar
|
||||
|
||||
# It should print:
|
||||
# Target //mediapipe/examples/android/src/java/com/google/mediapipe/apps/aar_example:mp_face_detection_aar up-to-date:
|
||||
# bazel-bin/mediapipe/examples/android/src/java/com/google/mediapipe/apps/aar_example/mp_face_detection_aar.aar
|
||||
# Target //mediapipe/examples/android/src/java/com/google/mediapipe/apps/aar_example:mediapipe_face_detection.aar up-to-date:
|
||||
# bazel-bin/mediapipe/examples/android/src/java/com/google/mediapipe/apps/aar_example/mediapipe_face_detection.aar
|
||||
```
|
||||
|
||||
3. (Optional) Save the AAR to your preferred location.
|
||||
|
||||
```bash
|
||||
cp bazel-bin/mediapipe/examples/android/src/java/com/google/mediapipe/apps/aar_example/mp_face_detection_aar.aar
|
||||
cp bazel-bin/mediapipe/examples/android/src/java/com/google/mediapipe/apps/aar_example/mediapipe_face_detection.aar
|
||||
/absolute/path/to/your/preferred/location
|
||||
```
|
||||
|
||||
@@ -73,11 +98,11 @@ each project.
|
||||
2. Copy the AAR into app/libs.
|
||||
|
||||
```bash
|
||||
cp bazel-bin/mediapipe/examples/android/src/java/com/google/mediapipe/apps/aar_example/mp_face_detection_aar.aar
|
||||
cp bazel-bin/mediapipe/examples/android/src/java/com/google/mediapipe/apps/aar_example/mediapipe_face_detection.aar
|
||||
/path/to/your/app/libs/
|
||||
```
|
||||
|
||||

|
||||
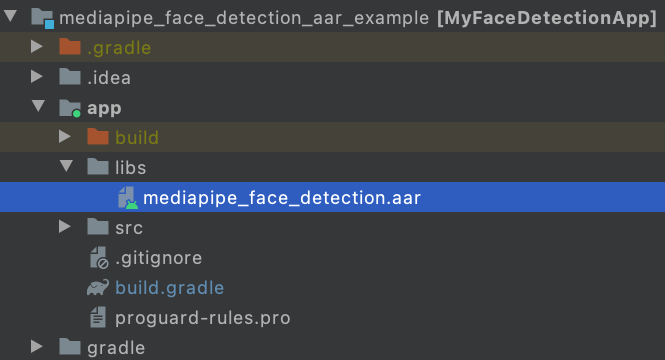
|
||||
|
||||
3. Make app/src/main/assets and copy assets (graph, model, and etc) into
|
||||
app/src/main/assets.
|
||||
@@ -85,36 +110,19 @@ each project.
|
||||
Build the MediaPipe binary graph and copy the assets into
|
||||
app/src/main/assets, e.g., for the face detection graph, you need to build
|
||||
and copy
|
||||
[the binary graph](https://github.com/google/mediapipe/blob/master/mediapipe/examples/android/src/java/com/google/mediapipe/apps/facedetectiongpu/BUILD#L41),
|
||||
[the tflite model](https://github.com/google/mediapipe/tree/master/mediapipe/models/face_detection_front.tflite),
|
||||
[the binary graph](https://github.com/google/mediapipe/blob/master/mediapipe/examples/android/src/java/com/google/mediapipe/apps/facedetectiongpu/BUILD#L41)
|
||||
and
|
||||
[the label map](https://github.com/google/mediapipe/blob/master/mediapipe/models/face_detection_front_labelmap.txt).
|
||||
[the face detection tflite model](https://github.com/google/mediapipe/tree/master/mediapipe/modules/face_detection/face_detection_short_range.tflite).
|
||||
|
||||
```bash
|
||||
bazel build -c opt mediapipe/mediapipe/graphs/face_detection:mobile_gpu_binary_graph
|
||||
cp bazel-bin/mediapipe/graphs/face_detection/mobile_gpu.binarypb /path/to/your/app/src/main/assets/
|
||||
cp mediapipe/models/face_detection_front.tflite /path/to/your/app/src/main/assets/
|
||||
cp mediapipe/models/face_detection_front_labelmap.txt /path/to/your/app/src/main/assets/
|
||||
bazel build -c opt mediapipe/graphs/face_detection:face_detection_mobile_gpu_binary_graph
|
||||
cp bazel-bin/mediapipe/graphs/face_detection/face_detection_mobile_gpu.binarypb /path/to/your/app/src/main/assets/
|
||||
cp mediapipe/modules/face_detection/face_detection_short_range.tflite /path/to/your/app/src/main/assets/
|
||||
```
|
||||
|
||||

|
||||
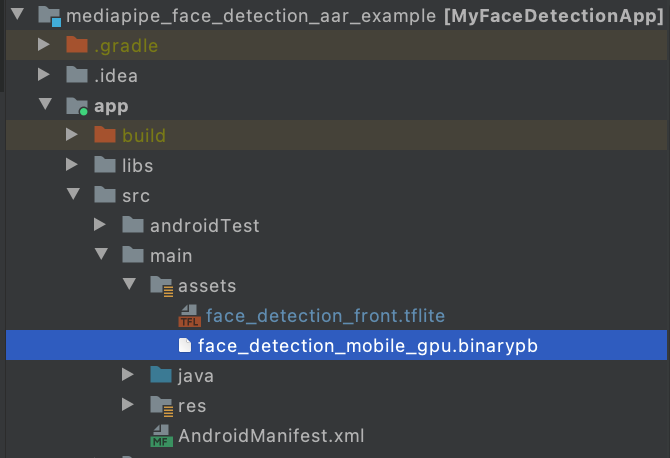
|
||||
|
||||
4. Make app/src/main/jniLibs and copy OpenCV JNI libraries into
|
||||
app/src/main/jniLibs.
|
||||
|
||||
MediaPipe depends on OpenCV, you will need to copy the precompiled OpenCV so
|
||||
files into app/src/main/jniLibs. You can download the official OpenCV
|
||||
Android SDK from
|
||||
[here](https://github.com/opencv/opencv/releases/download/3.4.3/opencv-3.4.3-android-sdk.zip)
|
||||
and run:
|
||||
|
||||
```bash
|
||||
cp -R ~/Downloads/OpenCV-android-sdk/sdk/native/libs/arm* /path/to/your/app/src/main/jniLibs/
|
||||
```
|
||||
|
||||

|
||||
|
||||
5. Modify app/build.gradle to add MediaPipe dependencies and MediaPipe AAR.
|
||||
4. Modify app/build.gradle to add MediaPipe dependencies and MediaPipe AAR.
|
||||
|
||||
```
|
||||
dependencies {
|
||||
@@ -125,20 +133,24 @@ each project.
|
||||
androidTestImplementation 'androidx.test.ext:junit:1.1.0'
|
||||
androidTestImplementation 'androidx.test.espresso:espresso-core:3.1.1'
|
||||
// MediaPipe deps
|
||||
implementation 'com.google.flogger:flogger:0.3.1'
|
||||
implementation 'com.google.flogger:flogger-system-backend:0.3.1'
|
||||
implementation 'com.google.code.findbugs:jsr305:3.0.2'
|
||||
implementation 'com.google.flogger:flogger:latest.release'
|
||||
implementation 'com.google.flogger:flogger-system-backend:latest.release'
|
||||
implementation 'com.google.code.findbugs:jsr305:latest.release'
|
||||
implementation 'com.google.guava:guava:27.0.1-android'
|
||||
implementation 'com.google.guava:guava:27.0.1-android'
|
||||
implementation 'com.google.protobuf:protobuf-java:3.11.4'
|
||||
implementation 'com.google.protobuf:protobuf-javalite:3.19.1'
|
||||
// CameraX core library
|
||||
def camerax_version = "1.0.0-alpha06"
|
||||
def camerax_version = "1.0.0-beta10"
|
||||
implementation "androidx.camera:camera-core:$camerax_version"
|
||||
implementation "androidx.camera:camera-camera2:$camerax_version"
|
||||
implementation "androidx.camera:camera-lifecycle:$camerax_version"
|
||||
// AutoValue
|
||||
def auto_value_version = "1.8.1"
|
||||
implementation "com.google.auto.value:auto-value-annotations:$auto_value_version"
|
||||
annotationProcessor "com.google.auto.value:auto-value:$auto_value_version"
|
||||
}
|
||||
```
|
||||
|
||||
6. Follow our Android app examples to use MediaPipe in Android Studio for your
|
||||
5. Follow our Android app examples to use MediaPipe in Android Studio for your
|
||||
use case. If you are looking for an example, a face detection example can be
|
||||
found
|
||||
[here](https://github.com/jiuqiant/mediapipe_face_detection_aar_example) and
|
||||
|
||||
@@ -0,0 +1,131 @@
|
||||
---
|
||||
layout: default
|
||||
title: MediaPipe Android Solutions
|
||||
parent: MediaPipe on Android
|
||||
grand_parent: Getting Started
|
||||
nav_order: 2
|
||||
---
|
||||
|
||||
# MediaPipe Android Solutions
|
||||
{: .no_toc }
|
||||
|
||||
1. TOC
|
||||
{:toc}
|
||||
---
|
||||
|
||||
MediaPipe Android Solution APIs (currently in alpha) are available in:
|
||||
|
||||
* [MediaPipe Face Detection](../solutions/face_detection#android-solution-api)
|
||||
* [MediaPipe Face Mesh](../solutions/face_mesh#android-solution-api)
|
||||
* [MediaPipe Hands](../solutions/hands#android-solution-api)
|
||||
|
||||
## Incorporation in Android Studio
|
||||
|
||||
Prebuilt packages of Android Solution APIs can be found in
|
||||
[Google's Maven Repository](https://maven.google.com/web/index.html?#com.google.mediapipe).
|
||||
To incorporate them into an Android Studio project, add the following into the
|
||||
project's Gradle dependencies:
|
||||
|
||||
```
|
||||
dependencies {
|
||||
// MediaPipe solution-core is the foundation of any MediaPipe Solutions.
|
||||
implementation 'com.google.mediapipe:solution-core:latest.release'
|
||||
// Optional: MediaPipe Face Detection Solution.
|
||||
implementation 'com.google.mediapipe:facedetection:latest.release'
|
||||
// Optional: MediaPipe Face Mesh Solution.
|
||||
implementation 'com.google.mediapipe:facemesh:latest.release'
|
||||
// Optional: MediaPipe Hands Solution.
|
||||
implementation 'com.google.mediapipe:hands:latest.release'
|
||||
}
|
||||
```
|
||||
|
||||
If you need further customization, instead of using the prebuilt maven packages
|
||||
consider building a MediaPipe Android Archive library locally from source by
|
||||
following these [instructions](./android_archive_library.md).
|
||||
|
||||
## Building solution example apps
|
||||
|
||||
Detailed usage examples of the Android Solution APIs can be found in the
|
||||
[source code](https://github.com/google/mediapipe/tree/master/mediapipe/examples/android/solutions)
|
||||
of the solution example apps.
|
||||
|
||||
To build these apps:
|
||||
|
||||
1. Open Android Studio Arctic Fox on Linux, macOS, or Windows.
|
||||
|
||||
2. Import mediapipe/examples/android/solutions directory into Android Studio.
|
||||
|
||||
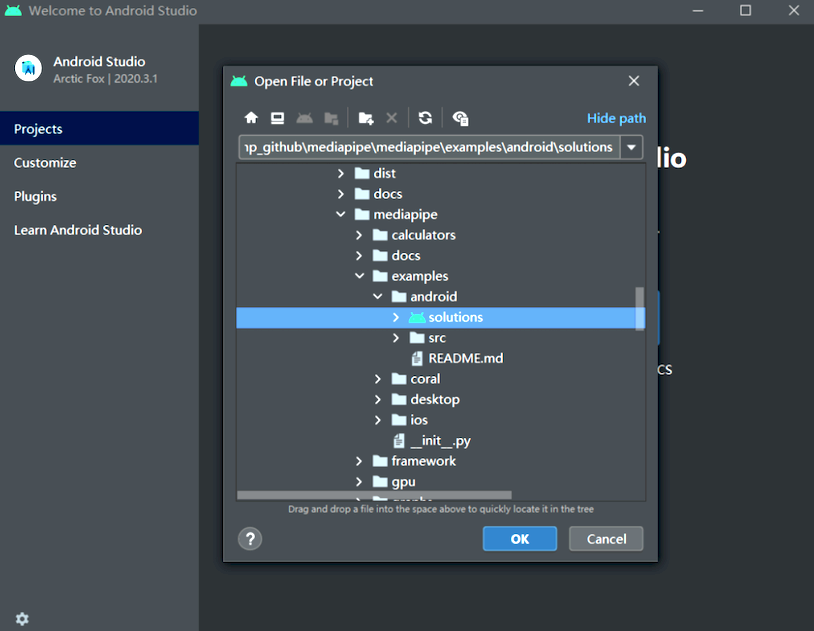
|
||||
|
||||
3. For Windows users, run `create_win_symlinks.bat` as administrator to create
|
||||
res directory symlinks.
|
||||
|
||||
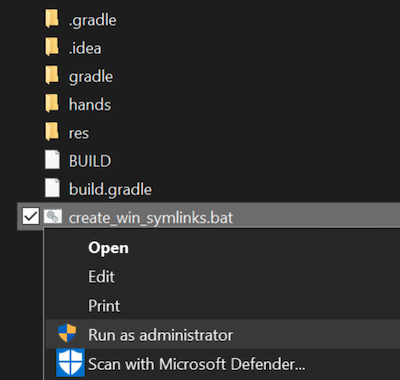
|
||||
|
||||
4. Select "File" -> "Sync Project with Gradle Files" to sync project.
|
||||
|
||||
5. Run solution example app in Android Studio.
|
||||
|
||||
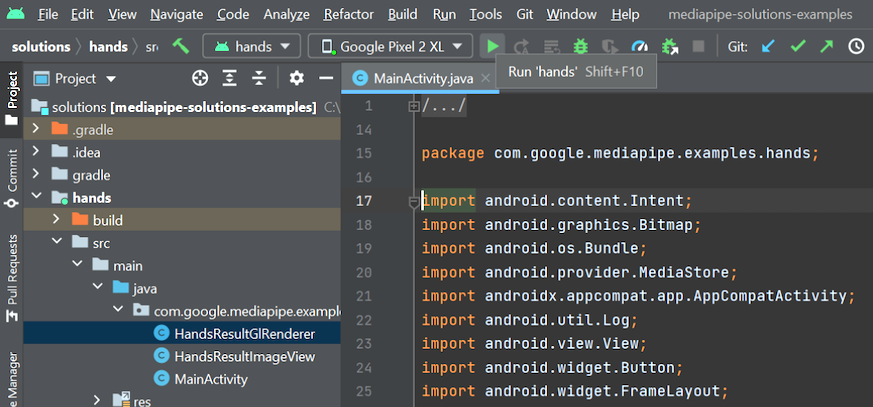
|
||||
|
||||
6. (Optional) Run solutions on CPU.
|
||||
|
||||
MediaPipe solution example apps run the pipeline and model inference on GPU
|
||||
by default. If needed, for example to run the apps on Android Emulator, set
|
||||
the `RUN_ON_GPU` boolean variable to `false` in the app's
|
||||
`MainActivity.java` to run the pipeline and model inference on CPU.
|
||||
|
||||
## MediaPipe Solution APIs Terms of Service
|
||||
|
||||
Last modified: November 12, 2021
|
||||
|
||||
Use of MediaPipe Solution APIs is subject to the
|
||||
[Google APIs Terms of Service](https://developers.google.com/terms),
|
||||
[Google API Services User Data Policy](https://developers.google.com/terms/api-services-user-data-policy),
|
||||
and the terms below. Please check back from time to time as these terms and
|
||||
policies are occasionally updated.
|
||||
|
||||
**Privacy**
|
||||
|
||||
When you use MediaPipe Solution APIs, processing of the input data (e.g. images,
|
||||
video, text) fully happens on-device, and **MediaPipe does not send that input
|
||||
data to Google servers**. As a result, you can use our APIs for processing data
|
||||
that should not leave the device.
|
||||
|
||||
MediaPipe Android Solution APIs will contact Google servers from time to time in
|
||||
order to receive things like bug fixes, updated models, and hardware accelerator
|
||||
compatibility information. MediaPipe Android Solution APIs also send metrics
|
||||
about the performance and utilization of the APIs in your app to Google. Google
|
||||
uses this metrics data to measure performance, API usage, debug, maintain and
|
||||
improve the APIs, and detect misuse or abuse, as further described in our
|
||||
[Privacy Policy](https://policies.google.com/privacy).
|
||||
|
||||
**You are responsible for obtaining informed consent from your app users about
|
||||
Google’s processing of MediaPipe metrics data as required by applicable law.**
|
||||
|
||||
Data we collect may include the following, across all MediaPipe Android Solution
|
||||
APIs:
|
||||
|
||||
- Device information (such as manufacturer, model, OS version and build) and
|
||||
available ML hardware accelerators (GPU and DSP). Used for diagnostics and
|
||||
usage analytics.
|
||||
|
||||
- App identification information (package name / bundle id, app version). Used
|
||||
for diagnostics and usage analytics.
|
||||
|
||||
- API configuration (such as image format, resolution, and MediaPipe version
|
||||
used). Used for diagnostics and usage analytics.
|
||||
|
||||
- Event type (such as initialize, download model, update, run, and detection).
|
||||
Used for diagnostics and usage analytics.
|
||||
|
||||
- Error codes. Used for diagnostics.
|
||||
|
||||
- Performance metrics. Used for diagnostics.
|
||||
|
||||
- Per-installation identifiers that do not uniquely identify a user or
|
||||
physical device. Used for operation of remote configuration and usage
|
||||
analytics.
|
||||
|
||||
- Network request sender IP addresses. Used for remote configuration
|
||||
diagnostics. Collected IP addresses are retained temporarily.
|
||||
@@ -2,7 +2,7 @@
|
||||
layout: default
|
||||
title: Building MediaPipe Examples
|
||||
parent: Getting Started
|
||||
nav_order: 2
|
||||
nav_exclude: true
|
||||
---
|
||||
|
||||
# Building MediaPipe Examples
|
||||
@@ -12,336 +12,22 @@ nav_order: 2
|
||||
{:toc}
|
||||
---
|
||||
|
||||
## Android
|
||||
### Android
|
||||
|
||||
### Prerequisite
|
||||
Please see these [instructions](./android.md).
|
||||
|
||||
* Java Runtime.
|
||||
* Android SDK release 28.0.3 and above.
|
||||
* Android NDK r18b and above.
|
||||
### iOS
|
||||
|
||||
MediaPipe recommends setting up Android SDK and NDK via Android Studio (and see
|
||||
below for Android Studio setup). However, if you prefer using MediaPipe without
|
||||
Android Studio, please run
|
||||
[`setup_android_sdk_and_ndk.sh`](https://github.com/google/mediapipe/blob/master/setup_android_sdk_and_ndk.sh)
|
||||
to download and setup Android SDK and NDK before building any Android example
|
||||
apps.
|
||||
Please see these [instructions](./ios.md).
|
||||
|
||||
If Android SDK and NDK are already installed (e.g., by Android Studio), set
|
||||
$ANDROID_HOME and $ANDROID_NDK_HOME to point to the installed SDK and NDK.
|
||||
### Python
|
||||
|
||||
```bash
|
||||
export ANDROID_HOME=<path to the Android SDK>
|
||||
export ANDROID_NDK_HOME=<path to the Android NDK>
|
||||
```
|
||||
Please see these [instructions](./python.md).
|
||||
|
||||
In order to use MediaPipe on earlier Android versions, MediaPipe needs to switch
|
||||
to a lower Android API level. You can achieve this by specifying `api_level =
|
||||
$YOUR_INTENDED_API_LEVEL` in android_ndk_repository() and/or
|
||||
android_sdk_repository() in the
|
||||
[`WORKSPACE`](https://github.com/google/mediapipe/blob/master/WORKSPACE) file.
|
||||
### JavaScript
|
||||
|
||||
Please verify all the necessary packages are installed.
|
||||
Please see these [instructions](./javascript.md).
|
||||
|
||||
* Android SDK Platform API Level 28 or 29
|
||||
* Android SDK Build-Tools 28 or 29
|
||||
* Android SDK Platform-Tools 28 or 29
|
||||
* Android SDK Tools 26.1.1
|
||||
* Android NDK 17c or above
|
||||
### C++
|
||||
|
||||
### Option 1: Build with Bazel in Command Line
|
||||
|
||||
Tip: You can run this
|
||||
[script](https://github.com/google/mediapipe/blob/master/build_android_examples.sh)
|
||||
to build (and install) all MediaPipe Android example apps.
|
||||
|
||||
1. To build an Android example app, build against the corresponding
|
||||
`android_binary` build target. For instance, for
|
||||
[MediaPipe Hands](../solutions/hands.md) the target is `handtrackinggpu` in
|
||||
the
|
||||
[BUILD](https://github.com/google/mediapipe/tree/master/mediapipe/examples/android/src/java/com/google/mediapipe/apps/handtrackinggpu/BUILD)
|
||||
file:
|
||||
|
||||
Note: To reduce the binary size, consider appending `--linkopt="-s"` to the
|
||||
command below to strip symbols.
|
||||
|
||||
```bash
|
||||
bazel build -c opt --config=android_arm64 mediapipe/examples/android/src/java/com/google/mediapipe/apps/handtrackinggpu:handtrackinggpu
|
||||
```
|
||||
|
||||
2. Install it on a device with:
|
||||
|
||||
```bash
|
||||
adb install bazel-bin/mediapipe/examples/android/src/java/com/google/mediapipe/apps/handtrackinggpu/handtrackinggpu.apk
|
||||
```
|
||||
|
||||
### Option 2: Build with Bazel in Android Studio
|
||||
|
||||
The MediaPipe project can be imported into Android Studio using the Bazel
|
||||
plugins. This allows the MediaPipe examples to be built and modified in Android
|
||||
Studio.
|
||||
|
||||
To incorporate MediaPipe into an existing Android Studio project, see these
|
||||
[instructions](./android_archive_library.md) that use Android Archive (AAR) and
|
||||
Gradle.
|
||||
|
||||
The steps below use Android Studio 3.5 to build and install a MediaPipe example
|
||||
app:
|
||||
|
||||
1. Install and launch Android Studio 3.5.
|
||||
|
||||
2. Select `Configure` -> `SDK Manager` -> `SDK Platforms`.
|
||||
|
||||
* Verify that Android SDK Platform API Level 28 or 29 is installed.
|
||||
* Take note of the Android SDK Location, e.g.,
|
||||
`/usr/local/home/Android/Sdk`.
|
||||
|
||||
3. Select `Configure` -> `SDK Manager` -> `SDK Tools`.
|
||||
|
||||
* Verify that Android SDK Build-Tools 28 or 29 is installed.
|
||||
* Verify that Android SDK Platform-Tools 28 or 29 is installed.
|
||||
* Verify that Android SDK Tools 26.1.1 is installed.
|
||||
* Verify that Android NDK 17c or above is installed.
|
||||
* Take note of the Android NDK Location, e.g.,
|
||||
`/usr/local/home/Android/Sdk/ndk-bundle` or
|
||||
`/usr/local/home/Android/Sdk/ndk/20.0.5594570`.
|
||||
|
||||
4. Set environment variables `$ANDROID_HOME` and `$ANDROID_NDK_HOME` to point
|
||||
to the installed SDK and NDK.
|
||||
|
||||
```bash
|
||||
export ANDROID_HOME=/usr/local/home/Android/Sdk
|
||||
|
||||
# If the NDK libraries are installed by a previous version of Android Studio, do
|
||||
export ANDROID_NDK_HOME=/usr/local/home/Android/Sdk/ndk-bundle
|
||||
# If the NDK libraries are installed by Android Studio 3.5, do
|
||||
export ANDROID_NDK_HOME=/usr/local/home/Android/Sdk/ndk/<version number>
|
||||
```
|
||||
|
||||
5. Select `Configure` -> `Plugins` to install `Bazel`.
|
||||
|
||||
6. On Linux, select `File` -> `Settings` -> `Bazel settings`. On macos, select
|
||||
`Android Studio` -> `Preferences` -> `Bazel settings`. Then, modify `Bazel
|
||||
binary location` to be the same as the output of `$ which bazel`.
|
||||
|
||||
7. Select `Import Bazel Project`.
|
||||
|
||||
* Select `Workspace`: `/path/to/mediapipe` and select `Next`.
|
||||
* Select `Generate from BUILD file`: `/path/to/mediapipe/BUILD` and select
|
||||
`Next`.
|
||||
* Modify `Project View` to be the following and select `Finish`.
|
||||
|
||||
```
|
||||
directories:
|
||||
# read project settings, e.g., .bazelrc
|
||||
.
|
||||
-mediapipe/objc
|
||||
-mediapipe/examples/ios
|
||||
|
||||
targets:
|
||||
//mediapipe/examples/android/...:all
|
||||
//mediapipe/java/...:all
|
||||
|
||||
android_sdk_platform: android-29
|
||||
|
||||
sync_flags:
|
||||
--host_crosstool_top=@bazel_tools//tools/cpp:toolchain
|
||||
```
|
||||
|
||||
8. Select `Bazel` -> `Sync` -> `Sync project with Build files`.
|
||||
|
||||
Note: Even after doing step 4, if you still see the error: `"no such package
|
||||
'@androidsdk//': Either the path attribute of android_sdk_repository or the
|
||||
ANDROID_HOME environment variable must be set."`, please modify the
|
||||
[`WORKSPACE`](https://github.com/google/mediapipe/blob/master/WORKSPACE)
|
||||
file to point to your SDK and NDK library locations, as below:
|
||||
|
||||
```
|
||||
android_sdk_repository(
|
||||
name = "androidsdk",
|
||||
path = "/path/to/android/sdk"
|
||||
)
|
||||
|
||||
android_ndk_repository(
|
||||
name = "androidndk",
|
||||
path = "/path/to/android/ndk"
|
||||
)
|
||||
```
|
||||
|
||||
9. Connect an Android device to the workstation.
|
||||
|
||||
10. Select `Run...` -> `Edit Configurations...`.
|
||||
|
||||
* Select `Templates` -> `Bazel Command`.
|
||||
* Enter Target Expression:
|
||||
`//mediapipe/examples/android/src/java/com/google/mediapipe/apps/handtrackinggpu:handtrackinggpu`
|
||||
* Enter Bazel command: `mobile-install`.
|
||||
* Enter Bazel flags: `-c opt --config=android_arm64`.
|
||||
* Press the `[+]` button to add the new configuration.
|
||||
* Select `Run` to run the example app on the connected Android device.
|
||||
|
||||
## iOS
|
||||
|
||||
### Prerequisite
|
||||
|
||||
1. Install [Xcode](https://developer.apple.com/xcode/), and additionally
|
||||
install the Command Line Tools by:
|
||||
|
||||
```bash
|
||||
xcode-select --install
|
||||
```
|
||||
|
||||
2. Install [Bazel](https://bazel.build/).
|
||||
|
||||
We recommend using [Homebrew](https://brew.sh/) to get the latest version.
|
||||
|
||||
3. Set Python 3.7 as the default Python version and install the Python "six"
|
||||
library.
|
||||
|
||||
To make Mediapipe work with TensorFlow, please set Python 3.7 as the default
|
||||
Python version and install the Python "six" library.
|
||||
|
||||
```bash
|
||||
pip3 install --user six
|
||||
```
|
||||
|
||||
4. Follow
|
||||
[Apple's instructions](https://developer.apple.com/support/certificates/) to
|
||||
obtain the required development certificates and provisioning profiles for
|
||||
your iOS device.
|
||||
|
||||
Tip: You can the following command to see the provisioning profiles you have
|
||||
previously downloaded using Xcode: `open
|
||||
~/Library/MobileDevice/"Provisioning Profiles"`. If there are none, generate
|
||||
and download a profile on
|
||||
[Apple's developer site](https://developer.apple.com/account/resources/).
|
||||
|
||||
5. Clone the MediaPipe repository.
|
||||
|
||||
```bash
|
||||
git clone https://github.com/google/mediapipe.git
|
||||
```
|
||||
|
||||
6. In the cloned MediaPipe repository, symlink or copy your provisioning profile
|
||||
to `mediapipe/provisioning_profile.mobileprovision`, e.g.,
|
||||
|
||||
```bash
|
||||
cd mediapipe
|
||||
ln -s ~/Downloads/MyProvisioningProfile.mobileprovision mediapipe/provisioning_profile.mobileprovision
|
||||
```
|
||||
|
||||
### Option 1: Build with Bazel in Command Line
|
||||
|
||||
1. Modify the `bundle_id` field of the app's `ios_application` build target to
|
||||
use your own identifier. For instance, for
|
||||
[MediaPipe Hands](../solutions/hands.md), the `bundle_id` is in the
|
||||
`HandTrackingGpuApp` target in the
|
||||
[BUILD](https://github.com/google/mediapipe/tree/master/mediapipe/examples/ios/handtrackinggpu/BUILD)
|
||||
file.
|
||||
|
||||
2. Again using [MediaPipe Hands](../solutions/hands.md) for example, run:
|
||||
|
||||
```bash
|
||||
bazel build -c opt --config=ios_arm64 mediapipe/examples/ios/handtrackinggpu:HandTrackingGpuApp
|
||||
```
|
||||
|
||||
You may see a permission request from `codesign` in order to sign the app.
|
||||
|
||||
Tip: You can run this
|
||||
[script](https://github.com/google/mediapipe/blob/master/build_ios_examples.sh)
|
||||
to build all MediaPipe iOS example apps.
|
||||
|
||||
3. In Xcode, open the `Devices and Simulators` window (command-shift-2).
|
||||
|
||||
4. Make sure your device is connected. You will see a list of installed apps.
|
||||
Press the "+" button under the list, and select the `.ipa` file built by
|
||||
Bazel.
|
||||
|
||||
5. You can now run the app on your device.
|
||||
|
||||
### Option 2: Build in Xcode
|
||||
|
||||
Note: This workflow requires a separate tool in addition to Bazel. If it fails
|
||||
to work for some reason, please resort to the command-line build instructions in
|
||||
the previous section.
|
||||
|
||||
1. We will use a tool called [Tulsi](https://tulsi.bazel.build/) for generating
|
||||
Xcode projects from Bazel build configurations.
|
||||
|
||||
```bash
|
||||
# cd out of the mediapipe directory, then:
|
||||
git clone https://github.com/bazelbuild/tulsi.git
|
||||
cd tulsi
|
||||
# remove Xcode version from Tulsi's .bazelrc (see http://github.com/bazelbuild/tulsi#building-and-installing):
|
||||
sed -i .orig '/xcode_version/d' .bazelrc
|
||||
# build and run Tulsi:
|
||||
sh build_and_run.sh
|
||||
```
|
||||
|
||||
This will install `Tulsi.app` inside the `Applications` directory in your
|
||||
home directory.
|
||||
|
||||
2. Open `mediapipe/Mediapipe.tulsiproj` using the Tulsi app.
|
||||
|
||||
Important: If Tulsi displays an error saying "Bazel could not be found",
|
||||
press the "Bazel..." button in the Packages tab and select the `bazel`
|
||||
executable in your homebrew `/bin/` directory.
|
||||
|
||||
3. Select the MediaPipe config in the Configs tab, then press the Generate
|
||||
button below. You will be asked for a location to save the Xcode project.
|
||||
Once the project is generated, it will be opened in Xcode.
|
||||
|
||||
4. You can now select any of the MediaPipe demos in the target menu, and build
|
||||
and run them as normal.
|
||||
|
||||
Note: When you ask Xcode to run an app, by default it will use the Debug
|
||||
configuration. Some of our demos are computationally heavy; you may want to
|
||||
use the Release configuration for better performance.
|
||||
|
||||
Tip: To switch build configuration in Xcode, click on the target menu,
|
||||
choose "Edit Scheme...", select the Run action, and switch the Build
|
||||
Configuration from Debug to Release. Note that this is set independently for
|
||||
each target.
|
||||
|
||||
## Desktop
|
||||
|
||||
### Option 1: Running on CPU
|
||||
|
||||
1. To build, for example, [MediaPipe Hands](../solutions/hands.md), run:
|
||||
|
||||
```bash
|
||||
bazel build -c opt --define MEDIAPIPE_DISABLE_GPU=1 mediapipe/examples/desktop/hand_tracking:hand_tracking_cpu
|
||||
```
|
||||
|
||||
This will open up your webcam as long as it is connected and on. Any errors
|
||||
is likely due to your webcam being not accessible.
|
||||
|
||||
2. To run the application:
|
||||
|
||||
```bash
|
||||
GLOG_logtostderr=1 bazel-bin/mediapipe/examples/desktop/hand_tracking/hand_tracking_cpu \
|
||||
--calculator_graph_config_file=mediapipe/graphs/hand_tracking/hand_tracking_desktop_live.pbtxt
|
||||
```
|
||||
|
||||
### Option 2: Running on GPU
|
||||
|
||||
Note: This currently works only on Linux, and please first follow
|
||||
[OpenGL ES Setup on Linux Desktop](./gpu_support.md#opengl-es-setup-on-linux-desktop).
|
||||
|
||||
1. To build, for example, [MediaPipe Hands](../solutions/hands.md), run:
|
||||
|
||||
```bash
|
||||
bazel build -c opt --copt -DMESA_EGL_NO_X11_HEADERS --copt -DEGL_NO_X11 \
|
||||
mediapipe/examples/desktop/hand_tracking:hand_tracking_gpu
|
||||
```
|
||||
|
||||
This will open up your webcam as long as it is connected and on. Any errors
|
||||
is likely due to your webcam being not accessible, or GPU drivers not setup
|
||||
properly.
|
||||
|
||||
2. To run the application:
|
||||
|
||||
```bash
|
||||
GLOG_logtostderr=1 bazel-bin/mediapipe/examples/desktop/hand_tracking/hand_tracking_gpu \
|
||||
--calculator_graph_config_file=mediapipe/graphs/hand_tracking/hand_tracking_mobile.pbtxt
|
||||
```
|
||||
Please see these [instructions](./cpp.md).
|
||||
|
||||
@@ -0,0 +1,62 @@
|
||||
---
|
||||
layout: default
|
||||
title: MediaPipe in C++
|
||||
parent: Getting Started
|
||||
has_children: true
|
||||
has_toc: false
|
||||
nav_order: 5
|
||||
---
|
||||
|
||||
# MediaPipe in C++
|
||||
{: .no_toc }
|
||||
|
||||
1. TOC
|
||||
{:toc}
|
||||
---
|
||||
|
||||
Please follow instructions below to build C++ command-line example apps in the
|
||||
supported MediaPipe [solutions](../solutions/solutions.md). To learn more about
|
||||
these example apps, start from [Hello World! in C++](./hello_world_cpp.md).
|
||||
|
||||
## Building C++ command-line example apps
|
||||
|
||||
### Option 1: Running on CPU
|
||||
|
||||
1. To build, for example, [MediaPipe Hands](../solutions/hands.md), run:
|
||||
|
||||
```bash
|
||||
bazel build -c opt --define MEDIAPIPE_DISABLE_GPU=1 mediapipe/examples/desktop/hand_tracking:hand_tracking_cpu
|
||||
```
|
||||
|
||||
2. To run the application:
|
||||
|
||||
```bash
|
||||
GLOG_logtostderr=1 bazel-bin/mediapipe/examples/desktop/hand_tracking/hand_tracking_cpu \
|
||||
--calculator_graph_config_file=mediapipe/graphs/hand_tracking/hand_tracking_desktop_live.pbtxt
|
||||
```
|
||||
|
||||
This will open up your webcam as long as it is connected and on. Any errors
|
||||
is likely due to your webcam being not accessible.
|
||||
|
||||
### Option 2: Running on GPU
|
||||
|
||||
Note: This currently works only on Linux, and please first follow
|
||||
[OpenGL ES Setup on Linux Desktop](./gpu_support.md#opengl-es-setup-on-linux-desktop).
|
||||
|
||||
1. To build, for example, [MediaPipe Hands](../solutions/hands.md), run:
|
||||
|
||||
```bash
|
||||
bazel build -c opt --copt -DMESA_EGL_NO_X11_HEADERS --copt -DEGL_NO_X11 \
|
||||
mediapipe/examples/desktop/hand_tracking:hand_tracking_gpu
|
||||
```
|
||||
|
||||
2. To run the application:
|
||||
|
||||
```bash
|
||||
GLOG_logtostderr=1 bazel-bin/mediapipe/examples/desktop/hand_tracking/hand_tracking_gpu \
|
||||
--calculator_graph_config_file=mediapipe/graphs/hand_tracking/hand_tracking_mobile.pbtxt
|
||||
```
|
||||
|
||||
This will open up your webcam as long as it is connected and on. Any errors
|
||||
is likely due to your webcam being not accessible, or GPU drivers not setup
|
||||
properly.
|
||||
@@ -103,7 +103,7 @@ monotonically increasing timestamps. By convention, realtime calculators and
|
||||
graphs use the recording time or the presentation time as the timestamp for each
|
||||
packet, with each timestamp representing microseconds since
|
||||
`Jan/1/1970:00:00:00`. This allows packets from various sources to be processed
|
||||
in a gloablly consistent order.
|
||||
in a globally consistent order.
|
||||
|
||||
Normally for offline processing, every input packet is processed and processing
|
||||
continues as long as necessary. For online processing, it is often necessary to
|
||||
|
||||
@@ -2,7 +2,7 @@
|
||||
layout: default
|
||||
title: GPU Support
|
||||
parent: Getting Started
|
||||
nav_order: 6
|
||||
nav_order: 7
|
||||
---
|
||||
|
||||
# GPU Support
|
||||
@@ -59,6 +59,21 @@ OpenGL ES profile shading language version string: OpenGL ES GLSL ES 3.20
|
||||
OpenGL ES profile extensions:
|
||||
```
|
||||
|
||||
If you have connected to your computer through SSH and find when you probe for
|
||||
GPU information you see the output:
|
||||
|
||||
```bash
|
||||
glxinfo | grep -i opengl
|
||||
Error: unable to open display
|
||||
```
|
||||
|
||||
Try re-establishing your SSH connection with the `-X` option and try again. For
|
||||
example:
|
||||
|
||||
```bash
|
||||
ssh -X <user>@<host>
|
||||
```
|
||||
|
||||
*Notice the ES 3.20 text above.*
|
||||
|
||||
You need to see ES 3.1 or greater printed in order to perform TFLite inference
|
||||
|
||||
@@ -1,8 +1,9 @@
|
||||
---
|
||||
layout: default
|
||||
title: Hello World! on Android
|
||||
parent: Getting Started
|
||||
nav_order: 3
|
||||
parent: MediaPipe on Android
|
||||
grand_parent: Getting Started
|
||||
nav_order: 1
|
||||
---
|
||||
|
||||
# Hello World! on Android
|
||||
@@ -26,12 +27,12 @@ graph on Android.
|
||||
A simple camera app for real-time Sobel edge detection applied to a live video
|
||||
stream on an Android device.
|
||||
|
||||

|
||||
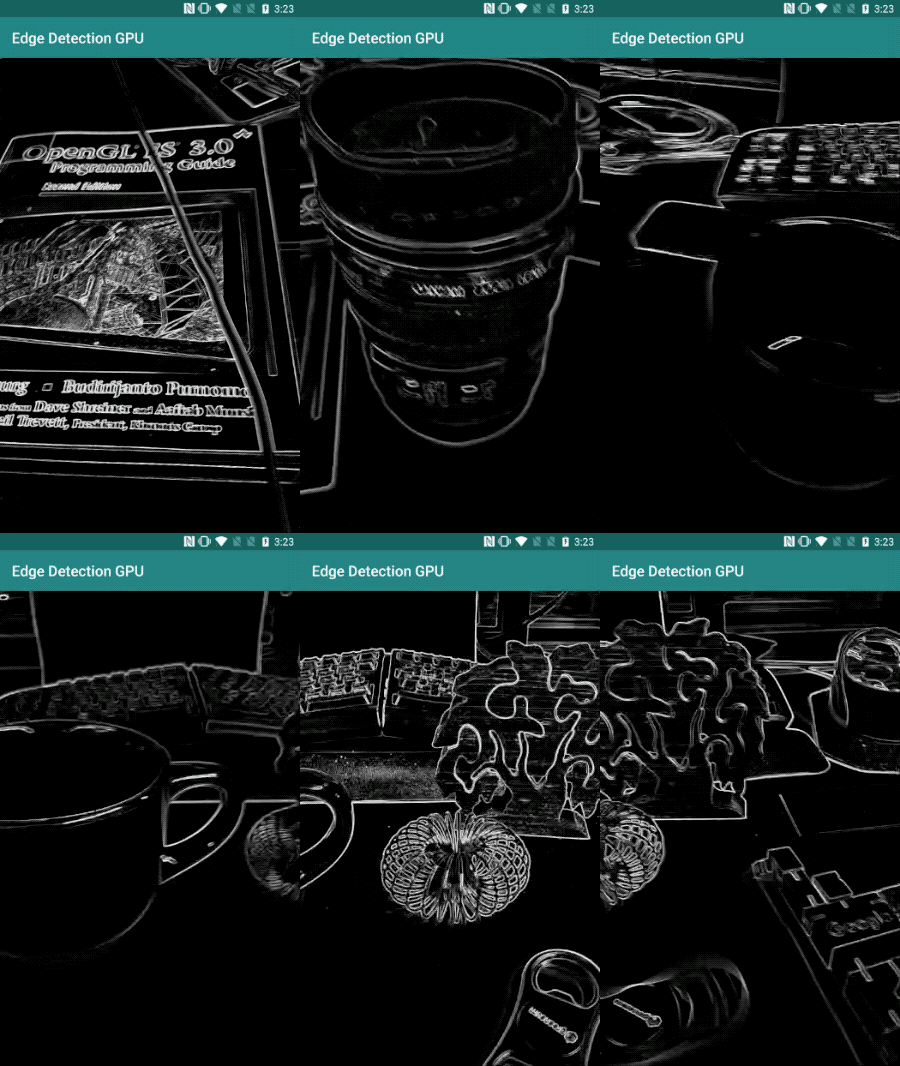
|
||||
|
||||
## Setup
|
||||
|
||||
1. Install MediaPipe on your system, see [MediaPipe installation guide] for
|
||||
details.
|
||||
1. Install MediaPipe on your system, see
|
||||
[MediaPipe installation guide](./install.md) for details.
|
||||
2. Install Android Development SDK and Android NDK. See how to do so also in
|
||||
[MediaPipe installation guide].
|
||||
3. Enable [developer options] on your Android device.
|
||||
@@ -43,8 +44,8 @@ We will be using the following graph, [`edge_detection_mobile_gpu.pbtxt`]:
|
||||
|
||||
```
|
||||
# MediaPipe graph that performs GPU Sobel edge detection on a live video stream.
|
||||
# Used in the examples
|
||||
# mediapipe/examples/android/src/java/com/mediapipe/apps/basic.
|
||||
# Used in the examples in
|
||||
# mediapipe/examples/android/src/java/com/mediapipe/apps/basic and
|
||||
# mediapipe/examples/ios/edgedetectiongpu.
|
||||
|
||||
# Images coming into and out of the graph.
|
||||
@@ -58,7 +59,7 @@ node: {
|
||||
output_stream: "luma_video"
|
||||
}
|
||||
|
||||
# Applies the Sobel filter to luminance images sotred in RGB format.
|
||||
# Applies the Sobel filter to luminance images stored in RGB format.
|
||||
node: {
|
||||
calculator: "SobelEdgesCalculator"
|
||||
input_stream: "luma_video"
|
||||
@@ -68,7 +69,7 @@ node: {
|
||||
|
||||
A visualization of the graph is shown below:
|
||||
|
||||

|
||||
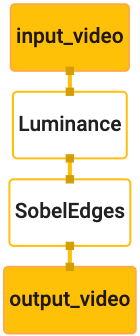
|
||||
|
||||
This graph has a single input stream named `input_video` for all incoming frames
|
||||
that will be provided by your device's camera.
|
||||
@@ -259,7 +260,7 @@ adb install bazel-bin/$APPLICATION_PATH/helloworld.apk
|
||||
Open the application on your device. It should display a screen with the text
|
||||
`Hello World!`.
|
||||
|
||||

|
||||
|
||||
|
||||
## Using the camera via `CameraX`
|
||||
|
||||
@@ -376,7 +377,7 @@ Add the following line in the `$APPLICATION_PATH/res/values/strings.xml` file:
|
||||
When the user doesn't grant camera permission, the screen will now look like
|
||||
this:
|
||||
|
||||

|
||||
|
||||
|
||||
Now, we will add the [`SurfaceTexture`] and [`SurfaceView`] objects to
|
||||
`MainActivity`:
|
||||
@@ -446,8 +447,8 @@ visible so that we can start seeing frames from the `previewFrameTexture`.
|
||||
However, before starting the camera, we need to decide which camera we want to
|
||||
use. [`CameraXPreviewHelper`] inherits from [`CameraHelper`] which provides two
|
||||
options, `FRONT` and `BACK`. We can pass in the decision from the `BUILD` file
|
||||
as metadata such that no code change is required to build a another version of
|
||||
the app using a different camera.
|
||||
as metadata such that no code change is required to build another version of the
|
||||
app using a different camera.
|
||||
|
||||
Assuming we want to use `BACK` camera to perform edge detection on a live scene
|
||||
that we view from the camera, add the metadata into `AndroidManifest.xml`:
|
||||
@@ -496,7 +497,7 @@ CameraHelper.CameraFacing cameraFacing =
|
||||
applicationInfo.metaData.getBoolean("cameraFacingFront", false)
|
||||
? CameraHelper.CameraFacing.FRONT
|
||||
: CameraHelper.CameraFacing.BACK;
|
||||
cameraHelper.startCamera(this, cameraFacing, /*surfaceTexture=*/ null);
|
||||
cameraHelper.startCamera(this, cameraFacing, /*unusedSurfaceTexture=*/ null);
|
||||
```
|
||||
|
||||
At this point, the application should build successfully. However, when you run
|
||||
@@ -752,7 +753,7 @@ And that's it! You should now be able to successfully build and run the
|
||||
application on the device and see Sobel edge detection running on a live camera
|
||||
feed! Congrats!
|
||||
|
||||

|
||||

|
||||
|
||||
If you ran into any issues, please see the full code of the tutorial
|
||||
[here](https://github.com/google/mediapipe/tree/master/mediapipe/examples/android/src/java/com/google/mediapipe/apps/basic).
|
||||
@@ -764,12 +765,11 @@ If you ran into any issues, please see the full code of the tutorial
|
||||
[CameraX]:https://developer.android.com/training/camerax
|
||||
[`CameraXPreviewHelper`]:https://github.com/google/mediapipe/tree/master/mediapipe/java/com/google/mediapipe/components/CameraXPreviewHelper.java
|
||||
[developer options]:https://developer.android.com/studio/debug/dev-options
|
||||
[`edge_detection_mobile_gpu.pbtxt`]:https://github.com/google/mediapipe/tree/master/mediapipe/graphs/object_detection/object_detection_mobile_gpu.pbtxt
|
||||
[`edge_detection_mobile_gpu.pbtxt`]:https://github.com/google/mediapipe/tree/master/mediapipe/graphs/edge_detection/edge_detection_mobile_gpu.pbtxt
|
||||
[`EglManager`]:https://github.com/google/mediapipe/tree/master/mediapipe/java/com/google/mediapipe/glutil/EglManager.java
|
||||
[`ExternalTextureConverter`]:https://github.com/google/mediapipe/tree/master/mediapipe/java/com/google/mediapipe/components/ExternalTextureConverter.java
|
||||
[`FrameLayout`]:https://developer.android.com/reference/android/widget/FrameLayout
|
||||
[`FrameProcessor`]:https://github.com/google/mediapipe/tree/master/mediapipe/java/com/google/mediapipe/components/FrameProcessor.java
|
||||
[MediaPipe installation guide]:./install.md
|
||||
[`PermissionHelper`]: https://github.com/google/mediapipe/tree/master/mediapipe/java/com/google/mediapipe/components/PermissionHelper.java
|
||||
[`SurfaceHolder.Callback`]:https://developer.android.com/reference/android/view/SurfaceHolder.Callback.html
|
||||
[`SurfaceView`]:https://developer.android.com/reference/android/view/SurfaceView
|
||||
|
||||
@@ -1,11 +1,12 @@
|
||||
---
|
||||
layout: default
|
||||
title: Hello World! on Desktop (C++)
|
||||
parent: Getting Started
|
||||
nav_order: 5
|
||||
title: Hello World! in C++
|
||||
parent: MediaPipe in C++
|
||||
grand_parent: Getting Started
|
||||
nav_order: 1
|
||||
---
|
||||
|
||||
# Hello World! on Desktop (C++)
|
||||
# Hello World! in C++
|
||||
{: .no_toc }
|
||||
|
||||
1. TOC
|
||||
@@ -18,7 +19,7 @@ nav_order: 5
|
||||
2. To run the [`hello world`] example:
|
||||
|
||||
```bash
|
||||
$ git clone https://github.com/google/mediapipe/mediapipe.git
|
||||
$ git clone https://github.com/google/mediapipe.git
|
||||
$ cd mediapipe
|
||||
|
||||
$ export GLOG_logtostderr=1
|
||||
@@ -43,7 +44,7 @@ nav_order: 5
|
||||
`PrintHelloWorld()` function, defined in a [`CalculatorGraphConfig`] proto.
|
||||
|
||||
```C++
|
||||
::mediapipe::Status PrintHelloWorld() {
|
||||
absl::Status PrintHelloWorld() {
|
||||
// Configures a simple graph, which concatenates 2 PassThroughCalculators.
|
||||
CalculatorGraphConfig config = ParseTextProtoOrDie<CalculatorGraphConfig>(R"(
|
||||
input_stream: "in"
|
||||
@@ -84,7 +85,7 @@ nav_order: 5
|
||||
This graph consists of 1 graph input stream (`in`) and 1 graph output stream
|
||||
(`out`), and 2 [`PassThroughCalculator`]s connected serially.
|
||||
|
||||

|
||||
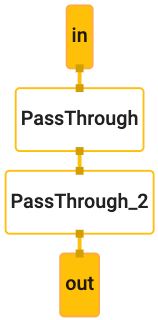
|
||||
|
||||
4. Before running the graph, an `OutputStreamPoller` object is connected to the
|
||||
output stream in order to later retrieve the graph output, and a graph run
|
||||
@@ -92,10 +93,10 @@ nav_order: 5
|
||||
|
||||
```c++
|
||||
CalculatorGraph graph;
|
||||
RETURN_IF_ERROR(graph.Initialize(config));
|
||||
ASSIGN_OR_RETURN(OutputStreamPoller poller,
|
||||
graph.AddOutputStreamPoller("out"));
|
||||
RETURN_IF_ERROR(graph.StartRun({}));
|
||||
MP_RETURN_IF_ERROR(graph.Initialize(config));
|
||||
MP_ASSIGN_OR_RETURN(OutputStreamPoller poller,
|
||||
graph.AddOutputStreamPoller("out"));
|
||||
MP_RETURN_IF_ERROR(graph.StartRun({}));
|
||||
```
|
||||
|
||||
5. The example then creates 10 packets (each packet contains a string "Hello
|
||||
@@ -105,9 +106,10 @@ nav_order: 5
|
||||
|
||||
```c++
|
||||
for (int i = 0; i < 10; ++i) {
|
||||
RETURN_IF_ERROR(graph.AddPacketToInputStream("in", MakePacket<std::string>("Hello World!").At(Timestamp(i))));
|
||||
MP_RETURN_IF_ERROR(graph.AddPacketToInputStream("in",
|
||||
MakePacket<std::string>("Hello World!").At(Timestamp(i))));
|
||||
}
|
||||
RETURN_IF_ERROR(graph.CloseInputStream("in"));
|
||||
MP_RETURN_IF_ERROR(graph.CloseInputStream("in"));
|
||||
```
|
||||
|
||||
6. Through the `OutputStreamPoller` object the example then retrieves all 10
|
||||
@@ -1,8 +1,9 @@
|
||||
---
|
||||
layout: default
|
||||
title: Hello World! on iOS
|
||||
parent: Getting Started
|
||||
nav_order: 4
|
||||
parent: MediaPipe on iOS
|
||||
grand_parent: Getting Started
|
||||
nav_order: 1
|
||||
---
|
||||
|
||||
# Hello World! on iOS
|
||||
@@ -18,20 +19,20 @@ This codelab uses MediaPipe on an iOS device.
|
||||
|
||||
### What you will learn
|
||||
|
||||
How to develop an iOS application that uses MediaPipe and run a MediaPipe
|
||||
graph on iOS.
|
||||
How to develop an iOS application that uses MediaPipe and run a MediaPipe graph
|
||||
on iOS.
|
||||
|
||||
### What you will build
|
||||
|
||||
A simple camera app for real-time Sobel edge detection applied to a live video
|
||||
stream on an iOS device.
|
||||
|
||||

|
||||
|
||||
|
||||
## Setup
|
||||
|
||||
1. Install MediaPipe on your system, see [MediaPipe installation guide] for
|
||||
details.
|
||||
1. Install MediaPipe on your system, see
|
||||
[MediaPipe installation guide](./install.md) for details.
|
||||
2. Setup your iOS device for development.
|
||||
3. Setup [Bazel] on your system to build and deploy the iOS app.
|
||||
|
||||
@@ -42,8 +43,8 @@ We will be using the following graph, [`edge_detection_mobile_gpu.pbtxt`]:
|
||||
```
|
||||
# MediaPipe graph that performs GPU Sobel edge detection on a live video stream.
|
||||
# Used in the examples
|
||||
# mediapipe/examples/android/src/java/com/mediapipe/apps/edgedetectiongpu.
|
||||
# mediapipe/examples/ios/edgedetectiongpu.
|
||||
# mediapipe/examples/android/src/java/com/google/mediapipe/apps/basic:helloworld
|
||||
# and mediapipe/examples/ios/helloworld.
|
||||
|
||||
# Images coming into and out of the graph.
|
||||
input_stream: "input_video"
|
||||
@@ -56,7 +57,7 @@ node: {
|
||||
output_stream: "luma_video"
|
||||
}
|
||||
|
||||
# Applies the Sobel filter to luminance images sotred in RGB format.
|
||||
# Applies the Sobel filter to luminance images stored in RGB format.
|
||||
node: {
|
||||
calculator: "SobelEdgesCalculator"
|
||||
input_stream: "luma_video"
|
||||
@@ -66,7 +67,7 @@ node: {
|
||||
|
||||
A visualization of the graph is shown below:
|
||||
|
||||

|
||||

|
||||
|
||||
This graph has a single input stream named `input_video` for all incoming frames
|
||||
that will be provided by your device's camera.
|
||||
@@ -89,21 +90,21 @@ to build it.
|
||||
|
||||
First, create an XCode project via File > New > Single View App.
|
||||
|
||||
Set the product name to "EdgeDetectionGpu", and use an appropriate organization
|
||||
Set the product name to "HelloWorld", and use an appropriate organization
|
||||
identifier, such as `com.google.mediapipe`. The organization identifier
|
||||
alongwith the product name will be the `bundle_id` for the application, such as
|
||||
`com.google.mediapipe.EdgeDetectionGpu`.
|
||||
`com.google.mediapipe.HelloWorld`.
|
||||
|
||||
Set the language to Objective-C.
|
||||
|
||||
Save the project to an appropriate location. Let's call this
|
||||
`$PROJECT_TEMPLATE_LOC`. So your project will be in the
|
||||
`$PROJECT_TEMPLATE_LOC/EdgeDetectionGpu` directory. This directory will contain
|
||||
another directory named `EdgeDetectionGpu` and an `EdgeDetectionGpu.xcodeproj` file.
|
||||
`$PROJECT_TEMPLATE_LOC/HelloWorld` directory. This directory will contain
|
||||
another directory named `HelloWorld` and an `HelloWorld.xcodeproj` file.
|
||||
|
||||
The `EdgeDetectionGpu.xcodeproj` will not be useful for this tutorial, as we will
|
||||
use bazel to build the iOS application. The content of the
|
||||
`$PROJECT_TEMPLATE_LOC/EdgeDetectionGpu/EdgeDetectionGpu` directory is listed below:
|
||||
The `HelloWorld.xcodeproj` will not be useful for this tutorial, as we will use
|
||||
bazel to build the iOS application. The content of the
|
||||
`$PROJECT_TEMPLATE_LOC/HelloWorld/HelloWorld` directory is listed below:
|
||||
|
||||
1. `AppDelegate.h` and `AppDelegate.m`
|
||||
2. `ViewController.h` and `ViewController.m`
|
||||
@@ -112,10 +113,14 @@ use bazel to build the iOS application. The content of the
|
||||
5. `Main.storyboard` and `Launch.storyboard`
|
||||
6. `Assets.xcassets` directory.
|
||||
|
||||
Copy these files to a directory named `EdgeDetectionGpu` to a location that can
|
||||
access the MediaPipe source code. For example, the source code of the
|
||||
application that we will build in this tutorial is located in
|
||||
`mediapipe/examples/ios/EdgeDetectionGpu`. We will refer to this path as the
|
||||
Note: In newer versions of Xcode, you may see additional files `SceneDelegate.h`
|
||||
and `SceneDelegate.m`. Make sure to copy them too and add them to the `BUILD`
|
||||
file mentioned below.
|
||||
|
||||
Copy these files to a directory named `HelloWorld` to a location that can access
|
||||
the MediaPipe source code. For example, the source code of the application that
|
||||
we will build in this tutorial is located in
|
||||
`mediapipe/examples/ios/HelloWorld`. We will refer to this path as the
|
||||
`$APPLICATION_PATH` throughout the codelab.
|
||||
|
||||
Note: MediaPipe provides Objective-C bindings for iOS. The edge detection
|
||||
@@ -126,7 +131,7 @@ Create a `BUILD` file in the `$APPLICATION_PATH` and add the following build
|
||||
rules:
|
||||
|
||||
```
|
||||
MIN_IOS_VERSION = "10.0"
|
||||
MIN_IOS_VERSION = "11.0"
|
||||
|
||||
load(
|
||||
"@build_bazel_rules_apple//apple:ios.bzl",
|
||||
@@ -134,8 +139,8 @@ load(
|
||||
)
|
||||
|
||||
ios_application(
|
||||
name = "EdgeDetectionGpuApp",
|
||||
bundle_id = "com.google.mediapipe.EdgeDetectionGpu",
|
||||
name = "HelloWorldApp",
|
||||
bundle_id = "com.google.mediapipe.HelloWorld",
|
||||
families = [
|
||||
"iphone",
|
||||
"ipad",
|
||||
@@ -143,11 +148,11 @@ ios_application(
|
||||
infoplists = ["Info.plist"],
|
||||
minimum_os_version = MIN_IOS_VERSION,
|
||||
provisioning_profile = "//mediapipe/examples/ios:developer_provisioning_profile",
|
||||
deps = [":EdgeDetectionGpuAppLibrary"],
|
||||
deps = [":HelloWorldAppLibrary"],
|
||||
)
|
||||
|
||||
objc_library(
|
||||
name = "EdgeDetectionGpuAppLibrary",
|
||||
name = "HelloWorldAppLibrary",
|
||||
srcs = [
|
||||
"AppDelegate.m",
|
||||
"ViewController.m",
|
||||
@@ -172,9 +177,8 @@ The `objc_library` rule adds dependencies for the `AppDelegate` and
|
||||
`ViewController` classes, `main.m` and the application storyboards. The
|
||||
templated app depends only on the `UIKit` SDK.
|
||||
|
||||
The `ios_application` rule uses the `EdgeDetectionGpuAppLibrary` Objective-C
|
||||
library generated to build an iOS application for installation on your iOS
|
||||
device.
|
||||
The `ios_application` rule uses the `HelloWorldAppLibrary` Objective-C library
|
||||
generated to build an iOS application for installation on your iOS device.
|
||||
|
||||
Note: You need to point to your own iOS developer provisioning profile to be
|
||||
able to run the application on your iOS device.
|
||||
@@ -182,21 +186,19 @@ able to run the application on your iOS device.
|
||||
To build the app, use the following command in a terminal:
|
||||
|
||||
```
|
||||
bazel build -c opt --config=ios_arm64 <$APPLICATION_PATH>:EdgeDetectionGpuApp'
|
||||
bazel build -c opt --config=ios_arm64 <$APPLICATION_PATH>:HelloWorldApp'
|
||||
```
|
||||
|
||||
For example, to build the `EdgeDetectionGpuApp` application in
|
||||
`mediapipe/examples/ios/edgedetectiongpu`, use the following
|
||||
command:
|
||||
For example, to build the `HelloWorldApp` application in
|
||||
`mediapipe/examples/ios/helloworld`, use the following command:
|
||||
|
||||
```
|
||||
bazel build -c opt --config=ios_arm64 mediapipe/examples/ios/edgedetectiongpu:EdgeDetectionGpuApp
|
||||
bazel build -c opt --config=ios_arm64 mediapipe/examples/ios/helloworld:HelloWorldApp
|
||||
```
|
||||
|
||||
Then, go back to XCode, open Window > Devices and Simulators, select your
|
||||
device, and add the `.ipa` file generated by the command above to your device.
|
||||
Here is the document on [setting up and compiling](./building_examples.md#ios) iOS
|
||||
MediaPipe apps.
|
||||
Here is the document on [setting up and compiling](./ios.md) iOS MediaPipe apps.
|
||||
|
||||
Open the application on your device. Since it is empty, it should display a
|
||||
blank white screen.
|
||||
@@ -249,6 +251,12 @@ We need to get frames from the `_cameraSource` into our application
|
||||
`MPPInputSourceDelegate`. So our application `ViewController` can be a delegate
|
||||
of `_cameraSource`.
|
||||
|
||||
Update the interface definition of `ViewController` accordingly:
|
||||
|
||||
```
|
||||
@interface ViewController () <MPPInputSourceDelegate>
|
||||
```
|
||||
|
||||
To handle camera setup and process incoming frames, we should use a queue
|
||||
different from the main queue. Add the following to the implementation block of
|
||||
the `ViewController`:
|
||||
@@ -290,6 +298,12 @@ utility called `MPPLayerRenderer` to display images on the screen. This utility
|
||||
can be used to display `CVPixelBufferRef` objects, which is the type of the
|
||||
images provided by `MPPCameraInputSource` to its delegates.
|
||||
|
||||
In `ViewController.m`, add the following import line:
|
||||
|
||||
```
|
||||
#import "mediapipe/objc/MPPLayerRenderer.h"
|
||||
```
|
||||
|
||||
To display images of the screen, we need to add a new `UIView` object called
|
||||
`_liveView` to the `ViewController`.
|
||||
|
||||
@@ -413,6 +427,12 @@ Objective-C++.
|
||||
|
||||
### Use the graph in `ViewController`
|
||||
|
||||
In `ViewController.m`, add the following import line:
|
||||
|
||||
```
|
||||
#import "mediapipe/objc/MPPGraph.h"
|
||||
```
|
||||
|
||||
Declare a static constant with the name of the graph, the input stream and the
|
||||
output stream:
|
||||
|
||||
@@ -494,6 +514,9 @@ in our app:
|
||||
if (![self.mediapipeGraph startWithError:&error]) {
|
||||
NSLog(@"Failed to start graph: %@", error);
|
||||
}
|
||||
else if (![self.mediapipeGraph waitUntilIdleWithError:&error]) {
|
||||
NSLog(@"Failed to complete graph initial run: %@", error);
|
||||
}
|
||||
|
||||
dispatch_async(_videoQueue, ^{
|
||||
[_cameraSource start];
|
||||
@@ -502,8 +525,9 @@ in our app:
|
||||
}];
|
||||
```
|
||||
|
||||
Note: It is important to start the graph before starting the camera, so that
|
||||
the graph is ready to process frames as soon as the camera starts sending them.
|
||||
Note: It is important to start the graph before starting the camera and wait
|
||||
until completion, so that the graph is ready to process frames as soon as the
|
||||
camera starts sending them.
|
||||
|
||||
Earlier, when we received frames from the camera in the `processVideoFrame`
|
||||
function, we displayed them in the `_liveView` using the `_renderer`. Now, we
|
||||
@@ -547,14 +571,22 @@ method to receive packets on this output stream and display them on the screen:
|
||||
}
|
||||
```
|
||||
|
||||
Update the interface definition of `ViewController` with `MPPGraphDelegate`:
|
||||
|
||||
```
|
||||
@interface ViewController () <MPPGraphDelegate, MPPInputSourceDelegate>
|
||||
```
|
||||
|
||||
And that is all! Build and run the app on your iOS device. You should see the
|
||||
results of running the edge detection graph on a live video feed. Congrats!
|
||||
|
||||

|
||||

|
||||
|
||||
If you ran into any issues, please see the full code of the tutorial
|
||||
[here](https://github.com/google/mediapipe/tree/master/mediapipe/examples/ios/edgedetectiongpu).
|
||||
Please note that the iOS examples now use a [common] template app. The code in
|
||||
this tutorial is used in the [common] template app. The [helloworld] app has the
|
||||
appropriate `BUILD` file dependencies for the edge detection graph.
|
||||
|
||||
[Bazel]:https://bazel.build/
|
||||
[`edge_detection_mobile_gpu.pbtxt`]:https://github.com/google/mediapipe/tree/master/mediapipe/graphs/object_detection/object_detection_mobile_gpu.pbtxt
|
||||
[MediaPipe installation guide]:./install.md
|
||||
[`edge_detection_mobile_gpu.pbtxt`]:https://github.com/google/mediapipe/tree/master/mediapipe/graphs/edge_detection/edge_detection_mobile_gpu.pbtxt
|
||||
[common]:https://github.com/google/mediapipe/tree/master/mediapipe/examples/ios/common
|
||||
[helloworld]:https://github.com/google/mediapipe/tree/master/mediapipe/examples/ios/helloworld
|
||||
|
||||
@@ -2,7 +2,7 @@
|
||||
layout: default
|
||||
title: Installation
|
||||
parent: Getting Started
|
||||
nav_order: 1
|
||||
nav_order: 6
|
||||
---
|
||||
|
||||
# Installation
|
||||
@@ -12,7 +12,7 @@ nav_order: 1
|
||||
{:toc}
|
||||
---
|
||||
|
||||
Note: To interoperate with OpenCV, OpenCV 3.x and above are preferred. OpenCV
|
||||
Note: To interoperate with OpenCV, OpenCV 3.x to 4.1 are preferred. OpenCV
|
||||
2.x currently works but interoperability support may be deprecated in the
|
||||
future.
|
||||
|
||||
@@ -23,97 +23,209 @@ Note: To make Mediapipe work with TensorFlow, please set Python 3.7 as the
|
||||
default Python version and install the Python "six" library by running `pip3
|
||||
install --user six`.
|
||||
|
||||
Note: To build and run Android example apps, see these
|
||||
[instructions](./building_examples.md#android). To build and run iOS example
|
||||
apps, see these [instructions](./building_examples.md#ios).
|
||||
|
||||
## Installing on Debian and Ubuntu
|
||||
|
||||
1. Checkout MediaPipe repository.
|
||||
1. Install Bazelisk.
|
||||
|
||||
Follow the official
|
||||
[Bazel documentation](https://docs.bazel.build/versions/master/install-bazelisk.html)
|
||||
to install Bazelisk.
|
||||
|
||||
2. Checkout MediaPipe repository.
|
||||
|
||||
```bash
|
||||
$ cd $HOME
|
||||
$ git clone https://github.com/google/mediapipe.git
|
||||
|
||||
# Change directory into MediaPipe root directory
|
||||
$ cd mediapipe
|
||||
```
|
||||
|
||||
2. Install Bazel.
|
||||
|
||||
Follow the official
|
||||
[Bazel documentation](https://docs.bazel.build/versions/master/install-ubuntu.html)
|
||||
to install Bazel 2.0 or higher.
|
||||
|
||||
For Nvidia Jetson and Raspberry Pi devices with ARM Ubuntu, Bazel needs to
|
||||
be built from source.
|
||||
|
||||
```bash
|
||||
# For Bazel 3.0.0
|
||||
wget https://github.com/bazelbuild/bazel/releases/download/3.0.0/bazel-3.0.0-dist.zip
|
||||
sudo apt-get install build-essential openjdk-8-jdk python zip unzip
|
||||
unzip bazel-3.0.0-dist.zip
|
||||
env EXTRA_BAZEL_ARGS="--host_javabase=@local_jdk//:jdk" bash ./compile.sh
|
||||
sudo cp output/bazel /usr/local/bin/
|
||||
```
|
||||
|
||||
3. Install OpenCV and FFmpeg.
|
||||
|
||||
Option 1. Use package manager tool to install the pre-compiled OpenCV
|
||||
libraries. FFmpeg will be installed via libopencv-video-dev.
|
||||
**Option 1**. Use package manager tool to install the pre-compiled OpenCV
|
||||
libraries. FFmpeg will be installed via `libopencv-video-dev`.
|
||||
|
||||
Note: Debian 9 and Ubuntu 16.04 provide OpenCV 2.4.9. You may want to take
|
||||
option 2 or 3 to install OpenCV 3 or above.
|
||||
OS | OpenCV
|
||||
-------------------- | ------
|
||||
Debian 9 (stretch) | 2.4
|
||||
Debian 10 (buster) | 3.2
|
||||
Debian 11 (bullseye) | 4.5
|
||||
Ubuntu 16.04 LTS | 2.4
|
||||
Ubuntu 18.04 LTS | 3.2
|
||||
Ubuntu 20.04 LTS | 4.2
|
||||
Ubuntu 20.04 LTS | 4.2
|
||||
Ubuntu 21.04 | 4.5
|
||||
|
||||
```bash
|
||||
$ sudo apt-get install libopencv-core-dev libopencv-highgui-dev \
|
||||
libopencv-calib3d-dev libopencv-features2d-dev \
|
||||
libopencv-imgproc-dev libopencv-video-dev
|
||||
$ sudo apt-get install -y \
|
||||
libopencv-core-dev \
|
||||
libopencv-highgui-dev \
|
||||
libopencv-calib3d-dev \
|
||||
libopencv-features2d-dev \
|
||||
libopencv-imgproc-dev \
|
||||
libopencv-video-dev
|
||||
```
|
||||
|
||||
[`opencv_linux.BUILD`] is configured for x86_64 by default. For Nvidia
|
||||
Jetson and Raspberry Pi devices with ARM Ubuntu, the lib paths need to be
|
||||
modified.
|
||||
MediaPipe's [`opencv_linux.BUILD`] and [`WORKSPACE`] are already configured
|
||||
for OpenCV 2/3 and should work correctly on any architecture:
|
||||
|
||||
```bash
|
||||
sed -i "s/x86_64-linux-gnu/aarch64-linux-gnu/g" third_party/opencv_linux.BUILD
|
||||
# WORKSPACE
|
||||
new_local_repository(
|
||||
name = "linux_opencv",
|
||||
build_file = "@//third_party:opencv_linux.BUILD",
|
||||
path = "/usr",
|
||||
)
|
||||
|
||||
# opencv_linux.BUILD for OpenCV 2/3 installed from Debian package
|
||||
cc_library(
|
||||
name = "opencv",
|
||||
linkopts = [
|
||||
"-l:libopencv_core.so",
|
||||
"-l:libopencv_calib3d.so",
|
||||
"-l:libopencv_features2d.so",
|
||||
"-l:libopencv_highgui.so",
|
||||
"-l:libopencv_imgcodecs.so",
|
||||
"-l:libopencv_imgproc.so",
|
||||
"-l:libopencv_video.so",
|
||||
"-l:libopencv_videoio.so",
|
||||
],
|
||||
)
|
||||
```
|
||||
|
||||
Option 2. Run [`setup_opencv.sh`] to automatically build OpenCV from source
|
||||
and modify MediaPipe's OpenCV config.
|
||||
For OpenCV 4 you need to modify [`opencv_linux.BUILD`] taking into account
|
||||
current architecture:
|
||||
|
||||
Option 3. Follow OpenCV's
|
||||
```bash
|
||||
# WORKSPACE
|
||||
new_local_repository(
|
||||
name = "linux_opencv",
|
||||
build_file = "@//third_party:opencv_linux.BUILD",
|
||||
path = "/usr",
|
||||
)
|
||||
|
||||
# opencv_linux.BUILD for OpenCV 4 installed from Debian package
|
||||
cc_library(
|
||||
name = "opencv",
|
||||
hdrs = glob([
|
||||
# Uncomment according to your multiarch value (gcc -print-multiarch):
|
||||
# "include/aarch64-linux-gnu/opencv4/opencv2/cvconfig.h",
|
||||
# "include/arm-linux-gnueabihf/opencv4/opencv2/cvconfig.h",
|
||||
# "include/x86_64-linux-gnu/opencv4/opencv2/cvconfig.h",
|
||||
"include/opencv4/opencv2/**/*.h*",
|
||||
]),
|
||||
includes = [
|
||||
# Uncomment according to your multiarch value (gcc -print-multiarch):
|
||||
# "include/aarch64-linux-gnu/opencv4/",
|
||||
# "include/arm-linux-gnueabihf/opencv4/",
|
||||
# "include/x86_64-linux-gnu/opencv4/",
|
||||
"include/opencv4/",
|
||||
],
|
||||
linkopts = [
|
||||
"-l:libopencv_core.so",
|
||||
"-l:libopencv_calib3d.so",
|
||||
"-l:libopencv_features2d.so",
|
||||
"-l:libopencv_highgui.so",
|
||||
"-l:libopencv_imgcodecs.so",
|
||||
"-l:libopencv_imgproc.so",
|
||||
"-l:libopencv_video.so",
|
||||
"-l:libopencv_videoio.so",
|
||||
],
|
||||
)
|
||||
```
|
||||
|
||||
**Option 2**. Run [`setup_opencv.sh`] to automatically build OpenCV from
|
||||
source and modify MediaPipe's OpenCV config. This option will do all steps
|
||||
defined in Option 3 automatically.
|
||||
|
||||
**Option 3**. Follow OpenCV's
|
||||
[documentation](https://docs.opencv.org/3.4.6/d7/d9f/tutorial_linux_install.html)
|
||||
to manually build OpenCV from source code.
|
||||
|
||||
Note: You may need to modify [`WORKSPACE`] and [`opencv_linux.BUILD`] to
|
||||
point MediaPipe to your own OpenCV libraries, e.g., if OpenCV 4 is installed
|
||||
in "/usr/local/", you need to update the "linux_opencv" new_local_repository
|
||||
rule in [`WORKSPACE`] and "opencv" cc_library rule in [`opencv_linux.BUILD`]
|
||||
like the following:
|
||||
You may need to modify [`WORKSPACE`] and [`opencv_linux.BUILD`] to point
|
||||
MediaPipe to your own OpenCV libraries. Assume OpenCV would be installed to
|
||||
`/usr/local/` which is recommended by default.
|
||||
|
||||
OpenCV 2/3 setup:
|
||||
|
||||
```bash
|
||||
# WORKSPACE
|
||||
new_local_repository(
|
||||
name = "linux_opencv",
|
||||
build_file = "@//third_party:opencv_linux.BUILD",
|
||||
path = "/usr/local",
|
||||
name = "linux_opencv",
|
||||
build_file = "@//third_party:opencv_linux.BUILD",
|
||||
path = "/usr/local",
|
||||
)
|
||||
|
||||
# opencv_linux.BUILD for OpenCV 2/3 installed to /usr/local
|
||||
cc_library(
|
||||
name = "opencv",
|
||||
srcs = glob(
|
||||
[
|
||||
"lib/libopencv_core.so",
|
||||
"lib/libopencv_highgui.so",
|
||||
"lib/libopencv_imgcodecs.so",
|
||||
"lib/libopencv_imgproc.so",
|
||||
"lib/libopencv_video.so",
|
||||
"lib/libopencv_videoio.so",
|
||||
],
|
||||
),
|
||||
hdrs = glob(["include/opencv4/**/*.h*"]),
|
||||
includes = ["include/opencv4/"],
|
||||
linkstatic = 1,
|
||||
visibility = ["//visibility:public"],
|
||||
name = "opencv",
|
||||
linkopts = [
|
||||
"-L/usr/local/lib",
|
||||
"-l:libopencv_core.so",
|
||||
"-l:libopencv_calib3d.so",
|
||||
"-l:libopencv_features2d.so",
|
||||
"-l:libopencv_highgui.so",
|
||||
"-l:libopencv_imgcodecs.so",
|
||||
"-l:libopencv_imgproc.so",
|
||||
"-l:libopencv_video.so",
|
||||
"-l:libopencv_videoio.so",
|
||||
],
|
||||
)
|
||||
```
|
||||
|
||||
OpenCV 4 setup:
|
||||
|
||||
```bash
|
||||
# WORKSPACE
|
||||
new_local_repository(
|
||||
name = "linux_opencv",
|
||||
build_file = "@//third_party:opencv_linux.BUILD",
|
||||
path = "/usr/local",
|
||||
)
|
||||
|
||||
# opencv_linux.BUILD for OpenCV 4 installed to /usr/local
|
||||
cc_library(
|
||||
name = "opencv",
|
||||
hdrs = glob([
|
||||
"include/opencv4/opencv2/**/*.h*",
|
||||
]),
|
||||
includes = [
|
||||
"include/opencv4/",
|
||||
],
|
||||
linkopts = [
|
||||
"-L/usr/local/lib",
|
||||
"-l:libopencv_core.so",
|
||||
"-l:libopencv_calib3d.so",
|
||||
"-l:libopencv_features2d.so",
|
||||
"-l:libopencv_highgui.so",
|
||||
"-l:libopencv_imgcodecs.so",
|
||||
"-l:libopencv_imgproc.so",
|
||||
"-l:libopencv_video.so",
|
||||
"-l:libopencv_videoio.so",
|
||||
],
|
||||
)
|
||||
```
|
||||
|
||||
Current FFmpeg setup is defined in [`ffmpeg_linux.BUILD`] and should work
|
||||
for any architecture:
|
||||
|
||||
```bash
|
||||
# WORKSPACE
|
||||
new_local_repository(
|
||||
name = "linux_ffmpeg",
|
||||
build_file = "@//third_party:ffmpeg_linux.BUILD",
|
||||
path = "/usr"
|
||||
)
|
||||
|
||||
# ffmpeg_linux.BUILD for FFmpeg installed from Debian package
|
||||
cc_library(
|
||||
name = "libffmpeg",
|
||||
linkopts = [
|
||||
"-l:libavcodec.so",
|
||||
"-l:libavformat.so",
|
||||
"-l:libavutil.so",
|
||||
],
|
||||
)
|
||||
```
|
||||
|
||||
@@ -132,7 +244,7 @@ apps, see these [instructions](./building_examples.md#ios).
|
||||
# when building GPU examples.
|
||||
```
|
||||
|
||||
5. Run the [Hello World desktop example](./hello_world_desktop.md).
|
||||
5. Run the [Hello World! in C++ example](./hello_world_cpp.md).
|
||||
|
||||
```bash
|
||||
$ export GLOG_logtostderr=1
|
||||
@@ -158,11 +270,21 @@ apps, see these [instructions](./building_examples.md#ios).
|
||||
# Hello World!
|
||||
```
|
||||
|
||||
If you run into a build error, please read
|
||||
[Troubleshooting](./troubleshooting.md) to find the solutions of several common
|
||||
build issues.
|
||||
|
||||
## Installing on CentOS
|
||||
|
||||
**Disclaimer**: Running MediaPipe on CentOS is experimental.
|
||||
|
||||
1. Checkout MediaPipe repository.
|
||||
1. Install Bazelisk.
|
||||
|
||||
Follow the official
|
||||
[Bazel documentation](https://docs.bazel.build/versions/master/install-bazelisk.html)
|
||||
to install Bazelisk.
|
||||
|
||||
2. Checkout MediaPipe repository.
|
||||
|
||||
```bash
|
||||
$ git clone https://github.com/google/mediapipe.git
|
||||
@@ -171,12 +293,6 @@ apps, see these [instructions](./building_examples.md#ios).
|
||||
$ cd mediapipe
|
||||
```
|
||||
|
||||
2. Install Bazel.
|
||||
|
||||
Follow the official
|
||||
[Bazel documentation](https://docs.bazel.build/versions/master/install-redhat.html)
|
||||
to install Bazel 2.0 or higher.
|
||||
|
||||
3. Install OpenCV.
|
||||
|
||||
Option 1. Use package manager tool to install the pre-compiled version.
|
||||
@@ -190,11 +306,13 @@ apps, see these [instructions](./building_examples.md#ios).
|
||||
|
||||
Option 2. Build OpenCV from source code.
|
||||
|
||||
Note: You may need to modify [`WORKSPACE`] and [`opencv_linux.BUILD`] to
|
||||
point MediaPipe to your own OpenCV libraries, e.g., if OpenCV 4 is installed
|
||||
in "/usr/local/", you need to update the "linux_opencv" new_local_repository
|
||||
rule in [`WORKSPACE`] and "opencv" cc_library rule in [`opencv_linux.BUILD`]
|
||||
like the following:
|
||||
Note: You may need to modify [`WORKSPACE`], [`opencv_linux.BUILD`] and
|
||||
[`ffmpeg_linux.BUILD`] to point MediaPipe to your own OpenCV and FFmpeg
|
||||
libraries. For example if OpenCV and FFmpeg are both manually installed in
|
||||
"/usr/local/", you will need to update: (1) the "linux_opencv" and
|
||||
"linux_ffmpeg" new_local_repository rules in [`WORKSPACE`], (2) the "opencv"
|
||||
cc_library rule in [`opencv_linux.BUILD`], and (3) the "libffmpeg"
|
||||
cc_library rule in [`ffmpeg_linux.BUILD`]. These 3 changes are shown below:
|
||||
|
||||
```bash
|
||||
new_local_repository(
|
||||
@@ -203,6 +321,12 @@ apps, see these [instructions](./building_examples.md#ios).
|
||||
path = "/usr/local",
|
||||
)
|
||||
|
||||
new_local_repository(
|
||||
name = "linux_ffmpeg",
|
||||
build_file = "@//third_party:ffmpeg_linux.BUILD",
|
||||
path = "/usr/local",
|
||||
)
|
||||
|
||||
cc_library(
|
||||
name = "opencv",
|
||||
srcs = glob(
|
||||
@@ -215,14 +339,42 @@ apps, see these [instructions](./building_examples.md#ios).
|
||||
"lib/libopencv_videoio.so",
|
||||
],
|
||||
),
|
||||
hdrs = glob(["include/opencv4/**/*.h*"]),
|
||||
includes = ["include/opencv4/"],
|
||||
hdrs = glob([
|
||||
# For OpenCV 3.x
|
||||
"include/opencv2/**/*.h*",
|
||||
# For OpenCV 4.x
|
||||
# "include/opencv4/opencv2/**/*.h*",
|
||||
]),
|
||||
includes = [
|
||||
# For OpenCV 3.x
|
||||
"include/",
|
||||
# For OpenCV 4.x
|
||||
# "include/opencv4/",
|
||||
],
|
||||
linkstatic = 1,
|
||||
visibility = ["//visibility:public"],
|
||||
)
|
||||
|
||||
cc_library(
|
||||
name = "libffmpeg",
|
||||
srcs = glob(
|
||||
[
|
||||
"lib/libav*.so",
|
||||
],
|
||||
),
|
||||
hdrs = glob(["include/libav*/*.h"]),
|
||||
includes = ["include"],
|
||||
linkopts = [
|
||||
"-lavcodec",
|
||||
"-lavformat",
|
||||
"-lavutil",
|
||||
],
|
||||
linkstatic = 1,
|
||||
visibility = ["//visibility:public"],
|
||||
)
|
||||
```
|
||||
|
||||
4. Run the [Hello World desktop example](./hello_world_desktop.md).
|
||||
4. Run the [Hello World! in C++ example](./hello_world_cpp.md).
|
||||
|
||||
```bash
|
||||
$ export GLOG_logtostderr=1
|
||||
@@ -243,6 +395,10 @@ apps, see these [instructions](./building_examples.md#ios).
|
||||
# Hello World!
|
||||
```
|
||||
|
||||
If you run into a build error, please read
|
||||
[Troubleshooting](./troubleshooting.md) to find the solutions of several common
|
||||
build issues.
|
||||
|
||||
## Installing on macOS
|
||||
|
||||
1. Prework:
|
||||
@@ -251,7 +407,13 @@ apps, see these [instructions](./building_examples.md#ios).
|
||||
* Install [Xcode](https://developer.apple.com/xcode/) and its Command Line
|
||||
Tools by `xcode-select --install`.
|
||||
|
||||
2. Checkout MediaPipe repository.
|
||||
2. Install Bazelisk.
|
||||
|
||||
Follow the official
|
||||
[Bazel documentation](https://docs.bazel.build/versions/master/install-bazelisk.html)
|
||||
to install Bazelisk.
|
||||
|
||||
3. Checkout MediaPipe repository.
|
||||
|
||||
```bash
|
||||
$ git clone https://github.com/google/mediapipe.git
|
||||
@@ -259,23 +421,10 @@ apps, see these [instructions](./building_examples.md#ios).
|
||||
$ cd mediapipe
|
||||
```
|
||||
|
||||
3. Install Bazel.
|
||||
|
||||
Option 1. Use package manager tool to install Bazel
|
||||
|
||||
```bash
|
||||
$ brew install bazel
|
||||
# Run 'bazel version' to check version of bazel
|
||||
```
|
||||
|
||||
Option 2. Follow the official
|
||||
[Bazel documentation](https://docs.bazel.build/versions/master/install-os-x.html#install-with-installer-mac-os-x)
|
||||
to install Bazel 2.0 or higher.
|
||||
|
||||
4. Install OpenCV and FFmpeg.
|
||||
|
||||
Option 1. Use HomeBrew package manager tool to install the pre-compiled
|
||||
OpenCV 3.4.5 libraries. FFmpeg will be installed via OpenCV.
|
||||
OpenCV 3 libraries. FFmpeg will be installed via OpenCV.
|
||||
|
||||
```bash
|
||||
$ brew install opencv@3
|
||||
@@ -341,7 +490,6 @@ apps, see these [instructions](./building_examples.md#ios).
|
||||
linkstatic = 1,
|
||||
visibility = ["//visibility:public"],
|
||||
)
|
||||
|
||||
```
|
||||
|
||||
5. Make sure that Python 3 and the Python "six" library are installed.
|
||||
@@ -354,7 +502,7 @@ apps, see these [instructions](./building_examples.md#ios).
|
||||
$ pip3 install --user six
|
||||
```
|
||||
|
||||
6. Run the [Hello World desktop example](./hello_world_desktop.md).
|
||||
6. Run the [Hello World! in C++ example](./hello_world_cpp.md).
|
||||
|
||||
```bash
|
||||
$ export GLOG_logtostderr=1
|
||||
@@ -375,6 +523,10 @@ apps, see these [instructions](./building_examples.md#ios).
|
||||
# Hello World!
|
||||
```
|
||||
|
||||
If you run into a build error, please read
|
||||
[Troubleshooting](./troubleshooting.md) to find the solutions of several common
|
||||
build issues.
|
||||
|
||||
## Installing on Windows
|
||||
|
||||
**Disclaimer**: Running MediaPipe on Windows is experimental.
|
||||
@@ -403,29 +555,36 @@ next section.
|
||||
|
||||
4. Install Visual C++ Build Tools 2019 and WinSDK
|
||||
|
||||
Go to https://visualstudio.microsoft.com/visual-cpp-build-tools, download
|
||||
build tools, and install Microsoft Visual C++ 2019 Redistributable and
|
||||
Microsoft Build Tools 2019.
|
||||
Go to
|
||||
[the VisualStudio website](https://visualstudio.microsoft.com/visual-cpp-build-tools),
|
||||
download build tools, and install Microsoft Visual C++ 2019 Redistributable
|
||||
and Microsoft Build Tools 2019.
|
||||
|
||||
Download the WinSDK from
|
||||
https://developer.microsoft.com/en-us/windows/downloads/windows-10-sdk/ and
|
||||
install.
|
||||
[the official MicroSoft website](https://developer.microsoft.com/en-us/windows/downloads/windows-10-sdk/)
|
||||
and install.
|
||||
|
||||
5. Install Bazel and add the location of the Bazel executable to the `%PATH%`
|
||||
environment variable.
|
||||
5. Install Bazel or Bazelisk and add the location of the Bazel executable to
|
||||
the `%PATH%` environment variable.
|
||||
|
||||
Follow the official
|
||||
[Bazel documentation](https://docs.bazel.build/versions/master/install-windows.html)
|
||||
to install Bazel 2.0 or higher.
|
||||
Option 1. Follow
|
||||
[the official Bazel documentation](https://docs.bazel.build/versions/master/install-windows.html)
|
||||
to install Bazel 5.2.0 or higher.
|
||||
|
||||
6. Set Bazel variables.
|
||||
Option 2. Follow the official
|
||||
[Bazel documentation](https://docs.bazel.build/versions/master/install-bazelisk.html)
|
||||
to install Bazelisk.
|
||||
|
||||
6. Set Bazel variables. Learn more details about
|
||||
["Build on Windows"](https://docs.bazel.build/versions/master/windows.html#build-c-with-msvc)
|
||||
in the Bazel official documentation.
|
||||
|
||||
```
|
||||
# Find the exact paths and version numbers from your local version.
|
||||
# Please find the exact paths and version numbers from your local version.
|
||||
C:\> set BAZEL_VS=C:\Program Files (x86)\Microsoft Visual Studio\2019\BuildTools
|
||||
C:\> set BAZEL_VC=C:\Program Files (x86)\Microsoft Visual Studio\2019\BuildTools\VC
|
||||
C:\> set BAZEL_VC_FULL_VERSION=14.25.28610
|
||||
C:\> set BAZEL_WINSDK_FULL_VERSION=10.1.18362.1
|
||||
C:\> set BAZEL_VC_FULL_VERSION=<Your local VC version>
|
||||
C:\> set BAZEL_WINSDK_FULL_VERSION=<Your local WinSDK version>
|
||||
```
|
||||
|
||||
7. Checkout MediaPipe repository.
|
||||
@@ -451,16 +610,16 @@ next section.
|
||||
)
|
||||
```
|
||||
|
||||
9. Run the [Hello World desktop example](./hello_world_desktop.md).
|
||||
9. Run the [Hello World! in C++ example](./hello_world_cpp.md).
|
||||
|
||||
Note: For building MediaPipe on Windows, please add `--action_env
|
||||
PYTHON_BIN_PATH="C:/path/to/python.exe"` to the build command.
|
||||
PYTHON_BIN_PATH="C://path//to//python.exe"` to the build command.
|
||||
Alternatively, you can follow
|
||||
[issue 724](https://github.com/google/mediapipe/issues/724) to fix the
|
||||
python configuration manually.
|
||||
|
||||
```
|
||||
C:\Users\Username\mediapipe_repo>bazel build -c opt --define MEDIAPIPE_DISABLE_GPU=1 --action_env PYTHON_BIN_PATH="C:/python_36/python.exe" mediapipe/examples/desktop/hello_world
|
||||
C:\Users\Username\mediapipe_repo>bazel build -c opt --define MEDIAPIPE_DISABLE_GPU=1 --action_env PYTHON_BIN_PATH="C://python_36//python.exe" mediapipe/examples/desktop/hello_world
|
||||
|
||||
C:\Users\Username\mediapipe_repo>set GLOG_logtostderr=1
|
||||
|
||||
@@ -477,9 +636,12 @@ next section.
|
||||
# I20200514 20:43:12.279618 1200 hello_world.cc:56] Hello World!
|
||||
# I20200514 20:43:12.279618 1200 hello_world.cc:56] Hello World!
|
||||
# I20200514 20:43:12.280613 1200 hello_world.cc:56] Hello World!
|
||||
|
||||
```
|
||||
|
||||
If you run into a build error, please read
|
||||
[Troubleshooting](./troubleshooting.md) to find the solutions of several common
|
||||
build issues.
|
||||
|
||||
## Installing on Windows Subsystem for Linux (WSL)
|
||||
|
||||
Note: The pre-built OpenCV packages don't support cameras in WSL. Unless you
|
||||
@@ -495,7 +657,7 @@ cameras. Alternatively, you use a video file as input.
|
||||
|
||||
Note: Windows' and WSL’s adb versions must be the same version, e.g., if WSL
|
||||
has ADB 1.0.39, you need to download the corresponding Windows ADB from
|
||||
[here](https://dl.google.com/android/repository/platform-tools_r26.0.1-windows.zip).
|
||||
[here](https://dl.google.com/android/repository/platform-tools_r30.0.3-windows.zip).
|
||||
|
||||
3. Launch WSL.
|
||||
|
||||
@@ -509,19 +671,11 @@ cameras. Alternatively, you use a video file as input.
|
||||
username@DESKTOP-TMVLBJ1:~$ sudo apt-get update && sudo apt-get install -y build-essential git python zip adb openjdk-8-jdk
|
||||
```
|
||||
|
||||
5. Install Bazel.
|
||||
5. Install Bazelisk.
|
||||
|
||||
```bash
|
||||
username@DESKTOP-TMVLBJ1:~$ curl -sLO --retry 5 --retry-max-time 10 \
|
||||
https://storage.googleapis.com/bazel/3.0.0/release/bazel-3.0.0-installer-linux-x86_64.sh && \
|
||||
sudo mkdir -p /usr/local/bazel/3.0.0 && \
|
||||
chmod 755 bazel-3.0.0-installer-linux-x86_64.sh && \
|
||||
sudo ./bazel-3.0.0-installer-linux-x86_64.sh --prefix=/usr/local/bazel/3.0.0 && \
|
||||
source /usr/local/bazel/3.0.0/lib/bazel/bin/bazel-complete.bash
|
||||
|
||||
username@DESKTOP-TMVLBJ1:~$ /usr/local/bazel/3.0.0/lib/bazel/bin/bazel version && \
|
||||
alias bazel='/usr/local/bazel/3.0.0/lib/bazel/bin/bazel'
|
||||
```
|
||||
Follow the official
|
||||
[Bazel documentation](https://docs.bazel.build/versions/master/install-bazelisk.html)
|
||||
to install Bazelisk.
|
||||
|
||||
6. Checkout MediaPipe repository.
|
||||
|
||||
@@ -581,7 +735,7 @@ cameras. Alternatively, you use a video file as input.
|
||||
)
|
||||
```
|
||||
|
||||
8. Run the [Hello World desktop example](./hello_world_desktop.md).
|
||||
8. Run the [Hello World! in C++ example](./hello_world_cpp.md).
|
||||
|
||||
```bash
|
||||
username@DESKTOP-TMVLBJ1:~/mediapipe$ export GLOG_logtostderr=1
|
||||
@@ -603,6 +757,10 @@ cameras. Alternatively, you use a video file as input.
|
||||
# Hello World!
|
||||
```
|
||||
|
||||
If you run into a build error, please
|
||||
read [Troubleshooting](./troubleshooting.md) to find the solutions of several
|
||||
common build issues.
|
||||
|
||||
## Installing using Docker
|
||||
|
||||
This will use a Docker image that will isolate mediapipe's installation from the rest of the system.
|
||||
@@ -633,12 +791,12 @@ This will use a Docker image that will isolate mediapipe's installation from the
|
||||
# Successfully tagged mediapipe:latest
|
||||
```
|
||||
|
||||
3. Run the [Hello World desktop example](./hello_world_desktop.md).
|
||||
3. Run the [Hello World! in C++ example](./hello_world_cpp.md).
|
||||
|
||||
```bash
|
||||
$ docker run -it --name mediapipe mediapipe:latest
|
||||
|
||||
root@bca08b91ff63:/mediapipe# GLOG_logtostderr=1 bazel run --define MEDIAPIPE_DISABLE_GPU=1 mediapipe/examples/desktop/hello_world:hello_world
|
||||
root@bca08b91ff63:/mediapipe# GLOG_logtostderr=1 bazel run --define MEDIAPIPE_DISABLE_GPU=1 mediapipe/examples/desktop/hello_world
|
||||
|
||||
# Should print:
|
||||
# Hello World!
|
||||
@@ -653,6 +811,10 @@ This will use a Docker image that will isolate mediapipe's installation from the
|
||||
# Hello World!
|
||||
```
|
||||
|
||||
If you run into a build error, please
|
||||
read [Troubleshooting](./troubleshooting.md) to find the solutions of several
|
||||
common build issues.
|
||||
|
||||
4. Build a MediaPipe Android example.
|
||||
|
||||
```bash
|
||||
@@ -661,7 +823,7 @@ This will use a Docker image that will isolate mediapipe's installation from the
|
||||
root@bca08b91ff63:/mediapipe# bash ./setup_android_sdk_and_ndk.sh
|
||||
|
||||
# Should print:
|
||||
# Android NDK is now installed. Consider setting $ANDROID_NDK_HOME environment variable to be /root/Android/Sdk/ndk-bundle/android-ndk-r18b
|
||||
# Android NDK is now installed. Consider setting $ANDROID_NDK_HOME environment variable to be /root/Android/Sdk/ndk-bundle/android-ndk-r19c
|
||||
# Set android_ndk_repository and android_sdk_repository in WORKSPACE
|
||||
# Done
|
||||
|
||||
@@ -692,6 +854,7 @@ This will use a Docker image that will isolate mediapipe's installation from the
|
||||
|
||||
[`WORKSPACE`]: https://github.com/google/mediapipe/blob/master/WORKSPACE
|
||||
[`opencv_linux.BUILD`]: https://github.com/google/mediapipe/tree/master/third_party/opencv_linux.BUILD
|
||||
[`ffmpeg_linux.BUILD`]:https://github.com/google/mediapipe/tree/master/third_party/ffmpeg_linux.BUILD
|
||||
[`opencv_macos.BUILD`]: https://github.com/google/mediapipe/tree/master/third_party/opencv_macos.BUILD
|
||||
[`ffmpeg_macos.BUILD`]:https://github.com/google/mediapipe/tree/master/third_party/ffmpeg_macos.BUILD
|
||||
[`setup_opencv.sh`]: https://github.com/google/mediapipe/blob/master/setup_opencv.sh
|
||||
|
||||
@@ -0,0 +1,230 @@
|
||||
---
|
||||
layout: default
|
||||
title: MediaPipe on iOS
|
||||
parent: Getting Started
|
||||
has_children: true
|
||||
has_toc: false
|
||||
nav_order: 2
|
||||
---
|
||||
|
||||
# MediaPipe on iOS
|
||||
{: .no_toc }
|
||||
|
||||
1. TOC
|
||||
{:toc}
|
||||
---
|
||||
|
||||
Please follow instructions below to build iOS example apps in the supported
|
||||
MediaPipe [solutions](../solutions/solutions.md). To learn more about these
|
||||
example apps, start from, start from
|
||||
[Hello World! on iOS](./hello_world_ios.md).
|
||||
|
||||
## Building iOS example apps
|
||||
|
||||
### Prerequisite
|
||||
|
||||
1. Install MediaPipe following these [instructions](./install.md).
|
||||
|
||||
2. Install [Xcode](https://developer.apple.com/xcode/), then install the
|
||||
Command Line Tools using:
|
||||
|
||||
```bash
|
||||
xcode-select --install
|
||||
```
|
||||
|
||||
3. Install [Bazelisk](https://github.com/bazelbuild/bazelisk)
|
||||
.
|
||||
|
||||
We recommend using [Homebrew](https://brew.sh/) to get the latest versions.
|
||||
|
||||
```bash
|
||||
brew install bazelisk
|
||||
```
|
||||
|
||||
4. Set Python 3.7 as the default Python version and install the Python "six"
|
||||
library. This is needed for TensorFlow.
|
||||
|
||||
```bash
|
||||
pip3 install --user six
|
||||
```
|
||||
|
||||
5. Clone the MediaPipe repository.
|
||||
|
||||
```bash
|
||||
git clone https://github.com/google/mediapipe.git
|
||||
```
|
||||
|
||||
### Set up a bundle ID prefix
|
||||
|
||||
All iOS apps must have a bundle ID, and you must have a provisioning profile
|
||||
that lets you install an app with that ID onto your phone. To avoid clashes
|
||||
between different MediaPipe users, you need to configure a unique prefix for the
|
||||
bundle IDs of our iOS demo apps.
|
||||
|
||||
If you have a custom provisioning profile, see
|
||||
[Custom provisioning](#custom-provisioning) below.
|
||||
|
||||
Otherwise, run this command to generate a unique prefix:
|
||||
|
||||
```bash
|
||||
python3 mediapipe/examples/ios/link_local_profiles.py
|
||||
```
|
||||
|
||||
### Create an Xcode project
|
||||
|
||||
This allows you to edit and debug one of the example apps in Xcode. It also
|
||||
allows you to make use of automatic provisioning (see later section).
|
||||
|
||||
1. We will use a tool called [Tulsi](https://tulsi.bazel.build/) for generating
|
||||
Xcode projects from Bazel build configurations.
|
||||
|
||||
```bash
|
||||
# cd out of the mediapipe directory, then:
|
||||
git clone https://github.com/bazelbuild/tulsi.git
|
||||
cd tulsi
|
||||
# remove Xcode version from Tulsi's .bazelrc (see http://github.com/bazelbuild/tulsi#building-and-installing):
|
||||
sed -i .orig '/xcode_version/d' .bazelrc
|
||||
# build and run Tulsi:
|
||||
sh build_and_run.sh
|
||||
```
|
||||
|
||||
This will install `Tulsi.app` inside the `Applications` directory in your
|
||||
home directory.
|
||||
|
||||
2. Open `mediapipe/Mediapipe.tulsiproj` using the Tulsi app.
|
||||
|
||||
Tip: If Tulsi displays an error saying "Bazel could not be found", press the
|
||||
"Bazel..." button in the Packages tab and select the `bazel` executable in
|
||||
your homebrew `/bin/` directory.
|
||||
|
||||
3. Select the MediaPipe config in the Configs tab, then press the Generate
|
||||
button below. You will be asked for a location to save the Xcode project.
|
||||
Once the project is generated, it will be opened in Xcode.
|
||||
|
||||
If you get an error about bundle IDs, see the
|
||||
[previous section](#set-up-a-bundle-id-prefix).
|
||||
|
||||
### Set up provisioning
|
||||
|
||||
To install applications on an iOS device, you need a provisioning profile. There
|
||||
are two options:
|
||||
|
||||
1. Automatic provisioning. This allows you to build and install an app to your
|
||||
personal device. The provisining profile is managed by Xcode, and has to be
|
||||
updated often (it is valid for about a week).
|
||||
|
||||
2. Custom provisioning. This uses a provisioning profile associated with an
|
||||
Apple developer account. These profiles have a longer validity period and
|
||||
can target multiple devices, but you need a paid developer account with
|
||||
Apple to obtain one.
|
||||
|
||||
#### Automatic provisioning
|
||||
|
||||
1. Create an Xcode project for MediaPipe, as discussed
|
||||
[earlier](#create-an-xcode-project).
|
||||
|
||||
2. In the project navigator in the left sidebar, select the "Mediapipe"
|
||||
project.
|
||||
|
||||
3. Select one of the application targets, e.g. HandTrackingGpuApp.
|
||||
|
||||
4. Select the "Signing & Capabilities" tab.
|
||||
|
||||
5. Check "Automatically manage signing", and confirm the dialog box.
|
||||
|
||||
6. Select "_Your Name_ (Personal Team)" in the Team pop-up menu.
|
||||
|
||||
7. This set-up needs to be done once for each application you want to install.
|
||||
Repeat steps 3-6 as needed.
|
||||
|
||||
This generates provisioning profiles for each app you have selected. Now we need
|
||||
to tell Bazel to use them. We have provided a script to make this easier.
|
||||
|
||||
1. In the terminal, to the `mediapipe` directory where you cloned the
|
||||
repository.
|
||||
|
||||
2. Run this command:
|
||||
|
||||
```bash
|
||||
python3 mediapipe/examples/ios/link_local_profiles.py
|
||||
```
|
||||
|
||||
This will find and link the provisioning profile for all applications for which
|
||||
you have enabled automatic provisioning in Xcode.
|
||||
|
||||
Note: once a profile expires, Xcode will generate a new one; you must then run
|
||||
this script again to link the updated profiles.
|
||||
|
||||
#### Custom provisioning
|
||||
|
||||
1. Obtain a provisioning profile from Apple.
|
||||
|
||||
Tip: You can use this command to see the provisioning profiles you have
|
||||
previously downloaded using Xcode: `open ~/Library/MobileDevice/"Provisioning
|
||||
Profiles"`. If there are none, generate and download a profile on
|
||||
[Apple's developer site](https://developer.apple.com/account/resources/).
|
||||
|
||||
1. Symlink or copy your provisioning profile to
|
||||
`mediapipe/mediapipe/provisioning_profile.mobileprovision`.
|
||||
|
||||
```bash
|
||||
cd mediapipe
|
||||
ln -s ~/Downloads/MyProvisioningProfile.mobileprovision mediapipe/provisioning_profile.mobileprovision
|
||||
```
|
||||
|
||||
Note: if you had previously set up automatic provisioning, you should remove the
|
||||
`provisioning_profile.mobileprovision` symlink in each example's directory,
|
||||
since it will take precedence over the common one. You can also overwrite it
|
||||
with you own profile if you need a different profile for different apps.
|
||||
|
||||
1. Open `mediapipe/examples/ios/bundle_id.bzl`, and change the
|
||||
`BUNDLE_ID_PREFIX` to a prefix associated with your provisioning profile.
|
||||
|
||||
### Build and run an app using Xcode
|
||||
|
||||
1. Create the Xcode project, and make sure you have set up either automatic or
|
||||
custom provisioning.
|
||||
|
||||
2. You can now select any of the MediaPipe demos in the target menu, and build
|
||||
and run them as normal.
|
||||
|
||||
Note: When you ask Xcode to run an app, by default it will use the Debug
|
||||
configuration. Some of our demos are computationally heavy; you may want to use
|
||||
the Release configuration for better performance.
|
||||
|
||||
Note: Due to an imcoptibility caused by one of our dependencies, MediaPipe
|
||||
cannot be used for apps running on the iPhone Simulator on Apple Silicon (M1).
|
||||
|
||||
Tip: To switch build configuration in Xcode, click on the target menu, choose
|
||||
"Edit Scheme...", select the Run action, and switch the Build Configuration from
|
||||
Debug to Release. Note that this is set independently for each target.
|
||||
|
||||
Tip: On the device, in Settings > General > Device Management, make sure the
|
||||
developer (yourself) is trusted.
|
||||
|
||||
### Build an app using the command line
|
||||
|
||||
1. Make sure you have set up either automatic or custom provisioning.
|
||||
|
||||
2. Using [MediaPipe Hands](../solutions/hands.md) for example, run:
|
||||
|
||||
```bash
|
||||
bazel build -c opt --config=ios_arm64 mediapipe/examples/ios/handtrackinggpu:HandTrackingGpuApp
|
||||
```
|
||||
|
||||
You may see a permission request from `codesign` in order to sign the app.
|
||||
|
||||
Tip: If you are using custom provisioning, you can run this
|
||||
[script](https://github.com/google/mediapipe/blob/master/build_ios_examples.sh)
|
||||
to build all MediaPipe iOS example apps.
|
||||
|
||||
3. In Xcode, open the `Devices and Simulators` window (command-shift-2).
|
||||
|
||||
4. Make sure your device is connected. You will see a list of installed apps.
|
||||
Press the "+" button under the list, and select the `.ipa` file built by
|
||||
Bazel.
|
||||
|
||||
5. You can now run the app on your device.
|
||||
|
||||
Tip: On the device, in Settings > General > Device Management, make sure the
|
||||
developer (yourself) is trusted.
|
||||
@@ -0,0 +1,102 @@
|
||||
---
|
||||
layout: default
|
||||
title: MediaPipe in JavaScript
|
||||
parent: Getting Started
|
||||
nav_order: 4
|
||||
---
|
||||
|
||||
# MediaPipe in JavaScript
|
||||
{: .no_toc }
|
||||
|
||||
1. TOC
|
||||
{:toc}
|
||||
---
|
||||
|
||||
## Ready-to-use JavaScript Solutions
|
||||
|
||||
MediaPipe currently offers the following solutions:
|
||||
|
||||
Solution | NPM Package | Example
|
||||
--------------------------- | --------------------------------------- | -------
|
||||
[Face Mesh][F-pg] | [@mediapipe/face_mesh][F-npm] | [mediapipe.dev/demo/face_mesh][F-demo]
|
||||
[Face Detection][Fd-pg] | [@mediapipe/face_detection][Fd-npm] | [mediapipe.dev/demo/face_detection][Fd-demo]
|
||||
[Hands][H-pg] | [@mediapipe/hands][H-npm] | [mediapipe.dev/demo/hands][H-demo]
|
||||
[Holistic][Ho-pg] | [@mediapipe/holistic][Ho-npm] | [mediapipe.dev/demo/holistic][Ho-demo]
|
||||
[Objectron][Ob-pg] | [@mediapipe/objectron][Ob-npm] | [mediapipe.dev/demo/objectron][Ob-demo]
|
||||
[Pose][P-pg] | [@mediapipe/pose][P-npm] | [mediapipe.dev/demo/pose][P-demo]
|
||||
[Selfie Segmentation][S-pg] | [@mediapipe/selfie_segmentation][S-npm] | [mediapipe.dev/demo/selfie_segmentation][S-demo]
|
||||
|
||||
Click on a solution link above for more information, including API and code
|
||||
snippets.
|
||||
|
||||
### Supported plaforms:
|
||||
|
||||
| Browser | Platform | Notes |
|
||||
| ------- | ----------------------- | -------------------------------------- |
|
||||
| Chrome | Android / Windows / Mac | Pixel 4 and older unsupported. Fuschia |
|
||||
| | | unsupported. |
|
||||
| Chrome | iOS | Camera unavailable in Chrome on iOS. |
|
||||
| Safari | iPad/iPhone/Mac | iOS and Safari on iPad / iPhone / |
|
||||
| | | MacBook |
|
||||
|
||||
The quickest way to get acclimated is to look at the examples above. Each demo
|
||||
has a link to a [CodePen][codepen] so that you can edit the code and try it
|
||||
yourself. We have included a number of utility packages to help you get started:
|
||||
|
||||
* [@mediapipe/drawing_utils][draw-npm] - Utilities to draw landmarks and
|
||||
connectors.
|
||||
* [@mediapipe/camera_utils][cam-npm] - Utilities to operate the camera.
|
||||
* [@mediapipe/control_utils][ctrl-npm] - Utilities to show sliders and FPS
|
||||
widgets.
|
||||
|
||||
Note: See these demos and more at [MediaPipe on CodePen][codepen]
|
||||
|
||||
All of these solutions are staged in [NPM][npm]. You can install any package
|
||||
locally with `npm install`. Example:
|
||||
|
||||
```
|
||||
npm install @mediapipe/holistic.
|
||||
```
|
||||
|
||||
If you would rather not stage these locally, you can rely on a CDN (e.g.,
|
||||
[jsDelivr](https://www.jsdelivr.com/)). This will allow you to add scripts
|
||||
directly to your HTML:
|
||||
|
||||
```
|
||||
<head>
|
||||
<script src="https://cdn.jsdelivr.net/npm/@mediapipe/[email protected]/drawing_utils.js" crossorigin="anonymous"></script>
|
||||
<script src="https://cdn.jsdelivr.net/npm/@mediapipe/[email protected]/holistic.js" crossorigin="anonymous"></script>
|
||||
</head>
|
||||
```
|
||||
|
||||
Note: You can specify version numbers to both NPM and jsdelivr. They are
|
||||
structured as `<major>.<minor>.<build>`. To prevent breaking changes from
|
||||
affecting your work, restrict your request to a `<minor>` number. e.g.,
|
||||
`@mediapipe/[email protected]`.
|
||||
|
||||
[Ho-pg]: ../solutions/holistic#javascript-solution-api
|
||||
[F-pg]: ../solutions/face_mesh#javascript-solution-api
|
||||
[Fd-pg]: ../solutions/face_detection#javascript-solution-api
|
||||
[H-pg]: ../solutions/hands#javascript-solution-api
|
||||
[Ob-pg]: ../solutions/objectron#javascript-solution-api
|
||||
[P-pg]: ../solutions/pose#javascript-solution-api
|
||||
[S-pg]: ../solutions/selfie_segmentation#javascript-solution-api
|
||||
[Ho-npm]: https://www.npmjs.com/package/@mediapipe/holistic
|
||||
[F-npm]: https://www.npmjs.com/package/@mediapipe/face_mesh
|
||||
[Fd-npm]: https://www.npmjs.com/package/@mediapipe/face_detection
|
||||
[H-npm]: https://www.npmjs.com/package/@mediapipe/hands
|
||||
[Ob-npm]: https://www.npmjs.com/package/@mediapipe/objectron
|
||||
[P-npm]: https://www.npmjs.com/package/@mediapipe/pose
|
||||
[S-npm]: https://www.npmjs.com/package/@mediapipe/selfie_segmentation
|
||||
[draw-npm]: https://www.npmjs.com/package/@mediapipe/drawing_utils
|
||||
[cam-npm]: https://www.npmjs.com/package/@mediapipe/camera_utils
|
||||
[ctrl-npm]: https://www.npmjs.com/package/@mediapipe/control_utils
|
||||
[Ho-demo]: https://mediapipe.dev/demo/holistic
|
||||
[F-demo]: https://mediapipe.dev/demo/face_mesh
|
||||
[Fd-demo]: https://mediapipe.dev/demo/face_detection
|
||||
[H-demo]: https://mediapipe.dev/demo/hands
|
||||
[Ob-demo]: https://mediapipe.dev/demo/objectron
|
||||
[P-demo]: https://mediapipe.dev/demo/pose
|
||||
[S-demo]: https://mediapipe.dev/demo/selfie_segmentation
|
||||
[npm]: https://www.npmjs.com/package/@mediapipe
|
||||
[codepen]: https://code.mediapipe.dev/codepen
|
||||
@@ -0,0 +1,143 @@
|
||||
---
|
||||
layout: default
|
||||
title: MediaPipe in Python
|
||||
parent: Getting Started
|
||||
has_children: true
|
||||
has_toc: false
|
||||
nav_order: 3
|
||||
---
|
||||
|
||||
# MediaPipe in Python
|
||||
{: .no_toc }
|
||||
|
||||
1. TOC
|
||||
{:toc}
|
||||
---
|
||||
|
||||
## Ready-to-use Python Solutions
|
||||
|
||||
MediaPipe offers ready-to-use yet customizable Python solutions as a prebuilt
|
||||
Python package. MediaPipe Python package is available on
|
||||
[PyPI](https://pypi.org/project/mediapipe/) for Linux, macOS and Windows.
|
||||
|
||||
You can, for instance, activate a Python virtual environment:
|
||||
|
||||
```bash
|
||||
$ python3 -m venv mp_env && source mp_env/bin/activate
|
||||
```
|
||||
|
||||
Install MediaPipe Python package and start Python interpreter:
|
||||
|
||||
```bash
|
||||
(mp_env)$ pip install mediapipe
|
||||
(mp_env)$ python3
|
||||
```
|
||||
|
||||
In Python interpreter, import the package and start using one of the solutions:
|
||||
|
||||
```python
|
||||
import mediapipe as mp
|
||||
mp_face_mesh = mp.solutions.face_mesh
|
||||
```
|
||||
|
||||
Tip: Use command `deactivate` to later exit the Python virtual environment.
|
||||
|
||||
To learn more about configuration options and usage examples, please find
|
||||
details in each solution via the links below:
|
||||
|
||||
* [MediaPipe Face Detection](../solutions/face_detection#python-solution-api)
|
||||
* [MediaPipe Face Mesh](../solutions/face_mesh#python-solution-api)
|
||||
* [MediaPipe Hands](../solutions/hands#python-solution-api)
|
||||
* [MediaPipe Holistic](../solutions/holistic#python-solution-api)
|
||||
* [MediaPipe Objectron](../solutions/objectron#python-solution-api)
|
||||
* [MediaPipe Pose](../solutions/pose#python-solution-api)
|
||||
* [MediaPipe Selfie Segmentation](../solutions/selfie_segmentation#python-solution-api)
|
||||
|
||||
## MediaPipe on Google Colab
|
||||
|
||||
* [MediaPipe Face Detection Colab](https://mediapipe.page.link/face_detection_py_colab)
|
||||
* [MediaPipe Face Mesh Colab](https://mediapipe.page.link/face_mesh_py_colab)
|
||||
* [MediaPipe Hands Colab](https://mediapipe.page.link/hands_py_colab)
|
||||
* [MediaPipe Holistic Colab](https://mediapipe.page.link/holistic_py_colab)
|
||||
* [MediaPipe Objectron Colab](https://mediapipe.page.link/objectron_py_colab)
|
||||
* [MediaPipe Pose Colab](https://mediapipe.page.link/pose_py_colab)
|
||||
* [MediaPipe Pose Classification Colab (Basic)](https://mediapipe.page.link/pose_classification_basic)
|
||||
* [MediaPipe Pose Classification Colab (Extended)](https://mediapipe.page.link/pose_classification_extended)
|
||||
* [MediaPipe Selfie Segmentation Colab](https://mediapipe.page.link/selfie_segmentation_py_colab)
|
||||
|
||||
## MediaPipe Python Framework
|
||||
|
||||
The ready-to-use solutions are built upon the MediaPipe Python framework, which
|
||||
can be used by advanced users to run their own MediaPipe graphs in Python.
|
||||
Please see [here](./python_framework.md) for more info.
|
||||
|
||||
## Building MediaPipe Python Package
|
||||
|
||||
Follow the steps below only if you have local changes and need to build the
|
||||
Python package from source. Otherwise, we strongly encourage our users to simply
|
||||
run `pip install mediapipe` to use the ready-to-use solutions, more convenient
|
||||
and much faster.
|
||||
|
||||
MediaPipe PyPI currently doesn't provide aarch64 Python wheel
|
||||
files. For building and using MediaPipe Python on aarch64 Linux systems such as
|
||||
Nvidia Jetson and Raspberry Pi, please read
|
||||
[here](https://github.com/jiuqiant/mediapipe-python-aarch64).
|
||||
|
||||
1. Make sure that Bazel and OpenCV are correctly installed and configured for
|
||||
MediaPipe. Please see [Installation](./install.md) for how to setup Bazel
|
||||
and OpenCV for MediaPipe on Linux and macOS.
|
||||
|
||||
2. Install the following dependencies.
|
||||
|
||||
Debian or Ubuntu:
|
||||
|
||||
```bash
|
||||
$ sudo apt install python3-dev
|
||||
$ sudo apt install python3-venv
|
||||
$ sudo apt install -y protobuf-compiler
|
||||
|
||||
# If you need to build opencv from source.
|
||||
$ sudo apt install cmake
|
||||
```
|
||||
|
||||
macOS:
|
||||
|
||||
```bash
|
||||
$ brew install protobuf
|
||||
|
||||
# If you need to build opencv from source.
|
||||
$ brew install cmake
|
||||
```
|
||||
|
||||
Windows:
|
||||
|
||||
Download the latest protoc win64 zip from
|
||||
[the Protobuf GitHub repo](https://github.com/protocolbuffers/protobuf/releases),
|
||||
unzip the file, and copy the protoc.exe executable to a preferred location.
|
||||
Please ensure that location is added into the Path environment variable.
|
||||
|
||||
3. Activate a Python virtual environment.
|
||||
|
||||
```bash
|
||||
$ python3 -m venv mp_env && source mp_env/bin/activate
|
||||
```
|
||||
|
||||
4. In the virtual environment, go to the MediaPipe repo directory.
|
||||
|
||||
5. Install the required Python packages.
|
||||
|
||||
```bash
|
||||
(mp_env)mediapipe$ pip3 install -r requirements.txt
|
||||
```
|
||||
|
||||
6. Build and install MediaPipe package.
|
||||
|
||||
```bash
|
||||
(mp_env)mediapipe$ python3 setup.py install --link-opencv
|
||||
```
|
||||
|
||||
or
|
||||
|
||||
```bash
|
||||
(mp_env)mediapipe$ python3 setup.py bdist_wheel
|
||||
```
|
||||
@@ -0,0 +1,269 @@
|
||||
---
|
||||
layout: default
|
||||
title: MediaPipe Python Framework
|
||||
parent: MediaPipe in Python
|
||||
grand_parent: Getting Started
|
||||
nav_order: 1
|
||||
---
|
||||
|
||||
# MediaPipe Python Framework
|
||||
{: .no_toc }
|
||||
|
||||
1. TOC
|
||||
{:toc}
|
||||
---
|
||||
|
||||
The MediaPipe Python framework grants direct access to the core components of
|
||||
the MediaPipe C++ framework such as Timestamp, Packet, and CalculatorGraph,
|
||||
whereas the
|
||||
[ready-to-use Python solutions](./python.md#ready-to-use-python-solutions) hide
|
||||
the technical details of the framework and simply return the readable model
|
||||
inference results back to the callers.
|
||||
|
||||
MediaPipe framework sits on top of
|
||||
[the pybind11 library](https://pybind11.readthedocs.io/en/stable/index.html).
|
||||
The C++ core framework is exposed in Python via a C++/Python language binding.
|
||||
The content below assumes that the reader already has a basic understanding of
|
||||
the MediaPipe C++ framework. Otherwise, you can find useful information in
|
||||
[Framework Concepts](../framework_concepts/framework_concepts.md).
|
||||
|
||||
### Packet
|
||||
|
||||
The packet is the basic data flow unit in MediaPipe. A packet consists of a
|
||||
numeric timestamp and a shared pointer to an immutable payload. In Python, a
|
||||
MediaPipe packet can be created by calling one of the packet creator methods in
|
||||
the
|
||||
[`mp.packet_creator`](https://github.com/google/mediapipe/tree/master/mediapipe/python/pybind/packet_creator.cc)
|
||||
module. Correspondingly, the packet payload can be retrieved by using one of the
|
||||
packet getter methods in the
|
||||
[`mp.packet_getter`](https://github.com/google/mediapipe/tree/master/mediapipe/python/pybind/packet_getter.cc)
|
||||
module. Note that the packet payload becomes **immutable** after packet
|
||||
creation. Thus, the modification of the retrieved packet content doesn't affect
|
||||
the actual payload in the packet. MediaPipe framework Python API supports the
|
||||
most commonly used data types of MediaPipe (e.g., ImageFrame, Matrix, Protocol
|
||||
Buffers, and the primitive data types) in the core binding. The comprehensive
|
||||
table below shows the type mappings between the Python and the C++ data type
|
||||
along with the packet creator and the content getter method for each data type
|
||||
supported by the MediaPipe Python framework API.
|
||||
|
||||
Python Data Type | C++ Data Type | Packet Creator | Content Getter
|
||||
------------------------------------ | ----------------------------- | ------------------------------------------------------------------------------------------------------------------------------------------------------------ | --------------
|
||||
bool | bool | create_bool(True) | get_bool(packet)
|
||||
int or np.intc | int_t | create_int(1) | get_int(packet)
|
||||
int or np.int8 | int8_t | create_int8(2**7-1) | get_int(packet)
|
||||
int or np.int16 | int16_t | create_int16(2**15-1) | get_int(packet)
|
||||
int or np.int32 | int32_t | create_int32(2**31-1) | get_int(packet)
|
||||
int or np.int64 | int64_t | create_int64(2**63-1) | get_int(packet)
|
||||
int or np.uint8 | uint8_t | create_uint8(2**8-1) | get_uint(packet)
|
||||
int or np.uint16 | uint16_t | create_uint16(2**16-1) | get_uint(packet)
|
||||
int or np.uint32 | uint32_t | create_uint32(2**32-1) | get_uint(packet)
|
||||
int or np.uint64 | uint64_t | create_uint64(2**64-1) | get_uint(packet)
|
||||
float or np.float32 | float | create_float(1.1) | get_float(packet)
|
||||
float or np.double | double | create_double(1.1) | get_float(packet)
|
||||
str (UTF-8) | std::string | create_string('abc') | get_str(packet)
|
||||
bytes | std::string | create_string(b'\xd0\xd0\xd0') | get_bytes(packet)
|
||||
mp.Packet | mp::Packet | create_packet(p) | get_packet(packet)
|
||||
List\[bool\] | std::vector\<bool\> | create_bool_vector(\[True, False\]) | get_bool_list(packet)
|
||||
List\[int\] or List\[np.intc\] | int\[\] | create_int_array(\[1, 2, 3\]) | get_int_list(packet, size=10)
|
||||
List\[int\] or List\[np.intc\] | std::vector\<int\> | create_int_vector(\[1, 2, 3\]) | get_int_list(packet)
|
||||
List\[float\] or List\[np.float\] | float\[\] | create_float_arrary(\[0.1, 0.2\]) | get_float_list(packet, size=10)
|
||||
List\[float\] or List\[np.float\] | std::vector\<float\> | create_float_vector(\[0.1, 0.2\]) | get_float_list(packet, size=10)
|
||||
List\[str\] | std::vector\<std::string\> | create_string_vector(\['a'\]) | get_str_list(packet)
|
||||
List\[mp.Packet\] | std::vector\<mp::Packet\> | create_packet_vector(<br> \[packet1, packet2\]) | get_packet_list(p)
|
||||
Mapping\[str, Packet\] | std::map<std::string, Packet> | create_string_to_packet_map(<br> {'a': packet1, 'b': packet2}) | get_str_to_packet_dict(packet)
|
||||
np.ndarray<br>(cv.mat and PIL.Image) | mp::ImageFrame | create_image_frame(<br> format=ImageFormat.SRGB,<br> data=mat) | get_image_frame(packet)
|
||||
np.ndarray | mp::Matrix | create_matrix(data) | get_matrix(packet)
|
||||
Google Proto Message | Google Proto Message | create_proto(proto) | get_proto(packet)
|
||||
List\[Proto\] | std::vector\<Proto\> | n/a | get_proto_list(packet)
|
||||
|
||||
It's not uncommon that users create custom C++ classes and and send those into
|
||||
the graphs and calculators. To allow the custom classes to be used in Python
|
||||
with MediaPipe, you may extend the Packet API for a new data type in the
|
||||
following steps:
|
||||
|
||||
1. Write the pybind11
|
||||
[class binding code](https://pybind11.readthedocs.io/en/stable/advanced/classes.html)
|
||||
or
|
||||
[a custom type caster](https://pybind11.readthedocs.io/en/stable/advanced/cast/custom.html?highlight=custom%20type%20caster)
|
||||
for the custom type in a cc file.
|
||||
|
||||
```c++
|
||||
#include "path/to/my_type/header/file.h"
|
||||
#include "pybind11/pybind11.h"
|
||||
|
||||
namespace py = pybind11;
|
||||
|
||||
PYBIND11_MODULE(my_type_binding, m) {
|
||||
// Write binding code or a custom type caster for MyType.
|
||||
py::class_<MyType>(m, "MyType")
|
||||
.def(py::init<>())
|
||||
.def(...);
|
||||
}
|
||||
```
|
||||
|
||||
2. Create a new packet creator and getter method of the custom type in a
|
||||
separate cc file.
|
||||
|
||||
```c++
|
||||
#include "path/to/my_type/header/file.h"
|
||||
#include "mediapipe/framework/packet.h"
|
||||
#include "pybind11/pybind11.h"
|
||||
|
||||
namespace mediapipe {
|
||||
namespace py = pybind11;
|
||||
|
||||
PYBIND11_MODULE(my_packet_methods, m) {
|
||||
m.def(
|
||||
"create_my_type",
|
||||
[](const MyType& my_type) { return MakePacket<MyType>(my_type); });
|
||||
|
||||
m.def(
|
||||
"get_my_type",
|
||||
[](const Packet& packet) {
|
||||
if(!packet.ValidateAsType<MyType>().ok()) {
|
||||
PyErr_SetString(PyExc_ValueError, "Packet data type mismatch.");
|
||||
return py::error_already_set();
|
||||
}
|
||||
return packet.Get<MyType>();
|
||||
});
|
||||
}
|
||||
} // namespace mediapipe
|
||||
```
|
||||
|
||||
3. Add two bazel build rules for the custom type binding and the new packet
|
||||
methods in the BUILD file.
|
||||
|
||||
```
|
||||
load("@pybind11_bazel//:build_defs.bzl", "pybind_extension")
|
||||
|
||||
pybind_extension(
|
||||
name = "my_type_binding",
|
||||
srcs = ["my_type_binding.cc"],
|
||||
deps = [":my_type"],
|
||||
)
|
||||
|
||||
pybind_extension(
|
||||
name = "my_packet_methods",
|
||||
srcs = ["my_packet_methods.cc"],
|
||||
deps = [
|
||||
":my_type",
|
||||
"//mediapipe/framework:packet"
|
||||
],
|
||||
)
|
||||
```
|
||||
|
||||
4. Build the pybind extension targets (with the suffix .so) by Bazel and move the generated dynamic libraries into one of the $LD_LIBRARY_PATH dirs.
|
||||
|
||||
5. Use the binding modules in Python.
|
||||
|
||||
```python
|
||||
import my_type_binding
|
||||
import my_packet_methods
|
||||
|
||||
packet = my_packet_methods.create_my_type(my_type_binding.MyType())
|
||||
my_type = my_packet_methods.get_my_type(packet)
|
||||
```
|
||||
|
||||
### Timestamp
|
||||
|
||||
Each packet contains a timestamp that is in units of microseconds. In Python,
|
||||
the Packet API provides a convenience method `packet.at()` to define the numeric
|
||||
timestamp of a packet. More generally, `packet.timestamp` is the packet class
|
||||
property for accessing the underlying timestamp. To convert an Unix epoch to a
|
||||
MediaPipe timestamp,
|
||||
[the Timestamp API](https://github.com/google/mediapipe/tree/master/mediapipe/python/pybind/timestamp.cc)
|
||||
offers a method `mp.Timestamp.from_seconds()` for this purpose.
|
||||
|
||||
### ImageFrame
|
||||
|
||||
ImageFrame is the container for storing an image or a video frame. Formats
|
||||
supported by ImageFrame are listed in
|
||||
[the ImageFormat enum](https://github.com/google/mediapipe/tree/master/mediapipe/python/pybind/image_frame.cc#l=170).
|
||||
Pixels are encoded row-major with interleaved color components, and ImageFrame
|
||||
supports uint8, uint16, and float as its data types. MediaPipe provides
|
||||
[an ImageFrame Python API](https://github.com/google/mediapipe/tree/master/mediapipe/python/pybind/image_frame.cc)
|
||||
to access the ImageFrame C++ class. In Python, the easiest way to retrieve the
|
||||
pixel data is to call `image_frame.numpy_view()` to get a numpy ndarray. Note
|
||||
that the returned numpy ndarray, a reference to the internal pixel data, is
|
||||
unwritable. If the callers need to modify the numpy ndarray, it's required to
|
||||
explicitly call a copy operation to obtain a copy. When MediaPipe takes a numpy
|
||||
ndarray to make an ImageFrame, it assumes that the data is stored contiguously.
|
||||
Correspondingly, the pixel data of an ImageFrame will be realigned to be
|
||||
contiguous when it's returned to the Python side.
|
||||
|
||||
### Graph
|
||||
|
||||
In MediaPipe, all processing takes places within the context of a
|
||||
CalculatorGraph.
|
||||
[The CalculatorGraph Python API](https://github.com/google/mediapipe/tree/master/mediapipe/python/pybind/calculator_graph.cc)
|
||||
is a direct binding to the C++ CalculatorGraph class. The major difference is
|
||||
the CalculatorGraph Python API raises a Python error instead of returning a
|
||||
non-OK Status when an error occurs. Therefore, as a Python user, you can handle
|
||||
the exceptions as you normally do. The life cycle of a CalculatorGraph contains
|
||||
three stages: initialization and setup, graph run, and graph shutdown.
|
||||
|
||||
1. Initialize a CalculatorGraph with a CalculatorGraphConfig protobuf or binary
|
||||
protobuf file, and provide callback method(s) to observe the output
|
||||
stream(s).
|
||||
|
||||
Option 1. Initialize a CalculatorGraph with a CalculatorGraphConfig protobuf
|
||||
or its text representation, and observe the output stream(s):
|
||||
|
||||
```python
|
||||
import mediapipe as mp
|
||||
|
||||
config_text = """
|
||||
input_stream: 'in_stream'
|
||||
output_stream: 'out_stream'
|
||||
node {
|
||||
calculator: 'PassThroughCalculator'
|
||||
input_stream: 'in_stream'
|
||||
output_stream: 'out_stream'
|
||||
}
|
||||
"""
|
||||
graph = mp.CalculatorGraph(graph_config=config_text)
|
||||
output_packets = []
|
||||
graph.observe_output_stream(
|
||||
'out_stream',
|
||||
lambda stream_name, packet:
|
||||
output_packets.append(mp.packet_getter.get_str(packet)))
|
||||
```
|
||||
|
||||
Option 2. Initialize a CalculatorGraph with with a binary protobuf file, and
|
||||
observe the output stream(s).
|
||||
|
||||
```python
|
||||
import mediapipe as mp
|
||||
# resources dependency
|
||||
|
||||
graph = mp.CalculatorGraph(
|
||||
binary_graph=os.path.join(
|
||||
resources.GetRunfilesDir(), 'path/to/your/graph.binarypb'))
|
||||
graph.observe_output_stream(
|
||||
'out_stream',
|
||||
lambda stream_name, packet: print(f'Get {packet} from {stream_name}'))
|
||||
```
|
||||
|
||||
2. Start the graph run and feed packets into the graph.
|
||||
|
||||
```python
|
||||
graph.start_run()
|
||||
|
||||
graph.add_packet_to_input_stream(
|
||||
'in_stream', mp.packet_creator.create_string('abc').at(0))
|
||||
|
||||
rgb_img = cv2.cvtColor(cv2.imread('/path/to/your/image.png'), cv2.COLOR_BGR2RGB)
|
||||
graph.add_packet_to_input_stream(
|
||||
'in_stream',
|
||||
mp.packet_creator.create_image_frame(image_format=mp.ImageFormat.SRGB,
|
||||
data=rgb_img).at(1))
|
||||
```
|
||||
|
||||
3. Close the graph after finish. You may restart the graph for another graph
|
||||
run after the call to `close()`.
|
||||
|
||||
```python
|
||||
graph.close()
|
||||
```
|
||||
|
||||
The Python script can be run by your local Python runtime.
|
||||
@@ -12,6 +12,134 @@ nav_order: 10
|
||||
{:toc}
|
||||
---
|
||||
|
||||
## Missing Python binary path
|
||||
|
||||
The error message:
|
||||
|
||||
```
|
||||
ERROR: An error occurred during the fetch of repository 'local_execution_config_python':
|
||||
Traceback (most recent call last):
|
||||
File "/sandbox_path/external/org_tensorflow/third_party/py/python_configure.bzl", line 208
|
||||
get_python_bin(repository_ctx)
|
||||
...
|
||||
Repository command failed
|
||||
```
|
||||
|
||||
usually indicates that Bazel fails to find the local Python binary. To solve
|
||||
this issue, please first find where the python binary is and then add
|
||||
`--action_env PYTHON_BIN_PATH=<path to python binary>` to the Bazel command. For
|
||||
example, you can switch to use the system default python3 binary by the
|
||||
following command:
|
||||
|
||||
```
|
||||
bazel build -c opt \
|
||||
--define MEDIAPIPE_DISABLE_GPU=1 \
|
||||
--action_env PYTHON_BIN_PATH=$(which python3) \
|
||||
mediapipe/examples/desktop/hello_world
|
||||
```
|
||||
|
||||
## Missing necessary Python packages
|
||||
|
||||
The error message:
|
||||
|
||||
```
|
||||
ImportError: No module named numpy
|
||||
Is numpy installed?
|
||||
```
|
||||
|
||||
usually indicates that certain Python packages are not installed. Please run
|
||||
`pip install` or `pip3 install` depending on your Python binary version to
|
||||
install those packages.
|
||||
|
||||
## Fail to fetch remote dependency repositories
|
||||
|
||||
The error message:
|
||||
|
||||
```
|
||||
ERROR: An error occurred during the fetch of repository 'org_tensorflow':
|
||||
java.io.IOException: Error downloading [https://mirror.bazel.build/github.com/tensorflow/tensorflow/archive/77e9ffb9b2bfb1a4f7056e62d84039626923e328.tar.gz, https://github.com/tensorflow/tensorflow/archive/77e9ffb9b2bfb1a4f7056e62d84039626923e328.tar.gz] to /sandbox_path/external/org_tensorflow/77e9ffb9b2bfb1a4f7056e62d84039626923e328.tar.gz: Tried to reconnect at offset 9,944,151 but server didn't support it
|
||||
|
||||
or
|
||||
|
||||
WARNING: Download from https://storage.googleapis.com/mirror.tensorflow.org/github.com/bazelbuild/rules_swift/releases/download/0.12.1/rules_swift.0.12.1.tar.gz failed: class java.net.ConnectException Connection timed out (Connection timed out)
|
||||
```
|
||||
|
||||
usually indicates that Bazel fails to download necessary dependency repositories
|
||||
that MediaPipe needs. MedaiPipe has several dependency repositories that are
|
||||
hosted by Google sites. In some regions, you may need to set up a network proxy
|
||||
or use a VPN to access those resources. You may also need to append
|
||||
`--host_jvm_args "-DsocksProxyHost=<ip address> -DsocksProxyPort=<port number>"`
|
||||
to the Bazel command. See
|
||||
[this GitHub issue](https://github.com/google/mediapipe/issues/581#issuecomment-610356857)
|
||||
for more details.
|
||||
|
||||
If you believe that it's not a network issue, another possibility is that some
|
||||
resources could be temporarily unavailable, please run `bazel clean --expunge`
|
||||
and retry it later. If it's still not working, please file a GitHub issue with
|
||||
the detailed error message.
|
||||
|
||||
## Incorrect MediaPipe OpenCV config
|
||||
|
||||
The error message:
|
||||
|
||||
```
|
||||
error: undefined reference to 'cv::String::deallocate()'
|
||||
error: undefined reference to 'cv::String::allocate(unsigned long)'
|
||||
error: undefined reference to 'cv::VideoCapture::VideoCapture(cv::String const&)'
|
||||
...
|
||||
error: undefined reference to 'cv::putText(cv::InputOutputArray const&, cv::String const&, cv::Point, int, double, cv::Scalar, int, int, bool)'
|
||||
```
|
||||
|
||||
usually indicates that OpenCV is not properly configured for MediaPipe. Please
|
||||
take a look at the "Install OpenCV and FFmpeg" sections in
|
||||
[Installation](./install.md) to see how to modify MediaPipe's WORKSPACE and
|
||||
linux_opencv/macos_opencv/windows_opencv.BUILD files for your local opencv
|
||||
libraries. [This GitHub issue](https://github.com/google/mediapipe/issues/666)
|
||||
may also help.
|
||||
|
||||
## Python pip install failure
|
||||
|
||||
The error message:
|
||||
|
||||
```
|
||||
ERROR: Could not find a version that satisfies the requirement mediapipe
|
||||
ERROR: No matching distribution found for mediapipe
|
||||
```
|
||||
|
||||
after running `pip install mediapipe` usually indicates that there is no qualified MediaPipe Python for your system.
|
||||
Please note that MediaPipe Python PyPI officially supports the **64-bit**
|
||||
version of Python 3.7 to 3.10 on the following OS:
|
||||
|
||||
- x86_64 Linux
|
||||
- x86_64 macOS 10.15+
|
||||
- amd64 Windows
|
||||
|
||||
If the OS is currently supported and you still see this error, please make sure
|
||||
that both the Python and pip binary are for Python 3.7 to 3.10. Otherwise,
|
||||
please consider building the MediaPipe Python package locally by following the
|
||||
instructions [here](python.md#building-mediapipe-python-package).
|
||||
|
||||
## Python DLL load failure on Windows
|
||||
|
||||
The error message:
|
||||
|
||||
```
|
||||
ImportError: DLL load failed: The specified module could not be found
|
||||
```
|
||||
|
||||
usually indicates that the local Windows system is missing Visual C++
|
||||
redistributable packages and/or Visual C++ runtime DLLs. This can be solved by
|
||||
either installing the official
|
||||
[vc_redist.x64.exe](https://support.microsoft.com/en-us/topic/the-latest-supported-visual-c-downloads-2647da03-1eea-4433-9aff-95f26a218cc0)
|
||||
or installing the "msvc-runtime" Python package by running
|
||||
|
||||
```bash
|
||||
$ python -m pip install msvc-runtime
|
||||
```
|
||||
|
||||
Please note that the "msvc-runtime" Python package is not released or maintained
|
||||
by Microsoft.
|
||||
|
||||
## Native method not found
|
||||
|
||||
The error message:
|
||||
|
||||

|
Before Width: | Height: | Size: 18 KiB |

|
Before Width: | Height: | Size: 15 KiB |

|
Before Width: | Height: | Size: 51 KiB |

|
Before Width: | Height: | Size: 885 KiB |

|
Before Width: | Height: | Size: 66 KiB |

|
Before Width: | Height: | Size: 8.2 MiB |

|
Before Width: | Height: | Size: 170 KiB |

|
Before Width: | Height: | Size: 5.5 MiB |

|
Before Width: | Height: | Size: 39 KiB |

|
Before Width: | Height: | Size: 361 KiB |

|
Before Width: | Height: | Size: 15 KiB |

|
Before Width: | Height: | Size: 5.8 KiB |

|
Before Width: | Height: | Size: 11 KiB |

|
Before Width: | Height: | Size: 27 KiB |

|
Before Width: | Height: | Size: 195 KiB |

|
Before Width: | Height: | Size: 35 KiB |

|
Before Width: | Height: | Size: 118 KiB |

|
Before Width: | Height: | Size: 7.1 MiB |
|
Before Width: | Height: | Size: 1.1 KiB |
|
Before Width: | Height: | Size: 923 B |

|
Before Width: | Height: | Size: 46 KiB |

|
Before Width: | Height: | Size: 217 KiB |

|
Before Width: | Height: | Size: 163 KiB |

|
Before Width: | Height: | Size: 9.6 KiB |

|
Before Width: | Height: | Size: 4.6 KiB |

|
Before Width: | Height: | Size: 1.3 MiB |

|
Before Width: | Height: | Size: 1.8 KiB |

|
Before Width: | Height: | Size: 26 KiB |

|
Before Width: | Height: | Size: 31 KiB |

|
Before Width: | Height: | Size: 20 KiB |

|
Before Width: | Height: | Size: 4.6 KiB |

|
Before Width: | Height: | Size: 302 KiB |

|
Before Width: | Height: | Size: 9.4 KiB |

|
Before Width: | Height: | Size: 35 KiB |

|
Before Width: | Height: | Size: 75 KiB |

|
Before Width: | Height: | Size: 29 KiB |

|
Before Width: | Height: | Size: 18 KiB |

|
Before Width: | Height: | Size: 37 KiB |

|
Before Width: | Height: | Size: 666 KiB |

|
Before Width: | Height: | Size: 529 KiB |

|
Before Width: | Height: | Size: 12 KiB |

|
Before Width: | Height: | Size: 2.3 MiB |

|
Before Width: | Height: | Size: 808 KiB |

|
Before Width: | Height: | Size: 121 KiB |

|
Before Width: | Height: | Size: 72 KiB |

|
Before Width: | Height: | Size: 121 KiB |

|
Before Width: | Height: | Size: 3.3 MiB |

|
Before Width: | Height: | Size: 1.0 MiB |

|
Before Width: | Height: | Size: 32 KiB |

|
Before Width: | Height: | Size: 59 KiB |

|
Before Width: | Height: | Size: 1.3 MiB |

|
Before Width: | Height: | Size: 460 KiB |

|
Before Width: | Height: | Size: 64 KiB |

|
Before Width: | Height: | Size: 299 KiB |