Compare commits

@@ -1,28 +1,48 @@
|
||||
# The bazelrc file for MediaPipe OSS.
|
||||
|
||||
# Tensorflow needs remote repo
|
||||
common --experimental_repo_remote_exec
|
||||
|
||||
# Basic build settings
|
||||
build --jobs 128
|
||||
build --define='absl=1'
|
||||
build --cxxopt='-std=c++14'
|
||||
build --copt='-Wno-sign-compare'
|
||||
build --copt='-Wno-unused-function'
|
||||
build --copt='-Wno-uninitialized'
|
||||
build --copt='-Wno-unused-result'
|
||||
build --copt='-Wno-comment'
|
||||
build --copt='-Wno-return-type'
|
||||
build --copt='-Wno-unused-local-typedefs'
|
||||
build --copt='-Wno-ignored-attributes'
|
||||
# Temporarily set the incompatibility flag for Bazel 0.27.0 and above
|
||||
build --incompatible_disable_deprecated_attr_params=false
|
||||
build --incompatible_depset_is_not_iterable=false
|
||||
build --define='absl=1' # for gtest
|
||||
build --enable_platform_specific_config
|
||||
|
||||
# Enable stack traces
|
||||
test --test_env="GTEST_INSTALL_FAILURE_SIGNAL_HANDLER=1"
|
||||
|
||||
# Linux
|
||||
build:linux --cxxopt=-std=c++17
|
||||
build:linux --host_cxxopt=-std=c++17
|
||||
build:linux --copt=-w
|
||||
|
||||
# windows
|
||||
build:windows --cxxopt=/std:c++17
|
||||
build:windows --host_cxxopt=/std:c++17
|
||||
build:windows --copt=/w
|
||||
# For using M_* math constants on Windows with MSVC.
|
||||
build:windows --copt=/D_USE_MATH_DEFINES
|
||||
build:windows --host_copt=/D_USE_MATH_DEFINES
|
||||
|
||||
# macOS
|
||||
build:macos --cxxopt=-std=c++17
|
||||
build:macos --host_cxxopt=-std=c++17
|
||||
build:macos --copt=-w
|
||||
|
||||
# Sets the default Apple platform to macOS.
|
||||
build --apple_platform_type=macos
|
||||
|
||||
# Compile ObjC++ files with C++17
|
||||
build --per_file_copt=.*\.mm\$@-std=c++17
|
||||
|
||||
# Allow debugging with XCODE
|
||||
build --apple_generate_dsym
|
||||
|
||||
# Android configs.
|
||||
# Note: the documentation tells us to use @androidndk//:default_crosstool, but
|
||||
# the automatic configuration transition uses //external:android/crosstool.
|
||||
# Using it here works and spares us from having two different config_settings
|
||||
# for Android.
|
||||
build:android --crosstool_top=//external:android/crosstool
|
||||
build:android --host_crosstool_top=@bazel_tools//tools/cpp:toolchain
|
||||
build:android --linkopt=-landroid
|
||||
@@ -41,6 +61,7 @@ build:android_arm64 --fat_apk_cpu=arm64-v8a
|
||||
|
||||
# iOS configs.
|
||||
build:ios --apple_platform_type=ios
|
||||
build:ios --copt=-fno-aligned-allocation
|
||||
|
||||
build:ios_i386 --config=ios
|
||||
build:ios_i386 --cpu=ios_i386
|
||||
@@ -65,3 +86,17 @@ build:ios_arm64e --watchos_cpus=armv7k
|
||||
build:ios_fat --config=ios
|
||||
build:ios_fat --ios_multi_cpus=armv7,arm64
|
||||
build:ios_fat --watchos_cpus=armv7k
|
||||
|
||||
build:darwin_x86_64 --apple_platform_type=macos
|
||||
build:darwin_x86_64 --macos_minimum_os=10.12
|
||||
build:darwin_x86_64 --cpu=darwin_x86_64
|
||||
|
||||
build:darwin_arm64 --apple_platform_type=macos
|
||||
build:darwin_arm64 --macos_minimum_os=10.16
|
||||
build:darwin_arm64 --cpu=darwin_arm64
|
||||
|
||||
# This bazelrc file is meant to be written by a setup script.
|
||||
try-import %workspace%/.configure.bazelrc
|
||||
|
||||
# This bazelrc file can be used for user-specific custom build settings.
|
||||
try-import %workspace%/.user.bazelrc
|
||||
|
||||
@@ -0,0 +1 @@
|
||||
5.2.0
|
||||
@@ -0,0 +1,27 @@
|
||||
---
|
||||
name: "Build/Installation Issue"
|
||||
about: Use this template for build/installation issues
|
||||
labels: type:build/install
|
||||
|
||||
---
|
||||
<em>Please make sure that this is a build/installation issue and also refer to the [troubleshooting](https://google.github.io/mediapipe/getting_started/troubleshooting.html) documentation before raising any issues.</em>
|
||||
|
||||
**System information** (Please provide as much relevant information as possible)
|
||||
- OS Platform and Distribution (e.g. Linux Ubuntu 16.04, Android 11, iOS 14.4):
|
||||
- Compiler version (e.g. gcc/g++ 8 /Apple clang version 12.0.0):
|
||||
- Programming Language and version ( e.g. C++ 14, Python 3.6, Java ):
|
||||
- Installed using virtualenv? pip? Conda? (if python):
|
||||
- [MediaPipe version](https://github.com/google/mediapipe/releases):
|
||||
- Bazel version:
|
||||
- XCode and Tulsi versions (if iOS):
|
||||
- Android SDK and NDK versions (if android):
|
||||
- Android [AAR](https://google.github.io/mediapipe/getting_started/android_archive_library.html) ( if android):
|
||||
- OpenCV version (if running on desktop):
|
||||
|
||||
**Describe the problem**:
|
||||
|
||||
|
||||
**[Provide the exact sequence of commands / steps that you executed before running into the problem](https://google.github.io/mediapipe/getting_started/getting_started.html):**
|
||||
|
||||
**Complete Logs:**
|
||||
Include Complete Log information or source code that would be helpful to diagnose the problem. If including tracebacks, please include the full traceback. Large logs and files should be attached:
|
||||
@@ -0,0 +1,26 @@
|
||||
---
|
||||
name: "Solution Issue"
|
||||
about: Use this template for assistance with a specific mediapipe solution, such as "Pose" or "Iris", including inference model usage/training, solution-specific calculators, etc.
|
||||
labels: type:support
|
||||
|
||||
---
|
||||
<em>Please make sure that this is a [solution](https://google.github.io/mediapipe/solutions/solutions.html) issue.<em>
|
||||
|
||||
**System information** (Please provide as much relevant information as possible)
|
||||
- Have I written custom code (as opposed to using a stock example script provided in Mediapipe):
|
||||
- OS Platform and Distribution (e.g., Linux Ubuntu 16.04, Android 11, iOS 14.4):
|
||||
- [MediaPipe version](https://github.com/google/mediapipe/releases):
|
||||
- Bazel version:
|
||||
- Solution (e.g. FaceMesh, Pose, Holistic):
|
||||
- Programming Language and version ( e.g. C++, Python, Java):
|
||||
|
||||
**Describe the expected behavior:**
|
||||
|
||||
**Standalone code you may have used to try to get what you need :**
|
||||
|
||||
If there is a problem, provide a reproducible test case that is the bare minimum necessary to generate the problem. If possible, please share a link to Colab/repo link /any notebook:
|
||||
|
||||
**Other info / Complete Logs :**
|
||||
Include any logs or source code that would be helpful to
|
||||
diagnose the problem. If including tracebacks, please include the full
|
||||
traceback. Large logs and files should be attached:
|
||||
@@ -0,0 +1,51 @@
|
||||
---
|
||||
name: "Documentation Issue"
|
||||
about: Use this template for documentation related issues
|
||||
labels: type:docs
|
||||
|
||||
---
|
||||
Thank you for submitting a MediaPipe documentation issue.
|
||||
The MediaPipe docs are open source! To get involved, read the documentation Contributor Guide
|
||||
## URL(s) with the issue:
|
||||
|
||||
Please provide a link to the documentation entry, for example: https://github.com/google/mediapipe/blob/master/docs/solutions/face_mesh.md#models
|
||||
|
||||
## Description of issue (what needs changing):
|
||||
|
||||
Kinds of documentation problems:
|
||||
|
||||
### Clear description
|
||||
|
||||
For example, why should someone use this method? How is it useful?
|
||||
|
||||
### Correct links
|
||||
|
||||
Is the link to the source code correct?
|
||||
|
||||
### Parameters defined
|
||||
Are all parameters defined and formatted correctly?
|
||||
|
||||
### Returns defined
|
||||
|
||||
Are return values defined?
|
||||
|
||||
### Raises listed and defined
|
||||
|
||||
Are the errors defined? For example,
|
||||
|
||||
### Usage example
|
||||
|
||||
Is there a usage example?
|
||||
|
||||
See the API guide:
|
||||
on how to write testable usage examples.
|
||||
|
||||
### Request visuals, if applicable
|
||||
|
||||
Are there currently visuals? If not, will it clarify the content?
|
||||
|
||||
### Submit a pull request?
|
||||
|
||||
Are you planning to also submit a pull request to fix the issue? See the docs
|
||||
https://github.com/google/mediapipe/blob/master/CONTRIBUTING.md
|
||||
|
||||
@@ -0,0 +1,32 @@
|
||||
---
|
||||
name: "Bug Issue"
|
||||
about: Use this template for reporting a bug
|
||||
labels: type:bug
|
||||
|
||||
---
|
||||
<em>Please make sure that this is a bug and also refer to the [troubleshooting](https://google.github.io/mediapipe/getting_started/troubleshooting.html), FAQ documentation before raising any issues.</em>
|
||||
|
||||
**System information** (Please provide as much relevant information as possible)
|
||||
|
||||
- Have I written custom code (as opposed to using a stock example script provided in MediaPipe):
|
||||
- OS Platform and Distribution (e.g., Linux Ubuntu 16.04, Android 11, iOS 14.4):
|
||||
- Mobile device (e.g. iPhone 8, Pixel 2, Samsung Galaxy) if the issue happens on mobile device:
|
||||
- Browser and version (e.g. Google Chrome, Safari) if the issue happens on browser:
|
||||
- Programming Language and version ( e.g. C++, Python, Java):
|
||||
- [MediaPipe version](https://github.com/google/mediapipe/releases):
|
||||
- Bazel version (if compiling from source):
|
||||
- Solution ( e.g. FaceMesh, Pose, Holistic ):
|
||||
- Android Studio, NDK, SDK versions (if issue is related to building in Android environment):
|
||||
- Xcode & Tulsi version (if issue is related to building for iOS):
|
||||
|
||||
**Describe the current behavior:**
|
||||
|
||||
**Describe the expected behavior:**
|
||||
|
||||
**Standalone code to reproduce the issue:**
|
||||
Provide a reproducible test case that is the bare minimum necessary to replicate the problem. If possible, please share a link to Colab/repo link /any notebook:
|
||||
|
||||
**Other info / Complete Logs :**
|
||||
Include any logs or source code that would be helpful to
|
||||
diagnose the problem. If including tracebacks, please include the full
|
||||
traceback. Large logs and files should be attached
|
||||
@@ -0,0 +1,24 @@
|
||||
---
|
||||
name: "Feature Request"
|
||||
about: Use this template for raising a feature request
|
||||
labels: type:feature
|
||||
|
||||
---
|
||||
<em>Please make sure that this is a feature request.</em>
|
||||
|
||||
**System information** (Please provide as much relevant information as possible)
|
||||
|
||||
- MediaPipe Solution (you are using):
|
||||
- Programming language : C++/typescript/Python/Objective C/Android Java
|
||||
- Are you willing to contribute it (Yes/No):
|
||||
|
||||
|
||||
**Describe the feature and the current behavior/state:**
|
||||
|
||||
**Will this change the current api? How?**
|
||||
|
||||
**Who will benefit with this feature?**
|
||||
|
||||
**Please specify the use cases for this feature:**
|
||||
|
||||
**Any Other info:**
|
||||
@@ -0,0 +1,12 @@
|
||||
---
|
||||
name: "Other Issue"
|
||||
about: Use this template for any other non-support related issues.
|
||||
labels: type:others
|
||||
|
||||
---
|
||||
This template is for miscellaneous issues not covered by the other issue categories
|
||||
|
||||
For questions on how to work with MediaPipe, or support for problems that are not verified bugs in MediaPipe, please go to [StackOverflow](https://stackoverflow.com/questions/tagged/mediapipe) and [Slack](https://mediapipe.page.link/joinslack) communities.
|
||||
|
||||
If you are reporting a vulnerability, please use the [dedicated reporting process](https://github.com/google/mediapipe/security).
|
||||
|
||||
@@ -0,0 +1,18 @@
|
||||
# Copyright 2021 The MediaPipe Authors.
|
||||
#
|
||||
# Licensed under the Apache License, Version 2.0 (the "License");
|
||||
# you may not use this file except in compliance with the License.
|
||||
# You may obtain a copy of the License at
|
||||
#
|
||||
# http://www.apache.org/licenses/LICENSE-2.0
|
||||
#
|
||||
# Unless required by applicable law or agreed to in writing, software
|
||||
# distributed under the License is distributed on an "AS IS" BASIS,
|
||||
# WITHOUT WARRANTIES OR CONDITIONS OF ANY KIND, either express or implied.
|
||||
# See the License for the specific language governing permissions and
|
||||
# limitations under the License.
|
||||
# ============================================================================
|
||||
|
||||
# A list of assignees
|
||||
assignees:
|
||||
- sureshdagooglecom
|
||||
@@ -0,0 +1,34 @@
|
||||
# Copyright 2021 The MediaPipe Authors.
|
||||
#
|
||||
# Licensed under the Apache License, Version 2.0 (the "License");
|
||||
# you may not use this file except in compliance with the License.
|
||||
# You may obtain a copy of the License at
|
||||
#
|
||||
# http://www.apache.org/licenses/LICENSE-2.0
|
||||
#
|
||||
# Unless required by applicable law or agreed to in writing, software
|
||||
# distributed under the License is distributed on an "AS IS" BASIS,
|
||||
# WITHOUT WARRANTIES OR CONDITIONS OF ANY KIND, either express or implied.
|
||||
# See the License for the specific language governing permissions and
|
||||
# limitations under the License.
|
||||
# ============================================================================
|
||||
#
|
||||
# This file was assembled from multiple pieces, whose use is documented
|
||||
# throughout. Please refer to the TensorFlow dockerfiles documentation
|
||||
# for more information.
|
||||
|
||||
# Number of days of inactivity before an Issue or Pull Request becomes stale
|
||||
daysUntilStale: 7
|
||||
# Number of days of inactivity before a stale Issue or Pull Request is closed
|
||||
daysUntilClose: 7
|
||||
# Only issues or pull requests with all of these labels are checked if stale. Defaults to `[]` (disabled)
|
||||
onlyLabels:
|
||||
- stat:awaiting response
|
||||
# Comment to post when marking as stale. Set to `false` to disable
|
||||
markComment: >
|
||||
This issue has been automatically marked as stale because it has not had
|
||||
recent activity. It will be closed if no further activity occurs. Thank you.
|
||||
# Comment to post when removing the stale label. Set to `false` to disable
|
||||
unmarkComment: false
|
||||
closeComment: >
|
||||
Closing as stale. Please reopen if you'd like to work on this further.
|
||||
+4
-6
@@ -1,8 +1,6 @@
|
||||
mediapipe/provisioning_profile.mobileprovision
|
||||
bazel-bin
|
||||
bazel-genfiles
|
||||
bazel-mediapipe-ioss
|
||||
bazel-out
|
||||
bazel-testlogs
|
||||
bazel-*
|
||||
mediapipe/MediaPipe.xcodeproj
|
||||
mediapipe/MediaPipe.tulsiproj/*.tulsiconf-user
|
||||
mediapipe/provisioning_profile.mobileprovision
|
||||
.configure.bazelrc
|
||||
.user.bazelrc
|
||||
|
||||
+1
-1
@@ -12,6 +12,6 @@
|
||||
# See the License for the specific language governing permissions and
|
||||
# limitations under the License.
|
||||
|
||||
licenses(["notice"]) # Apache 2.0
|
||||
licenses(["notice"])
|
||||
|
||||
exports_files(["LICENSE"])
|
||||
+8
-99
@@ -1,15 +1,17 @@
|
||||
# Contributing guidelines
|
||||
|
||||
## Pull Request Checklist
|
||||
## What type of pull request do we accept into MediaPipe repository?
|
||||
|
||||
* Bug fixes
|
||||
* Documentation fixes
|
||||
|
||||
For new feature additions (e.g., new graphs and calculators), we are currently not planning to accept new feature pull requests into the MediaPipe repository. Instead, we like to get contributors to create their own repositories of the new feature and list it at [Awesome MediaPipe](https://mediapipe.page.link/awesome-mediapipe). This will allow contributors to more quickly get their code out to the community.
|
||||
|
||||
Before sending your pull requests, make sure you followed this list.
|
||||
|
||||
- Read [contributing guidelines](CONTRIBUTING.md).
|
||||
- Read [Code of Conduct](CODE_OF_CONDUCT.md).
|
||||
- Ensure you have signed the [Contributor License Agreement (CLA)](https://cla.developers.google.com/).
|
||||
- Check if my changes are consistent with the [guidelines](https://github.com/google/mediapipe/blob/master/CONTRIBUTING.md#general-guidelines-and-philosophy-for-contribution).
|
||||
- Changes are consistent with the [Coding Style](https://github.com/google/mediapipe/blob/master/CONTRIBUTING.md#c-coding-style).
|
||||
- Run [Unit Tests](https://github.com/google/mediapipe/blob/master/CONTRIBUTING.md#running-unit-tests).
|
||||
|
||||
## How to become a contributor and submit your own code
|
||||
|
||||
@@ -28,100 +30,7 @@ Follow either of the two links above to access the appropriate CLA and instructi
|
||||
|
||||
### Contributing code
|
||||
|
||||
If you have improvements to MediaPipe, send us your pull requests! For those
|
||||
If you have bug fixes and documentation fixes to MediaPipe, send us your pull requests! For those
|
||||
just getting started, GitHub has a [howto](https://help.github.com/articles/using-pull-requests/).
|
||||
|
||||
MediaPipe team members will be assigned to review your pull requests. Once the
|
||||
pull requests are approved and pass continuous integration checks, a MediaPipe
|
||||
team member will apply `ready to pull` label to your change. This means we are
|
||||
working on getting your pull request submitted to our internal repository. After
|
||||
the change has been submitted internally, your pull request will be merged
|
||||
automatically on GitHub.
|
||||
|
||||
If you want to contribute but you're not sure where to start, take a look at the
|
||||
[issues with the "contributions welcome" label](https://github.com/google/mediapipe/labels/stat%3Acontributions%20welcome).
|
||||
These are issues that we believe are particularly well suited for outside
|
||||
contributions, often because we probably won't get to them right now. If you
|
||||
decide to start on an issue, leave a comment so that other people know that
|
||||
you're working on it. If you want to help out, but not alone, use the issue
|
||||
comment thread to coordinate.
|
||||
|
||||
### Contribution guidelines and standards
|
||||
|
||||
Before sending your pull request for
|
||||
[review](https://github.com/google/mediapipe/pulls),
|
||||
make sure your changes are consistent with the guidelines and follow the
|
||||
MediaPipe coding style.
|
||||
|
||||
#### General guidelines and philosophy for contribution
|
||||
|
||||
* Include unit tests when you contribute new features, as they help to a)
|
||||
prove that your code works correctly, and b) guard against future breaking
|
||||
changes to lower the maintenance cost.
|
||||
* Bug fixes also generally require unit tests, because the presence of bugs
|
||||
usually indicates insufficient test coverage.
|
||||
* Keep API compatibility in mind when you change code in MediaPipe framework
|
||||
e.g., code in
|
||||
[mediapipe/framework](https://github.com/google/mediapipe/tree/master/mediapipe/framework)
|
||||
and
|
||||
[mediapipe/calculators](https://github.com/google/mediapipe/tree/master/mediapipe/calculators).
|
||||
Once MediaPipe has reached version 1 and we will not make
|
||||
non-backward-compatible API changes without a major release. Reviewers of
|
||||
your pull request will comment on any API compatibility issues.
|
||||
* When you contribute a new feature to MediaPipe, the maintenance burden is
|
||||
(by default) transferred to the MediaPipe team. This means that benefit of
|
||||
the contribution must be compared against the cost of maintaining the
|
||||
feature.
|
||||
* Full new features (e.g., a new op implementing a cutting-edge algorithm)
|
||||
typically will live in
|
||||
[mediapipe/addons](https://github.com/google/mediapipe/addons) to get some
|
||||
airtime before decision is made regarding whether they are to be migrated to
|
||||
the core.
|
||||
|
||||
#### License
|
||||
|
||||
Include a license at the top of new files.
|
||||
|
||||
* [C/C++ license example](https://github.com/google/mediapipe/blob/master/mediapipe/framework/calculator_base.cc#L1)
|
||||
* [Java license example](https://github.com/google/mediapipe/blob/master/mediapipe/java/com/google/mediapipe/components/CameraHelper.java)
|
||||
|
||||
Bazel BUILD files also need to include a license section, e.g.,
|
||||
[BUILD example](https://github.com/google/mediapipe/blob/master/mediapipe/framework/BUILD#L61).
|
||||
|
||||
#### C++ coding style
|
||||
|
||||
Changes to MediaPipe C++ code should conform to
|
||||
[Google C++ Style Guide](https://google.github.io/styleguide/cppguide.html).
|
||||
|
||||
Use `clang-tidy` to check your C/C++ changes. To install `clang-tidy` on ubuntu:16.04, do:
|
||||
|
||||
```bash
|
||||
apt-get install -y clang-tidy
|
||||
```
|
||||
|
||||
You can check a C/C++ file by doing:
|
||||
|
||||
|
||||
```bash
|
||||
clang-format <my_cc_file> --style=google > /tmp/my_cc_file.cc
|
||||
diff <my_cc_file> /tmp/my_cc_file.cc
|
||||
```
|
||||
|
||||
#### Coding style for other languages
|
||||
|
||||
* [Google Java Style Guide](https://google.github.io/styleguide/javaguide.html)
|
||||
* [Google JavaScript Style Guide](https://google.github.io/styleguide/jsguide.html)
|
||||
* [Google Shell Style Guide](https://google.github.io/styleguide/shell.xml)
|
||||
* [Google Objective-C Style Guide](https://google.github.io/styleguide/objcguide.html)
|
||||
|
||||
#### Running sanity check
|
||||
|
||||
If you have Docker installed on your system, you can perform a sanity check on
|
||||
your changes by running the command:
|
||||
|
||||
```bash
|
||||
mediapipe/tools/ci_build/ci_build.sh CPU mediapipe/tools/ci_build/ci_sanity.sh
|
||||
```
|
||||
|
||||
This will catch most license, Python coding style and BUILD file issues that
|
||||
may exist in your changes.
|
||||
MediaPipe team members will be assigned to review your pull requests. Once the bug/documentation fixes are verified, a MediaPipe team member will acknowledge your contribution in the pull request comments, manually merge the fixes into our internal codebase upstream, and apply the `to be closed` label to the pull request. These fixes will later be pushed to GitHub in the next release, and a MediaPipe team member will then close the pull request.
|
||||
|
||||
+18
-7
@@ -12,7 +12,7 @@
|
||||
# See the License for the specific language governing permissions and
|
||||
# limitations under the License.
|
||||
|
||||
FROM ubuntu:latest
|
||||
FROM ubuntu:20.04
|
||||
|
||||
MAINTAINER <[email protected]>
|
||||
|
||||
@@ -23,13 +23,15 @@ ENV DEBIAN_FRONTEND=noninteractive
|
||||
|
||||
RUN apt-get update && apt-get install -y --no-install-recommends \
|
||||
build-essential \
|
||||
gcc-8 g++-8 \
|
||||
ca-certificates \
|
||||
curl \
|
||||
ffmpeg \
|
||||
git \
|
||||
wget \
|
||||
unzip \
|
||||
python \
|
||||
python-pip \
|
||||
python3-dev \
|
||||
python3-opencv \
|
||||
python3-pip \
|
||||
libopencv-core-dev \
|
||||
libopencv-highgui-dev \
|
||||
@@ -40,15 +42,24 @@ RUN apt-get update && apt-get install -y --no-install-recommends \
|
||||
software-properties-common && \
|
||||
add-apt-repository -y ppa:openjdk-r/ppa && \
|
||||
apt-get update && apt-get install -y openjdk-8-jdk && \
|
||||
apt-get install -y mesa-common-dev libegl1-mesa-dev libgles2-mesa-dev && \
|
||||
apt-get install -y mesa-utils && \
|
||||
apt-get clean && \
|
||||
rm -rf /var/lib/apt/lists/*
|
||||
|
||||
RUN pip install --upgrade setuptools
|
||||
RUN pip install future
|
||||
RUN pip3 install six
|
||||
RUN update-alternatives --install /usr/bin/gcc gcc /usr/bin/gcc-8 100 --slave /usr/bin/g++ g++ /usr/bin/g++-8
|
||||
RUN pip3 install --upgrade setuptools
|
||||
RUN pip3 install wheel
|
||||
RUN pip3 install future
|
||||
RUN pip3 install absl-py numpy opencv-contrib-python protobuf==3.20.1
|
||||
RUN pip3 install six==1.14.0
|
||||
RUN pip3 install tensorflow==2.2.0
|
||||
RUN pip3 install tf_slim
|
||||
|
||||
RUN ln -s /usr/bin/python3 /usr/bin/python
|
||||
|
||||
# Install bazel
|
||||
ARG BAZEL_VERSION=1.1.0
|
||||
ARG BAZEL_VERSION=5.2.0
|
||||
RUN mkdir /bazel && \
|
||||
wget --no-check-certificate -O /bazel/installer.sh "https://github.com/bazelbuild/bazel/releases/download/${BAZEL_VERSION}/b\
|
||||
azel-${BAZEL_VERSION}-installer-linux-x86_64.sh" && \
|
||||
|
||||
+10
@@ -0,0 +1,10 @@
|
||||
global-exclude .git*
|
||||
global-exclude *_test.py
|
||||
|
||||
include CONTRIBUTING.md
|
||||
include LICENSE
|
||||
include MANIFEST.in
|
||||
include README.md
|
||||
include requirements.txt
|
||||
|
||||
recursive-include mediapipe/modules *.txt
|
||||
@@ -1,74 +1,156 @@
|
||||

|
||||
=======================================================================
|
||||
---
|
||||
layout: default
|
||||
title: Home
|
||||
nav_order: 1
|
||||
---
|
||||
|
||||
[MediaPipe](http://mediapipe.dev) is a framework for building multimodal (eg. video, audio, any time series data), cross platform (i.e Android, iOS, web, edge devices) applied ML pipelines. With MediaPipe, a perception pipeline can be built as a graph of modular components, including, for instance, inference models (e.g., TensorFlow, TFLite) and media processing functions.
|
||||

|
||||
|
||||

|
||||
--------------------------------------------------------------------------------
|
||||
|
||||
> "<em>MediaPipe has made it extremely easy to build our 3D person pose reconstruction demo app, facilitating accelerated neural network inference on device and synchronization of our result visualization with the video capture stream. Highly recommended!</em>" - George Papandreou, CTO, [Ariel AI](https://arielai.com)
|
||||
## Live ML anywhere
|
||||
|
||||
## ML Solutions in MediaPipe
|
||||
[MediaPipe](https://google.github.io/mediapipe/) offers cross-platform, customizable
|
||||
ML solutions for live and streaming media.
|
||||
|
||||
* [Face Detection](mediapipe/docs/face_detection_mobile_gpu.md) [[Web Demo]](https://viz.mediapipe.dev/runner/demos/face_detection/face_detection.html)
|
||||
* [Multi-hand Tracking](mediapipe/docs/multi_hand_tracking_mobile_gpu.md)
|
||||
* [Hand Tracking](mediapipe/docs/hand_tracking_mobile_gpu.md) [[Web Demo]](https://viz.mediapipe.dev/runner/demos/hand_tracking/hand_tracking.html)
|
||||
* [Hair Segmentation](mediapipe/docs/hair_segmentation_mobile_gpu.md) [[Web Demo]](https://viz.mediapipe.dev/runner/demos/hair_segmentation/hair_segmentation.html)
|
||||
* [Object Detection](mediapipe/docs/object_detection_mobile_gpu.md)
|
||||
* [Object Detection and Tracking](mediapipe/docs/object_tracking_mobile_gpu.md)
|
||||
* [Objectron: 3D Object Detection and Tracking](mediapipe/docs/objectron_mobile_gpu.md)
|
||||
* [AutoFlip](mediapipe/docs/autoflip.md)
|
||||
 | 
|
||||
:------------------------------------------------------------------------------------------------------------: | :----------------------------------------------------:
|
||||
***End-to-End acceleration***: *Built-in fast ML inference and processing accelerated even on common hardware* | ***Build once, deploy anywhere***: *Unified solution works across Android, iOS, desktop/cloud, web and IoT*
|
||||
 | 
|
||||
***Ready-to-use solutions***: *Cutting-edge ML solutions demonstrating full power of the framework* | ***Free and open source***: *Framework and solutions both under Apache 2.0, fully extensible and customizable*
|
||||
|
||||

|
||||

|
||||

|
||||

|
||||

|
||||
## ML solutions in MediaPipe
|
||||
|
||||
## Installation
|
||||
Follow these [instructions](mediapipe/docs/install.md).
|
||||
Face Detection | Face Mesh | Iris | Hands | Pose | Holistic
|
||||
:----------------------------------------------------------------------------------------------------------------------------: | :-------------------------------------------------------------------------------------------------------------: | :-------------------------------------------------------------------------------------------------------: | :--------------------------------------------------------------------------------------------------------: | :-------------------------------------------------------------------------------------------------------: | :------:
|
||||
[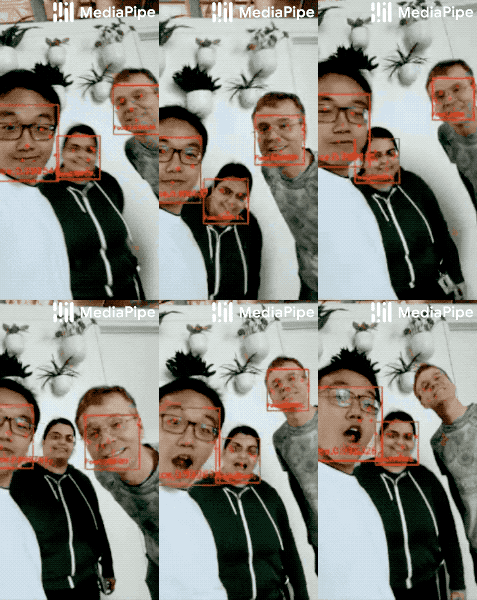](https://google.github.io/mediapipe/solutions/face_detection) | [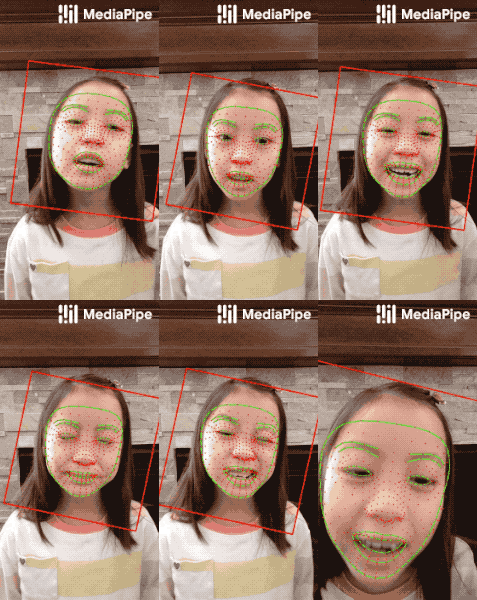](https://google.github.io/mediapipe/solutions/face_mesh) | [](https://google.github.io/mediapipe/solutions/iris) | [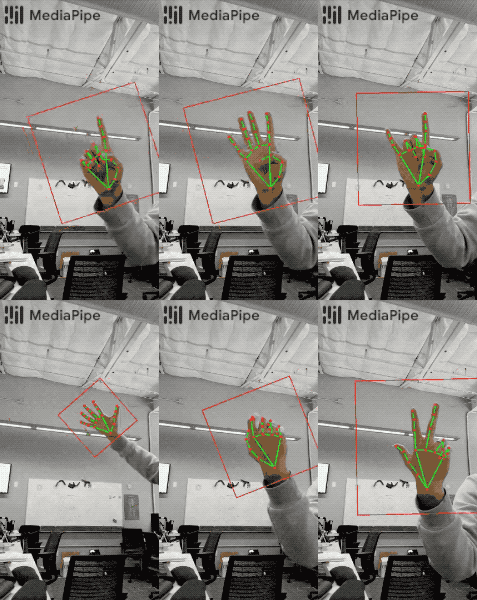](https://google.github.io/mediapipe/solutions/hands) | [](https://google.github.io/mediapipe/solutions/pose) | [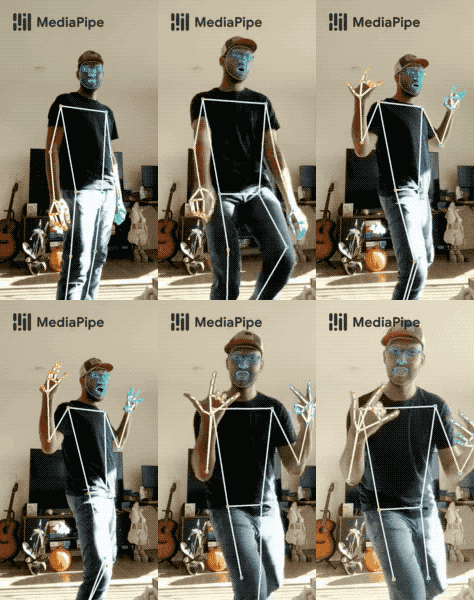](https://google.github.io/mediapipe/solutions/holistic)
|
||||
|
||||
Hair Segmentation | Object Detection | Box Tracking | Instant Motion Tracking | Objectron | KNIFT
|
||||
:-------------------------------------------------------------------------------------------------------------------------------------: | :----------------------------------------------------------------------------------------------------------------------------------: | :-------------------------------------------------------------------------------------------------------------------------: | :---------------------------------------------------------------------------------------------------------------------------------------------------: | :-------------------------------------------------------------------------------------------------------------------: | :---:
|
||||
[](https://google.github.io/mediapipe/solutions/hair_segmentation) | [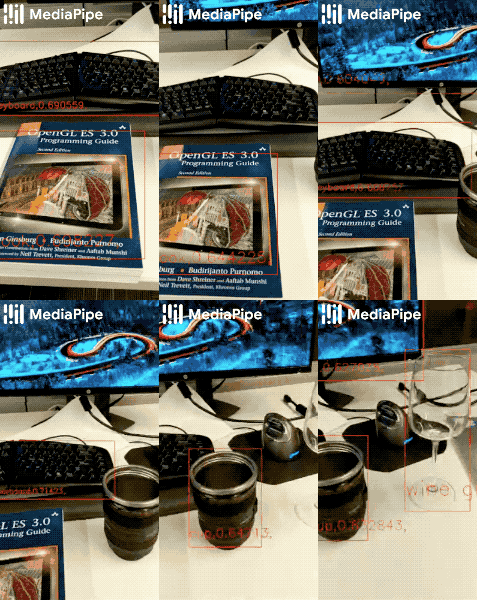](https://google.github.io/mediapipe/solutions/object_detection) | [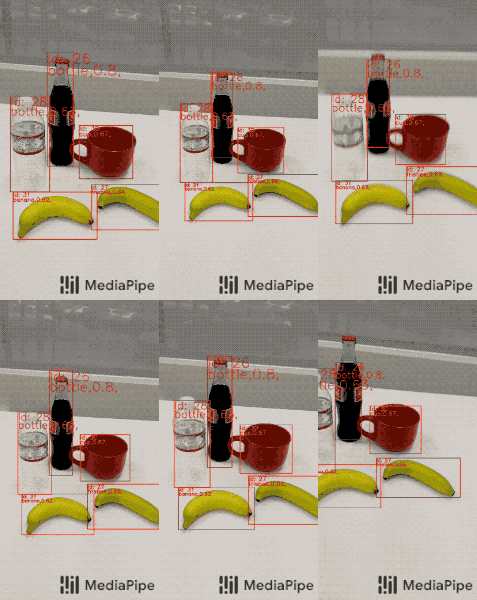](https://google.github.io/mediapipe/solutions/box_tracking) | [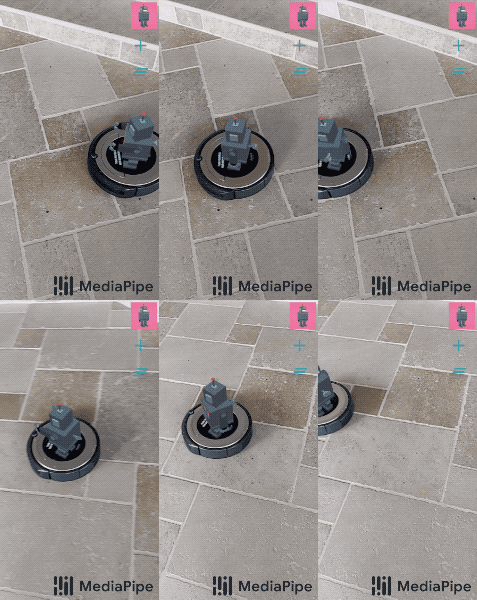](https://google.github.io/mediapipe/solutions/instant_motion_tracking) | [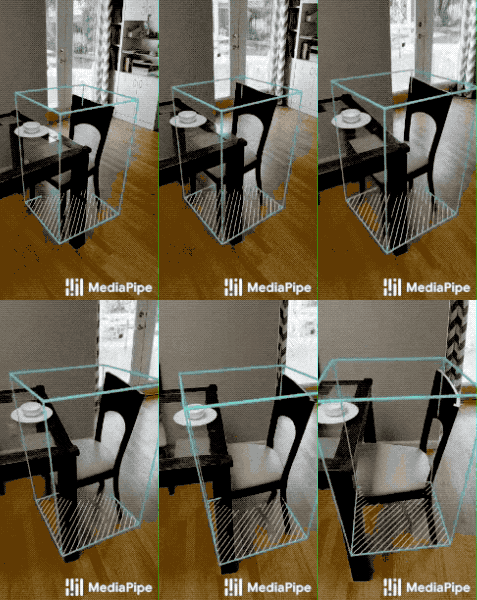](https://google.github.io/mediapipe/solutions/objectron) | [](https://google.github.io/mediapipe/solutions/knift)
|
||||
|
||||
<!-- []() in the first cell is needed to preserve table formatting in GitHub Pages. -->
|
||||
<!-- Whenever this table is updated, paste a copy to solutions/solutions.md. -->
|
||||
|
||||
[]() | [Android](https://google.github.io/mediapipe/getting_started/android) | [iOS](https://google.github.io/mediapipe/getting_started/ios) | [C++](https://google.github.io/mediapipe/getting_started/cpp) | [Python](https://google.github.io/mediapipe/getting_started/python) | [JS](https://google.github.io/mediapipe/getting_started/javascript) | [Coral](https://github.com/google/mediapipe/tree/master/mediapipe/examples/coral/README.md)
|
||||
:---------------------------------------------------------------------------------------- | :-------------------------------------------------------------: | :-----------------------------------------------------: | :-----------------------------------------------------: | :-----------------------------------------------------------: | :-----------------------------------------------------------: | :--------------------------------------------------------------------:
|
||||
[Face Detection](https://google.github.io/mediapipe/solutions/face_detection) | ✅ | ✅ | ✅ | ✅ | ✅ | ✅
|
||||
[Face Mesh](https://google.github.io/mediapipe/solutions/face_mesh) | ✅ | ✅ | ✅ | ✅ | ✅ |
|
||||
[Iris](https://google.github.io/mediapipe/solutions/iris) | ✅ | ✅ | ✅ | | |
|
||||
[Hands](https://google.github.io/mediapipe/solutions/hands) | ✅ | ✅ | ✅ | ✅ | ✅ |
|
||||
[Pose](https://google.github.io/mediapipe/solutions/pose) | ✅ | ✅ | ✅ | ✅ | ✅ |
|
||||
[Holistic](https://google.github.io/mediapipe/solutions/holistic) | ✅ | ✅ | ✅ | ✅ | ✅ |
|
||||
[Selfie Segmentation](https://google.github.io/mediapipe/solutions/selfie_segmentation) | ✅ | ✅ | ✅ | ✅ | ✅ |
|
||||
[Hair Segmentation](https://google.github.io/mediapipe/solutions/hair_segmentation) | ✅ | | ✅ | | |
|
||||
[Object Detection](https://google.github.io/mediapipe/solutions/object_detection) | ✅ | ✅ | ✅ | | | ✅
|
||||
[Box Tracking](https://google.github.io/mediapipe/solutions/box_tracking) | ✅ | ✅ | ✅ | | |
|
||||
[Instant Motion Tracking](https://google.github.io/mediapipe/solutions/instant_motion_tracking) | ✅ | | | | |
|
||||
[Objectron](https://google.github.io/mediapipe/solutions/objectron) | ✅ | | ✅ | ✅ | ✅ |
|
||||
[KNIFT](https://google.github.io/mediapipe/solutions/knift) | ✅ | | | | |
|
||||
[AutoFlip](https://google.github.io/mediapipe/solutions/autoflip) | | | ✅ | | |
|
||||
[MediaSequence](https://google.github.io/mediapipe/solutions/media_sequence) | | | ✅ | | |
|
||||
[YouTube 8M](https://google.github.io/mediapipe/solutions/youtube_8m) | | | ✅ | | |
|
||||
|
||||
See also
|
||||
[MediaPipe Models and Model Cards](https://google.github.io/mediapipe/solutions/models)
|
||||
for ML models released in MediaPipe.
|
||||
|
||||
## Getting started
|
||||
See mobile, desktop and Google Coral [examples](mediapipe/docs/examples.md).
|
||||
|
||||
Check out some web demos [[Edge detection]](https://viz.mediapipe.dev/runner/demos/edge_detection/edge_detection.html) [[Face detection]](https://viz.mediapipe.dev/runner/demos/face_detection/face_detection.html) [[Hand Tracking]](https://viz.mediapipe.dev/runner/demos/hand_tracking/hand_tracking.html)
|
||||
To start using MediaPipe
|
||||
[solutions](https://google.github.io/mediapipe/solutions/solutions) with only a few
|
||||
lines code, see example code and demos in
|
||||
[MediaPipe in Python](https://google.github.io/mediapipe/getting_started/python) and
|
||||
[MediaPipe in JavaScript](https://google.github.io/mediapipe/getting_started/javascript).
|
||||
|
||||
## Documentation
|
||||
[MediaPipe Read-the-Docs](https://mediapipe.readthedocs.io/) or [docs.mediapipe.dev](https://docs.mediapipe.dev)
|
||||
To use MediaPipe in C++, Android and iOS, which allow further customization of
|
||||
the [solutions](https://google.github.io/mediapipe/solutions/solutions) as well as
|
||||
building your own, learn how to
|
||||
[install](https://google.github.io/mediapipe/getting_started/install) MediaPipe and
|
||||
start building example applications in
|
||||
[C++](https://google.github.io/mediapipe/getting_started/cpp),
|
||||
[Android](https://google.github.io/mediapipe/getting_started/android) and
|
||||
[iOS](https://google.github.io/mediapipe/getting_started/ios).
|
||||
|
||||
Check out the [Examples page](https://mediapipe.readthedocs.io/en/latest/examples.html) for tutorials on how to use MediaPipe. [Concepts page](https://mediapipe.readthedocs.io/en/latest/concepts.html) for basic definitions
|
||||
|
||||
## Visualizing MediaPipe graphs
|
||||
A web-based visualizer is hosted on [viz.mediapipe.dev](https://viz.mediapipe.dev/). Please also see instructions [here](mediapipe/docs/visualizer.md).
|
||||
|
||||
## Videos
|
||||
* [YouTube Channel](https://www.youtube.com/channel/UCObqmpuSMx-usADtL_qdMAw)
|
||||
The source code is hosted in the
|
||||
[MediaPipe Github repository](https://github.com/google/mediapipe), and you can
|
||||
run code search using
|
||||
[Google Open Source Code Search](https://cs.opensource.google/mediapipe/mediapipe).
|
||||
|
||||
## Publications
|
||||
* [MediaPipe Objectron: Real-time 3D Object Detection on Mobile Devices](https://mediapipe.page.link/objectron-aiblog)
|
||||
* [AutoFlip: An Open Source Framework for Intelligent Video Reframing](https://mediapipe.page.link/autoflip)
|
||||
* [Google Developer Blog: MediaPipe on the Web](https://mediapipe.page.link/webdevblog)
|
||||
* [Google Developer Blog: Object Detection and Tracking using MediaPipe](https://mediapipe.page.link/objecttrackingblog)
|
||||
* [On-Device, Real-Time Hand Tracking with MediaPipe](https://ai.googleblog.com/2019/08/on-device-real-time-hand-tracking-with.html)
|
||||
* [MediaPipe: A Framework for Building Perception Pipelines](https://arxiv.org/abs/1906.08172)
|
||||
|
||||
* [Bringing artworks to life with AR](https://developers.googleblog.com/2021/07/bringing-artworks-to-life-with-ar.html)
|
||||
in Google Developers Blog
|
||||
* [Prosthesis control via Mirru App using MediaPipe hand tracking](https://developers.googleblog.com/2021/05/control-your-mirru-prosthesis-with-mediapipe-hand-tracking.html)
|
||||
in Google Developers Blog
|
||||
* [SignAll SDK: Sign language interface using MediaPipe is now available for
|
||||
developers](https://developers.googleblog.com/2021/04/signall-sdk-sign-language-interface-using-mediapipe-now-available.html)
|
||||
in Google Developers Blog
|
||||
* [MediaPipe Holistic - Simultaneous Face, Hand and Pose Prediction, on Device](https://ai.googleblog.com/2020/12/mediapipe-holistic-simultaneous-face.html)
|
||||
in Google AI Blog
|
||||
* [Background Features in Google Meet, Powered by Web ML](https://ai.googleblog.com/2020/10/background-features-in-google-meet.html)
|
||||
in Google AI Blog
|
||||
* [MediaPipe 3D Face Transform](https://developers.googleblog.com/2020/09/mediapipe-3d-face-transform.html)
|
||||
in Google Developers Blog
|
||||
* [Instant Motion Tracking With MediaPipe](https://developers.googleblog.com/2020/08/instant-motion-tracking-with-mediapipe.html)
|
||||
in Google Developers Blog
|
||||
* [BlazePose - On-device Real-time Body Pose Tracking](https://ai.googleblog.com/2020/08/on-device-real-time-body-pose-tracking.html)
|
||||
in Google AI Blog
|
||||
* [MediaPipe Iris: Real-time Eye Tracking and Depth Estimation](https://ai.googleblog.com/2020/08/mediapipe-iris-real-time-iris-tracking.html)
|
||||
in Google AI Blog
|
||||
* [MediaPipe KNIFT: Template-based feature matching](https://developers.googleblog.com/2020/04/mediapipe-knift-template-based-feature-matching.html)
|
||||
in Google Developers Blog
|
||||
* [Alfred Camera: Smart camera features using MediaPipe](https://developers.googleblog.com/2020/03/alfred-camera-smart-camera-features-using-mediapipe.html)
|
||||
in Google Developers Blog
|
||||
* [Real-Time 3D Object Detection on Mobile Devices with MediaPipe](https://ai.googleblog.com/2020/03/real-time-3d-object-detection-on-mobile.html)
|
||||
in Google AI Blog
|
||||
* [AutoFlip: An Open Source Framework for Intelligent Video Reframing](https://ai.googleblog.com/2020/02/autoflip-open-source-framework-for.html)
|
||||
in Google AI Blog
|
||||
* [MediaPipe on the Web](https://developers.googleblog.com/2020/01/mediapipe-on-web.html)
|
||||
in Google Developers Blog
|
||||
* [Object Detection and Tracking using MediaPipe](https://developers.googleblog.com/2019/12/object-detection-and-tracking-using-mediapipe.html)
|
||||
in Google Developers Blog
|
||||
* [On-Device, Real-Time Hand Tracking with MediaPipe](https://ai.googleblog.com/2019/08/on-device-real-time-hand-tracking-with.html)
|
||||
in Google AI Blog
|
||||
* [MediaPipe: A Framework for Building Perception Pipelines](https://arxiv.org/abs/1906.08172)
|
||||
|
||||
## Videos
|
||||
|
||||
* [YouTube Channel](https://www.youtube.com/c/MediaPipe)
|
||||
|
||||
## Events
|
||||
* [AI Nextcon 2020, 12-16 Feb 2020, Seattle](http://aisea20.xnextcon.com/)
|
||||
* [MediaPipe Madrid Meetup, 16 Dec 2019](https://www.meetup.com/Madrid-AI-Developers-Group/events/266329088/)
|
||||
* [MediaPipe London Meetup, Google 123 Building, 12 Dec 2019](https://www.meetup.com/London-AI-Tech-Talk/events/266329038)
|
||||
* [ML Conference, Berlin, 11 Dec 2019](https://mlconference.ai/machine-learning-advanced-development/mediapipe-building-real-time-cross-platform-mobile-web-edge-desktop-video-audio-ml-pipelines/)
|
||||
* [MediaPipe Berlin Meetup, Google Berlin, 11 Dec 2019](https://www.meetup.com/Berlin-AI-Tech-Talk/events/266328794/)
|
||||
* [The 3rd Workshop on YouTube-8M Large Scale Video Understanding Workshop](https://research.google.com/youtube8m/workshop2019/index.html) Seoul, Korea ICCV 2019
|
||||
* [AI DevWorld 2019](https://aidevworld.com) on Oct 10 in San Jose, California
|
||||
* [Google Industry Workshop at ICIP 2019](http://2019.ieeeicip.org/?action=page4&id=14#Google) [Presentation](https://docs.google.com/presentation/d/e/2PACX-1vRIBBbO_LO9v2YmvbHHEt1cwyqH6EjDxiILjuT0foXy1E7g6uyh4CesB2DkkEwlRDO9_lWfuKMZx98T/pub?start=false&loop=false&delayms=3000&slide=id.g556cc1a659_0_5) on Sept 24 in Taipei, Taiwan
|
||||
* [Open sourced at CVPR 2019](https://sites.google.com/corp/view/perception-cv4arvr/mediapipe) on June 17~20 in Long Beach, CA
|
||||
|
||||
## Community forum
|
||||
* [Discuss](https://groups.google.com/forum/#!forum/mediapipe) - General community discussion around MediaPipe
|
||||
* [MediaPipe Seattle Meetup, Google Building Waterside, 13 Feb 2020](https://mediapipe.page.link/seattle2020)
|
||||
* [AI Nextcon 2020, 12-16 Feb 2020, Seattle](http://aisea20.xnextcon.com/)
|
||||
* [MediaPipe Madrid Meetup, 16 Dec 2019](https://www.meetup.com/Madrid-AI-Developers-Group/events/266329088/)
|
||||
* [MediaPipe London Meetup, Google 123 Building, 12 Dec 2019](https://www.meetup.com/London-AI-Tech-Talk/events/266329038)
|
||||
* [ML Conference, Berlin, 11 Dec 2019](https://mlconference.ai/machine-learning-advanced-development/mediapipe-building-real-time-cross-platform-mobile-web-edge-desktop-video-audio-ml-pipelines/)
|
||||
* [MediaPipe Berlin Meetup, Google Berlin, 11 Dec 2019](https://www.meetup.com/Berlin-AI-Tech-Talk/events/266328794/)
|
||||
* [The 3rd Workshop on YouTube-8M Large Scale Video Understanding Workshop,
|
||||
Seoul, Korea ICCV
|
||||
2019](https://research.google.com/youtube8m/workshop2019/index.html)
|
||||
* [AI DevWorld 2019, 10 Oct 2019, San Jose, CA](https://aidevworld.com)
|
||||
* [Google Industry Workshop at ICIP 2019, 24 Sept 2019, Taipei, Taiwan](http://2019.ieeeicip.org/?action=page4&id=14#Google)
|
||||
([presentation](https://docs.google.com/presentation/d/e/2PACX-1vRIBBbO_LO9v2YmvbHHEt1cwyqH6EjDxiILjuT0foXy1E7g6uyh4CesB2DkkEwlRDO9_lWfuKMZx98T/pub?start=false&loop=false&delayms=3000&slide=id.g556cc1a659_0_5))
|
||||
* [Open sourced at CVPR 2019, 17~20 June, Long Beach, CA](https://sites.google.com/corp/view/perception-cv4arvr/mediapipe)
|
||||
|
||||
## Alpha Disclaimer
|
||||
MediaPipe is currently in alpha for v0.7. We are still making breaking API changes and expect to get to stable API by v1.0.
|
||||
## Community
|
||||
|
||||
* [Awesome MediaPipe](https://mediapipe.page.link/awesome-mediapipe) - A
|
||||
curated list of awesome MediaPipe related frameworks, libraries and software
|
||||
* [Slack community](https://mediapipe.page.link/joinslack) for MediaPipe users
|
||||
* [Discuss](https://groups.google.com/forum/#!forum/mediapipe) - General
|
||||
community discussion around MediaPipe
|
||||
|
||||
## Alpha disclaimer
|
||||
|
||||
MediaPipe is currently in alpha at v0.7. We may be still making breaking API
|
||||
changes and expect to get to stable APIs by v1.0.
|
||||
|
||||
## Contributing
|
||||
We welcome contributions. Please follow these [guidelines](./CONTRIBUTING.md).
|
||||
|
||||
We use GitHub issues for tracking requests and bugs. Please post questions to the MediaPipe Stack Overflow with a 'mediapipe' tag.
|
||||
We welcome contributions. Please follow these
|
||||
[guidelines](https://github.com/google/mediapipe/blob/master/CONTRIBUTING.md).
|
||||
|
||||
We use GitHub issues for tracking requests and bugs. Please post questions to
|
||||
the MediaPipe Stack Overflow with a `mediapipe` tag.
|
||||
|
||||
@@ -2,23 +2,31 @@ workspace(name = "mediapipe")
|
||||
|
||||
load("@bazel_tools//tools/build_defs/repo:http.bzl", "http_archive")
|
||||
|
||||
skylib_version = "0.8.0"
|
||||
# Protobuf expects an //external:python_headers target
|
||||
bind(
|
||||
name = "python_headers",
|
||||
actual = "@local_config_python//:python_headers",
|
||||
)
|
||||
|
||||
http_archive(
|
||||
name = "bazel_skylib",
|
||||
type = "tar.gz",
|
||||
url = "https://github.com/bazelbuild/bazel-skylib/releases/download/{}/bazel-skylib.{}.tar.gz".format (skylib_version, skylib_version),
|
||||
sha256 = "2ef429f5d7ce7111263289644d233707dba35e39696377ebab8b0bc701f7818e",
|
||||
urls = [
|
||||
"https://github.com/bazelbuild/bazel-skylib/releases/download/1.0.3/bazel-skylib-1.0.3.tar.gz",
|
||||
"https://mirror.bazel.build/github.com/bazelbuild/bazel-skylib/releases/download/1.0.3/bazel-skylib-1.0.3.tar.gz",
|
||||
],
|
||||
sha256 = "1c531376ac7e5a180e0237938a2536de0c54d93f5c278634818e0efc952dd56c",
|
||||
)
|
||||
load("@bazel_skylib//:workspace.bzl", "bazel_skylib_workspace")
|
||||
bazel_skylib_workspace()
|
||||
load("@bazel_skylib//lib:versions.bzl", "versions")
|
||||
versions.check(minimum_bazel_version = "1.0.0",
|
||||
maximum_bazel_version = "1.2.1")
|
||||
versions.check(minimum_bazel_version = "3.7.2")
|
||||
|
||||
|
||||
# ABSL cpp library lts_2020_02_25
|
||||
# ABSL cpp library lts_2021_03_24, patch 2.
|
||||
http_archive(
|
||||
name = "com_google_absl",
|
||||
urls = [
|
||||
"https://github.com/abseil/abseil-cpp/archive/20200225.tar.gz",
|
||||
"https://github.com/abseil/abseil-cpp/archive/refs/tags/20210324.2.tar.gz",
|
||||
],
|
||||
# Remove after https://github.com/abseil/abseil-cpp/issues/326 is solved.
|
||||
patches = [
|
||||
@@ -27,51 +35,75 @@ http_archive(
|
||||
patch_args = [
|
||||
"-p1",
|
||||
],
|
||||
strip_prefix = "abseil-cpp-20200225",
|
||||
sha256 = "728a813291bdec2aa46eab8356ace9f75ac2ed9dfe2df5ab603c4e6c09f1c353"
|
||||
strip_prefix = "abseil-cpp-20210324.2",
|
||||
sha256 = "59b862f50e710277f8ede96f083a5bb8d7c9595376146838b9580be90374ee1f"
|
||||
)
|
||||
|
||||
http_archive(
|
||||
name = "rules_cc",
|
||||
strip_prefix = "rules_cc-master",
|
||||
urls = ["https://github.com/bazelbuild/rules_cc/archive/master.zip"],
|
||||
strip_prefix = "rules_cc-2f8c04c04462ab83c545ab14c0da68c3b4c96191",
|
||||
# The commit can be updated if the build passes. Last updated 6/23/22.
|
||||
urls = ["https://github.com/bazelbuild/rules_cc/archive/2f8c04c04462ab83c545ab14c0da68c3b4c96191.zip"],
|
||||
)
|
||||
|
||||
http_archive(
|
||||
name = "rules_foreign_cc",
|
||||
strip_prefix = "rules_foreign_cc-0.1.0",
|
||||
url = "https://github.com/bazelbuild/rules_foreign_cc/archive/0.1.0.zip",
|
||||
)
|
||||
|
||||
load("@rules_foreign_cc//:workspace_definitions.bzl", "rules_foreign_cc_dependencies")
|
||||
|
||||
rules_foreign_cc_dependencies()
|
||||
|
||||
# This is used to select all contents of the archives for CMake-based packages to give CMake access to them.
|
||||
all_content = """filegroup(name = "all", srcs = glob(["**"]), visibility = ["//visibility:public"])"""
|
||||
|
||||
# GoogleTest/GoogleMock framework. Used by most unit-tests.
|
||||
# Last updated 2021-07-02.
|
||||
http_archive(
|
||||
name = "com_google_googletest",
|
||||
urls = ["https://github.com/google/googletest/archive/master.zip"],
|
||||
strip_prefix = "googletest-master",
|
||||
name = "com_google_googletest",
|
||||
urls = ["https://github.com/google/googletest/archive/4ec4cd23f486bf70efcc5d2caa40f24368f752e3.zip"],
|
||||
strip_prefix = "googletest-4ec4cd23f486bf70efcc5d2caa40f24368f752e3",
|
||||
sha256 = "de682ea824bfffba05b4e33b67431c247397d6175962534305136aa06f92e049",
|
||||
)
|
||||
|
||||
# Google Benchmark library.
|
||||
# Google Benchmark library v1.6.1 released on 2022-01-10.
|
||||
http_archive(
|
||||
name = "com_google_benchmark",
|
||||
urls = ["https://github.com/google/benchmark/archive/master.zip"],
|
||||
strip_prefix = "benchmark-master",
|
||||
urls = ["https://github.com/google/benchmark/archive/refs/tags/v1.6.1.tar.gz"],
|
||||
strip_prefix = "benchmark-1.6.1",
|
||||
sha256 = "6132883bc8c9b0df5375b16ab520fac1a85dc9e4cf5be59480448ece74b278d4",
|
||||
build_file = "@//third_party:benchmark.BUILD",
|
||||
)
|
||||
|
||||
# gflags needed by glog
|
||||
http_archive(
|
||||
name = "com_github_gflags_gflags",
|
||||
sha256 = "6e16c8bc91b1310a44f3965e616383dbda48f83e8c1eaa2370a215057b00cabe",
|
||||
strip_prefix = "gflags-77592648e3f3be87d6c7123eb81cbad75f9aef5a",
|
||||
urls = [
|
||||
"https://mirror.bazel.build/github.com/gflags/gflags/archive/77592648e3f3be87d6c7123eb81cbad75f9aef5a.tar.gz",
|
||||
"https://github.com/gflags/gflags/archive/77592648e3f3be87d6c7123eb81cbad75f9aef5a.tar.gz",
|
||||
],
|
||||
strip_prefix = "gflags-2.2.2",
|
||||
sha256 = "19713a36c9f32b33df59d1c79b4958434cb005b5b47dc5400a7a4b078111d9b5",
|
||||
url = "https://github.com/gflags/gflags/archive/v2.2.2.zip",
|
||||
)
|
||||
|
||||
# glog
|
||||
# 2020-08-21
|
||||
http_archive(
|
||||
name = "com_github_glog_glog",
|
||||
url = "https://github.com/google/glog/archive/v0.3.5.zip",
|
||||
sha256 = "267103f8a1e9578978aa1dc256001e6529ef593e5aea38193d31c2872ee025e8",
|
||||
strip_prefix = "glog-0.3.5",
|
||||
build_file = "@//third_party:glog.BUILD",
|
||||
strip_prefix = "glog-0a2e5931bd5ff22fd3bf8999eb8ce776f159cda6",
|
||||
sha256 = "58c9b3b6aaa4dd8b836c0fd8f65d0f941441fb95e27212c5eeb9979cfd3592ab",
|
||||
urls = [
|
||||
"https://github.com/google/glog/archive/0a2e5931bd5ff22fd3bf8999eb8ce776f159cda6.zip",
|
||||
],
|
||||
)
|
||||
http_archive(
|
||||
name = "com_github_glog_glog_no_gflags",
|
||||
strip_prefix = "glog-0a2e5931bd5ff22fd3bf8999eb8ce776f159cda6",
|
||||
sha256 = "58c9b3b6aaa4dd8b836c0fd8f65d0f941441fb95e27212c5eeb9979cfd3592ab",
|
||||
build_file = "@//third_party:glog_no_gflags.BUILD",
|
||||
urls = [
|
||||
"https://github.com/google/glog/archive/0a2e5931bd5ff22fd3bf8999eb8ce776f159cda6.zip",
|
||||
],
|
||||
patches = [
|
||||
"@//third_party:com_github_glog_glog_9779e5ea6ef59562b030248947f787d1256132ae.diff"
|
||||
"@//third_party:com_github_glog_glog_9779e5ea6ef59562b030248947f787d1256132ae.diff",
|
||||
],
|
||||
patch_args = [
|
||||
"-p1",
|
||||
@@ -89,79 +121,126 @@ http_archive(
|
||||
# libyuv
|
||||
http_archive(
|
||||
name = "libyuv",
|
||||
urls = ["https://chromium.googlesource.com/libyuv/libyuv/+archive/refs/heads/master.tar.gz"],
|
||||
# Error: operand type mismatch for `vbroadcastss' caused by commit 8a13626e42f7fdcf3a6acbb0316760ee54cda7d8.
|
||||
urls = ["https://chromium.googlesource.com/libyuv/libyuv/+archive/2525698acba9bf9b701ba6b4d9584291a1f62257.tar.gz"],
|
||||
build_file = "@//third_party:libyuv.BUILD",
|
||||
)
|
||||
|
||||
# Note: protobuf-javalite is no longer released as a separate download, it's included in the main Java download.
|
||||
# ...but the Java download is currently broken, so we use the "source" download.
|
||||
http_archive(
|
||||
name = "com_google_protobuf_javalite",
|
||||
sha256 = "79d102c61e2a479a0b7e5fc167bcfaa4832a0c6aad4a75fa7da0480564931bcc",
|
||||
strip_prefix = "protobuf-384989534b2246d413dbcd750744faab2607b516",
|
||||
urls = ["https://github.com/google/protobuf/archive/384989534b2246d413dbcd750744faab2607b516.zip"],
|
||||
sha256 = "87407cd28e7a9c95d9f61a098a53cf031109d451a7763e7dd1253abf8b4df422",
|
||||
strip_prefix = "protobuf-3.19.1",
|
||||
urls = ["https://github.com/protocolbuffers/protobuf/archive/v3.19.1.tar.gz"],
|
||||
)
|
||||
|
||||
http_archive(
|
||||
name = "com_google_protobuf",
|
||||
sha256 = "87407cd28e7a9c95d9f61a098a53cf031109d451a7763e7dd1253abf8b4df422",
|
||||
strip_prefix = "protobuf-3.19.1",
|
||||
urls = ["https://github.com/protocolbuffers/protobuf/archive/v3.19.1.tar.gz"],
|
||||
patches = [
|
||||
"@//third_party:com_google_protobuf_fixes.diff"
|
||||
],
|
||||
patch_args = [
|
||||
"-p1",
|
||||
],
|
||||
)
|
||||
|
||||
load("//third_party/flatbuffers:workspace.bzl", flatbuffers = "repo")
|
||||
flatbuffers()
|
||||
|
||||
http_archive(
|
||||
name = "com_google_audio_tools",
|
||||
strip_prefix = "multichannel-audio-tools-master",
|
||||
urls = ["https://github.com/google/multichannel-audio-tools/archive/master.zip"],
|
||||
)
|
||||
|
||||
# Needed by TensorFlow
|
||||
# sentencepiece
|
||||
http_archive(
|
||||
name = "io_bazel_rules_closure",
|
||||
sha256 = "e0a111000aeed2051f29fcc7a3f83be3ad8c6c93c186e64beb1ad313f0c7f9f9",
|
||||
strip_prefix = "rules_closure-cf1e44edb908e9616030cc83d085989b8e6cd6df",
|
||||
name = "com_google_sentencepiece",
|
||||
strip_prefix = "sentencepiece-1.0.0",
|
||||
sha256 = "c05901f30a1d0ed64cbcf40eba08e48894e1b0e985777217b7c9036cac631346",
|
||||
urls = [
|
||||
"http://mirror.tensorflow.org/github.com/bazelbuild/rules_closure/archive/cf1e44edb908e9616030cc83d085989b8e6cd6df.tar.gz",
|
||||
"https://github.com/bazelbuild/rules_closure/archive/cf1e44edb908e9616030cc83d085989b8e6cd6df.tar.gz", # 2019-04-04
|
||||
"https://github.com/google/sentencepiece/archive/1.0.0.zip",
|
||||
],
|
||||
repo_mapping = {"@com_google_glog" : "@com_github_glog_glog"},
|
||||
)
|
||||
|
||||
# 2020-02-12
|
||||
# The last commit before TensorFlow switched to Bazel 2.0
|
||||
_TENSORFLOW_GIT_COMMIT = "77e9ffb9b2bfb1a4f7056e62d84039626923e328"
|
||||
_TENSORFLOW_SHA256= "176ccd82f7dd17c5e117b50d353603b129c7a6ccbfebd522ca47cc2a40f33f13"
|
||||
http_archive(
|
||||
name = "org_tensorflow",
|
||||
name = "org_tensorflow_text",
|
||||
sha256 = "f64647276f7288d1b1fe4c89581d51404d0ce4ae97f2bcc4c19bd667549adca8",
|
||||
strip_prefix = "text-2.2.0",
|
||||
urls = [
|
||||
"https://mirror.bazel.build/github.com/tensorflow/tensorflow/archive/%s.tar.gz" % _TENSORFLOW_GIT_COMMIT,
|
||||
"https://github.com/tensorflow/tensorflow/archive/%s.tar.gz" % _TENSORFLOW_GIT_COMMIT,
|
||||
"https://github.com/tensorflow/text/archive/v2.2.0.zip",
|
||||
],
|
||||
# A compatibility patch
|
||||
patches = [
|
||||
"@//third_party:org_tensorflow_528e22eae8bf3206189a066032c66e9e5c9b4a61.diff",
|
||||
# Updates for XNNPACK: https://github.com/tensorflow/tensorflow/commit/cfc31e324c8de6b52f752a39cb161d99d853ca99
|
||||
"@//third_party:org_tensorflow_cfc31e324c8de6b52f752a39cb161d99d853ca99.diff",
|
||||
# CpuInfo's build rule fixes.
|
||||
"@//third_party:org_tensorflow_9696366bcadab23a25c773b3ed405bac8ded4d0d.diff",
|
||||
"//third_party:tensorflow_text_remove_tf_deps.diff",
|
||||
"//third_party:tensorflow_text_a0f49e63.diff",
|
||||
],
|
||||
patch_args = [
|
||||
"-p1",
|
||||
],
|
||||
strip_prefix = "tensorflow-%s" % _TENSORFLOW_GIT_COMMIT,
|
||||
sha256 = _TENSORFLOW_SHA256,
|
||||
patch_args = ["-p1"],
|
||||
repo_mapping = {"@com_google_re2": "@com_googlesource_code_re2"},
|
||||
)
|
||||
|
||||
load("@org_tensorflow//tensorflow:workspace.bzl", "tf_workspace")
|
||||
tf_workspace(tf_repo_name = "org_tensorflow")
|
||||
http_archive(
|
||||
name = "com_googlesource_code_re2",
|
||||
sha256 = "e06b718c129f4019d6e7aa8b7631bee38d3d450dd980246bfaf493eb7db67868",
|
||||
strip_prefix = "re2-fe4a310131c37f9a7e7f7816fa6ce2a8b27d65a8",
|
||||
urls = [
|
||||
"https://github.com/google/re2/archive/fe4a310131c37f9a7e7f7816fa6ce2a8b27d65a8.tar.gz",
|
||||
],
|
||||
)
|
||||
|
||||
# 2020-07-09
|
||||
http_archive(
|
||||
name = "pybind11_bazel",
|
||||
strip_prefix = "pybind11_bazel-203508e14aab7309892a1c5f7dd05debda22d9a5",
|
||||
urls = ["https://github.com/pybind/pybind11_bazel/archive/203508e14aab7309892a1c5f7dd05debda22d9a5.zip"],
|
||||
sha256 = "75922da3a1bdb417d820398eb03d4e9bd067c4905a4246d35a44c01d62154d91",
|
||||
)
|
||||
|
||||
# Point to the commit that deprecates the usage of Eigen::MappedSparseMatrix.
|
||||
http_archive(
|
||||
name = "pybind11",
|
||||
urls = [
|
||||
"https://github.com/pybind/pybind11/archive/70a58c577eaf067748c2ec31bfd0b0a614cffba6.zip",
|
||||
],
|
||||
sha256 = "b971842fab1b5b8f3815a2302331782b7d137fef0e06502422bc4bc360f4956c",
|
||||
strip_prefix = "pybind11-70a58c577eaf067748c2ec31bfd0b0a614cffba6",
|
||||
build_file = "@pybind11_bazel//:pybind11.BUILD",
|
||||
)
|
||||
|
||||
http_archive(
|
||||
name = "pybind11_protobuf",
|
||||
sha256 = "baa1f53568283630a5055c85f0898b8810f7a6431bd01bbaedd32b4c1defbcb1",
|
||||
strip_prefix = "pybind11_protobuf-3594106f2df3d725e65015ffb4c7886d6eeee683",
|
||||
urls = [
|
||||
"https://github.com/pybind/pybind11_protobuf/archive/3594106f2df3d725e65015ffb4c7886d6eeee683.tar.gz",
|
||||
],
|
||||
)
|
||||
|
||||
# Point to the commit that deprecates the usage of Eigen::MappedSparseMatrix.
|
||||
http_archive(
|
||||
name = "ceres_solver",
|
||||
url = "https://github.com/ceres-solver/ceres-solver/archive/1.14.0.zip",
|
||||
url = "https://github.com/ceres-solver/ceres-solver/archive/123fba61cf2611a3c8bddc9d91416db26b10b558.zip",
|
||||
patches = [
|
||||
"@//third_party:ceres_solver_9bf9588988236279e1262f75d7f4d85711dfa172.diff"
|
||||
"@//third_party:ceres_solver_compatibility_fixes.diff"
|
||||
],
|
||||
patch_args = [
|
||||
"-p1",
|
||||
],
|
||||
strip_prefix = "ceres-solver-1.14.0",
|
||||
sha256 = "5ba6d0db4e784621fda44a50c58bb23b0892684692f0c623e2063f9c19f192f1"
|
||||
strip_prefix = "ceres-solver-123fba61cf2611a3c8bddc9d91416db26b10b558",
|
||||
sha256 = "8b7b16ceb363420e0fd499576daf73fa338adb0b1449f58bea7862766baa1ac7"
|
||||
)
|
||||
|
||||
http_archive(
|
||||
name = "opencv",
|
||||
build_file_content = all_content,
|
||||
strip_prefix = "opencv-3.4.10",
|
||||
urls = ["https://github.com/opencv/opencv/archive/3.4.10.tar.gz"],
|
||||
)
|
||||
|
||||
# Please run
|
||||
# $ sudo apt-get install libopencv-core-dev libopencv-highgui-dev \
|
||||
# libopencv-calib3d-dev libopencv-features2d-dev \
|
||||
# libopencv-imgproc-dev libopencv-video-dev
|
||||
new_local_repository(
|
||||
name = "linux_opencv",
|
||||
build_file = "@//third_party:opencv_linux.BUILD",
|
||||
@@ -174,17 +253,25 @@ new_local_repository(
|
||||
path = "/usr"
|
||||
)
|
||||
|
||||
# Please run $ brew install opencv@3
|
||||
new_local_repository(
|
||||
name = "macos_opencv",
|
||||
build_file = "@//third_party:opencv_macos.BUILD",
|
||||
path = "/usr",
|
||||
# For local MacOS builds, the path should point to an opencv@3 installation.
|
||||
# If you edit the path here, you will also need to update the corresponding
|
||||
# prefix in "opencv_macos.BUILD".
|
||||
path = "/usr/local",
|
||||
)
|
||||
|
||||
new_local_repository(
|
||||
name = "macos_ffmpeg",
|
||||
build_file = "@//third_party:ffmpeg_macos.BUILD",
|
||||
path = "/usr",
|
||||
path = "/usr/local/opt/ffmpeg",
|
||||
)
|
||||
|
||||
new_local_repository(
|
||||
name = "windows_opencv",
|
||||
build_file = "@//third_party:opencv_windows.BUILD",
|
||||
path = "C:\\opencv\\build",
|
||||
)
|
||||
|
||||
http_archive(
|
||||
@@ -207,95 +294,33 @@ http_archive(
|
||||
url = "https://github.com/opencv/opencv/releases/download/3.2.0/opencv-3.2.0-ios-framework.zip",
|
||||
)
|
||||
|
||||
RULES_JVM_EXTERNAL_TAG = "2.2"
|
||||
RULES_JVM_EXTERNAL_SHA = "f1203ce04e232ab6fdd81897cf0ff76f2c04c0741424d192f28e65ae752ce2d6"
|
||||
|
||||
http_archive(
|
||||
name = "rules_jvm_external",
|
||||
strip_prefix = "rules_jvm_external-%s" % RULES_JVM_EXTERNAL_TAG,
|
||||
sha256 = RULES_JVM_EXTERNAL_SHA,
|
||||
url = "https://github.com/bazelbuild/rules_jvm_external/archive/%s.zip" % RULES_JVM_EXTERNAL_TAG,
|
||||
)
|
||||
|
||||
load("@rules_jvm_external//:defs.bzl", "maven_install")
|
||||
|
||||
maven_install(
|
||||
artifacts = [
|
||||
"androidx.annotation:annotation:aar:1.1.0",
|
||||
"androidx.appcompat:appcompat:aar:1.1.0-rc01",
|
||||
"androidx.camera:camera-core:aar:1.0.0-alpha06",
|
||||
"androidx.camera:camera-camera2:aar:1.0.0-alpha06",
|
||||
"androidx.constraintlayout:constraintlayout:aar:1.1.3",
|
||||
"androidx.core:core:aar:1.1.0-rc03",
|
||||
"androidx.legacy:legacy-support-v4:aar:1.0.0",
|
||||
"androidx.recyclerview:recyclerview:aar:1.1.0-beta02",
|
||||
"com.google.android.material:material:aar:1.0.0-rc01",
|
||||
name = "stblib",
|
||||
strip_prefix = "stb-b42009b3b9d4ca35bc703f5310eedc74f584be58",
|
||||
sha256 = "13a99ad430e930907f5611325ec384168a958bf7610e63e60e2fd8e7b7379610",
|
||||
urls = ["https://github.com/nothings/stb/archive/b42009b3b9d4ca35bc703f5310eedc74f584be58.tar.gz"],
|
||||
build_file = "@//third_party:stblib.BUILD",
|
||||
patches = [
|
||||
"@//third_party:stb_image_impl.diff"
|
||||
],
|
||||
repositories = [
|
||||
"https://dl.google.com/dl/android/maven2",
|
||||
"https://repo1.maven.org/maven2",
|
||||
patch_args = [
|
||||
"-p1",
|
||||
],
|
||||
)
|
||||
|
||||
maven_server(
|
||||
name = "google_server",
|
||||
url = "https://dl.google.com/dl/android/maven2",
|
||||
)
|
||||
|
||||
maven_jar(
|
||||
name = "androidx_lifecycle",
|
||||
artifact = "androidx.lifecycle:lifecycle-common:2.0.0",
|
||||
sha1 = "e070ffae07452331bc5684734fce6831d531785c",
|
||||
server = "google_server",
|
||||
)
|
||||
|
||||
maven_jar(
|
||||
name = "androidx_concurrent_futures",
|
||||
artifact = "androidx.concurrent:concurrent-futures:1.0.0-alpha03",
|
||||
sha1 = "b528df95c7e2fefa2210c0c742bf3e491c1818ae",
|
||||
server = "google_server",
|
||||
)
|
||||
|
||||
maven_jar(
|
||||
name = "com_google_guava_android",
|
||||
artifact = "com.google.guava:guava:27.0.1-android",
|
||||
sha1 = "b7e1c37f66ef193796ccd7ea6e80c2b05426182d",
|
||||
)
|
||||
|
||||
maven_jar(
|
||||
name = "com_google_common_flogger",
|
||||
artifact = "com.google.flogger:flogger:0.3.1",
|
||||
sha1 = "585030fe1ec709760cbef997a459729fb965df0e",
|
||||
)
|
||||
|
||||
maven_jar(
|
||||
name = "com_google_common_flogger_system_backend",
|
||||
artifact = "com.google.flogger:flogger-system-backend:0.3.1",
|
||||
sha1 = "287b569d76abcd82f9de87fe41829fbc7ebd8ac9",
|
||||
)
|
||||
|
||||
maven_jar(
|
||||
name = "com_google_code_findbugs",
|
||||
artifact = "com.google.code.findbugs:jsr305:3.0.2",
|
||||
sha1 = "25ea2e8b0c338a877313bd4672d3fe056ea78f0d",
|
||||
)
|
||||
|
||||
# You may run setup_android.sh to install Android SDK and NDK.
|
||||
android_ndk_repository(
|
||||
name = "androidndk",
|
||||
)
|
||||
|
||||
android_sdk_repository(
|
||||
name = "androidsdk",
|
||||
)
|
||||
|
||||
# iOS basic build deps.
|
||||
|
||||
http_archive(
|
||||
name = "build_bazel_rules_apple",
|
||||
sha256 = "bdc8e66e70b8a75da23b79f1f8c6207356df07d041d96d2189add7ee0780cf4e",
|
||||
strip_prefix = "rules_apple-b869b0d3868d78a1d4ffd866ccb304fb68aa12c3",
|
||||
url = "https://github.com/bazelbuild/rules_apple/archive/b869b0d3868d78a1d4ffd866ccb304fb68aa12c3.tar.gz",
|
||||
sha256 = "77e8bf6fda706f420a55874ae6ee4df0c9d95da6c7838228b26910fc82eea5a2",
|
||||
url = "https://github.com/bazelbuild/rules_apple/releases/download/0.32.0/rules_apple.0.32.0.tar.gz",
|
||||
patches = [
|
||||
# Bypass checking ios unit test runner when building MP ios applications.
|
||||
"@//third_party:build_bazel_rules_apple_bypass_test_runner_check.diff"
|
||||
],
|
||||
patch_args = [
|
||||
"-p1",
|
||||
],
|
||||
)
|
||||
|
||||
load(
|
||||
@@ -312,6 +337,14 @@ load(
|
||||
|
||||
swift_rules_dependencies()
|
||||
|
||||
http_archive(
|
||||
name = "build_bazel_apple_support",
|
||||
sha256 = "741366f79d900c11e11d8efd6cc6c66a31bfb2451178b58e0b5edc6f1db17b35",
|
||||
urls = [
|
||||
"https://github.com/bazelbuild/apple_support/releases/download/0.10.0/apple_support.0.10.0.tar.gz"
|
||||
],
|
||||
)
|
||||
|
||||
load(
|
||||
"@build_bazel_apple_support//lib:repositories.bzl",
|
||||
"apple_support_dependencies",
|
||||
@@ -329,3 +362,133 @@ http_archive(
|
||||
build_file = "@//third_party:google_toolbox_for_mac.BUILD",
|
||||
)
|
||||
|
||||
# Maven dependencies.
|
||||
|
||||
RULES_JVM_EXTERNAL_TAG = "4.0"
|
||||
RULES_JVM_EXTERNAL_SHA = "31701ad93dbfe544d597dbe62c9a1fdd76d81d8a9150c2bf1ecf928ecdf97169"
|
||||
|
||||
http_archive(
|
||||
name = "rules_jvm_external",
|
||||
strip_prefix = "rules_jvm_external-%s" % RULES_JVM_EXTERNAL_TAG,
|
||||
sha256 = RULES_JVM_EXTERNAL_SHA,
|
||||
url = "https://github.com/bazelbuild/rules_jvm_external/archive/%s.zip" % RULES_JVM_EXTERNAL_TAG,
|
||||
)
|
||||
|
||||
load("@rules_jvm_external//:defs.bzl", "maven_install")
|
||||
|
||||
# Important: there can only be one maven_install rule. Add new maven deps here.
|
||||
maven_install(
|
||||
artifacts = [
|
||||
"androidx.concurrent:concurrent-futures:1.0.0-alpha03",
|
||||
"androidx.lifecycle:lifecycle-common:2.3.1",
|
||||
"androidx.activity:activity:1.2.2",
|
||||
"androidx.exifinterface:exifinterface:1.3.3",
|
||||
"androidx.fragment:fragment:1.3.4",
|
||||
"androidx.annotation:annotation:aar:1.1.0",
|
||||
"androidx.appcompat:appcompat:aar:1.1.0-rc01",
|
||||
"androidx.camera:camera-core:1.0.0-beta10",
|
||||
"androidx.camera:camera-camera2:1.0.0-beta10",
|
||||
"androidx.camera:camera-lifecycle:1.0.0-beta10",
|
||||
"androidx.constraintlayout:constraintlayout:aar:1.1.3",
|
||||
"androidx.core:core:aar:1.1.0-rc03",
|
||||
"androidx.legacy:legacy-support-v4:aar:1.0.0",
|
||||
"androidx.recyclerview:recyclerview:aar:1.1.0-beta02",
|
||||
"androidx.test.espresso:espresso-core:3.1.1",
|
||||
"com.github.bumptech.glide:glide:4.11.0",
|
||||
"com.google.android.material:material:aar:1.0.0-rc01",
|
||||
"com.google.auto.value:auto-value:1.8.1",
|
||||
"com.google.auto.value:auto-value-annotations:1.8.1",
|
||||
"com.google.code.findbugs:jsr305:latest.release",
|
||||
"com.google.android.datatransport:transport-api:3.0.0",
|
||||
"com.google.android.datatransport:transport-backend-cct:3.1.0",
|
||||
"com.google.android.datatransport:transport-runtime:3.1.0",
|
||||
"com.google.flogger:flogger-system-backend:0.6",
|
||||
"com.google.flogger:flogger:0.6",
|
||||
"com.google.guava:guava:27.0.1-android",
|
||||
"com.google.guava:listenablefuture:1.0",
|
||||
"junit:junit:4.12",
|
||||
"org.hamcrest:hamcrest-library:1.3",
|
||||
],
|
||||
repositories = [
|
||||
"https://maven.google.com",
|
||||
"https://dl.google.com/dl/android/maven2",
|
||||
"https://repo1.maven.org/maven2",
|
||||
"https://jcenter.bintray.com",
|
||||
],
|
||||
fetch_sources = True,
|
||||
version_conflict_policy = "pinned",
|
||||
)
|
||||
|
||||
# Needed by TensorFlow
|
||||
http_archive(
|
||||
name = "io_bazel_rules_closure",
|
||||
sha256 = "e0a111000aeed2051f29fcc7a3f83be3ad8c6c93c186e64beb1ad313f0c7f9f9",
|
||||
strip_prefix = "rules_closure-cf1e44edb908e9616030cc83d085989b8e6cd6df",
|
||||
urls = [
|
||||
"http://mirror.tensorflow.org/github.com/bazelbuild/rules_closure/archive/cf1e44edb908e9616030cc83d085989b8e6cd6df.tar.gz",
|
||||
"https://github.com/bazelbuild/rules_closure/archive/cf1e44edb908e9616030cc83d085989b8e6cd6df.tar.gz", # 2019-04-04
|
||||
],
|
||||
)
|
||||
|
||||
# Load Zlib before initializing TensorFlow to guarantee that the target
|
||||
# @zlib//:mini_zlib is available
|
||||
http_archive(
|
||||
name = "zlib",
|
||||
build_file = "//third_party:zlib.BUILD",
|
||||
sha256 = "c3e5e9fdd5004dcb542feda5ee4f0ff0744628baf8ed2dd5d66f8ca1197cb1a1",
|
||||
strip_prefix = "zlib-1.2.11",
|
||||
urls = [
|
||||
"http://mirror.bazel.build/zlib.net/fossils/zlib-1.2.11.tar.gz",
|
||||
"http://zlib.net/fossils/zlib-1.2.11.tar.gz", # 2017-01-15
|
||||
],
|
||||
patches = [
|
||||
"@//third_party:zlib.diff",
|
||||
],
|
||||
patch_args = [
|
||||
"-p1",
|
||||
],
|
||||
)
|
||||
|
||||
# TensorFlow repo should always go after the other external dependencies.
|
||||
# TF on 2022-08-10.
|
||||
_TENSORFLOW_GIT_COMMIT = "af1d5bc4fbb66d9e6cc1cf89503014a99233583b"
|
||||
_TENSORFLOW_SHA256 = "f85a5443264fc58a12d136ca6a30774b5bc25ceaf7d114d97f252351b3c3a2cb"
|
||||
http_archive(
|
||||
name = "org_tensorflow",
|
||||
urls = [
|
||||
"https://github.com/tensorflow/tensorflow/archive/%s.tar.gz" % _TENSORFLOW_GIT_COMMIT,
|
||||
],
|
||||
patches = [
|
||||
"@//third_party:org_tensorflow_compatibility_fixes.diff",
|
||||
# Diff is generated with a script, don't update it manually.
|
||||
"@//third_party:org_tensorflow_custom_ops.diff",
|
||||
],
|
||||
patch_args = [
|
||||
"-p1",
|
||||
],
|
||||
strip_prefix = "tensorflow-%s" % _TENSORFLOW_GIT_COMMIT,
|
||||
sha256 = _TENSORFLOW_SHA256,
|
||||
)
|
||||
|
||||
load("@org_tensorflow//tensorflow:workspace3.bzl", "tf_workspace3")
|
||||
tf_workspace3()
|
||||
load("@org_tensorflow//tensorflow:workspace2.bzl", "tf_workspace2")
|
||||
tf_workspace2()
|
||||
|
||||
# Edge TPU
|
||||
http_archive(
|
||||
name = "libedgetpu",
|
||||
sha256 = "14d5527a943a25bc648c28a9961f954f70ba4d79c0a9ca5ae226e1831d72fe80",
|
||||
strip_prefix = "libedgetpu-3164995622300286ef2bb14d7fdc2792dae045b7",
|
||||
urls = [
|
||||
"https://github.com/google-coral/libedgetpu/archive/3164995622300286ef2bb14d7fdc2792dae045b7.tar.gz"
|
||||
],
|
||||
)
|
||||
load("@libedgetpu//:workspace.bzl", "libedgetpu_dependencies")
|
||||
libedgetpu_dependencies()
|
||||
|
||||
load("@coral_crosstool//:configure.bzl", "cc_crosstool")
|
||||
cc_crosstool(name = "crosstool")
|
||||
|
||||
load("//third_party:external_files.bzl", "external_files")
|
||||
external_files()
|
||||
|
||||
@@ -0,0 +1,143 @@
|
||||
#!/bin/bash
|
||||
# Copyright 2020 The MediaPipe Authors.
|
||||
#
|
||||
# Licensed under the Apache License, Version 2.0 (the "License");
|
||||
# you may not use this file except in compliance with the License.
|
||||
# You may obtain a copy of the License at
|
||||
#
|
||||
# http://www.apache.org/licenses/LICENSE-2.0
|
||||
#
|
||||
# Unless required by applicable law or agreed to in writing, software
|
||||
# distributed under the License is distributed on an "AS IS" BASIS,
|
||||
# WITHOUT WARRANTIES OR CONDITIONS OF ANY KIND, either express or implied.
|
||||
# See the License for the specific language governing permissions and
|
||||
# limitations under the License.
|
||||
# =========================================================================
|
||||
#
|
||||
# Script to build all MediaPipe Android example apps.
|
||||
#
|
||||
# To build all apps and store them in out_dir, and install them:
|
||||
# $ ./build_android_examples.sh -d out_dir
|
||||
# Omitting -d and the associated directory saves all generated APKs in the
|
||||
# current directory.
|
||||
# $ ./build_android_examples.sh -d out_dir --nostrip
|
||||
# Same as above except that the symnbols are not stripped.
|
||||
#
|
||||
# To install the apps already stored in out_dir (after building them with the
|
||||
# usages above):
|
||||
# $ ./build_android_examples.sh -d out_dir -i
|
||||
# Omitting -d and the associated directory assumes the apps are in the
|
||||
# current directory.
|
||||
|
||||
set -e
|
||||
|
||||
function switch_to_opencv_3() {
|
||||
echo "Switching to OpenCV 3"
|
||||
sed -i -e 's:4.0.1/opencv-4.0.1:3.4.3/opencv-3.4.3:g' WORKSPACE
|
||||
sed -i -e 's:libopencv_java4:libopencv_java3:g' third_party/opencv_android.BUILD
|
||||
}
|
||||
|
||||
function switch_to_opencv_4() {
|
||||
echo "Switching to OpenCV 4"
|
||||
sed -i -e 's:3.4.3/opencv-3.4.3:4.0.1/opencv-4.0.1:g' WORKSPACE
|
||||
sed -i -e 's:libopencv_java3:libopencv_java4:g' third_party/opencv_android.BUILD
|
||||
}
|
||||
|
||||
out_dir="."
|
||||
strip=true
|
||||
install_only=false
|
||||
app_dir="mediapipe/examples/android/src/java/com/google/mediapipe/apps"
|
||||
bin_dir="bazel-bin"
|
||||
declare -a default_bazel_flags=(build -c opt --config=android_arm64)
|
||||
|
||||
while [[ -n $1 ]]; do
|
||||
case $1 in
|
||||
-d)
|
||||
shift
|
||||
out_dir=$1
|
||||
;;
|
||||
--nostrip)
|
||||
strip=false
|
||||
;;
|
||||
-i)
|
||||
install_only=true
|
||||
;;
|
||||
*)
|
||||
echo "Unsupported input argument $1."
|
||||
exit 1
|
||||
;;
|
||||
esac
|
||||
shift
|
||||
done
|
||||
|
||||
echo "app_dir: $app_dir"
|
||||
echo "out_dir: $out_dir"
|
||||
echo "strip: $strip"
|
||||
|
||||
declare -a apks=()
|
||||
declare -a bazel_flags
|
||||
switch_to_opencv_3
|
||||
|
||||
apps="${app_dir}/*"
|
||||
for app in ${apps}; do
|
||||
if [[ -d "${app}" ]]; then
|
||||
app_name=${app##*/}
|
||||
if [[ ${app_name} == "basic" ]]; then
|
||||
target_name="helloworld"
|
||||
else
|
||||
target_name=${app_name}
|
||||
fi
|
||||
target="${app}:${target_name}"
|
||||
bin="${bin_dir}/${app}/${target_name}.apk"
|
||||
|
||||
echo "=== Target: ${target}"
|
||||
|
||||
if [[ $install_only == false ]]; then
|
||||
bazel_flags=("${default_bazel_flags[@]}")
|
||||
bazel_flags+=(${target})
|
||||
if [[ $strip == true ]]; then
|
||||
bazel_flags+=(--linkopt=-s)
|
||||
fi
|
||||
fi
|
||||
|
||||
if [[ ${app_name} == "objectdetection3d" ]]; then
|
||||
categories=("shoe" "chair" "cup" "camera" "shoe_1stage" "chair_1stage")
|
||||
for category in "${categories[@]}"; do
|
||||
apk="${out_dir}/${target_name}_${category}.apk"
|
||||
if [[ $install_only == false ]]; then
|
||||
bazel_flags_extended=("${bazel_flags[@]}")
|
||||
if [[ ${category} != "shoe" ]]; then
|
||||
bazel_flags_extended+=(--define ${category}=true)
|
||||
fi
|
||||
bazelisk "${bazel_flags_extended[@]}"
|
||||
cp -f "${bin}" "${apk}"
|
||||
fi
|
||||
apks+=(${apk})
|
||||
done
|
||||
else
|
||||
apk="${out_dir}/${target_name}.apk"
|
||||
if [[ $install_only == false ]]; then
|
||||
if [[ ${app_name} == "templatematchingcpu" ]]; then
|
||||
switch_to_opencv_4
|
||||
fi
|
||||
bazelisk "${bazel_flags[@]}"
|
||||
cp -f "${bin}" "${apk}"
|
||||
if [[ ${app_name} == "templatematchingcpu" ]]; then
|
||||
switch_to_opencv_3
|
||||
fi
|
||||
fi
|
||||
apks+=(${apk})
|
||||
fi
|
||||
fi
|
||||
done
|
||||
|
||||
echo
|
||||
echo "Connect your device via adb to install the apps."
|
||||
read -p "Press 'a' to abort, or press any other key to continue ..." -n 1 -r
|
||||
echo
|
||||
if [[ ! $REPLY =~ ^[Aa]$ ]]; then
|
||||
for apk in "${apks[@]}"; do
|
||||
echo "=== Installing $apk"
|
||||
adb install -r "${apk}"
|
||||
done
|
||||
fi
|
||||
@@ -0,0 +1,110 @@
|
||||
#!/bin/bash
|
||||
# Copyright 2020 The MediaPipe Authors.
|
||||
#
|
||||
# Licensed under the Apache License, Version 2.0 (the "License");
|
||||
# you may not use this file except in compliance with the License.
|
||||
# You may obtain a copy of the License at
|
||||
#
|
||||
# http://www.apache.org/licenses/LICENSE-2.0
|
||||
#
|
||||
# Unless required by applicable law or agreed to in writing, software
|
||||
# distributed under the License is distributed on an "AS IS" BASIS,
|
||||
# WITHOUT WARRANTIES OR CONDITIONS OF ANY KIND, either express or implied.
|
||||
# See the License for the specific language governing permissions and
|
||||
# limitations under the License.
|
||||
# =========================================================================
|
||||
#
|
||||
# Script to build/run all MediaPipe desktop example apps (with webcam input).
|
||||
#
|
||||
# To build and run all apps and store them in out_dir:
|
||||
# $ ./build_desktop_examples.sh -d out_dir
|
||||
# Omitting -d and the associated directory saves all generated apps in the
|
||||
# current directory.
|
||||
# To build all apps and store them in out_dir:
|
||||
# $ ./build_desktop_examples.sh -d out_dir -b
|
||||
# Omitting -d and the associated directory saves all generated apps in the
|
||||
# current directory.
|
||||
# To run all apps already stored in out_dir:
|
||||
# $ ./build_desktop_examples.sh -d out_dir -r
|
||||
# Omitting -d and the associated directory assumes all apps are in the current
|
||||
# directory.
|
||||
|
||||
set -e
|
||||
|
||||
out_dir="."
|
||||
build_only=false
|
||||
run_only=false
|
||||
app_dir="mediapipe/examples/desktop"
|
||||
bin_dir="bazel-bin"
|
||||
declare -a default_bazel_flags=(build -c opt --define MEDIAPIPE_DISABLE_GPU=1)
|
||||
|
||||
while [[ -n $1 ]]; do
|
||||
case $1 in
|
||||
-d)
|
||||
shift
|
||||
out_dir=$1
|
||||
;;
|
||||
-b)
|
||||
build_only=true
|
||||
;;
|
||||
-r)
|
||||
run_only=true
|
||||
;;
|
||||
*)
|
||||
echo "Unsupported input argument $1."
|
||||
exit 1
|
||||
;;
|
||||
esac
|
||||
shift
|
||||
done
|
||||
|
||||
echo "app_dir: $app_dir"
|
||||
echo "out_dir: $out_dir"
|
||||
|
||||
declare -a bazel_flags
|
||||
|
||||
apps="${app_dir}/*"
|
||||
for app in ${apps}; do
|
||||
if [[ -d "${app}" ]]; then
|
||||
target_name=${app##*/}
|
||||
if [[ "${target_name}" == "autoflip" ||
|
||||
"${target_name}" == "hello_world" ||
|
||||
"${target_name}" == "media_sequence" ||
|
||||
"${target_name}" == "object_detection_3d" ||
|
||||
"${target_name}" == "template_matching" ||
|
||||
"${target_name}" == "youtube8m" ]]; then
|
||||
continue
|
||||
fi
|
||||
target="${app}:${target_name}_cpu"
|
||||
|
||||
echo "=== Target: ${target}"
|
||||
|
||||
if [[ $run_only == false ]]; then
|
||||
bazel_flags=("${default_bazel_flags[@]}")
|
||||
bazel_flags+=(${target})
|
||||
|
||||
bazelisk "${bazel_flags[@]}"
|
||||
cp -f "${bin_dir}/${app}/"*"_cpu" "${out_dir}"
|
||||
fi
|
||||
if [[ $build_only == false ]]; then
|
||||
if [[ ${target_name} == "object_tracking" ]]; then
|
||||
graph_name="tracking/object_detection_tracking"
|
||||
elif [[ ${target_name} == "upper_body_pose_tracking" ]]; then
|
||||
graph_name="pose_tracking/upper_body_pose_tracking"
|
||||
else
|
||||
graph_name="${target_name}/${target_name}"
|
||||
fi
|
||||
if [[ ${target_name} == "holistic_tracking" ||
|
||||
${target_name} == "iris_tracking" ||
|
||||
${target_name} == "pose_tracking" ||
|
||||
${target_name} == "selfie_segmentation" ||
|
||||
${target_name} == "upper_body_pose_tracking" ]]; then
|
||||
graph_suffix="cpu"
|
||||
else
|
||||
graph_suffix="desktop_live"
|
||||
fi
|
||||
GLOG_logtostderr=1 "${out_dir}/${target_name}_cpu" \
|
||||
--calculator_graph_config_file=mediapipe/graphs/"${graph_name}_${graph_suffix}.pbtxt"
|
||||
fi
|
||||
fi
|
||||
done
|
||||
@@ -0,0 +1,77 @@
|
||||
#!/bin/bash
|
||||
# Copyright 2020 The MediaPipe Authors.
|
||||
#
|
||||
# Licensed under the Apache License, Version 2.0 (the "License");
|
||||
# you may not use this file except in compliance with the License.
|
||||
# You may obtain a copy of the License at
|
||||
#
|
||||
# http://www.apache.org/licenses/LICENSE-2.0
|
||||
#
|
||||
# Unless required by applicable law or agreed to in writing, software
|
||||
# distributed under the License is distributed on an "AS IS" BASIS,
|
||||
# WITHOUT WARRANTIES OR CONDITIONS OF ANY KIND, either express or implied.
|
||||
# See the License for the specific language governing permissions and
|
||||
# limitations under the License.
|
||||
# =========================================================================
|
||||
#
|
||||
# Script to build all MediaPipe iOS example apps.
|
||||
#
|
||||
# To build all apps and store them in out_dir:
|
||||
# $ ./build_ios_examples.sh -d out_dir
|
||||
# Omitting -d and the associated directory saves all generated IPAs in the
|
||||
# current directory.
|
||||
# $ ./build_ios_examples.sh -d out_dir --nostrip
|
||||
# Same as above except that the symnbols are not stripped.
|
||||
|
||||
set -e
|
||||
|
||||
out_dir="."
|
||||
strip=true
|
||||
app_dir="mediapipe/examples/ios"
|
||||
bin_dir="bazel-bin"
|
||||
declare -a default_bazel_flags=(build -c opt --config=ios_arm64)
|
||||
|
||||
while [[ -n $1 ]]; do
|
||||
case $1 in
|
||||
-d)
|
||||
shift
|
||||
out_dir=$1
|
||||
;;
|
||||
--nostrip)
|
||||
strip=false
|
||||
;;
|
||||
*)
|
||||
echo "Unsupported input argument $1."
|
||||
exit 1
|
||||
;;
|
||||
esac
|
||||
shift
|
||||
done
|
||||
|
||||
echo "app_dir: $app_dir"
|
||||
echo "out_dir: $out_dir"
|
||||
echo "strip: $strip"
|
||||
|
||||
declare -a bazel_flags
|
||||
|
||||
apps="${app_dir}/*"
|
||||
for app in ${apps}; do
|
||||
if [[ -d "${app}" ]]; then
|
||||
target_name=${app##*/}
|
||||
if [[ "${target_name}" == "common" ]]; then
|
||||
continue
|
||||
fi
|
||||
target="${app}:${target_name}"
|
||||
|
||||
echo "=== Target: ${target}"
|
||||
|
||||
bazel_flags=("${default_bazel_flags[@]}")
|
||||
bazel_flags+=(${target})
|
||||
if [[ $strip == true ]]; then
|
||||
bazel_flags+=(--linkopt=-s)
|
||||
fi
|
||||
|
||||
bazelisk "${bazel_flags[@]}"
|
||||
cp -f "${bin_dir}/${app}/"*".ipa" "${out_dir}"
|
||||
fi
|
||||
done
|
||||
@@ -0,0 +1,29 @@
|
||||
# Configuration for GitHub Pages
|
||||
|
||||
remote_theme: pmarsceill/just-the-docs
|
||||
|
||||
# Set a path/url to a logo that will be displayed instead of the title
|
||||
logo: "images/logo_horizontal_color.png"
|
||||
|
||||
# Enable or disable the site search
|
||||
search_enabled: true
|
||||
|
||||
# Set the search token separator for hyphenated-word search:
|
||||
search_tokenizer_separator: /[\s/]+/
|
||||
|
||||
# Enable or disable heading anchors
|
||||
heading_anchors: true
|
||||
|
||||
# Aux links for the upper right navigation
|
||||
aux_links:
|
||||
"MediaPipe on GitHub":
|
||||
- "//github.com/google/mediapipe"
|
||||
|
||||
# Footer content appears at the bottom of every page's main content
|
||||
footer_content: "© GOOGLE LLC | <a href=\"https://policies.google.com/privacy\">PRIVACY POLICY</a> | <a href=\"https://policies.google.com/terms\">TERMS OF SERVICE</a>"
|
||||
|
||||
# Color scheme currently only supports "dark", "light"/nil (default), or a custom scheme that you define
|
||||
color_scheme: mediapipe
|
||||
|
||||
# Google Analytics Tracking (optional)
|
||||
ga_tracking: UA-140696581-2
|
||||
@@ -0,0 +1 @@
|
||||
$link-color: #0097A7;
|
||||
@@ -19,7 +19,7 @@ project = 'MediaPipe'
|
||||
author = 'Google LLC'
|
||||
|
||||
# The full version, including alpha/beta/rc tags
|
||||
release = 'v0.5'
|
||||
release = 'v0.7.5'
|
||||
|
||||
|
||||
# -- General configuration ---------------------------------------------------
|
||||
Binary file not shown.
@@ -0,0 +1,464 @@
|
||||
---
|
||||
layout: default
|
||||
title: Calculators
|
||||
parent: Framework Concepts
|
||||
nav_order: 1
|
||||
---
|
||||
|
||||
# Calculators
|
||||
{: .no_toc }
|
||||
|
||||
1. TOC
|
||||
{:toc}
|
||||
---
|
||||
|
||||
Each calculator is a node of a graph. We describe how to create a new
|
||||
calculator, how to initialize a calculator, how to perform its calculations,
|
||||
input and output streams, timestamps, and options. Each node in the graph is
|
||||
implemented as a `Calculator`. The bulk of graph execution happens inside its
|
||||
calculators. A calculator may receive zero or more input streams and/or side
|
||||
packets and produces zero or more output streams and/or side packets.
|
||||
|
||||
## CalculatorBase
|
||||
|
||||
A calculator is created by defining a new sub-class of the
|
||||
[`CalculatorBase`](https://github.com/google/mediapipe/tree/master/mediapipe/framework/calculator_base.cc)
|
||||
class, implementing a number of methods, and registering the new sub-class with
|
||||
Mediapipe. At a minimum, a new calculator must implement the below four methods
|
||||
|
||||
* `GetContract()`
|
||||
* Calculator authors can specify the expected types of inputs and outputs
|
||||
of a calculator in GetContract(). When a graph is initialized, the
|
||||
framework calls a static method to verify if the packet types of the
|
||||
connected inputs and outputs match the information in this
|
||||
specification.
|
||||
* `Open()`
|
||||
* After a graph starts, the framework calls `Open()`. The input side
|
||||
packets are available to the calculator at this point. `Open()`
|
||||
interprets the node configuration operations (see [Graphs](graphs.md))
|
||||
and prepares the calculator's per-graph-run state. This function may
|
||||
also write packets to calculator outputs. An error during `Open()` can
|
||||
terminate the graph run.
|
||||
* `Process()`
|
||||
* For a calculator with inputs, the framework calls `Process()` repeatedly
|
||||
whenever at least one input stream has a packet available. The framework
|
||||
by default guarantees that all inputs have the same timestamp (see
|
||||
[Synchronization](synchronization.md) for more information). Multiple
|
||||
`Process()` calls can be invoked simultaneously when parallel execution
|
||||
is enabled. If an error occurs during `Process()`, the framework calls
|
||||
`Close()` and the graph run terminates.
|
||||
* `Close()`
|
||||
* After all calls to `Process()` finish or when all input streams close,
|
||||
the framework calls `Close()`. This function is always called if
|
||||
`Open()` was called and succeeded and even if the graph run terminated
|
||||
because of an error. No inputs are available via any input streams
|
||||
during `Close()`, but it still has access to input side packets and
|
||||
therefore may write outputs. After `Close()` returns, the calculator
|
||||
should be considered a dead node. The calculator object is destroyed as
|
||||
soon as the graph finishes running.
|
||||
|
||||
The following are code snippets from
|
||||
[CalculatorBase.h](https://github.com/google/mediapipe/tree/master/mediapipe/framework/calculator_base.h).
|
||||
|
||||
```c++
|
||||
class CalculatorBase {
|
||||
public:
|
||||
...
|
||||
|
||||
// The subclasses of CalculatorBase must implement GetContract.
|
||||
// ...
|
||||
static absl::Status GetContract(CalculatorContract* cc);
|
||||
|
||||
// Open is called before any Process() calls, on a freshly constructed
|
||||
// calculator. Subclasses may override this method to perform necessary
|
||||
// setup, and possibly output Packets and/or set output streams' headers.
|
||||
// ...
|
||||
virtual absl::Status Open(CalculatorContext* cc) {
|
||||
return absl::OkStatus();
|
||||
}
|
||||
|
||||
// Processes the incoming inputs. May call the methods on cc to access
|
||||
// inputs and produce outputs.
|
||||
// ...
|
||||
virtual absl::Status Process(CalculatorContext* cc) = 0;
|
||||
|
||||
// Is called if Open() was called and succeeded. Is called either
|
||||
// immediately after processing is complete or after a graph run has ended
|
||||
// (if an error occurred in the graph). ...
|
||||
virtual absl::Status Close(CalculatorContext* cc) {
|
||||
return absl::OkStatus();
|
||||
}
|
||||
|
||||
...
|
||||
};
|
||||
```
|
||||
|
||||
## Life of a calculator
|
||||
|
||||
During initialization of a MediaPipe graph, the framework calls a
|
||||
`GetContract()` static method to determine what kinds of packets are expected.
|
||||
|
||||
The framework constructs and destroys the entire calculator for each graph run
|
||||
(e.g. once per video or once per image). Expensive or large objects that remain
|
||||
constant across graph runs should be supplied as input side packets so the
|
||||
calculations are not repeated on subsequent runs.
|
||||
|
||||
After initialization, for each run of the graph, the following sequence occurs:
|
||||
|
||||
* `Open()`
|
||||
* `Process()` (repeatedly)
|
||||
* `Close()`
|
||||
|
||||
The framework calls `Open()` to initialize the calculator. `Open()` should
|
||||
interpret any options and set up the calculator's per-graph-run state. `Open()`
|
||||
may obtain input side packets and write packets to calculator outputs. If
|
||||
appropriate, it should call `SetOffset()` to reduce potential packet buffering
|
||||
of input streams.
|
||||
|
||||
If an error occurs during `Open()` or `Process()` (as indicated by one of them
|
||||
returning a non-`Ok` status), the graph run is terminated with no further calls
|
||||
to the calculator's methods, and the calculator is destroyed.
|
||||
|
||||
For a calculator with inputs, the framework calls `Process()` whenever at least
|
||||
one input has a packet available. The framework guarantees that inputs all have
|
||||
the same timestamp, that timestamps increase with each call to `Process()` and
|
||||
that all packets are delivered. As a consequence, some inputs may not have any
|
||||
packets when `Process()` is called. An input whose packet is missing appears to
|
||||
produce an empty packet (with no timestamp).
|
||||
|
||||
The framework calls `Close()` after all calls to `Process()`. All inputs will
|
||||
have been exhausted, but `Close()` has access to input side packets and may
|
||||
write outputs. After Close returns, the calculator is destroyed.
|
||||
|
||||
Calculators with no inputs are referred to as sources. A source calculator
|
||||
continues to have `Process()` called as long as it returns an `Ok` status. A
|
||||
source calculator indicates that it is exhausted by returning a stop status
|
||||
(i.e. [`mediaPipe::tool::StatusStop()`](https://github.com/google/mediapipe/tree/master/mediapipe/framework/tool/status_util.cc).).
|
||||
|
||||
## Identifying inputs and outputs
|
||||
|
||||
The public interface to a calculator consists of a set of input streams and
|
||||
output streams. In a CalculatorGraphConfiguration, the outputs from some
|
||||
calculators are connected to the inputs of other calculators using named
|
||||
streams. Stream names are normally lowercase, while input and output tags are
|
||||
normally UPPERCASE. In the example below, the output with tag name `VIDEO` is
|
||||
connected to the input with tag name `VIDEO_IN` using the stream named
|
||||
`video_stream`.
|
||||
|
||||
```proto
|
||||
# Graph describing calculator SomeAudioVideoCalculator
|
||||
node {
|
||||
calculator: "SomeAudioVideoCalculator"
|
||||
input_stream: "INPUT:combined_input"
|
||||
output_stream: "VIDEO:video_stream"
|
||||
}
|
||||
node {
|
||||
calculator: "SomeVideoCalculator"
|
||||
input_stream: "VIDEO_IN:video_stream"
|
||||
output_stream: "VIDEO_OUT:processed_video"
|
||||
}
|
||||
```
|
||||
|
||||
Input and output streams can be identified by index number, by tag name, or by a
|
||||
combination of tag name and index number. You can see some examples of input and
|
||||
output identifiers in the example below. `SomeAudioVideoCalculator` identifies
|
||||
its video output by tag and its audio outputs by the combination of tag and
|
||||
index. The input with tag `VIDEO` is connected to the stream named
|
||||
`video_stream`. The outputs with tag `AUDIO` and indices `0` and `1` are
|
||||
connected to the streams named `audio_left` and `audio_right`.
|
||||
`SomeAudioCalculator` identifies its audio inputs by index only (no tag needed).
|
||||
|
||||
```proto
|
||||
# Graph describing calculator SomeAudioVideoCalculator
|
||||
node {
|
||||
calculator: "SomeAudioVideoCalculator"
|
||||
input_stream: "combined_input"
|
||||
output_stream: "VIDEO:video_stream"
|
||||
output_stream: "AUDIO:0:audio_left"
|
||||
output_stream: "AUDIO:1:audio_right"
|
||||
}
|
||||
|
||||
node {
|
||||
calculator: "SomeAudioCalculator"
|
||||
input_stream: "audio_left"
|
||||
input_stream: "audio_right"
|
||||
output_stream: "audio_energy"
|
||||
}
|
||||
```
|
||||
|
||||
In the calculator implementation, inputs and outputs are also identified by tag
|
||||
name and index number. In the function below input and output are identified:
|
||||
|
||||
* By index number: The combined input stream is identified simply by index
|
||||
`0`.
|
||||
* By tag name: The video output stream is identified by tag name "VIDEO".
|
||||
* By tag name and index number: The output audio streams are identified by the
|
||||
combination of the tag name `AUDIO` and the index numbers `0` and `1`.
|
||||
|
||||
```c++
|
||||
// c++ Code snippet describing the SomeAudioVideoCalculator GetContract() method
|
||||
class SomeAudioVideoCalculator : public CalculatorBase {
|
||||
public:
|
||||
static absl::Status GetContract(CalculatorContract* cc) {
|
||||
cc->Inputs().Index(0).SetAny();
|
||||
// SetAny() is used to specify that whatever the type of the
|
||||
// stream is, it's acceptable. This does not mean that any
|
||||
// packet is acceptable. Packets in the stream still have a
|
||||
// particular type. SetAny() has the same effect as explicitly
|
||||
// setting the type to be the stream's type.
|
||||
cc->Outputs().Tag("VIDEO").Set<ImageFrame>();
|
||||
cc->Outputs().Get("AUDIO", 0).Set<Matrix>();
|
||||
cc->Outputs().Get("AUDIO", 1).Set<Matrix>();
|
||||
return absl::OkStatus();
|
||||
}
|
||||
```
|
||||
|
||||
## Processing
|
||||
|
||||
`Process()` called on a non-source node must return `absl::OkStatus()` to
|
||||
indicate that all went well, or any other status code to signal an error
|
||||
|
||||
If a non-source calculator returns `tool::StatusStop()`, then this signals the
|
||||
graph is being cancelled early. In this case, all source calculators and graph
|
||||
input streams will be closed (and remaining Packets will propagate through the
|
||||
graph).
|
||||
|
||||
A source node in a graph will continue to have `Process()` called on it as long
|
||||
as it returns `absl::OkStatus(`). To indicate that there is no more data to be
|
||||
generated return `tool::StatusStop()`. Any other status indicates an error has
|
||||
occurred.
|
||||
|
||||
`Close()` returns `absl::OkStatus()` to indicate success. Any other status
|
||||
indicates a failure.
|
||||
|
||||
Here is the basic `Process()` function. It uses the `Input()` method (which can
|
||||
be used only if the calculator has a single input) to request its input data. It
|
||||
then uses `std::unique_ptr` to allocate the memory needed for the output packet,
|
||||
and does the calculations. When done it releases the pointer when adding it to
|
||||
the output stream.
|
||||
|
||||
```c++
|
||||
absl::Status MyCalculator::Process() {
|
||||
const Matrix& input = Input()->Get<Matrix>();
|
||||
std::unique_ptr<Matrix> output(new Matrix(input.rows(), input.cols()));
|
||||
// do your magic here....
|
||||
// output->row(n) = ...
|
||||
Output()->Add(output.release(), InputTimestamp());
|
||||
return absl::OkStatus();
|
||||
}
|
||||
```
|
||||
|
||||
## Calculator options
|
||||
|
||||
Calculators accept processing parameters through (1) input stream packets (2)
|
||||
input side packets, and (3) calculator options. Calculator options, if
|
||||
specified, appear as literal values in the `node_options` field of the
|
||||
`CalculatorGraphConfiguration.Node` message.
|
||||
|
||||
```
|
||||
node {
|
||||
calculator: "TfLiteInferenceCalculator"
|
||||
input_stream: "TENSORS:main_model_input"
|
||||
output_stream: "TENSORS:main_model_output"
|
||||
node_options: {
|
||||
[type.googleapis.com/mediapipe.TfLiteInferenceCalculatorOptions] {
|
||||
model_path: "mediapipe/models/detection_model.tflite"
|
||||
}
|
||||
}
|
||||
}
|
||||
```
|
||||
|
||||
The `node_options` field accepts the proto3 syntax. Alternatively, calculator
|
||||
options can be specified in the `options` field using proto2 syntax.
|
||||
|
||||
```
|
||||
node {
|
||||
calculator: "TfLiteInferenceCalculator"
|
||||
input_stream: "TENSORS:main_model_input"
|
||||
output_stream: "TENSORS:main_model_output"
|
||||
node_options: {
|
||||
[type.googleapis.com/mediapipe.TfLiteInferenceCalculatorOptions] {
|
||||
model_path: "mediapipe/models/detection_model.tflite"
|
||||
}
|
||||
}
|
||||
}
|
||||
```
|
||||
|
||||
Not all calculators accept calcuator options. In order to accept options, a
|
||||
calculator will normally define a new protobuf message type to represent its
|
||||
options, such as `PacketClonerCalculatorOptions`. The calculator will then
|
||||
read that protobuf message in its `CalculatorBase::Open` method, and possibly
|
||||
also in its `CalculatorBase::GetContract` function or its
|
||||
`CalculatorBase::Process` method. Normally, the new protobuf message type will
|
||||
be defined as a protobuf schema using a ".proto" file and a
|
||||
`mediapipe_proto_library()` build rule.
|
||||
|
||||
```
|
||||
mediapipe_proto_library(
|
||||
name = "packet_cloner_calculator_proto",
|
||||
srcs = ["packet_cloner_calculator.proto"],
|
||||
visibility = ["//visibility:public"],
|
||||
deps = [
|
||||
"//mediapipe/framework:calculator_options_proto",
|
||||
"//mediapipe/framework:calculator_proto",
|
||||
],
|
||||
)
|
||||
```
|
||||
|
||||
|
||||
## Example calculator
|
||||
|
||||
This section discusses the implementation of `PacketClonerCalculator`, which
|
||||
does a relatively simple job, and is used in many calculator graphs.
|
||||
`PacketClonerCalculator` simply produces a copy of its most recent input packets
|
||||
on demand.
|
||||
|
||||
`PacketClonerCalculator` is useful when the timestamps of arriving data packets
|
||||
are not aligned perfectly. Suppose we have a room with a microphone, light
|
||||
sensor and a video camera that is collecting sensory data. Each of the sensors
|
||||
operates independently and collects data intermittently. Suppose that the output
|
||||
of each sensor is:
|
||||
|
||||
* microphone = loudness in decibels of sound in the room (Integer)
|
||||
* light sensor = brightness of room (Integer)
|
||||
* video camera = RGB image frame of room (ImageFrame)
|
||||
|
||||
Our simple perception pipeline is designed to process sensory data from these 3
|
||||
sensors such that at any time when we have image frame data from the camera that
|
||||
is synchronized with the last collected microphone loudness data and light
|
||||
sensor brightness data. To do this with MediaPipe, our perception pipeline has 3
|
||||
input streams:
|
||||
|
||||
* room_mic_signal - Each packet of data in this input stream is integer data
|
||||
representing how loud audio is in a room with timestamp.
|
||||
* room_lightening_sensor - Each packet of data in this input stream is integer
|
||||
data representing how bright is the room illuminated with timestamp.
|
||||
* room_video_tick_signal - Each packet of data in this input stream is
|
||||
imageframe of video data representing video collected from camera in the
|
||||
room with timestamp.
|
||||
|
||||
Below is the implementation of the `PacketClonerCalculator`. You can see the
|
||||
`GetContract()`, `Open()`, and `Process()` methods as well as the instance
|
||||
variable `current_` which holds the most recent input packets.
|
||||
|
||||
```c++
|
||||
// This takes packets from N+1 streams, A_1, A_2, ..., A_N, B.
|
||||
// For every packet that appears in B, outputs the most recent packet from each
|
||||
// of the A_i on a separate stream.
|
||||
|
||||
#include <vector>
|
||||
|
||||
#include "absl/strings/str_cat.h"
|
||||
#include "mediapipe/framework/calculator_framework.h"
|
||||
|
||||
namespace mediapipe {
|
||||
|
||||
// For every packet received on the last stream, output the latest packet
|
||||
// obtained on all other streams. Therefore, if the last stream outputs at a
|
||||
// higher rate than the others, this effectively clones the packets from the
|
||||
// other streams to match the last.
|
||||
//
|
||||
// Example config:
|
||||
// node {
|
||||
// calculator: "PacketClonerCalculator"
|
||||
// input_stream: "first_base_signal"
|
||||
// input_stream: "second_base_signal"
|
||||
// input_stream: "tick_signal"
|
||||
// output_stream: "cloned_first_base_signal"
|
||||
// output_stream: "cloned_second_base_signal"
|
||||
// }
|
||||
//
|
||||
class PacketClonerCalculator : public CalculatorBase {
|
||||
public:
|
||||
static absl::Status GetContract(CalculatorContract* cc) {
|
||||
const int tick_signal_index = cc->Inputs().NumEntries() - 1;
|
||||
// cc->Inputs().NumEntries() returns the number of input streams
|
||||
// for the PacketClonerCalculator
|
||||
for (int i = 0; i < tick_signal_index; ++i) {
|
||||
cc->Inputs().Index(i).SetAny();
|
||||
// cc->Inputs().Index(i) returns the input stream pointer by index
|
||||
cc->Outputs().Index(i).SetSameAs(&cc->Inputs().Index(i));
|
||||
}
|
||||
cc->Inputs().Index(tick_signal_index).SetAny();
|
||||
return absl::OkStatus();
|
||||
}
|
||||
|
||||
absl::Status Open(CalculatorContext* cc) final {
|
||||
tick_signal_index_ = cc->Inputs().NumEntries() - 1;
|
||||
current_.resize(tick_signal_index_);
|
||||
// Pass along the header for each stream if present.
|
||||
for (int i = 0; i < tick_signal_index_; ++i) {
|
||||
if (!cc->Inputs().Index(i).Header().IsEmpty()) {
|
||||
cc->Outputs().Index(i).SetHeader(cc->Inputs().Index(i).Header());
|
||||
// Sets the output stream of index i header to be the same as
|
||||
// the header for the input stream of index i
|
||||
}
|
||||
}
|
||||
return absl::OkStatus();
|
||||
}
|
||||
|
||||
absl::Status Process(CalculatorContext* cc) final {
|
||||
// Store input signals.
|
||||
for (int i = 0; i < tick_signal_index_; ++i) {
|
||||
if (!cc->Inputs().Index(i).Value().IsEmpty()) {
|
||||
current_[i] = cc->Inputs().Index(i).Value();
|
||||
}
|
||||
}
|
||||
|
||||
// Output if the tick signal is non-empty.
|
||||
if (!cc->Inputs().Index(tick_signal_index_).Value().IsEmpty()) {
|
||||
for (int i = 0; i < tick_signal_index_; ++i) {
|
||||
if (!current_[i].IsEmpty()) {
|
||||
cc->Outputs().Index(i).AddPacket(
|
||||
current_[i].At(cc->InputTimestamp()));
|
||||
// Add a packet to output stream of index i a packet from inputstream i
|
||||
// with timestamp common to all present inputs
|
||||
} else {
|
||||
cc->Outputs().Index(i).SetNextTimestampBound(
|
||||
cc->InputTimestamp().NextAllowedInStream());
|
||||
// if current_[i], 1 packet buffer for input stream i is empty, we will set
|
||||
// next allowed timestamp for input stream i to be current timestamp + 1
|
||||
}
|
||||
}
|
||||
}
|
||||
return absl::OkStatus();
|
||||
}
|
||||
|
||||
private:
|
||||
std::vector<Packet> current_;
|
||||
int tick_signal_index_;
|
||||
};
|
||||
|
||||
REGISTER_CALCULATOR(PacketClonerCalculator);
|
||||
} // namespace mediapipe
|
||||
```
|
||||
|
||||
Typically, a calculator has only a .cc file. No .h is required, because
|
||||
mediapipe uses registration to make calculators known to it. After you have
|
||||
defined your calculator class, register it with a macro invocation
|
||||
REGISTER_CALCULATOR(calculator_class_name).
|
||||
|
||||
Below is a trivial MediaPipe graph that has 3 input streams, 1 node
|
||||
(PacketClonerCalculator) and 2 output streams.
|
||||
|
||||
```proto
|
||||
input_stream: "room_mic_signal"
|
||||
input_stream: "room_lighting_sensor"
|
||||
input_stream: "room_video_tick_signal"
|
||||
|
||||
node {
|
||||
calculator: "PacketClonerCalculator"
|
||||
input_stream: "room_mic_signal"
|
||||
input_stream: "room_lighting_sensor"
|
||||
input_stream: "room_video_tick_signal"
|
||||
output_stream: "cloned_room_mic_signal"
|
||||
output_stream: "cloned_lighting_sensor"
|
||||
}
|
||||
```
|
||||
|
||||
The diagram below shows how the `PacketClonerCalculator` defines its output
|
||||
packets (bottom) based on its series of input packets (top).
|
||||
|
||||
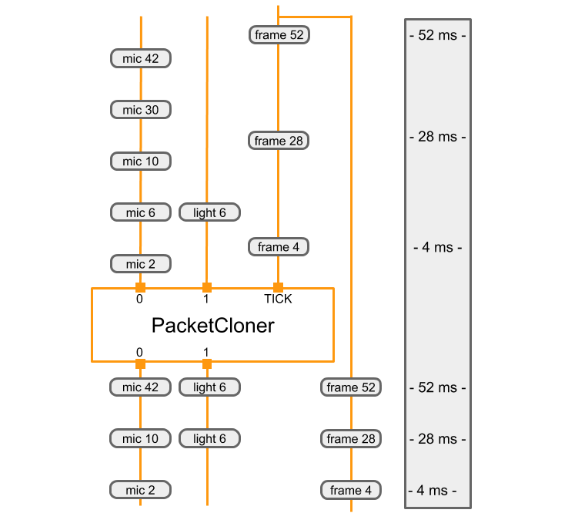 |
|
||||
:--------------------------------------------------------------------------: |
|
||||
*Each time it receives a packet on its TICK input stream, the PacketClonerCalculator outputs the most recent packet from each of its input streams. The sequence of output packets (bottom) is determined by the sequence of input packets (top) and their timestamps. The timestamps are shown along the right side of the diagram.* |
|
||||
@@ -1,24 +1,42 @@
|
||||
# MediaPipe Concepts
|
||||
---
|
||||
layout: default
|
||||
title: Framework Concepts
|
||||
nav_order: 5
|
||||
has_children: true
|
||||
has_toc: false
|
||||
---
|
||||
|
||||
# Framework Concepts
|
||||
{: .no_toc }
|
||||
|
||||
1. TOC
|
||||
{:toc}
|
||||
---
|
||||
|
||||
## The basics
|
||||
|
||||
### Packet
|
||||
|
||||
The basic data flow unit. A packet consists of a numeric timestamp and a shared pointer to an **immutable** payload. The payload can be of any C++ type, and the payload's type is also referred to as the type of the packet. Packets are value classes and can be copied cheaply. Each copy shares ownership of the payload, with reference-counting semantics. Each copy has its own timestamp. [Details](packets.md).
|
||||
The basic data flow unit. A packet consists of a numeric timestamp and a shared
|
||||
pointer to an **immutable** payload. The payload can be of any C++ type, and the
|
||||
payload's type is also referred to as the type of the packet. Packets are value
|
||||
classes and can be copied cheaply. Each copy shares ownership of the payload,
|
||||
with reference-counting semantics. Each copy has its own timestamp. See also
|
||||
[Packet](packets.md).
|
||||
|
||||
### Graph
|
||||
|
||||
MediaPipe processing takes place inside a graph, which defines packet flow paths
|
||||
between **nodes**. A graph can have any number of inputs and outputs, and data
|
||||
flow can branch and merge. Generally data flows forward, but
|
||||
[backward loops](cycles.md) are possible.
|
||||
flow can branch and merge. Generally data flows forward, but backward loops are
|
||||
possible. See [Graphs](graphs.md) for details.
|
||||
|
||||
### Nodes
|
||||
|
||||
Nodes produce and/or consume packets, and they are where the bulk of the graph’s
|
||||
work takes place. They are also known as “calculators”, for historical reasons.
|
||||
Each node’s interface defines a number of input and output **ports**, identified by
|
||||
a tag and/or an index.
|
||||
Each node’s interface defines a number of input and output **ports**, identified
|
||||
by a tag and/or an index. See [Calculators](calculators.md) for details.
|
||||
|
||||
### Streams
|
||||
|
||||
@@ -34,21 +52,23 @@ whereas a stream represents a flow of data that changes over time.
|
||||
### Packet Ports
|
||||
|
||||
A port has an associated type; packets transiting through the port must be of
|
||||
that type. An output stream port can be connected to any number of
|
||||
input stream ports of the same type; each consumer receives a separate copy of
|
||||
the output packets, and has its own queue, so it can consume them at its own
|
||||
pace. Similarly, a side packet output port can be connected to as many side
|
||||
packet input ports as desired.
|
||||
that type. An output stream port can be connected to any number of input stream
|
||||
ports of the same type; each consumer receives a separate copy of the output
|
||||
packets, and has its own queue, so it can consume them at its own pace.
|
||||
Similarly, a side packet output port can be connected to as many side packet
|
||||
input ports as desired.
|
||||
|
||||
A port can be required, meaning that a connection must be made for the graph to
|
||||
be valid, or optional, meaning it may remain unconnected.
|
||||
|
||||
Note: even if a stream connection is required, the stream may not carry a packet for all timestamps.
|
||||
Note: even if a stream connection is required, the stream may not carry a packet
|
||||
for all timestamps.
|
||||
|
||||
## Input and output
|
||||
|
||||
Data flow can originate from **source nodes**, which have no input streams and
|
||||
produce packets spontaneously (e.g. by reading from a file); or from **graph input streams**, which let an application feed packets into a graph.
|
||||
produce packets spontaneously (e.g. by reading from a file); or from **graph
|
||||
input streams**, which let an application feed packets into a graph.
|
||||
|
||||
Similarly, there are **sink nodes** that receive data and write it to various
|
||||
destinations (e.g. a file, a memory buffer, etc.), and an application can also
|
||||
@@ -78,15 +98,24 @@ processed data.
|
||||
|
||||
### Input policies
|
||||
|
||||
The default input policy is deterministic collation of packets by timestamp. A node receives
|
||||
all inputs for the same timestamp at the same time, in an invocation of its
|
||||
Process method; and successive input sets are received in their timestamp order. This can
|
||||
require delaying the processing of some packets until a packet with the same
|
||||
timestamp is received on all input streams, or until it can be guaranteed that a
|
||||
packet with that timestamp will not be arriving on the streams that have not
|
||||
received it.
|
||||
The default input policy is deterministic collation of packets by timestamp. A
|
||||
node receives all inputs for the same timestamp at the same time, in an
|
||||
invocation of its Process method; and successive input sets are received in
|
||||
their timestamp order. This can require delaying the processing of some packets
|
||||
until a packet with the same timestamp is received on all input streams, or
|
||||
until it can be guaranteed that a packet with that timestamp will not be
|
||||
arriving on the streams that have not received it.
|
||||
|
||||
Other policies are also available, implemented using a separate kind of
|
||||
component known as an InputStreamHandler.
|
||||
|
||||
See [scheduling](scheduling_sync.md) for more details.
|
||||
See [Synchronization](synchronization.md) for more details.
|
||||
|
||||
### Real-time streams
|
||||
|
||||
MediaPipe calculator graphs are often used to process streams of video or audio
|
||||
frames for interactive applications. Normally, each Calculator runs as soon as
|
||||
all of its input packets for a given timestamp become available. Calculators
|
||||
used in real-time graphs need to define output timestamp bounds based on input
|
||||
timestamp bounds in order to allow downstream calculators to be scheduled
|
||||
promptly. See [Real-time Streams](realtime_streams.md) for details.
|
||||
@@ -1,13 +1,19 @@
|
||||
## Running on GPUs
|
||||
---
|
||||
layout: default
|
||||
title: GPU
|
||||
parent: Framework Concepts
|
||||
nav_order: 5
|
||||
---
|
||||
|
||||
- [Overview](#overview)
|
||||
- [OpenGL Support](#opengl-support)
|
||||
- [Desktop GPUs](#desktop-gpu-linux)
|
||||
- [Life of a GPU calculator](#life-of-a-gpu-calculator)
|
||||
- [GpuBuffer to ImageFrame converters](#gpubuffer-to-imageframe-converters)
|
||||
- [Disable GPU support](#disable-gpu-support)
|
||||
# GPU
|
||||
{: .no_toc }
|
||||
|
||||
1. TOC
|
||||
{:toc}
|
||||
---
|
||||
|
||||
## Overview
|
||||
|
||||
### Overview
|
||||
MediaPipe supports calculator nodes for GPU compute and rendering, and allows combining multiple GPU nodes, as well as mixing them with CPU based calculator nodes. There exist several GPU APIs on mobile platforms (eg, OpenGL ES, Metal and Vulkan). MediaPipe does not attempt to offer a single cross-API GPU abstraction. Individual nodes can be written using different APIs, allowing them to take advantage of platform specific features when needed.
|
||||
|
||||
GPU support is essential for good performance on mobile platforms, especially for real-time video. MediaPipe enables developers to write GPU compatible calculators that support the use of GPU for:
|
||||
@@ -23,7 +29,7 @@ Below are the design principles for GPU support in MediaPipe
|
||||
* Because different platforms may require different techniques for best performance, the API should allow flexibility in the way things are implemented behind the scenes.
|
||||
* A calculator should be allowed maximum flexibility in using the GPU for all or part of its operation, combining it with the CPU if necessary.
|
||||
|
||||
### OpenGL Support
|
||||
## OpenGL ES Support
|
||||
|
||||
MediaPipe supports OpenGL ES up to version 3.2 on Android/Linux and up to ES 3.0
|
||||
on iOS. In addition, MediaPipe also supports Metal on iOS.
|
||||
@@ -48,37 +54,7 @@ some Android devices. Therefore, our approach is to have one dedicated thread
|
||||
per context. Each thread issues GL commands, building up a serial command queue
|
||||
on its context, which is then executed by the GPU asynchronously.
|
||||
|
||||
#### Desktop GPU (Linux)
|
||||
|
||||
MediaPipe GPU can run on linux systems with video cards that support OpenGL ES
|
||||
3.1 and up.
|
||||
|
||||
To check if your linux desktop GPU can run mediapipe:
|
||||
|
||||
```bash
|
||||
$ sudo apt-get install mesa-common-dev libegl1-mesa-dev libgles2-mesa-dev
|
||||
$ sudo apt-get install mesa-utils
|
||||
$ glxinfo | grep -i opengl
|
||||
```
|
||||
|
||||
My linux box prints:
|
||||
|
||||
```bash
|
||||
$ glxinfo | grep -i opengl
|
||||
...
|
||||
OpenGL ES profile version string: OpenGL ES 3.2 NVIDIA 430.50
|
||||
OpenGL ES profile shading language version string: OpenGL ES GLSL ES 3.20
|
||||
OpenGL ES profile extensions:
|
||||
```
|
||||
|
||||
*^notice the OpenGL ES 3.2 text^*
|
||||
|
||||
To run MediaPipe GPU on desktop, you need to see ES 3.1 or greater printed.
|
||||
|
||||
If OpenGL ES is not printed, or is below 3.1, then the GPU inference will not
|
||||
run.
|
||||
|
||||
### Life of a GPU calculator
|
||||
## Life of a GPU Calculator
|
||||
|
||||
This section presents the basic structure of the Process method of a GPU
|
||||
calculator derived from base class GlSimpleCalculator. The GPU calculator
|
||||
@@ -90,10 +66,10 @@ calculator derived from base class GlSimpleCalculator. The GPU calculator
|
||||
// See GlSimpleCalculator for inputs, outputs and input side packets.
|
||||
class LuminanceCalculator : public GlSimpleCalculator {
|
||||
public:
|
||||
::mediapipe::Status GlSetup() override;
|
||||
::mediapipe::Status GlRender(const GlTexture& src,
|
||||
const GlTexture& dst) override;
|
||||
::mediapipe::Status GlTeardown() override;
|
||||
absl::Status GlSetup() override;
|
||||
absl::Status GlRender(const GlTexture& src,
|
||||
const GlTexture& dst) override;
|
||||
absl::Status GlTeardown() override;
|
||||
|
||||
private:
|
||||
GLuint program_ = 0;
|
||||
@@ -101,8 +77,8 @@ class LuminanceCalculator : public GlSimpleCalculator {
|
||||
};
|
||||
REGISTER_CALCULATOR(LuminanceCalculator);
|
||||
|
||||
::mediapipe::Status LuminanceCalculator::GlRender(const GlTexture& src,
|
||||
const GlTexture& dst) {
|
||||
absl::Status LuminanceCalculator::GlRender(const GlTexture& src,
|
||||
const GlTexture& dst) {
|
||||
static const GLfloat square_vertices[] = {
|
||||
-1.0f, -1.0f, // bottom left
|
||||
1.0f, -1.0f, // bottom right
|
||||
@@ -152,7 +128,7 @@ REGISTER_CALCULATOR(LuminanceCalculator);
|
||||
glDeleteVertexArrays(1, &vao);
|
||||
glDeleteBuffers(2, vbo);
|
||||
|
||||
return ::mediapipe::OkStatus();
|
||||
return absl::OkStatus();
|
||||
}
|
||||
```
|
||||
|
||||
@@ -165,7 +141,7 @@ choices for MediaPipe GPU support:
|
||||
* Data that needs to be shared between all GPU-based calculators is provided as a external input that is implemented as a graph service and is managed by the `GlCalculatorHelper` class.
|
||||
* The combination of calculator-specific helpers and a shared graph service allows us great flexibility in managing the GPU resource: we can have a separate context per calculator, share a single context, share a lock or other synchronization primitives, etc. -- and all of this is managed by the helper and hidden from the individual calculators.
|
||||
|
||||
### GpuBuffer to ImageFrame converters
|
||||
## GpuBuffer to ImageFrame Converters
|
||||
|
||||
We provide two calculators called `GpuBufferToImageFrameCalculator` and `ImageFrameToGpuBufferCalculator`. These calculators convert between `ImageFrame` and `GpuBuffer`, allowing the construction of graphs that combine GPU and CPU calculators. They are supported on both iOS and Android
|
||||
|
||||
@@ -173,30 +149,15 @@ When possible, these calculators use platform-specific functionality to share da
|
||||
|
||||
The below diagram shows the data flow in a mobile application that captures video from the camera, runs it through a MediaPipe graph, and renders the output on the screen in real time. The dashed line indicates which parts are inside the MediaPipe graph proper. This application runs a Canny edge-detection filter on the CPU using OpenCV, and overlays it on top of the original video using the GPU.
|
||||
|
||||
|  |
|
||||
|:--:|
|
||||
| *Video frames from the camera are fed into the graph as `GpuBuffer` packets. The input stream is accessed by two calculators in parallel. `GpuBufferToImageFrameCalculator` converts the buffer into an `ImageFrame`, which is then sent through a grayscale converter and a canny filter (both based on OpenCV and running on the CPU), whose output is then converted into a `GpuBuffer` again. A multi-input GPU calculator, GlOverlayCalculator, takes as input both the original `GpuBuffer` and the one coming out of the edge detector, and overlays them using a shader. The output is then sent back to the application using a callback calculator, and the application renders the image to the screen using OpenGL.* |
|
||||
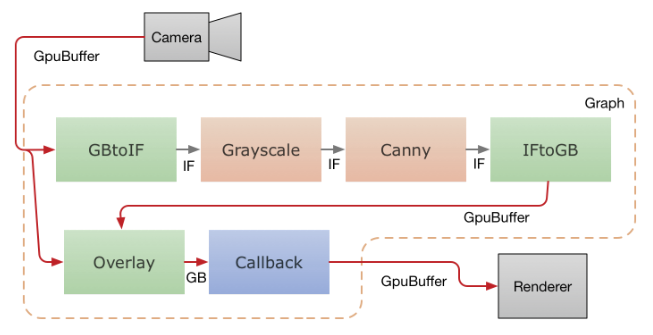
|
||||
|
||||
### Disable GPU Support
|
||||
|
||||
By default, building MediaPipe (with no special bazel flags) attempts to compile
|
||||
and link against OpenGL/Metal libraries.
|
||||
|
||||
There are some command line build flags available to disable/enable GPU support
|
||||
within the MediaPipe framework:
|
||||
|
||||
```
|
||||
# To disable *all* gpu support
|
||||
bazel build --define MEDIAPIPE_DISABLE_GPU=1 <my-target>
|
||||
|
||||
# to enable full GPU support (OpenGL ES 3.1+ & Metal)
|
||||
bazel build --copt -DMESA_EGL_NO_X11_HEADERS <my-target>
|
||||
|
||||
# to enable only OpenGL ES 3.0 and below (no GLES 3.1+ features)
|
||||
bazel build --copt -DMESA_EGL_NO_X11_HEADERS --copt -DMEDIAPIPE_DISABLE_GL_COMPUTE <my-target>
|
||||
```
|
||||
|
||||
Note *MEDIAPIPE_DISABLE_GL_COMPUTE* is automatically defined on all Apple
|
||||
systems (Apple doesn't support OpenGL ES 3.1+).
|
||||
|
||||
Note on iOS and Android, it is assumed that GPU support will be enabled.
|
||||
Video frames from the camera are fed into the graph as `GpuBuffer` packets. The
|
||||
input stream is accessed by two calculators in parallel.
|
||||
`GpuBufferToImageFrameCalculator` converts the buffer into an `ImageFrame`,
|
||||
which is then sent through a grayscale converter and a canny filter (both based
|
||||
on OpenCV and running on the CPU), whose output is then converted into a
|
||||
`GpuBuffer` again. A multi-input GPU calculator, GlOverlayCalculator, takes as
|
||||
input both the original `GpuBuffer` and the one coming out of the edge detector,
|
||||
and overlays them using a shader. The output is then sent back to the
|
||||
application using a callback calculator, and the application renders the image
|
||||
to the screen using OpenGL.
|
||||
@@ -0,0 +1,271 @@
|
||||
---
|
||||
layout: default
|
||||
title: Graphs
|
||||
parent: Framework Concepts
|
||||
nav_order: 2
|
||||
---
|
||||
|
||||
# Graphs
|
||||
{: .no_toc }
|
||||
|
||||
1. TOC
|
||||
{:toc}
|
||||
---
|
||||
|
||||
## GraphConfig
|
||||
|
||||
A `GraphConfig` is a specification that describes the topology and functionality
|
||||
of a MediaPipe graph. In the specification, a node in the graph represents an
|
||||
instance of a particular calculator. All the necessary configurations of the
|
||||
node, such its type, inputs and outputs must be described in the specification.
|
||||
Description of the node can also include several optional fields, such as
|
||||
node-specific options, input policy and executor, discussed in
|
||||
[Synchronization](synchronization.md).
|
||||
|
||||
`GraphConfig` has several other fields to configure the global graph-level
|
||||
settings, eg, graph executor configs, number of threads, and maximum queue size
|
||||
of input streams. Several graph-level settings are useful for tuning the
|
||||
performance of the graph on different platforms (eg, desktop v.s. mobile). For
|
||||
instance, on mobile, attaching a heavy model-inference calculator to a separate
|
||||
executor can improve the performance of a real-time application since this
|
||||
enables thread locality.
|
||||
|
||||
Below is a trivial `GraphConfig` example where we have series of passthrough
|
||||
calculators :
|
||||
|
||||
```proto
|
||||
# This graph named main_pass_throughcals_nosubgraph.pbtxt contains 4
|
||||
# passthrough calculators.
|
||||
input_stream: "in"
|
||||
node {
|
||||
calculator: "PassThroughCalculator"
|
||||
input_stream: "in"
|
||||
output_stream: "out1"
|
||||
}
|
||||
node {
|
||||
calculator: "PassThroughCalculator"
|
||||
input_stream: "out1"
|
||||
output_stream: "out2"
|
||||
}
|
||||
node {
|
||||
calculator: "PassThroughCalculator"
|
||||
input_stream: "out2"
|
||||
output_stream: "out3"
|
||||
}
|
||||
node {
|
||||
calculator: "PassThroughCalculator"
|
||||
input_stream: "out3"
|
||||
output_stream: "out4"
|
||||
}
|
||||
```
|
||||
|
||||
## Subgraph
|
||||
|
||||
To modularize a `CalculatorGraphConfig` into sub-modules and assist with re-use
|
||||
of perception solutions, a MediaPipe graph can be defined as a `Subgraph`. The
|
||||
public interface of a subgraph consists of a set of input and output streams
|
||||
similar to a calculator's public interface. The subgraph can then be included in
|
||||
an `CalculatorGraphConfig` as if it were a calculator. When a MediaPipe graph is
|
||||
loaded from a `CalculatorGraphConfig`, each subgraph node is replaced by the
|
||||
corresponding graph of calculators. As a result, the semantics and performance
|
||||
of the subgraph is identical to the corresponding graph of calculators.
|
||||
|
||||
Below is an example of how to create a subgraph named `TwoPassThroughSubgraph`.
|
||||
|
||||
1. Defining the subgraph.
|
||||
|
||||
```proto
|
||||
# This subgraph is defined in two_pass_through_subgraph.pbtxt
|
||||
# and is registered as "TwoPassThroughSubgraph"
|
||||
|
||||
type: "TwoPassThroughSubgraph"
|
||||
input_stream: "out1"
|
||||
output_stream: "out3"
|
||||
|
||||
node {
|
||||
calculator: "PassThroughCalculator"
|
||||
input_stream: "out1"
|
||||
output_stream: "out2"
|
||||
}
|
||||
node {
|
||||
calculator: "PassThroughCalculator"
|
||||
input_stream: "out2"
|
||||
output_stream: "out3"
|
||||
}
|
||||
```
|
||||
|
||||
The public interface to the subgraph consists of:
|
||||
|
||||
* Graph input streams
|
||||
* Graph output streams
|
||||
* Graph input side packets
|
||||
* Graph output side packets
|
||||
|
||||
2. Register the subgraph using BUILD rule `mediapipe_simple_subgraph`. The
|
||||
parameter `register_as` defines the component name for the new subgraph.
|
||||
|
||||
```proto
|
||||
# Small section of BUILD file for registering the "TwoPassThroughSubgraph"
|
||||
# subgraph for use by main graph main_pass_throughcals.pbtxt
|
||||
|
||||
mediapipe_simple_subgraph(
|
||||
name = "twopassthrough_subgraph",
|
||||
graph = "twopassthrough_subgraph.pbtxt",
|
||||
register_as = "TwoPassThroughSubgraph",
|
||||
deps = [
|
||||
"//mediapipe/calculators/core:pass_through_calculator",
|
||||
"//mediapipe/framework:calculator_graph",
|
||||
],
|
||||
)
|
||||
```
|
||||
|
||||
3. Use the subgraph in the main graph.
|
||||
|
||||
```proto
|
||||
# This main graph is defined in main_pass_throughcals.pbtxt
|
||||
# using subgraph called "TwoPassThroughSubgraph"
|
||||
|
||||
input_stream: "in"
|
||||
node {
|
||||
calculator: "PassThroughCalculator"
|
||||
input_stream: "in"
|
||||
output_stream: "out1"
|
||||
}
|
||||
node {
|
||||
calculator: "TwoPassThroughSubgraph"
|
||||
input_stream: "out1"
|
||||
output_stream: "out3"
|
||||
}
|
||||
node {
|
||||
calculator: "PassThroughCalculator"
|
||||
input_stream: "out3"
|
||||
output_stream: "out4"
|
||||
}
|
||||
```
|
||||
|
||||
## Cycles
|
||||
|
||||
<!-- TODO: add discussion of PreviousLoopbackCalculator -->
|
||||
|
||||
By default, MediaPipe requires calculator graphs to be acyclic and treats cycles
|
||||
in a graph as errors. If a graph is intended to have cycles, the cycles need to
|
||||
be annotated in the graph config. This page describes how to do that.
|
||||
|
||||
NOTE: The current approach is experimental and subject to change. We welcome
|
||||
your feedback.
|
||||
|
||||
Please use the `CalculatorGraphTest.Cycle` unit test in
|
||||
`mediapipe/framework/calculator_graph_test.cc` as sample code. Shown
|
||||
below is the cyclic graph in the test. The `sum` output of the adder is the sum
|
||||
of the integers generated by the integer source calculator.
|
||||
|
||||
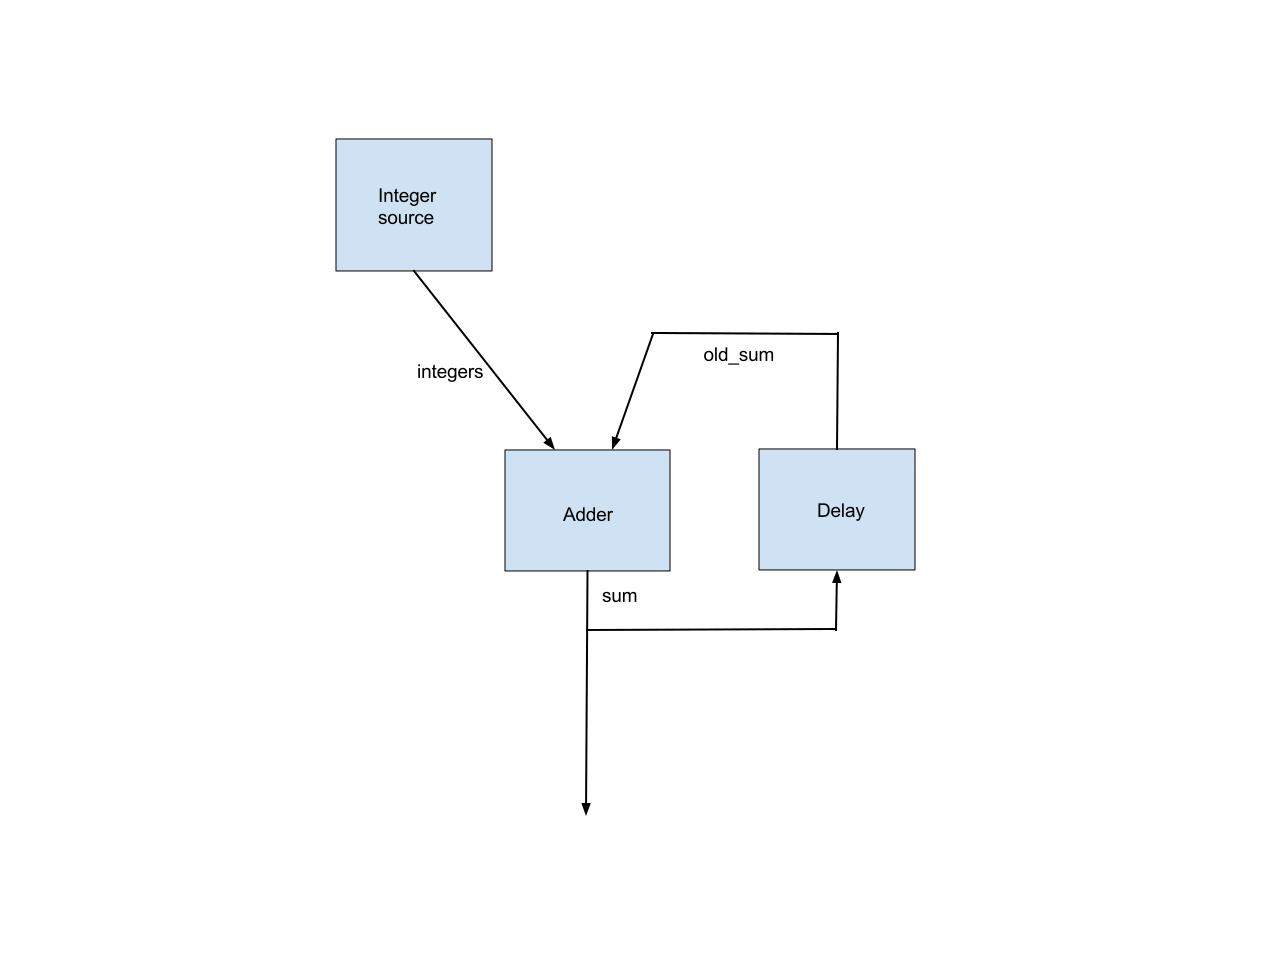
|
||||
|
||||
This simple graph illustrates all the issues in supporting cyclic graphs.
|
||||
|
||||
### Back Edge Annotation
|
||||
|
||||
We require that an edge in each cycle be annotated as a back edge. This allows
|
||||
MediaPipe’s topological sort to work, after removing all the back edges.
|
||||
|
||||
There are usually multiple ways to select the back edges. Which edges are marked
|
||||
as back edges affects which nodes are considered as upstream and which nodes are
|
||||
considered as downstream, which in turn affects the priorities MediaPipe assigns
|
||||
to the nodes.
|
||||
|
||||
For example, the `CalculatorGraphTest.Cycle` test marks the `old_sum` edge as a
|
||||
back edge, so the Delay node is considered as a downstream node of the adder
|
||||
node and is given a higher priority. Alternatively, we could mark the `sum`
|
||||
input to the delay node as the back edge, in which case the delay node would be
|
||||
considered as an upstream node of the adder node and is given a lower priority.
|
||||
|
||||
### Initial Packet
|
||||
|
||||
For the adder calculator to be runnable when the first integer from the integer
|
||||
source arrives, we need an initial packet, with value 0 and with the same
|
||||
timestamp, on the `old_sum` input stream to the adder. This initial packet
|
||||
should be output by the delay calculator in the `Open()` method.
|
||||
|
||||
### Delay in a Loop
|
||||
|
||||
Each loop should incur a delay to align the previous `sum` output with the next
|
||||
integer input. This is also done by the delay node. So the delay node needs to
|
||||
know the following about the timestamps of the integer source calculator:
|
||||
|
||||
* The timestamp of the first output.
|
||||
|
||||
* The timestamp delta between successive outputs.
|
||||
|
||||
We plan to add an alternative scheduling policy that only cares about packet
|
||||
ordering and ignores packet timestamps, which will eliminate this inconvenience.
|
||||
|
||||
### Early Termination of a Calculator When One Input Stream is Done
|
||||
|
||||
By default, MediaPipe calls the `Close()` method of a non-source calculator when
|
||||
all of its input streams are done. In the example graph, we want to stop the
|
||||
adder node as soon as the integer source is done. This is accomplished by
|
||||
configuring the adder node with an alternative input stream handler,
|
||||
`EarlyCloseInputStreamHandler`.
|
||||
|
||||
### Relevant Source Code
|
||||
|
||||
#### Delay Calculator
|
||||
|
||||
Note the code in `Open()` that outputs the initial packet and the code in
|
||||
`Process()` that adds a (unit) delay to input packets. As noted above, this
|
||||
delay node assumes that its output stream is used alongside an input stream with
|
||||
packet timestamps 0, 1, 2, 3, ...
|
||||
|
||||
```c++
|
||||
class UnitDelayCalculator : public Calculator {
|
||||
public:
|
||||
static absl::Status FillExpectations(
|
||||
const CalculatorOptions& extendable_options, PacketTypeSet* inputs,
|
||||
PacketTypeSet* outputs, PacketTypeSet* input_side_packets) {
|
||||
inputs->Index(0)->Set<int>("An integer.");
|
||||
outputs->Index(0)->Set<int>("The input delayed by one time unit.");
|
||||
return absl::OkStatus();
|
||||
}
|
||||
|
||||
absl::Status Open() final {
|
||||
Output()->Add(new int(0), Timestamp(0));
|
||||
return absl::OkStatus();
|
||||
}
|
||||
|
||||
absl::Status Process() final {
|
||||
const Packet& packet = Input()->Value();
|
||||
Output()->AddPacket(packet.At(packet.Timestamp().NextAllowedInStream()));
|
||||
return absl::OkStatus();
|
||||
}
|
||||
};
|
||||
```
|
||||
|
||||
#### Graph Config
|
||||
|
||||
Note the `back_edge` annotation and the alternative `input_stream_handler`.
|
||||
|
||||
```proto
|
||||
node {
|
||||
calculator: 'GlobalCountSourceCalculator'
|
||||
input_side_packet: 'global_counter'
|
||||
output_stream: 'integers'
|
||||
}
|
||||
node {
|
||||
calculator: 'IntAdderCalculator'
|
||||
input_stream: 'integers'
|
||||
input_stream: 'old_sum'
|
||||
input_stream_info: {
|
||||
tag_index: ':1' # 'old_sum'
|
||||
back_edge: true
|
||||
}
|
||||
output_stream: 'sum'
|
||||
input_stream_handler {
|
||||
input_stream_handler: 'EarlyCloseInputStreamHandler'
|
||||
}
|
||||
}
|
||||
node {
|
||||
calculator: 'UnitDelayCalculator'
|
||||
input_stream: 'sum'
|
||||
output_stream: 'old_sum'
|
||||
}
|
||||
```
|
||||
@@ -0,0 +1,41 @@
|
||||
---
|
||||
layout: default
|
||||
title: Packets
|
||||
parent: Framework Concepts
|
||||
nav_order: 3
|
||||
---
|
||||
|
||||
# Packets
|
||||
{: .no_toc }
|
||||
|
||||
1. TOC
|
||||
{:toc}
|
||||
---
|
||||
|
||||
Calculators communicate by sending and receiving packets. Typically a single
|
||||
packet is sent along each input stream at each input timestamp. A packet can
|
||||
contain any kind of data, such as a single frame of video or a single integer
|
||||
detection count.
|
||||
|
||||
## Creating a packet
|
||||
|
||||
Packets are generally created with `mediapipe::MakePacket<T>()` or
|
||||
`mediapipe::Adopt()` (from packet.h).
|
||||
|
||||
```c++
|
||||
// Create a packet containing some new data.
|
||||
Packet p = MakePacket<MyDataClass>("constructor_argument");
|
||||
// Make a new packet with the same data and a different timestamp.
|
||||
Packet p2 = p.At(Timestamp::PostStream());
|
||||
```
|
||||
|
||||
or:
|
||||
|
||||
```c++
|
||||
// Create some new data.
|
||||
auto data = absl::make_unique<MyDataClass>("constructor_argument");
|
||||
// Create a packet to own the data.
|
||||
Packet p = Adopt(data.release()).At(Timestamp::PostStream());
|
||||
```
|
||||
|
||||
Data within a packet is accessed with `Packet::Get<T>()`
|
||||
@@ -0,0 +1,186 @@
|
||||
---
|
||||
layout: default
|
||||
title: Real-time Streams
|
||||
parent: Framework Concepts
|
||||
nav_order: 6
|
||||
---
|
||||
|
||||
# Real-time Streams
|
||||
{: .no_toc }
|
||||
|
||||
1. TOC
|
||||
{:toc}
|
||||
---
|
||||
|
||||
## Real-time timestamps
|
||||
|
||||
MediaPipe calculator graphs are often used to process streams of video or audio
|
||||
frames for interactive applications. The MediaPipe framework requires only that
|
||||
successive packets be assigned monotonically increasing timestamps. By
|
||||
convention, real-time calculators and graphs use the recording time or the
|
||||
presentation time of each frame as its timestamp, with each timestamp indicating
|
||||
the microseconds since `Jan/1/1970:00:00:00`. This allows packets from various
|
||||
sources to be processed in a globally consistent sequence.
|
||||
|
||||
## Real-time scheduling
|
||||
|
||||
Normally, each Calculator runs as soon as all of its input packets for a given
|
||||
timestamp become available. Normally, this happens when the calculator has
|
||||
finished processing the previous frame, and each of the calculators producing
|
||||
its inputs have finished processing the current frame. The MediaPipe scheduler
|
||||
invokes each calculator as soon as these conditions are met. See
|
||||
[Synchronization](synchronization.md) for more details.
|
||||
|
||||
## Timestamp bounds
|
||||
|
||||
When a calculator does not produce any output packets for a given timestamp, it
|
||||
can instead output a "timestamp bound" indicating that no packet will be
|
||||
produced for that timestamp. This indication is necessary to allow downstream
|
||||
calculators to run at that timestamp, even though no packet has arrived for
|
||||
certain streams for that timestamp. This is especially important for real-time
|
||||
graphs in interactive applications, where it is crucial that each calculator
|
||||
begin processing as soon as possible.
|
||||
|
||||
Consider a graph like the following:
|
||||
|
||||
```
|
||||
node {
|
||||
calculator: "A"
|
||||
input_stream: "alpha_in"
|
||||
output_stream: "alpha"
|
||||
}
|
||||
node {
|
||||
calculator: "B"
|
||||
input_stream: "alpha"
|
||||
input_stream: "foo"
|
||||
output_stream: "beta"
|
||||
}
|
||||
```
|
||||
|
||||
Suppose: at timestamp `T`, node `A` doesn't send a packet in its output stream
|
||||
`alpha`. Node `B` gets a packet in `foo` at timestamp `T` and is waiting for a
|
||||
packet in `alpha` at timestamp `T`. If `A` doesn't send `B` a timestamp bound
|
||||
update for `alpha`, `B` will keep waiting for a packet to arrive in `alpha`.
|
||||
Meanwhile, the packet queue of `foo` will accumulate packets at `T`, `T+1` and
|
||||
so on.
|
||||
|
||||
To output a packet on a stream, a calculator uses the API functions
|
||||
`CalculatorContext::Outputs` and `OutputStream::Add`. To instead output a
|
||||
timestamp bound on a stream, a calculator can use the API functions
|
||||
`CalculatorContext::Outputs` and `CalculatorContext::SetNextTimestampBound`. The
|
||||
specified bound is the lowest allowable timestamp for the next packet on the
|
||||
specified output stream. When no packet is output, a calculator will typically
|
||||
do something like:
|
||||
|
||||
```
|
||||
cc->Outputs().Tag("output_frame").SetNextTimestampBound(
|
||||
cc->InputTimestamp().NextAllowedInStream());
|
||||
```
|
||||
|
||||
The function `Timestamp::NextAllowedInStream` returns the successive timestamp.
|
||||
For example, `Timestamp(1).NextAllowedInStream() == Timestamp(2)`.
|
||||
|
||||
## Propagating timestamp bounds
|
||||
|
||||
Calculators that will be used in real-time graphs need to define output
|
||||
timestamp bounds based on input timestamp bounds in order to allow downstream
|
||||
calculators to be scheduled promptly. A common pattern is for calculators to
|
||||
output packets with the same timestamps as their input packets. In this case,
|
||||
simply outputting a packet on every call to `Calculator::Process` is sufficient
|
||||
to define output timestamp bounds.
|
||||
|
||||
However, calculators are not required to follow this common pattern for output
|
||||
timestamps, they are only required to choose monotonically increasing output
|
||||
timestamps. As a result, certain calculators must calculate timestamp bounds
|
||||
explicitly. MediaPipe provides several tools for computing appropriate timestamp
|
||||
bound for each calculator.
|
||||
|
||||
1\. **SetNextTimestampBound()** can be used to specify the timestamp bound, `t +
|
||||
1`, for an output stream.
|
||||
|
||||
```
|
||||
cc->Outputs.Tag("OUT").SetNextTimestampBound(t.NextAllowedInStream());
|
||||
```
|
||||
|
||||
Alternatively, an empty packet with timestamp `t` can be produced to specify the
|
||||
timestamp bound `t + 1`.
|
||||
|
||||
```
|
||||
cc->Outputs.Tag("OUT").Add(Packet(), t);
|
||||
```
|
||||
|
||||
The timestamp bound of an input stream is indicated by the packet or the empty
|
||||
packet on the input stream.
|
||||
|
||||
```
|
||||
Timestamp bound = cc->Inputs().Tag("IN").Value().Timestamp();
|
||||
```
|
||||
|
||||
2\. **TimestampOffset()** can be specified in order to automatically copy the
|
||||
timestamp bound from input streams to output streams.
|
||||
|
||||
```
|
||||
cc->SetTimestampOffset(0);
|
||||
```
|
||||
|
||||
This setting has the advantage of propagating timestamp bounds automatically,
|
||||
even when only timestamp bounds arrive and Calculator::Process is not invoked.
|
||||
|
||||
3\. **ProcessTimestampBounds()** can be specified in order to invoke
|
||||
`Calculator::Process` for each new "settled timestamp", where the "settled
|
||||
timestamp" is the new highest timestamp below the current timestamp bounds.
|
||||
Without `ProcessTimestampBounds()`, `Calculator::Process` is invoked only with
|
||||
one or more arriving packets.
|
||||
|
||||
```
|
||||
cc->SetProcessTimestampBounds(true);
|
||||
```
|
||||
|
||||
This setting allows a calculator to perform its own timestamp bounds calculation
|
||||
and propagation, even when only input timestamps are updated. It can be used to
|
||||
replicate the effect of `TimestampOffset()`, but it can also be used to
|
||||
calculate a timestamp bound that takes into account additional factors.
|
||||
|
||||
For example, in order to replicate `SetTimestampOffset(0)`, a calculator could
|
||||
do the following:
|
||||
|
||||
```
|
||||
absl::Status Open(CalculatorContext* cc) {
|
||||
cc->SetProcessTimestampBounds(true);
|
||||
}
|
||||
|
||||
absl::Status Process(CalculatorContext* cc) {
|
||||
cc->Outputs.Tag("OUT").SetNextTimestampBound(
|
||||
cc->InputTimestamp().NextAllowedInStream());
|
||||
}
|
||||
```
|
||||
|
||||
## Scheduling of Calculator::Open and Calculator::Close
|
||||
|
||||
`Calculator::Open` is invoked when all required input side-packets have been
|
||||
produced. Input side-packets can be provided by the enclosing application or by
|
||||
"side-packet calculators" inside the graph. Side-packets can be specified from
|
||||
outside the graph using the API's `CalculatorGraph::Initialize` and
|
||||
`CalculatorGraph::StartRun`. Side packets can be specified by calculators within
|
||||
the graph using `CalculatorGraphConfig::OutputSidePackets` and
|
||||
`OutputSidePacket::Set`.
|
||||
|
||||
Calculator::Close is invoked when all of the input streams have become `Done` by
|
||||
being closed or reaching timestamp bound `Timestamp::Done`.
|
||||
|
||||
**Note:** If the graph finishes all pending calculator execution and becomes
|
||||
`Done`, before some streams become `Done`, then MediaPipe will invoke the
|
||||
remaining calls to `Calculator::Close`, so that every calculator can produce its
|
||||
final outputs.
|
||||
|
||||
The use of `TimestampOffset` has some implications for `Calculator::Close`. A
|
||||
calculator specifying `SetTimestampOffset(0)` will by design signal that all of
|
||||
its output streams have reached `Timestamp::Done` when all of its input streams
|
||||
have reached `Timestamp::Done`, and therefore no further outputs are possible.
|
||||
This prevents such a calculator from emitting any packets during
|
||||
`Calculator::Close`. If a calculator needs to produce a summary packet during
|
||||
`Calculator::Close`, `Calculator::Process` must specify timestamp bounds such
|
||||
that at least one timestamp (such as `Timestamp::Max`) remains available during
|
||||
`Calculator::Close`. This means that such a calculator normally cannot rely upon
|
||||
`SetTimestampOffset(0)` and must instead specify timestamp bounds explicitly
|
||||
using `SetNextTimestampBounds()`.
|
||||
@@ -1,4 +1,16 @@
|
||||
# Framework Architecture
|
||||
---
|
||||
layout: default
|
||||
title: Synchronization
|
||||
parent: Framework Concepts
|
||||
nav_order: 4
|
||||
---
|
||||
|
||||
# Synchronization
|
||||
{: .no_toc }
|
||||
|
||||
1. TOC
|
||||
{:toc}
|
||||
---
|
||||
|
||||
## Scheduling mechanics
|
||||
|
||||
@@ -157,7 +169,7 @@ behavior depending on resource constraints.
|
||||
|
||||
[`CalculatorBase`]: https://github.com/google/mediapipe/tree/master/mediapipe/framework/calculator_base.h
|
||||
[`DefaultInputStreamHandler`]: https://github.com/google/mediapipe/tree/master/mediapipe/framework/stream_handler/default_input_stream_handler.h
|
||||
[`SyncSetInputStreamHandler`]: https://github.com/google/mediapipe/tree/master/mediapipe/framework/stream_handler/sync_set_input_stream_handler.h
|
||||
[`ImmediateInputStreamHandler`]: https://github.com/google/mediapipe/tree/master/mediapipe/framework/stream_handler/immediate_input_stream_handler.h
|
||||
[`SyncSetInputStreamHandler`]: https://github.com/google/mediapipe/tree/master/mediapipe/framework/stream_handler/sync_set_input_stream_handler.cc
|
||||
[`ImmediateInputStreamHandler`]: https://github.com/google/mediapipe/tree/master/mediapipe/framework/stream_handler/immediate_input_stream_handler.cc
|
||||
[`CalculatorGraphConfig::max_queue_size`]: https://github.com/google/mediapipe/tree/master/mediapipe/framework/calculator.proto
|
||||
[`FlowLimiterCalculator`]: https://github.com/google/mediapipe/tree/master/mediapipe/calculators/core/flow_limiter_calculator.cc
|
||||
@@ -0,0 +1,87 @@
|
||||
---
|
||||
layout: default
|
||||
title: MediaPipe on Android
|
||||
parent: Getting Started
|
||||
has_children: true
|
||||
has_toc: false
|
||||
nav_order: 1
|
||||
---
|
||||
|
||||
# MediaPipe on Android
|
||||
{: .no_toc }
|
||||
|
||||
1. TOC
|
||||
{:toc}
|
||||
---
|
||||
|
||||
Please follow instructions below to build Android example apps in the supported
|
||||
MediaPipe [solutions](../solutions/solutions.md). To learn more about these
|
||||
example apps, start from [Hello World! on Android](./hello_world_android.md).
|
||||
|
||||
To incorporate MediaPipe into Android Studio projects, see these
|
||||
[instructions](./android_solutions.md) to use the MediaPipe Android Solution
|
||||
APIs (currently in alpha) that are now available in
|
||||
[Google's Maven Repository](https://maven.google.com/web/index.html?#com.google.mediapipe).
|
||||
|
||||
## Building Android example apps with Bazel
|
||||
|
||||
### Prerequisite
|
||||
|
||||
* Install MediaPipe following these [instructions](./install.md).
|
||||
* Setup Java Runtime.
|
||||
* Setup Android SDK release 30.0.0 and above.
|
||||
* Setup Android NDK version between 18 and 21.
|
||||
|
||||
MediaPipe recommends setting up Android SDK and NDK via Android Studio (and see
|
||||
below for Android Studio setup). However, if you prefer using MediaPipe without
|
||||
Android Studio, please run
|
||||
[`setup_android_sdk_and_ndk.sh`](https://github.com/google/mediapipe/blob/master/setup_android_sdk_and_ndk.sh)
|
||||
to download and setup Android SDK and NDK before building any Android example
|
||||
apps.
|
||||
|
||||
If Android SDK and NDK are already installed (e.g., by Android Studio), set
|
||||
$ANDROID_HOME and $ANDROID_NDK_HOME to point to the installed SDK and NDK.
|
||||
|
||||
```bash
|
||||
export ANDROID_HOME=<path to the Android SDK>
|
||||
export ANDROID_NDK_HOME=<path to the Android NDK>
|
||||
```
|
||||
|
||||
and add android_ndk_repository() and android_sdk_repository() rules into the
|
||||
[`WORKSPACE`](https://github.com/google/mediapipe/blob/master/WORKSPACE) file as
|
||||
the following:
|
||||
|
||||
```bash
|
||||
$ echo "android_sdk_repository(name = \"androidsdk\")" >> WORKSPACE
|
||||
$ echo "android_ndk_repository(name = \"androidndk\", api_level=21)" >> WORKSPACE
|
||||
```
|
||||
|
||||
In order to use MediaPipe on earlier Android versions, MediaPipe needs to switch
|
||||
to a lower Android API level. You can achieve this by specifying `api_level =
|
||||
$YOUR_INTENDED_API_LEVEL` in android_ndk_repository() and/or
|
||||
android_sdk_repository() in the
|
||||
[`WORKSPACE`](https://github.com/google/mediapipe/blob/master/WORKSPACE) file.
|
||||
|
||||
Tip: You can run this
|
||||
[script](https://github.com/google/mediapipe/blob/master/build_android_examples.sh)
|
||||
to build (and install) all MediaPipe Android example apps.
|
||||
|
||||
1. To build an Android example app, build against the corresponding
|
||||
`android_binary` build target. For instance, for
|
||||
[MediaPipe Hands](../solutions/hands.md) the target is `handtrackinggpu` in
|
||||
the
|
||||
[BUILD](https://github.com/google/mediapipe/tree/master/mediapipe/examples/android/src/java/com/google/mediapipe/apps/handtrackinggpu/BUILD)
|
||||
file:
|
||||
|
||||
Note: To reduce the binary size, consider appending `--linkopt="-s"` to the
|
||||
command below to strip symbols.
|
||||
|
||||
```bash
|
||||
bazel build -c opt --config=android_arm64 mediapipe/examples/android/src/java/com/google/mediapipe/apps/handtrackinggpu:handtrackinggpu
|
||||
```
|
||||
|
||||
2. Install it on a device with:
|
||||
|
||||
```bash
|
||||
adb install bazel-bin/mediapipe/examples/android/src/java/com/google/mediapipe/apps/handtrackinggpu/handtrackinggpu.apk
|
||||
```
|
||||
@@ -0,0 +1,158 @@
|
||||
---
|
||||
layout: default
|
||||
title: MediaPipe Android Archive
|
||||
parent: MediaPipe on Android
|
||||
grand_parent: Getting Started
|
||||
nav_order: 3
|
||||
---
|
||||
|
||||
# MediaPipe Android Archive
|
||||
{: .no_toc }
|
||||
|
||||
1. TOC
|
||||
{:toc}
|
||||
---
|
||||
|
||||
***Experimental Only***
|
||||
|
||||
The MediaPipe Android Archive (AAR) library is a convenient way to use MediaPipe
|
||||
with Android Studio and Gradle. MediaPipe doesn't publish a general AAR that can
|
||||
be used by all projects. Instead, developers need to add a mediapipe_aar()
|
||||
target to generate a custom AAR file for their own projects. This is necessary
|
||||
in order to include specific resources such as MediaPipe calculators needed for
|
||||
each project.
|
||||
|
||||
## Steps to build a MediaPipe AAR
|
||||
|
||||
1. Create a mediapipe_aar() target.
|
||||
|
||||
In the MediaPipe directory, create a new mediapipe_aar() target in a BUILD
|
||||
file. You need to figure out what calculators are used in the graph and
|
||||
provide the calculator dependencies to the mediapipe_aar(). For example, to
|
||||
build an AAR for [MediaPipe Face Detection](../solutions/face_detection.md),
|
||||
you can put the following code into
|
||||
mediapipe/examples/android/src/java/com/google/mediapipe/apps/aar_example/BUILD.
|
||||
|
||||
```
|
||||
load("//mediapipe/java/com/google/mediapipe:mediapipe_aar.bzl", "mediapipe_aar")
|
||||
|
||||
mediapipe_aar(
|
||||
name = "mediapipe_face_detection",
|
||||
calculators = ["//mediapipe/graphs/face_detection:mobile_calculators"],
|
||||
)
|
||||
```
|
||||
|
||||
2. Run the Bazel build command to generate the AAR.
|
||||
|
||||
```bash
|
||||
bazel build -c opt --strip=ALWAYS \
|
||||
--host_crosstool_top=@bazel_tools//tools/cpp:toolchain \
|
||||
--fat_apk_cpu=arm64-v8a,armeabi-v7a \
|
||||
--legacy_whole_archive=0 \
|
||||
--features=-legacy_whole_archive \
|
||||
--copt=-fvisibility=hidden \
|
||||
--copt=-ffunction-sections \
|
||||
--copt=-fdata-sections \
|
||||
--copt=-fstack-protector \
|
||||
--copt=-Oz \
|
||||
--copt=-fomit-frame-pointer \
|
||||
--copt=-DABSL_MIN_LOG_LEVEL=2 \
|
||||
--linkopt=-Wl,--gc-sections,--strip-all \
|
||||
//path/to/the/aar/build/file:aar_name.aar
|
||||
```
|
||||
|
||||
For the face detection AAR target we made in step 1, run:
|
||||
|
||||
```bash
|
||||
bazel build -c opt --strip=ALWAYS \
|
||||
--host_crosstool_top=@bazel_tools//tools/cpp:toolchain \
|
||||
--fat_apk_cpu=arm64-v8a,armeabi-v7a \
|
||||
--legacy_whole_archive=0 \
|
||||
--features=-legacy_whole_archive \
|
||||
--copt=-fvisibility=hidden \
|
||||
--copt=-ffunction-sections \
|
||||
--copt=-fdata-sections \
|
||||
--copt=-fstack-protector \
|
||||
--copt=-Oz \
|
||||
--copt=-fomit-frame-pointer \
|
||||
--copt=-DABSL_MIN_LOG_LEVEL=2 \
|
||||
--linkopt=-Wl,--gc-sections,--strip-all \
|
||||
//mediapipe/examples/android/src/java/com/google/mediapipe/apps/aar_example:mediapipe_face_detection.aar
|
||||
|
||||
# It should print:
|
||||
# Target //mediapipe/examples/android/src/java/com/google/mediapipe/apps/aar_example:mediapipe_face_detection.aar up-to-date:
|
||||
# bazel-bin/mediapipe/examples/android/src/java/com/google/mediapipe/apps/aar_example/mediapipe_face_detection.aar
|
||||
```
|
||||
|
||||
3. (Optional) Save the AAR to your preferred location.
|
||||
|
||||
```bash
|
||||
cp bazel-bin/mediapipe/examples/android/src/java/com/google/mediapipe/apps/aar_example/mediapipe_face_detection.aar
|
||||
/absolute/path/to/your/preferred/location
|
||||
```
|
||||
|
||||
## Steps to use a MediaPipe AAR in Android Studio with Gradle
|
||||
|
||||
1. Start Android Studio and go to your project.
|
||||
|
||||
2. Copy the AAR into app/libs.
|
||||
|
||||
```bash
|
||||
cp bazel-bin/mediapipe/examples/android/src/java/com/google/mediapipe/apps/aar_example/mediapipe_face_detection.aar
|
||||
/path/to/your/app/libs/
|
||||
```
|
||||
|
||||
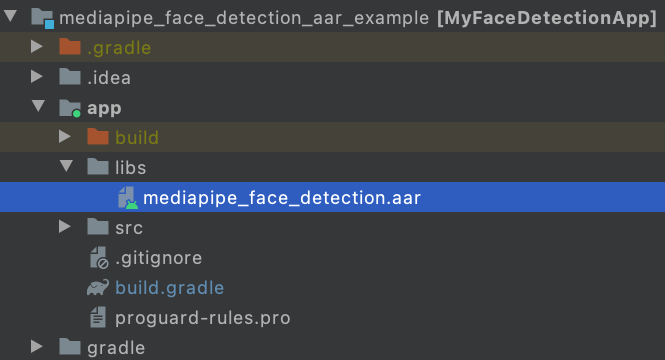
|
||||
|
||||
3. Make app/src/main/assets and copy assets (graph, model, and etc) into
|
||||
app/src/main/assets.
|
||||
|
||||
Build the MediaPipe binary graph and copy the assets into
|
||||
app/src/main/assets, e.g., for the face detection graph, you need to build
|
||||
and copy
|
||||
[the binary graph](https://github.com/google/mediapipe/blob/master/mediapipe/examples/android/src/java/com/google/mediapipe/apps/facedetectiongpu/BUILD#L41)
|
||||
and
|
||||
[the face detection tflite model](https://github.com/google/mediapipe/tree/master/mediapipe/modules/face_detection/face_detection_short_range.tflite).
|
||||
|
||||
```bash
|
||||
bazel build -c opt mediapipe/graphs/face_detection:face_detection_mobile_gpu_binary_graph
|
||||
cp bazel-bin/mediapipe/graphs/face_detection/face_detection_mobile_gpu.binarypb /path/to/your/app/src/main/assets/
|
||||
cp mediapipe/modules/face_detection/face_detection_short_range.tflite /path/to/your/app/src/main/assets/
|
||||
```
|
||||
|
||||
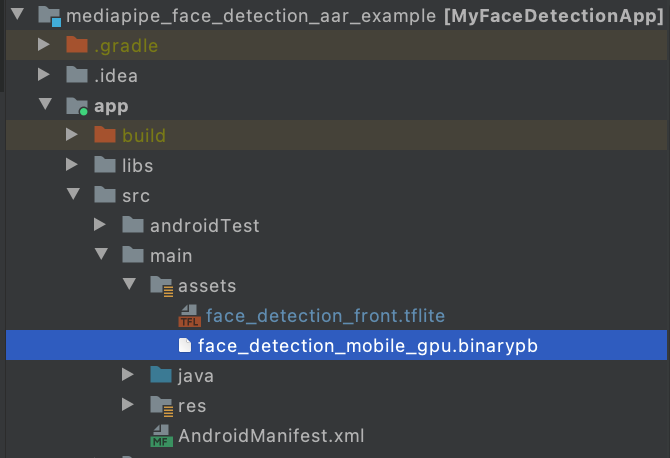
|
||||
|
||||
4. Modify app/build.gradle to add MediaPipe dependencies and MediaPipe AAR.
|
||||
|
||||
```
|
||||
dependencies {
|
||||
implementation fileTree(dir: 'libs', include: ['*.jar', '*.aar'])
|
||||
implementation 'androidx.appcompat:appcompat:1.0.2'
|
||||
implementation 'androidx.constraintlayout:constraintlayout:1.1.3'
|
||||
testImplementation 'junit:junit:4.12'
|
||||
androidTestImplementation 'androidx.test.ext:junit:1.1.0'
|
||||
androidTestImplementation 'androidx.test.espresso:espresso-core:3.1.1'
|
||||
// MediaPipe deps
|
||||
implementation 'com.google.flogger:flogger:latest.release'
|
||||
implementation 'com.google.flogger:flogger-system-backend:latest.release'
|
||||
implementation 'com.google.code.findbugs:jsr305:latest.release'
|
||||
implementation 'com.google.guava:guava:27.0.1-android'
|
||||
implementation 'com.google.protobuf:protobuf-javalite:3.19.1'
|
||||
// CameraX core library
|
||||
def camerax_version = "1.0.0-beta10"
|
||||
implementation "androidx.camera:camera-core:$camerax_version"
|
||||
implementation "androidx.camera:camera-camera2:$camerax_version"
|
||||
implementation "androidx.camera:camera-lifecycle:$camerax_version"
|
||||
// AutoValue
|
||||
def auto_value_version = "1.8.1"
|
||||
implementation "com.google.auto.value:auto-value-annotations:$auto_value_version"
|
||||
annotationProcessor "com.google.auto.value:auto-value:$auto_value_version"
|
||||
}
|
||||
```
|
||||
|
||||
5. Follow our Android app examples to use MediaPipe in Android Studio for your
|
||||
use case. If you are looking for an example, a face detection example can be
|
||||
found
|
||||
[here](https://github.com/jiuqiant/mediapipe_face_detection_aar_example) and
|
||||
a multi-hand tracking example can be found
|
||||
[here](https://github.com/jiuqiant/mediapipe_multi_hands_tracking_aar_example).
|
||||
@@ -0,0 +1,131 @@
|
||||
---
|
||||
layout: default
|
||||
title: MediaPipe Android Solutions
|
||||
parent: MediaPipe on Android
|
||||
grand_parent: Getting Started
|
||||
nav_order: 2
|
||||
---
|
||||
|
||||
# MediaPipe Android Solutions
|
||||
{: .no_toc }
|
||||
|
||||
1. TOC
|
||||
{:toc}
|
||||
---
|
||||
|
||||
MediaPipe Android Solution APIs (currently in alpha) are available in:
|
||||
|
||||
* [MediaPipe Face Detection](../solutions/face_detection#android-solution-api)
|
||||
* [MediaPipe Face Mesh](../solutions/face_mesh#android-solution-api)
|
||||
* [MediaPipe Hands](../solutions/hands#android-solution-api)
|
||||
|
||||
## Incorporation in Android Studio
|
||||
|
||||
Prebuilt packages of Android Solution APIs can be found in
|
||||
[Google's Maven Repository](https://maven.google.com/web/index.html?#com.google.mediapipe).
|
||||
To incorporate them into an Android Studio project, add the following into the
|
||||
project's Gradle dependencies:
|
||||
|
||||
```
|
||||
dependencies {
|
||||
// MediaPipe solution-core is the foundation of any MediaPipe Solutions.
|
||||
implementation 'com.google.mediapipe:solution-core:latest.release'
|
||||
// Optional: MediaPipe Face Detection Solution.
|
||||
implementation 'com.google.mediapipe:facedetection:latest.release'
|
||||
// Optional: MediaPipe Face Mesh Solution.
|
||||
implementation 'com.google.mediapipe:facemesh:latest.release'
|
||||
// Optional: MediaPipe Hands Solution.
|
||||
implementation 'com.google.mediapipe:hands:latest.release'
|
||||
}
|
||||
```
|
||||
|
||||
If you need further customization, instead of using the prebuilt maven packages
|
||||
consider building a MediaPipe Android Archive library locally from source by
|
||||
following these [instructions](./android_archive_library.md).
|
||||
|
||||
## Building solution example apps
|
||||
|
||||
Detailed usage examples of the Android Solution APIs can be found in the
|
||||
[source code](https://github.com/google/mediapipe/tree/master/mediapipe/examples/android/solutions)
|
||||
of the solution example apps.
|
||||
|
||||
To build these apps:
|
||||
|
||||
1. Open Android Studio Arctic Fox on Linux, macOS, or Windows.
|
||||
|
||||
2. Import mediapipe/examples/android/solutions directory into Android Studio.
|
||||
|
||||
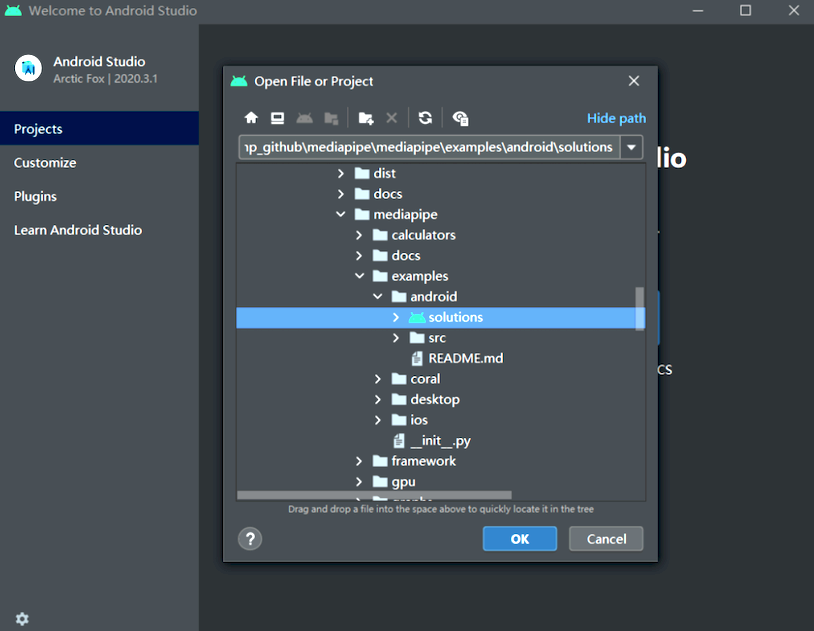
|
||||
|
||||
3. For Windows users, run `create_win_symlinks.bat` as administrator to create
|
||||
res directory symlinks.
|
||||
|
||||
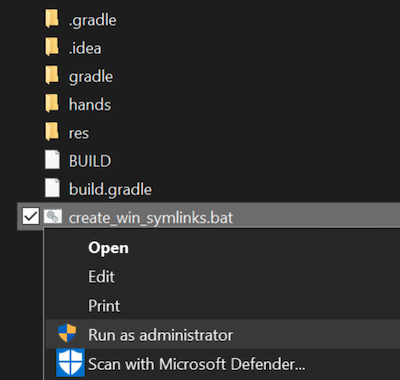
|
||||
|
||||
4. Select "File" -> "Sync Project with Gradle Files" to sync project.
|
||||
|
||||
5. Run solution example app in Android Studio.
|
||||
|
||||
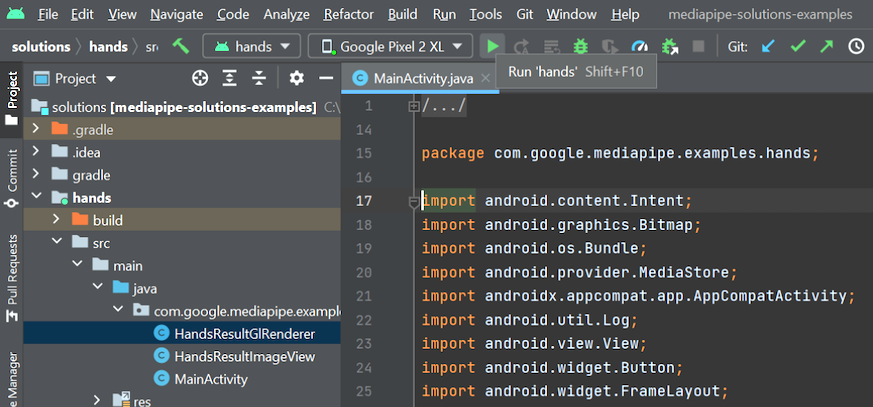
|
||||
|
||||
6. (Optional) Run solutions on CPU.
|
||||
|
||||
MediaPipe solution example apps run the pipeline and model inference on GPU
|
||||
by default. If needed, for example to run the apps on Android Emulator, set
|
||||
the `RUN_ON_GPU` boolean variable to `false` in the app's
|
||||
`MainActivity.java` to run the pipeline and model inference on CPU.
|
||||
|
||||
## MediaPipe Solution APIs Terms of Service
|
||||
|
||||
Last modified: November 12, 2021
|
||||
|
||||
Use of MediaPipe Solution APIs is subject to the
|
||||
[Google APIs Terms of Service](https://developers.google.com/terms),
|
||||
[Google API Services User Data Policy](https://developers.google.com/terms/api-services-user-data-policy),
|
||||
and the terms below. Please check back from time to time as these terms and
|
||||
policies are occasionally updated.
|
||||
|
||||
**Privacy**
|
||||
|
||||
When you use MediaPipe Solution APIs, processing of the input data (e.g. images,
|
||||
video, text) fully happens on-device, and **MediaPipe does not send that input
|
||||
data to Google servers**. As a result, you can use our APIs for processing data
|
||||
that should not leave the device.
|
||||
|
||||
MediaPipe Android Solution APIs will contact Google servers from time to time in
|
||||
order to receive things like bug fixes, updated models, and hardware accelerator
|
||||
compatibility information. MediaPipe Android Solution APIs also send metrics
|
||||
about the performance and utilization of the APIs in your app to Google. Google
|
||||
uses this metrics data to measure performance, API usage, debug, maintain and
|
||||
improve the APIs, and detect misuse or abuse, as further described in our
|
||||
[Privacy Policy](https://policies.google.com/privacy).
|
||||
|
||||
**You are responsible for obtaining informed consent from your app users about
|
||||
Google’s processing of MediaPipe metrics data as required by applicable law.**
|
||||
|
||||
Data we collect may include the following, across all MediaPipe Android Solution
|
||||
APIs:
|
||||
|
||||
- Device information (such as manufacturer, model, OS version and build) and
|
||||
available ML hardware accelerators (GPU and DSP). Used for diagnostics and
|
||||
usage analytics.
|
||||
|
||||
- App identification information (package name / bundle id, app version). Used
|
||||
for diagnostics and usage analytics.
|
||||
|
||||
- API configuration (such as image format, resolution, and MediaPipe version
|
||||
used). Used for diagnostics and usage analytics.
|
||||
|
||||
- Event type (such as initialize, download model, update, run, and detection).
|
||||
Used for diagnostics and usage analytics.
|
||||
|
||||
- Error codes. Used for diagnostics.
|
||||
|
||||
- Performance metrics. Used for diagnostics.
|
||||
|
||||
- Per-installation identifiers that do not uniquely identify a user or
|
||||
physical device. Used for operation of remote configuration and usage
|
||||
analytics.
|
||||
|
||||
- Network request sender IP addresses. Used for remote configuration
|
||||
diagnostics. Collected IP addresses are retained temporarily.
|
||||
@@ -0,0 +1,33 @@
|
||||
---
|
||||
layout: default
|
||||
title: Building MediaPipe Examples
|
||||
parent: Getting Started
|
||||
nav_exclude: true
|
||||
---
|
||||
|
||||
# Building MediaPipe Examples
|
||||
{: .no_toc }
|
||||
|
||||
1. TOC
|
||||
{:toc}
|
||||
---
|
||||
|
||||
### Android
|
||||
|
||||
Please see these [instructions](./android.md).
|
||||
|
||||
### iOS
|
||||
|
||||
Please see these [instructions](./ios.md).
|
||||
|
||||
### Python
|
||||
|
||||
Please see these [instructions](./python.md).
|
||||
|
||||
### JavaScript
|
||||
|
||||
Please see these [instructions](./javascript.md).
|
||||
|
||||
### C++
|
||||
|
||||
Please see these [instructions](./cpp.md).
|
||||
@@ -0,0 +1,62 @@
|
||||
---
|
||||
layout: default
|
||||
title: MediaPipe in C++
|
||||
parent: Getting Started
|
||||
has_children: true
|
||||
has_toc: false
|
||||
nav_order: 5
|
||||
---
|
||||
|
||||
# MediaPipe in C++
|
||||
{: .no_toc }
|
||||
|
||||
1. TOC
|
||||
{:toc}
|
||||
---
|
||||
|
||||
Please follow instructions below to build C++ command-line example apps in the
|
||||
supported MediaPipe [solutions](../solutions/solutions.md). To learn more about
|
||||
these example apps, start from [Hello World! in C++](./hello_world_cpp.md).
|
||||
|
||||
## Building C++ command-line example apps
|
||||
|
||||
### Option 1: Running on CPU
|
||||
|
||||
1. To build, for example, [MediaPipe Hands](../solutions/hands.md), run:
|
||||
|
||||
```bash
|
||||
bazel build -c opt --define MEDIAPIPE_DISABLE_GPU=1 mediapipe/examples/desktop/hand_tracking:hand_tracking_cpu
|
||||
```
|
||||
|
||||
2. To run the application:
|
||||
|
||||
```bash
|
||||
GLOG_logtostderr=1 bazel-bin/mediapipe/examples/desktop/hand_tracking/hand_tracking_cpu \
|
||||
--calculator_graph_config_file=mediapipe/graphs/hand_tracking/hand_tracking_desktop_live.pbtxt
|
||||
```
|
||||
|
||||
This will open up your webcam as long as it is connected and on. Any errors
|
||||
is likely due to your webcam being not accessible.
|
||||
|
||||
### Option 2: Running on GPU
|
||||
|
||||
Note: This currently works only on Linux, and please first follow
|
||||
[OpenGL ES Setup on Linux Desktop](./gpu_support.md#opengl-es-setup-on-linux-desktop).
|
||||
|
||||
1. To build, for example, [MediaPipe Hands](../solutions/hands.md), run:
|
||||
|
||||
```bash
|
||||
bazel build -c opt --copt -DMESA_EGL_NO_X11_HEADERS --copt -DEGL_NO_X11 \
|
||||
mediapipe/examples/desktop/hand_tracking:hand_tracking_gpu
|
||||
```
|
||||
|
||||
2. To run the application:
|
||||
|
||||
```bash
|
||||
GLOG_logtostderr=1 bazel-bin/mediapipe/examples/desktop/hand_tracking/hand_tracking_gpu \
|
||||
--calculator_graph_config_file=mediapipe/graphs/hand_tracking/hand_tracking_mobile.pbtxt
|
||||
```
|
||||
|
||||
This will open up your webcam as long as it is connected and on. Any errors
|
||||
is likely due to your webcam being not accessible, or GPU drivers not setup
|
||||
properly.
|
||||
@@ -1,12 +1,16 @@
|
||||
## Questions and Answers
|
||||
---
|
||||
layout: default
|
||||
title: FAQ
|
||||
parent: Getting Started
|
||||
nav_order: 9
|
||||
---
|
||||
|
||||
- [How to convert ImageFrames and GpuBuffers](#how-to-convert-imageframes-and-gpubuffers)
|
||||
- [How to visualize perceived results](#how-to-visualize-perception-results)
|
||||
- [How to run calculators in parallel](#how-to-run-calculators-in-parallel)
|
||||
- [Output timestamps when using ImmediateInputStreamHandler](#output-timestamps-when-using-immediateinputstreamhandler)
|
||||
- [How to change settings at runtime](#how-to-change-settings-at-runtime)
|
||||
- [How to process real-time input streams](#how-to-process-real-time-input-streams)
|
||||
- [Can I run MediaPipe on MS Windows?](#can-i-run-mediapipe-on-ms-windows)
|
||||
# FAQ
|
||||
{: .no_toc }
|
||||
|
||||
1. TOC
|
||||
{:toc}
|
||||
---
|
||||
|
||||
### How to convert ImageFrames and GpuBuffers
|
||||
|
||||
@@ -16,7 +20,7 @@ type [`ImageFrame`] and [`GpuBuffer`]. [`ImageFrame`] refers to image data in
|
||||
CPU memory in any of a number of bitmap image formats. [`GpuBuffer`] refers to
|
||||
image data in GPU memory. You can find more detail in the Framework Concepts
|
||||
section
|
||||
[GpuBuffer to ImageFrame converters](./gpu.md).
|
||||
[GpuBuffer to ImageFrame Converters](./gpu.md#gpubuffer-to-imageframe-converters).
|
||||
You can see an example in:
|
||||
|
||||
* [`object_detection_mobile_cpu.pbtxt`]
|
||||
@@ -99,7 +103,7 @@ monotonically increasing timestamps. By convention, realtime calculators and
|
||||
graphs use the recording time or the presentation time as the timestamp for each
|
||||
packet, with each timestamp representing microseconds since
|
||||
`Jan/1/1970:00:00:00`. This allows packets from various sources to be processed
|
||||
in a gloablly consistent order.
|
||||
in a globally consistent order.
|
||||
|
||||
Normally for offline processing, every input packet is processed and processing
|
||||
continues as long as necessary. For online processing, it is often necessary to
|
||||
@@ -0,0 +1,13 @@
|
||||
---
|
||||
layout: default
|
||||
title: Getting Started
|
||||
nav_order: 2
|
||||
has_children: true
|
||||
---
|
||||
|
||||
# Getting Started
|
||||
{: .no_toc }
|
||||
|
||||
1. TOC
|
||||
{:toc}
|
||||
---
|
||||
@@ -0,0 +1,201 @@
|
||||
---
|
||||
layout: default
|
||||
title: GPU Support
|
||||
parent: Getting Started
|
||||
nav_order: 7
|
||||
---
|
||||
|
||||
# GPU Support
|
||||
{: .no_toc }
|
||||
|
||||
1. TOC
|
||||
{:toc}
|
||||
---
|
||||
|
||||
## OpenGL ES Support
|
||||
|
||||
MediaPipe supports OpenGL ES up to version 3.2 on Android/Linux and up to ES 3.0
|
||||
on iOS. In addition, MediaPipe also supports Metal on iOS.
|
||||
|
||||
OpenGL ES 3.1 or greater is required (on Android/Linux systems) for running
|
||||
machine learning inference calculators and graphs.
|
||||
|
||||
## Disable OpenGL ES Support
|
||||
|
||||
By default, building MediaPipe (with no special bazel flags) attempts to compile
|
||||
and link against OpenGL ES (and for iOS also Metal) libraries.
|
||||
|
||||
On platforms where OpenGL ES is not available (see also
|
||||
[OpenGL ES Setup on Linux Desktop](#opengl-es-setup-on-linux-desktop)), you
|
||||
should disable OpenGL ES support with:
|
||||
|
||||
```
|
||||
$ bazel build --define MEDIAPIPE_DISABLE_GPU=1 <my-target>
|
||||
```
|
||||
|
||||
Note: On Android and iOS, OpenGL ES is required by MediaPipe framework and the
|
||||
support should never be disabled.
|
||||
|
||||
## OpenGL ES Setup on Linux Desktop
|
||||
|
||||
On Linux desktop with video cards that support OpenGL ES 3.1+, MediaPipe can run
|
||||
GPU compute and rendering and perform TFLite inference on GPU.
|
||||
|
||||
To check if your Linux desktop GPU can run MediaPipe with OpenGL ES:
|
||||
|
||||
```bash
|
||||
$ sudo apt-get install mesa-common-dev libegl1-mesa-dev libgles2-mesa-dev
|
||||
$ sudo apt-get install mesa-utils
|
||||
$ glxinfo | grep -i opengl
|
||||
```
|
||||
|
||||
For example, it may print:
|
||||
|
||||
```bash
|
||||
$ glxinfo | grep -i opengl
|
||||
...
|
||||
OpenGL ES profile version string: OpenGL ES 3.2 NVIDIA 430.50
|
||||
OpenGL ES profile shading language version string: OpenGL ES GLSL ES 3.20
|
||||
OpenGL ES profile extensions:
|
||||
```
|
||||
|
||||
If you have connected to your computer through SSH and find when you probe for
|
||||
GPU information you see the output:
|
||||
|
||||
```bash
|
||||
glxinfo | grep -i opengl
|
||||
Error: unable to open display
|
||||
```
|
||||
|
||||
Try re-establishing your SSH connection with the `-X` option and try again. For
|
||||
example:
|
||||
|
||||
```bash
|
||||
ssh -X <user>@<host>
|
||||
```
|
||||
|
||||
*Notice the ES 3.20 text above.*
|
||||
|
||||
You need to see ES 3.1 or greater printed in order to perform TFLite inference
|
||||
on GPU in MediaPipe. With this setup, build with:
|
||||
|
||||
```
|
||||
$ bazel build --copt -DMESA_EGL_NO_X11_HEADERS --copt -DEGL_NO_X11 <my-target>
|
||||
```
|
||||
|
||||
If only ES 3.0 or below is supported, you can still build MediaPipe targets that
|
||||
don't require TFLite inference on GPU with:
|
||||
|
||||
```
|
||||
$ bazel build --copt -DMESA_EGL_NO_X11_HEADERS --copt -DEGL_NO_X11 --copt -DMEDIAPIPE_DISABLE_GL_COMPUTE <my-target>
|
||||
```
|
||||
|
||||
Note: MEDIAPIPE_DISABLE_GL_COMPUTE is already defined automatically on all Apple
|
||||
systems (Apple doesn't support OpenGL ES 3.1+).
|
||||
|
||||
## TensorFlow CUDA Support and Setup on Linux Desktop
|
||||
|
||||
MediaPipe framework doesn't require CUDA for GPU compute and rendering. However,
|
||||
MediaPipe can work with TensorFlow to perform GPU inference on video cards that
|
||||
support CUDA.
|
||||
|
||||
To enable TensorFlow GPU inference with MediaPipe, the first step is to follow
|
||||
the
|
||||
[TensorFlow GPU documentation](https://www.tensorflow.org/install/gpu#software_requirements)
|
||||
to install the required NVIDIA software on your Linux desktop.
|
||||
|
||||
After installation, update `$PATH` and `$LD_LIBRARY_PATH` and run `ldconfig`
|
||||
with:
|
||||
|
||||
```
|
||||
$ export PATH=/usr/local/cuda-10.1/bin${PATH:+:${PATH}}
|
||||
$ export LD_LIBRARY_PATH=/usr/local/cuda/extras/CUPTI/lib64,/usr/local/cuda-10.1/lib64${LD_LIBRARY_PATH:+:${LD_LIBRARY_PATH}}
|
||||
$ sudo ldconfig
|
||||
```
|
||||
|
||||
It's recommended to verify the installation of CUPTI, CUDA, CuDNN, and NVCC:
|
||||
|
||||
```
|
||||
$ ls /usr/local/cuda/extras/CUPTI
|
||||
/lib64
|
||||
libcupti.so libcupti.so.10.1.208 libnvperf_host.so libnvperf_target.so
|
||||
libcupti.so.10.1 libcupti_static.a libnvperf_host_static.a
|
||||
|
||||
$ ls /usr/local/cuda-10.1
|
||||
LICENSE bin extras lib64 libnvvp nvml samples src tools
|
||||
README doc include libnsight nsightee_plugins nvvm share targets version.txt
|
||||
|
||||
$ nvcc -V
|
||||
nvcc: NVIDIA (R) Cuda compiler driver
|
||||
Copyright (c) 2005-2019 NVIDIA Corporation
|
||||
Built on Sun_Jul_28_19:07:16_PDT_2019
|
||||
Cuda compilation tools, release 10.1, V10.1.243
|
||||
|
||||
$ ls /usr/lib/x86_64-linux-gnu/ | grep libcudnn.so
|
||||
libcudnn.so
|
||||
libcudnn.so.7
|
||||
libcudnn.so.7.6.4
|
||||
```
|
||||
|
||||
Setting `$TF_CUDA_PATHS` is the way to declare where the CUDA library is. Note
|
||||
that the following code snippet also adds `/usr/lib/x86_64-linux-gnu` and
|
||||
`/usr/include` into `$TF_CUDA_PATHS` for cudablas and libcudnn.
|
||||
|
||||
```
|
||||
$ export TF_CUDA_PATHS=/usr/local/cuda-10.1,/usr/lib/x86_64-linux-gnu,/usr/include
|
||||
```
|
||||
|
||||
To make MediaPipe get TensorFlow's CUDA settings, find TensorFlow's
|
||||
[.bazelrc](https://github.com/tensorflow/tensorflow/blob/master/.bazelrc) and
|
||||
copy the `build:using_cuda` and `build:cuda` section into MediaPipe's .bazelrc
|
||||
file. For example, as of April 23, 2020, TensorFlow's CUDA setting is the
|
||||
following:
|
||||
|
||||
```
|
||||
# This config refers to building with CUDA available. It does not necessarily
|
||||
# mean that we build CUDA op kernels.
|
||||
build:using_cuda --define=using_cuda=true
|
||||
build:using_cuda --action_env TF_NEED_CUDA=1
|
||||
build:using_cuda --crosstool_top=@local_config_cuda//crosstool:toolchain
|
||||
|
||||
# This config refers to building CUDA op kernels with nvcc.
|
||||
build:cuda --config=using_cuda
|
||||
build:cuda --define=using_cuda_nvcc=true
|
||||
```
|
||||
|
||||
Finally, build MediaPipe with TensorFlow GPU with two more flags `--config=cuda`
|
||||
and `--spawn_strategy=local`. For example:
|
||||
|
||||
```
|
||||
$ bazel build -c opt --config=cuda --spawn_strategy=local \
|
||||
--define no_aws_support=true --copt -DMESA_EGL_NO_X11_HEADERS \
|
||||
mediapipe/examples/desktop/object_detection:object_detection_tensorflow
|
||||
```
|
||||
|
||||
While the binary is running, it prints out the GPU device info:
|
||||
|
||||
```
|
||||
I external/org_tensorflow/tensorflow/stream_executor/platform/default/dso_loader.cc:44] Successfully opened dynamic library libcuda.so.1
|
||||
I external/org_tensorflow/tensorflow/core/common_runtime/gpu/gpu_device.cc:1544] Found device 0 with properties: pciBusID: 0000:00:04.0 name: Tesla T4 computeCapability: 7.5 coreClock: 1.59GHz coreCount: 40 deviceMemorySize: 14.75GiB deviceMemoryBandwidth: 298.08GiB/s
|
||||
I external/org_tensorflow/tensorflow/core/common_runtime/gpu/gpu_device.cc:1686] Adding visible gpu devices: 0
|
||||
```
|
||||
|
||||
You can monitor the GPU usage to verify whether the GPU is used for model
|
||||
inference.
|
||||
|
||||
```
|
||||
$ nvidia-smi --query-gpu=utilization.gpu --format=csv --loop=1
|
||||
|
||||
0 %
|
||||
0 %
|
||||
4 %
|
||||
5 %
|
||||
83 %
|
||||
21 %
|
||||
22 %
|
||||
27 %
|
||||
29 %
|
||||
100 %
|
||||
0 %
|
||||
0%
|
||||
```
|
||||
+121
-78
@@ -1,4 +1,17 @@
|
||||
# Hello World! in MediaPipe on Android
|
||||
---
|
||||
layout: default
|
||||
title: Hello World! on Android
|
||||
parent: MediaPipe on Android
|
||||
grand_parent: Getting Started
|
||||
nav_order: 1
|
||||
---
|
||||
|
||||
# Hello World! on Android
|
||||
{: .no_toc }
|
||||
|
||||
1. TOC
|
||||
{:toc}
|
||||
---
|
||||
|
||||
## Introduction
|
||||
|
||||
@@ -14,12 +27,12 @@ graph on Android.
|
||||
A simple camera app for real-time Sobel edge detection applied to a live video
|
||||
stream on an Android device.
|
||||
|
||||

|
||||
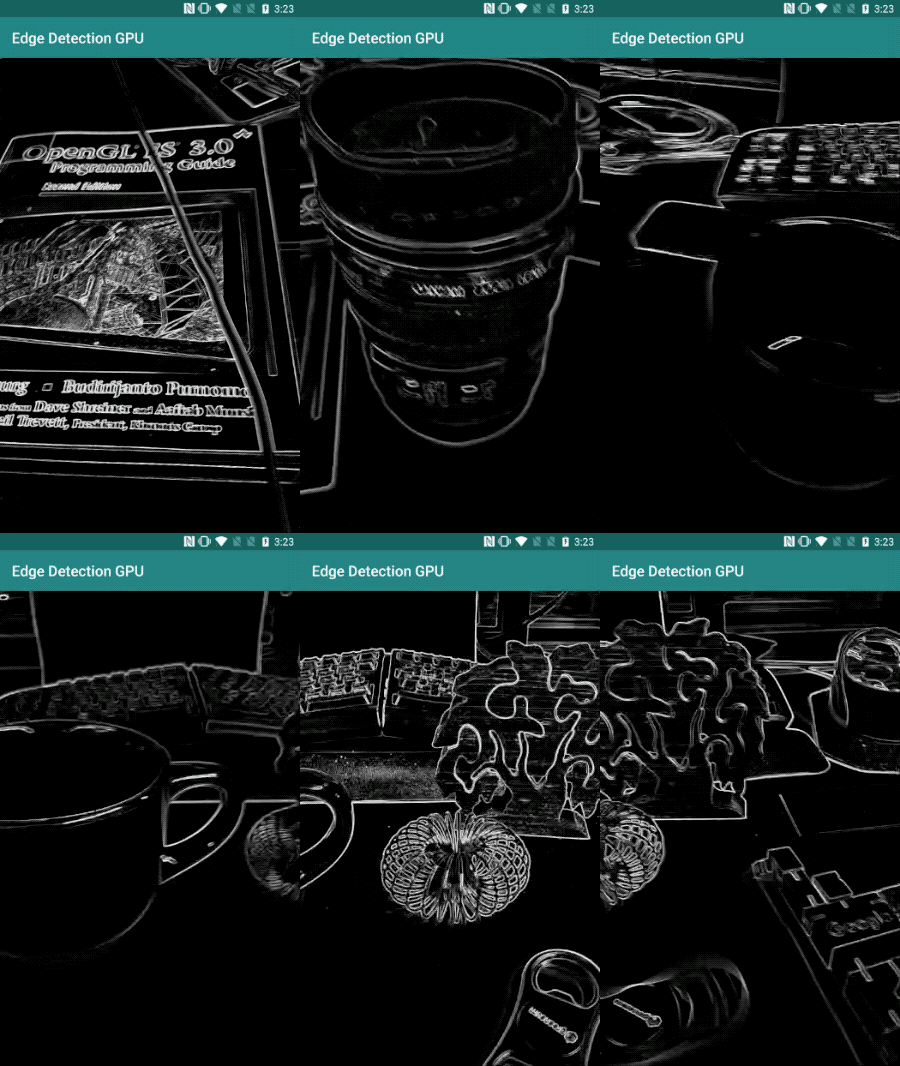
|
||||
|
||||
## Setup
|
||||
|
||||
1. Install MediaPipe on your system, see [MediaPipe installation guide] for
|
||||
details.
|
||||
1. Install MediaPipe on your system, see
|
||||
[MediaPipe installation guide](./install.md) for details.
|
||||
2. Install Android Development SDK and Android NDK. See how to do so also in
|
||||
[MediaPipe installation guide].
|
||||
3. Enable [developer options] on your Android device.
|
||||
@@ -31,8 +44,8 @@ We will be using the following graph, [`edge_detection_mobile_gpu.pbtxt`]:
|
||||
|
||||
```
|
||||
# MediaPipe graph that performs GPU Sobel edge detection on a live video stream.
|
||||
# Used in the examples
|
||||
# mediapipe/examples/android/src/java/com/mediapipe/apps/edgedetectiongpu.
|
||||
# Used in the examples in
|
||||
# mediapipe/examples/android/src/java/com/mediapipe/apps/basic and
|
||||
# mediapipe/examples/ios/edgedetectiongpu.
|
||||
|
||||
# Images coming into and out of the graph.
|
||||
@@ -46,7 +59,7 @@ node: {
|
||||
output_stream: "luma_video"
|
||||
}
|
||||
|
||||
# Applies the Sobel filter to luminance images sotred in RGB format.
|
||||
# Applies the Sobel filter to luminance images stored in RGB format.
|
||||
node: {
|
||||
calculator: "SobelEdgesCalculator"
|
||||
input_stream: "luma_video"
|
||||
@@ -56,7 +69,7 @@ node: {
|
||||
|
||||
A visualization of the graph is shown below:
|
||||
|
||||

|
||||
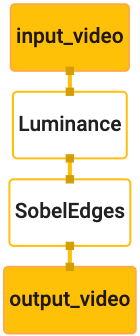
|
||||
|
||||
This graph has a single input stream named `input_video` for all incoming frames
|
||||
that will be provided by your device's camera.
|
||||
@@ -80,15 +93,15 @@ applications using `bazel`.
|
||||
|
||||
Create a new directory where you will create your Android application. For
|
||||
example, the complete code of this tutorial can be found at
|
||||
`mediapipe/examples/android/src/java/com/google/mediapipe/apps/edgedetectiongpu`.
|
||||
We will refer to this path as `$APPLICATION_PATH` throughout the codelab.
|
||||
`mediapipe/examples/android/src/java/com/google/mediapipe/apps/basic`. We
|
||||
will refer to this path as `$APPLICATION_PATH` throughout the codelab.
|
||||
|
||||
Note that in the path to the application:
|
||||
|
||||
* The application is named `edgedetectiongpu`.
|
||||
* The application is named `helloworld`.
|
||||
* The `$PACKAGE_PATH` of the application is
|
||||
`com.google.mediapipe.apps.edgdetectiongpu`. This is used in code snippets in
|
||||
this tutorial, so please remember to use your own `$PACKAGE_PATH` when you
|
||||
`com.google.mediapipe.apps.basic`. This is used in code snippets in this
|
||||
tutorial, so please remember to use your own `$PACKAGE_PATH` when you
|
||||
copy/use the code snippets.
|
||||
|
||||
Add a file `activity_main.xml` to `$APPLICATION_PATH/res/layout`. This displays
|
||||
@@ -119,7 +132,7 @@ Add a simple `MainActivity.java` to `$APPLICATION_PATH` which loads the content
|
||||
of the `activity_main.xml` layout as shown below:
|
||||
|
||||
```
|
||||
package com.google.mediapipe.apps.edgedetectiongpu;
|
||||
package com.google.mediapipe.apps.basic;
|
||||
|
||||
import android.os.Bundle;
|
||||
import androidx.appcompat.app.AppCompatActivity;
|
||||
@@ -141,7 +154,7 @@ launches `MainActivity` on application start:
|
||||
```
|
||||
<?xml version="1.0" encoding="utf-8"?>
|
||||
<manifest xmlns:android="http://schemas.android.com/apk/res/android"
|
||||
package="com.google.mediapipe.apps.edgedetectiongpu">
|
||||
package="com.google.mediapipe.apps.basic">
|
||||
|
||||
<uses-sdk
|
||||
android:minSdkVersion="19"
|
||||
@@ -149,11 +162,11 @@ launches `MainActivity` on application start:
|
||||
|
||||
<application
|
||||
android:allowBackup="true"
|
||||
android:label="@string/app_name"
|
||||
android:label="${appName}"
|
||||
android:supportsRtl="true"
|
||||
android:theme="@style/AppTheme">
|
||||
<activity
|
||||
android:name=".MainActivity"
|
||||
android:name="${mainActivity}"
|
||||
android:exported="true"
|
||||
android:screenOrientation="portrait">
|
||||
<intent-filter>
|
||||
@@ -166,17 +179,8 @@ launches `MainActivity` on application start:
|
||||
</manifest>
|
||||
```
|
||||
|
||||
To get `@string/app_name`, we need to add a file `strings.xml` to
|
||||
`$APPLICATION_PATH/res/values/`:
|
||||
|
||||
```
|
||||
<resources>
|
||||
<string name="app_name" translatable="false">Edge Detection GPU</string>
|
||||
</resources>
|
||||
```
|
||||
|
||||
Also, in our application we are using a `Theme.AppCompat` theme in the app, so
|
||||
we need appropriate theme references. Add `colors.xml` to
|
||||
In our application we are using a `Theme.AppCompat` theme in the app, so we need
|
||||
appropriate theme references. Add `colors.xml` to
|
||||
`$APPLICATION_PATH/res/values/`:
|
||||
|
||||
```
|
||||
@@ -204,11 +208,13 @@ Add `styles.xml` to `$APPLICATION_PATH/res/values/`:
|
||||
</resources>
|
||||
```
|
||||
|
||||
To build the application, add a `BUILD` file to `$APPLICATION_PATH`:
|
||||
To build the application, add a `BUILD` file to `$APPLICATION_PATH`, and
|
||||
`${appName}` and `${mainActivity}` in the manifest will be replaced by strings
|
||||
specified in `BUILD` as shown below.
|
||||
|
||||
```
|
||||
android_library(
|
||||
name = "mediapipe_lib",
|
||||
name = "basic_lib",
|
||||
srcs = glob(["*.java"]),
|
||||
manifest = "AndroidManifest.xml",
|
||||
resource_files = glob(["res/**"]),
|
||||
@@ -219,40 +225,42 @@ android_library(
|
||||
)
|
||||
|
||||
android_binary(
|
||||
name = "edgedetectiongpu",
|
||||
aapt_version = "aapt2",
|
||||
name = "helloworld",
|
||||
manifest = "AndroidManifest.xml",
|
||||
manifest_values = {"applicationId": "com.google.mediapipe.apps.edgedetectiongpu"},
|
||||
manifest_values = {
|
||||
"applicationId": "com.google.mediapipe.apps.basic",
|
||||
"appName": "Hello World",
|
||||
"mainActivity": ".MainActivity",
|
||||
},
|
||||
multidex = "native",
|
||||
deps = [
|
||||
":mediapipe_lib",
|
||||
":basic_lib",
|
||||
],
|
||||
)
|
||||
|
||||
```
|
||||
|
||||
The `android_library` rule adds dependencies for `MainActivity`, resource files
|
||||
and `AndroidManifest.xml`.
|
||||
|
||||
The `android_binary` rule, uses the `mediapipe_lib` Android library generated to
|
||||
The `android_binary` rule, uses the `basic_lib` Android library generated to
|
||||
build a binary APK for installation on your Android device.
|
||||
|
||||
To build the app, use the following command:
|
||||
|
||||
```
|
||||
bazel build -c opt --config=android_arm64 $APPLICATION_PATH
|
||||
bazel build -c opt --config=android_arm64 $APPLICATION_PATH:helloworld
|
||||
```
|
||||
|
||||
Install the generated APK file using `adb install`. For example:
|
||||
|
||||
```
|
||||
adb install bazel-bin/$APPLICATION_PATH/edgedetectiongpu.apk
|
||||
adb install bazel-bin/$APPLICATION_PATH/helloworld.apk
|
||||
```
|
||||
|
||||
Open the application on your device. It should display a screen with the text
|
||||
`Hello World!`.
|
||||
|
||||

|
||||
|
||||
|
||||
## Using the camera via `CameraX`
|
||||
|
||||
@@ -369,7 +377,7 @@ Add the following line in the `$APPLICATION_PATH/res/values/strings.xml` file:
|
||||
When the user doesn't grant camera permission, the screen will now look like
|
||||
this:
|
||||
|
||||

|
||||
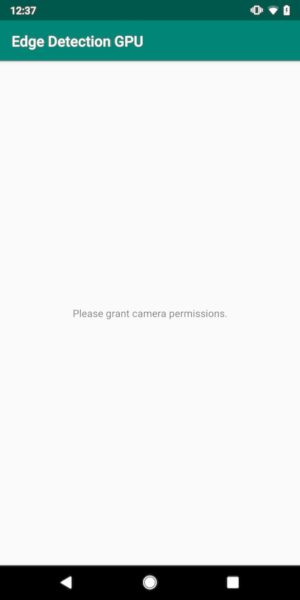
|
||||
|
||||
Now, we will add the [`SurfaceTexture`] and [`SurfaceView`] objects to
|
||||
`MainActivity`:
|
||||
@@ -438,22 +446,58 @@ visible so that we can start seeing frames from the `previewFrameTexture`.
|
||||
|
||||
However, before starting the camera, we need to decide which camera we want to
|
||||
use. [`CameraXPreviewHelper`] inherits from [`CameraHelper`] which provides two
|
||||
options, `FRONT` and `BACK`. We will use `BACK` camera for this application to
|
||||
perform edge detection on a live scene that we view from the camera.
|
||||
options, `FRONT` and `BACK`. We can pass in the decision from the `BUILD` file
|
||||
as metadata such that no code change is required to build another version of the
|
||||
app using a different camera.
|
||||
|
||||
Add the following line to define `CAMERA_FACING` for our application,
|
||||
Assuming we want to use `BACK` camera to perform edge detection on a live scene
|
||||
that we view from the camera, add the metadata into `AndroidManifest.xml`:
|
||||
|
||||
```
|
||||
private static final CameraHelper.CameraFacing CAMERA_FACING = CameraHelper.CameraFacing.BACK;
|
||||
...
|
||||
<meta-data android:name="cameraFacingFront" android:value="${cameraFacingFront}"/>
|
||||
</application>
|
||||
</manifest>
|
||||
```
|
||||
|
||||
`CAMERA_FACING` is a static variable as we will use the same camera throughout
|
||||
the application from start to finish.
|
||||
and specify the selection in `BUILD` in the `helloworld` android binary rule
|
||||
with a new entry in `manifest_values`:
|
||||
|
||||
```
|
||||
manifest_values = {
|
||||
"applicationId": "com.google.mediapipe.apps.basic",
|
||||
"appName": "Hello World",
|
||||
"mainActivity": ".MainActivity",
|
||||
"cameraFacingFront": "False",
|
||||
},
|
||||
```
|
||||
|
||||
Now, in `MainActivity` to retrieve the metadata specified in `manifest_values`,
|
||||
add an [`ApplicationInfo`] object:
|
||||
|
||||
```
|
||||
private ApplicationInfo applicationInfo;
|
||||
```
|
||||
|
||||
In the `onCreate()` function, add:
|
||||
|
||||
```
|
||||
try {
|
||||
applicationInfo =
|
||||
getPackageManager().getApplicationInfo(getPackageName(), PackageManager.GET_META_DATA);
|
||||
} catch (NameNotFoundException e) {
|
||||
Log.e(TAG, "Cannot find application info: " + e);
|
||||
}
|
||||
```
|
||||
|
||||
Now add the following line at the end of the `startCamera()` function:
|
||||
|
||||
```
|
||||
cameraHelper.startCamera(this, CAMERA_FACING, /*surfaceTexture=*/ null);
|
||||
CameraHelper.CameraFacing cameraFacing =
|
||||
applicationInfo.metaData.getBoolean("cameraFacingFront", false)
|
||||
? CameraHelper.CameraFacing.FRONT
|
||||
: CameraHelper.CameraFacing.BACK;
|
||||
cameraHelper.startCamera(this, cameraFacing, /*unusedSurfaceTexture=*/ null);
|
||||
```
|
||||
|
||||
At this point, the application should build successfully. However, when you run
|
||||
@@ -595,24 +639,13 @@ build rule:
|
||||
|
||||
MediaPipe graphs are `.pbtxt` files, but to use them in the application, we need
|
||||
to use the `mediapipe_binary_graph` build rule to generate a `.binarypb` file.
|
||||
We can then use an application specific alias for the graph via the `genrule`
|
||||
build rule. Add the following `genrule` to use an alias for the edge detection
|
||||
graph:
|
||||
|
||||
```
|
||||
genrule(
|
||||
name = "binary_graph",
|
||||
srcs = ["//mediapipe/graphs/edge_detection:mobile_gpu_binary_graph"],
|
||||
outs = ["edgedetectiongpu.binarypb"],
|
||||
cmd = "cp $< $@",
|
||||
)
|
||||
```
|
||||
|
||||
Then in the `mediapipe_lib` build rule, add assets:
|
||||
In the `helloworld` android binary build rule, add the `mediapipe_binary_graph`
|
||||
target specific to the graph as an asset:
|
||||
|
||||
```
|
||||
assets = [
|
||||
":binary_graph",
|
||||
"//mediapipe/graphs/edge_detection:mobile_gpu_binary_graph",
|
||||
],
|
||||
assets_dir = "",
|
||||
```
|
||||
@@ -620,6 +653,26 @@ assets_dir = "",
|
||||
In the `assets` build rule, you can also add other assets such as TensorFlowLite
|
||||
models used in your graph.
|
||||
|
||||
In addition, add additional `manifest_values` for properties specific to the
|
||||
graph, to be later retrieved in `MainActivity`:
|
||||
|
||||
```
|
||||
manifest_values = {
|
||||
"applicationId": "com.google.mediapipe.apps.basic",
|
||||
"appName": "Hello World",
|
||||
"mainActivity": ".MainActivity",
|
||||
"cameraFacingFront": "False",
|
||||
"binaryGraphName": "mobile_gpu.binarypb",
|
||||
"inputVideoStreamName": "input_video",
|
||||
"outputVideoStreamName": "output_video",
|
||||
},
|
||||
```
|
||||
|
||||
Note that `binaryGraphName` indicates the filename of the binary graph,
|
||||
determined by the `output_name` field in the `mediapipe_binary_graph` target.
|
||||
`inputVideoStreamName` and `outputVideoStreamName` are the input and output
|
||||
video stream name specified in the graph respectively.
|
||||
|
||||
Now, the `MainActivity` needs to load the MediaPipe framework. Also, the
|
||||
framework uses OpenCV, so `MainActvity` should also load `OpenCV`. Use the
|
||||
following code in `MainActivity` (inside the class, but not inside any function)
|
||||
@@ -648,15 +701,6 @@ Initialize the asset manager in `onCreate(Bundle)` before initializing
|
||||
AndroidAssetUtil.initializeNativeAssetManager(this);
|
||||
```
|
||||
|
||||
Declare a static variable with the graph name, the name of the input stream and
|
||||
the name of the output stream:
|
||||
|
||||
```
|
||||
private static final String BINARY_GRAPH_NAME = "edgedetectiongpu.binarypb";
|
||||
private static final String INPUT_VIDEO_STREAM_NAME = "input_video";
|
||||
private static final String OUTPUT_VIDEO_STREAM_NAME = "output_video";
|
||||
```
|
||||
|
||||
Now, we need to setup a [`FrameProcessor`] object that sends camera frames
|
||||
prepared by the `converter` to the MediaPipe graph and runs the graph, prepares
|
||||
the output and then updates the `previewDisplayView` to display the output. Add
|
||||
@@ -673,9 +717,9 @@ processor =
|
||||
new FrameProcessor(
|
||||
this,
|
||||
eglManager.getNativeContext(),
|
||||
BINARY_GRAPH_NAME,
|
||||
INPUT_VIDEO_STREAM_NAME,
|
||||
OUTPUT_VIDEO_STREAM_NAME);
|
||||
applicationInfo.metaData.getString("binaryGraphName"),
|
||||
applicationInfo.metaData.getString("inputVideoStreamName"),
|
||||
applicationInfo.metaData.getString("outputVideoStreamName"));
|
||||
```
|
||||
|
||||
The `processor` needs to consume the converted frames from the `converter` for
|
||||
@@ -709,24 +753,23 @@ And that's it! You should now be able to successfully build and run the
|
||||
application on the device and see Sobel edge detection running on a live camera
|
||||
feed! Congrats!
|
||||
|
||||

|
||||

|
||||
|
||||
If you ran into any issues, please see the full code of the tutorial
|
||||
[here](https://github.com/google/mediapipe/tree/master/mediapipe/examples/android/src/java/com/google/mediapipe/apps/edgedetectiongpu).
|
||||
[here](https://github.com/google/mediapipe/tree/master/mediapipe/examples/android/src/java/com/google/mediapipe/apps/basic).
|
||||
|
||||
[`ApplicationInfo`]:https://developer.android.com/reference/android/content/pm/ApplicationInfo
|
||||
[`AndroidAssetUtil`]:https://github.com/google/mediapipe/tree/master/mediapipe/java/com/google/mediapipe/framework/AndroidAssetUtil.java
|
||||
[Bazel]:https://bazel.build/
|
||||
[`CameraHelper`]:https://github.com/google/mediapipe/tree/master/mediapipe/java/com/google/mediapipe/components/CameraHelper.java
|
||||
[CameraX]:https://developer.android.com/training/camerax
|
||||
[`CameraXPreviewHelper`]:https://github.com/google/mediapipe/tree/master/mediapipe/java/com/google/mediapipe/components/CameraXPreviewHelper.java
|
||||
[developer options]:https://developer.android.com/studio/debug/dev-options
|
||||
[`edge_detection_mobile_gpu.pbtxt`]:https://github.com/google/mediapipe/tree/master/mediapipe/graphs/object_detection/object_detection_mobile_gpu.pbtxt
|
||||
[`EdgeDetectionGPU` example]:https://github.com/google/mediapipe/tree/master/mediapipe/examples/android/src/java/com/google/mediapipe/apps/edgedetectiongpu/
|
||||
[`edge_detection_mobile_gpu.pbtxt`]:https://github.com/google/mediapipe/tree/master/mediapipe/graphs/edge_detection/edge_detection_mobile_gpu.pbtxt
|
||||
[`EglManager`]:https://github.com/google/mediapipe/tree/master/mediapipe/java/com/google/mediapipe/glutil/EglManager.java
|
||||
[`ExternalTextureConverter`]:https://github.com/google/mediapipe/tree/master/mediapipe/java/com/google/mediapipe/components/ExternalTextureConverter.java
|
||||
[`FrameLayout`]:https://developer.android.com/reference/android/widget/FrameLayout
|
||||
[`FrameProcessor`]:https://github.com/google/mediapipe/tree/master/mediapipe/java/com/google/mediapipe/components/FrameProcessor.java
|
||||
[MediaPipe installation guide]:./install.md
|
||||
[`PermissionHelper`]: https://github.com/google/mediapipe/tree/master/mediapipe/java/com/google/mediapipe/components/PermissionHelper.java
|
||||
[`SurfaceHolder.Callback`]:https://developer.android.com/reference/android/view/SurfaceHolder.Callback.html
|
||||
[`SurfaceView`]:https://developer.android.com/reference/android/view/SurfaceView
|
||||
@@ -1,4 +1,17 @@
|
||||
## Hello World for C++
|
||||
---
|
||||
layout: default
|
||||
title: Hello World! in C++
|
||||
parent: MediaPipe in C++
|
||||
grand_parent: Getting Started
|
||||
nav_order: 1
|
||||
---
|
||||
|
||||
# Hello World! in C++
|
||||
{: .no_toc }
|
||||
|
||||
1. TOC
|
||||
{:toc}
|
||||
---
|
||||
|
||||
1. Ensure you have a working version of MediaPipe. See
|
||||
[installation instructions](./install.md).
|
||||
@@ -6,7 +19,7 @@
|
||||
2. To run the [`hello world`] example:
|
||||
|
||||
```bash
|
||||
$ git clone https://github.com/google/mediapipe/mediapipe.git
|
||||
$ git clone https://github.com/google/mediapipe.git
|
||||
$ cd mediapipe
|
||||
|
||||
$ export GLOG_logtostderr=1
|
||||
@@ -31,7 +44,7 @@
|
||||
`PrintHelloWorld()` function, defined in a [`CalculatorGraphConfig`] proto.
|
||||
|
||||
```C++
|
||||
::mediapipe::Status PrintHelloWorld() {
|
||||
absl::Status PrintHelloWorld() {
|
||||
// Configures a simple graph, which concatenates 2 PassThroughCalculators.
|
||||
CalculatorGraphConfig config = ParseTextProtoOrDie<CalculatorGraphConfig>(R"(
|
||||
input_stream: "in"
|
||||
@@ -52,7 +65,7 @@
|
||||
You can visualize this graph using
|
||||
[MediaPipe Visualizer](https://viz.mediapipe.dev) by pasting the
|
||||
CalculatorGraphConfig content below into the visualizer. See
|
||||
[here](./visualizer.md) for help on the visualizer.
|
||||
[here](../tools/visualizer.md) for help on the visualizer.
|
||||
|
||||
```bash
|
||||
input_stream: "in"
|
||||
@@ -72,7 +85,7 @@
|
||||
This graph consists of 1 graph input stream (`in`) and 1 graph output stream
|
||||
(`out`), and 2 [`PassThroughCalculator`]s connected serially.
|
||||
|
||||

|
||||
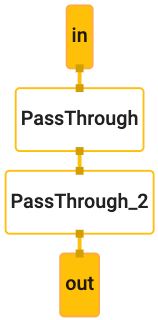
|
||||
|
||||
4. Before running the graph, an `OutputStreamPoller` object is connected to the
|
||||
output stream in order to later retrieve the graph output, and a graph run
|
||||
@@ -80,10 +93,10 @@
|
||||
|
||||
```c++
|
||||
CalculatorGraph graph;
|
||||
RETURN_IF_ERROR(graph.Initialize(config));
|
||||
ASSIGN_OR_RETURN(OutputStreamPoller poller,
|
||||
graph.AddOutputStreamPoller("out"));
|
||||
RETURN_IF_ERROR(graph.StartRun({}));
|
||||
MP_RETURN_IF_ERROR(graph.Initialize(config));
|
||||
MP_ASSIGN_OR_RETURN(OutputStreamPoller poller,
|
||||
graph.AddOutputStreamPoller("out"));
|
||||
MP_RETURN_IF_ERROR(graph.StartRun({}));
|
||||
```
|
||||
|
||||
5. The example then creates 10 packets (each packet contains a string "Hello
|
||||
@@ -93,9 +106,10 @@
|
||||
|
||||
```c++
|
||||
for (int i = 0; i < 10; ++i) {
|
||||
RETURN_IF_ERROR(graph.AddPacketToInputStream("in", MakePacket<std::string>("Hello World!").At(Timestamp(i))));
|
||||
MP_RETURN_IF_ERROR(graph.AddPacketToInputStream("in",
|
||||
MakePacket<std::string>("Hello World!").At(Timestamp(i))));
|
||||
}
|
||||
RETURN_IF_ERROR(graph.CloseInputStream("in"));
|
||||
MP_RETURN_IF_ERROR(graph.CloseInputStream("in"));
|
||||
```
|
||||
|
||||
6. Through the `OutputStreamPoller` object the example then retrieves all 10
|
||||
@@ -1,4 +1,17 @@
|
||||
# Hello World! in MediaPipe on iOS
|
||||
---
|
||||
layout: default
|
||||
title: Hello World! on iOS
|
||||
parent: MediaPipe on iOS
|
||||
grand_parent: Getting Started
|
||||
nav_order: 1
|
||||
---
|
||||
|
||||
# Hello World! on iOS
|
||||
{: .no_toc }
|
||||
|
||||
1. TOC
|
||||
{:toc}
|
||||
---
|
||||
|
||||
## Introduction
|
||||
|
||||
@@ -6,20 +19,20 @@ This codelab uses MediaPipe on an iOS device.
|
||||
|
||||
### What you will learn
|
||||
|
||||
How to develop an iOS application that uses MediaPipe and run a MediaPipe
|
||||
graph on iOS.
|
||||
How to develop an iOS application that uses MediaPipe and run a MediaPipe graph
|
||||
on iOS.
|
||||
|
||||
### What you will build
|
||||
|
||||
A simple camera app for real-time Sobel edge detection applied to a live video
|
||||
stream on an iOS device.
|
||||
|
||||

|
||||
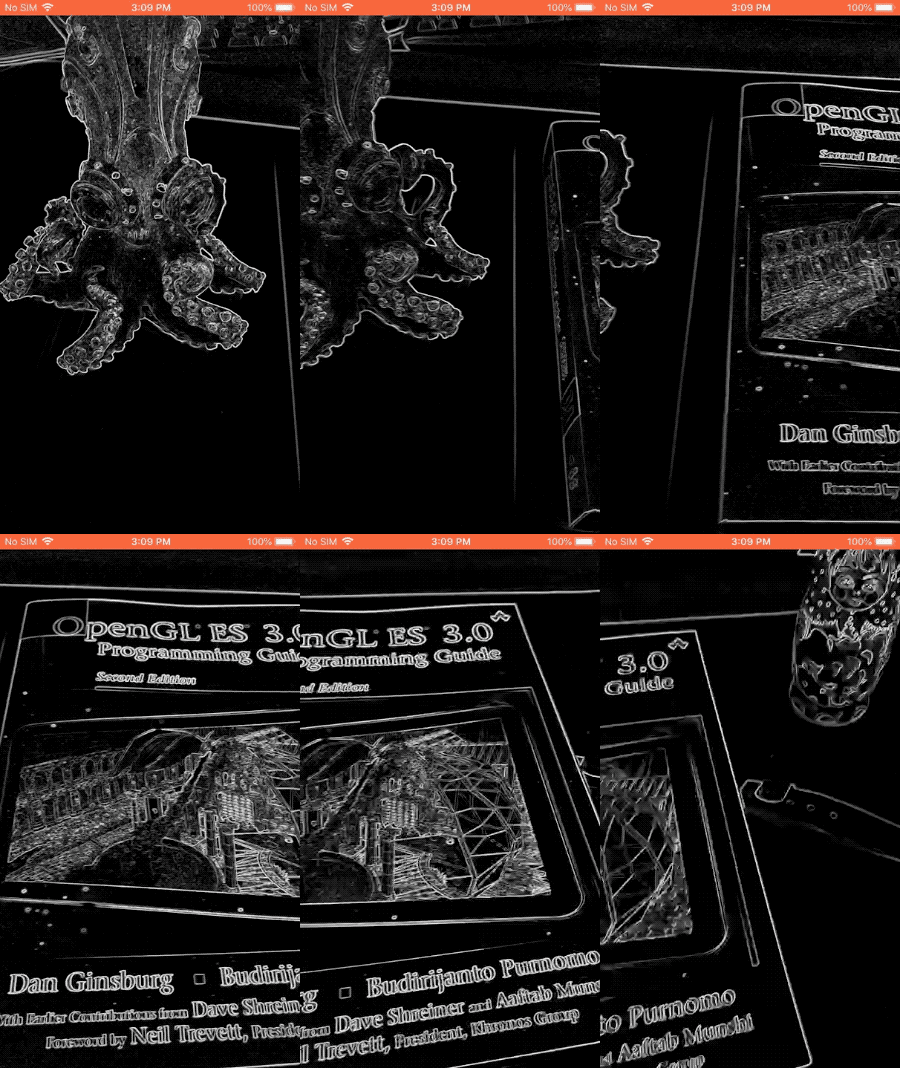
|
||||
|
||||
## Setup
|
||||
|
||||
1. Install MediaPipe on your system, see [MediaPipe installation guide] for
|
||||
details.
|
||||
1. Install MediaPipe on your system, see
|
||||
[MediaPipe installation guide](./install.md) for details.
|
||||
2. Setup your iOS device for development.
|
||||
3. Setup [Bazel] on your system to build and deploy the iOS app.
|
||||
|
||||
@@ -30,8 +43,8 @@ We will be using the following graph, [`edge_detection_mobile_gpu.pbtxt`]:
|
||||
```
|
||||
# MediaPipe graph that performs GPU Sobel edge detection on a live video stream.
|
||||
# Used in the examples
|
||||
# mediapipe/examples/android/src/java/com/mediapipe/apps/edgedetectiongpu.
|
||||
# mediapipe/examples/ios/edgedetectiongpu.
|
||||
# mediapipe/examples/android/src/java/com/google/mediapipe/apps/basic:helloworld
|
||||
# and mediapipe/examples/ios/helloworld.
|
||||
|
||||
# Images coming into and out of the graph.
|
||||
input_stream: "input_video"
|
||||
@@ -44,7 +57,7 @@ node: {
|
||||
output_stream: "luma_video"
|
||||
}
|
||||
|
||||
# Applies the Sobel filter to luminance images sotred in RGB format.
|
||||
# Applies the Sobel filter to luminance images stored in RGB format.
|
||||
node: {
|
||||
calculator: "SobelEdgesCalculator"
|
||||
input_stream: "luma_video"
|
||||
@@ -54,7 +67,7 @@ node: {
|
||||
|
||||
A visualization of the graph is shown below:
|
||||
|
||||

|
||||

|
||||
|
||||
This graph has a single input stream named `input_video` for all incoming frames
|
||||
that will be provided by your device's camera.
|
||||
@@ -77,21 +90,21 @@ to build it.
|
||||
|
||||
First, create an XCode project via File > New > Single View App.
|
||||
|
||||
Set the product name to "EdgeDetectionGpu", and use an appropriate organization
|
||||
Set the product name to "HelloWorld", and use an appropriate organization
|
||||
identifier, such as `com.google.mediapipe`. The organization identifier
|
||||
alongwith the product name will be the `bundle_id` for the application, such as
|
||||
`com.google.mediapipe.EdgeDetectionGpu`.
|
||||
`com.google.mediapipe.HelloWorld`.
|
||||
|
||||
Set the language to Objective-C.
|
||||
|
||||
Save the project to an appropriate location. Let's call this
|
||||
`$PROJECT_TEMPLATE_LOC`. So your project will be in the
|
||||
`$PROJECT_TEMPLATE_LOC/EdgeDetectionGpu` directory. This directory will contain
|
||||
another directory named `EdgeDetectionGpu` and an `EdgeDetectionGpu.xcodeproj` file.
|
||||
`$PROJECT_TEMPLATE_LOC/HelloWorld` directory. This directory will contain
|
||||
another directory named `HelloWorld` and an `HelloWorld.xcodeproj` file.
|
||||
|
||||
The `EdgeDetectionGpu.xcodeproj` will not be useful for this tutorial, as we will
|
||||
use bazel to build the iOS application. The content of the
|
||||
`$PROJECT_TEMPLATE_LOC/EdgeDetectionGpu/EdgeDetectionGpu` directory is listed below:
|
||||
The `HelloWorld.xcodeproj` will not be useful for this tutorial, as we will use
|
||||
bazel to build the iOS application. The content of the
|
||||
`$PROJECT_TEMPLATE_LOC/HelloWorld/HelloWorld` directory is listed below:
|
||||
|
||||
1. `AppDelegate.h` and `AppDelegate.m`
|
||||
2. `ViewController.h` and `ViewController.m`
|
||||
@@ -100,10 +113,14 @@ use bazel to build the iOS application. The content of the
|
||||
5. `Main.storyboard` and `Launch.storyboard`
|
||||
6. `Assets.xcassets` directory.
|
||||
|
||||
Copy these files to a directory named `EdgeDetectionGpu` to a location that can
|
||||
access the MediaPipe source code. For example, the source code of the
|
||||
application that we will build in this tutorial is located in
|
||||
`mediapipe/examples/ios/EdgeDetectionGpu`. We will refer to this path as the
|
||||
Note: In newer versions of Xcode, you may see additional files `SceneDelegate.h`
|
||||
and `SceneDelegate.m`. Make sure to copy them too and add them to the `BUILD`
|
||||
file mentioned below.
|
||||
|
||||
Copy these files to a directory named `HelloWorld` to a location that can access
|
||||
the MediaPipe source code. For example, the source code of the application that
|
||||
we will build in this tutorial is located in
|
||||
`mediapipe/examples/ios/HelloWorld`. We will refer to this path as the
|
||||
`$APPLICATION_PATH` throughout the codelab.
|
||||
|
||||
Note: MediaPipe provides Objective-C bindings for iOS. The edge detection
|
||||
@@ -114,7 +131,7 @@ Create a `BUILD` file in the `$APPLICATION_PATH` and add the following build
|
||||
rules:
|
||||
|
||||
```
|
||||
MIN_IOS_VERSION = "10.0"
|
||||
MIN_IOS_VERSION = "11.0"
|
||||
|
||||
load(
|
||||
"@build_bazel_rules_apple//apple:ios.bzl",
|
||||
@@ -122,8 +139,8 @@ load(
|
||||
)
|
||||
|
||||
ios_application(
|
||||
name = "EdgeDetectionGpuApp",
|
||||
bundle_id = "com.google.mediapipe.EdgeDetectionGpu",
|
||||
name = "HelloWorldApp",
|
||||
bundle_id = "com.google.mediapipe.HelloWorld",
|
||||
families = [
|
||||
"iphone",
|
||||
"ipad",
|
||||
@@ -131,11 +148,11 @@ ios_application(
|
||||
infoplists = ["Info.plist"],
|
||||
minimum_os_version = MIN_IOS_VERSION,
|
||||
provisioning_profile = "//mediapipe/examples/ios:developer_provisioning_profile",
|
||||
deps = [":EdgeDetectionGpuAppLibrary"],
|
||||
deps = [":HelloWorldAppLibrary"],
|
||||
)
|
||||
|
||||
objc_library(
|
||||
name = "EdgeDetectionGpuAppLibrary",
|
||||
name = "HelloWorldAppLibrary",
|
||||
srcs = [
|
||||
"AppDelegate.m",
|
||||
"ViewController.m",
|
||||
@@ -160,9 +177,8 @@ The `objc_library` rule adds dependencies for the `AppDelegate` and
|
||||
`ViewController` classes, `main.m` and the application storyboards. The
|
||||
templated app depends only on the `UIKit` SDK.
|
||||
|
||||
The `ios_application` rule uses the `EdgeDetectionGpuAppLibrary` Objective-C
|
||||
library generated to build an iOS application for installation on your iOS
|
||||
device.
|
||||
The `ios_application` rule uses the `HelloWorldAppLibrary` Objective-C library
|
||||
generated to build an iOS application for installation on your iOS device.
|
||||
|
||||
Note: You need to point to your own iOS developer provisioning profile to be
|
||||
able to run the application on your iOS device.
|
||||
@@ -170,21 +186,19 @@ able to run the application on your iOS device.
|
||||
To build the app, use the following command in a terminal:
|
||||
|
||||
```
|
||||
bazel build -c opt --config=ios_arm64 <$APPLICATION_PATH>:EdgeDetectionGpuApp'
|
||||
bazel build -c opt --config=ios_arm64 <$APPLICATION_PATH>:HelloWorldApp'
|
||||
```
|
||||
|
||||
For example, to build the `EdgeDetectionGpuApp` application in
|
||||
`mediapipe/examples/ios/edgedetectiongpu`, use the following
|
||||
command:
|
||||
For example, to build the `HelloWorldApp` application in
|
||||
`mediapipe/examples/ios/helloworld`, use the following command:
|
||||
|
||||
```
|
||||
bazel build -c opt --config=ios_arm64 mediapipe/examples/ios/edgedetectiongpu:EdgeDetectionGpuApp
|
||||
bazel build -c opt --config=ios_arm64 mediapipe/examples/ios/helloworld:HelloWorldApp
|
||||
```
|
||||
|
||||
Then, go back to XCode, open Window > Devices and Simulators, select your
|
||||
device, and add the `.ipa` file generated by the command above to your device.
|
||||
Here is the document on [setting up and compiling](./mediapipe_ios_setup.md) iOS
|
||||
MediaPipe apps.
|
||||
Here is the document on [setting up and compiling](./ios.md) iOS MediaPipe apps.
|
||||
|
||||
Open the application on your device. Since it is empty, it should display a
|
||||
blank white screen.
|
||||
@@ -237,6 +251,12 @@ We need to get frames from the `_cameraSource` into our application
|
||||
`MPPInputSourceDelegate`. So our application `ViewController` can be a delegate
|
||||
of `_cameraSource`.
|
||||
|
||||
Update the interface definition of `ViewController` accordingly:
|
||||
|
||||
```
|
||||
@interface ViewController () <MPPInputSourceDelegate>
|
||||
```
|
||||
|
||||
To handle camera setup and process incoming frames, we should use a queue
|
||||
different from the main queue. Add the following to the implementation block of
|
||||
the `ViewController`:
|
||||
@@ -278,6 +298,12 @@ utility called `MPPLayerRenderer` to display images on the screen. This utility
|
||||
can be used to display `CVPixelBufferRef` objects, which is the type of the
|
||||
images provided by `MPPCameraInputSource` to its delegates.
|
||||
|
||||
In `ViewController.m`, add the following import line:
|
||||
|
||||
```
|
||||
#import "mediapipe/objc/MPPLayerRenderer.h"
|
||||
```
|
||||
|
||||
To display images of the screen, we need to add a new `UIView` object called
|
||||
`_liveView` to the `ViewController`.
|
||||
|
||||
@@ -348,7 +374,7 @@ responded. Add the following code to `viewWillAppear:animated`:
|
||||
```
|
||||
[_cameraSource requestCameraAccessWithCompletionHandler:^void(BOOL granted) {
|
||||
if (granted) {
|
||||
dispatch_queue(_videoQueue, ^{
|
||||
dispatch_async(_videoQueue, ^{
|
||||
[_cameraSource start];
|
||||
});
|
||||
}
|
||||
@@ -401,11 +427,17 @@ Objective-C++.
|
||||
|
||||
### Use the graph in `ViewController`
|
||||
|
||||
In `ViewController.m`, add the following import line:
|
||||
|
||||
```
|
||||
#import "mediapipe/objc/MPPGraph.h"
|
||||
```
|
||||
|
||||
Declare a static constant with the name of the graph, the input stream and the
|
||||
output stream:
|
||||
|
||||
```
|
||||
static NSString* const kGraphName = @"android_gpu";
|
||||
static NSString* const kGraphName = @"mobile_gpu";
|
||||
|
||||
static const char* kInputStream = "input_video";
|
||||
static const char* kOutputStream = "output_video";
|
||||
@@ -482,16 +514,20 @@ in our app:
|
||||
if (![self.mediapipeGraph startWithError:&error]) {
|
||||
NSLog(@"Failed to start graph: %@", error);
|
||||
}
|
||||
else if (![self.mediapipeGraph waitUntilIdleWithError:&error]) {
|
||||
NSLog(@"Failed to complete graph initial run: %@", error);
|
||||
}
|
||||
|
||||
dispatch_queue(_videoQueue, ^{
|
||||
dispatch_async(_videoQueue, ^{
|
||||
[_cameraSource start];
|
||||
});
|
||||
}
|
||||
}];
|
||||
```
|
||||
|
||||
Note: It is important to start the graph before starting the camera, so that
|
||||
the graph is ready to process frames as soon as the camera starts sending them.
|
||||
Note: It is important to start the graph before starting the camera and wait
|
||||
until completion, so that the graph is ready to process frames as soon as the
|
||||
camera starts sending them.
|
||||
|
||||
Earlier, when we received frames from the camera in the `processVideoFrame`
|
||||
function, we displayed them in the `_liveView` using the `_renderer`. Now, we
|
||||
@@ -535,14 +571,22 @@ method to receive packets on this output stream and display them on the screen:
|
||||
}
|
||||
```
|
||||
|
||||
Update the interface definition of `ViewController` with `MPPGraphDelegate`:
|
||||
|
||||
```
|
||||
@interface ViewController () <MPPGraphDelegate, MPPInputSourceDelegate>
|
||||
```
|
||||
|
||||
And that is all! Build and run the app on your iOS device. You should see the
|
||||
results of running the edge detection graph on a live video feed. Congrats!
|
||||
|
||||

|
||||

|
||||
|
||||
If you ran into any issues, please see the full code of the tutorial
|
||||
[here](https://github.com/google/mediapipe/tree/master/mediapipe/examples/ios/edgedetectiongpu).
|
||||
Please note that the iOS examples now use a [common] template app. The code in
|
||||
this tutorial is used in the [common] template app. The [helloworld] app has the
|
||||
appropriate `BUILD` file dependencies for the edge detection graph.
|
||||
|
||||
[Bazel]:https://bazel.build/
|
||||
[`edge_detection_mobile_gpu.pbtxt`]:https://github.com/google/mediapipe/tree/master/mediapipe/graphs/object_detection/object_detection_mobile_gpu.pbtxt
|
||||
[MediaPipe installation guide]:./install.md
|
||||
[`edge_detection_mobile_gpu.pbtxt`]:https://github.com/google/mediapipe/tree/master/mediapipe/graphs/edge_detection/edge_detection_mobile_gpu.pbtxt
|
||||
[common]:https://github.com/google/mediapipe/tree/master/mediapipe/examples/ios/common
|
||||
[helloworld]:https://github.com/google/mediapipe/tree/master/mediapipe/examples/ios/helloworld
|
||||
@@ -1,17 +1,24 @@
|
||||
## Getting Help
|
||||
---
|
||||
layout: default
|
||||
title: Getting Help
|
||||
parent: Getting Started
|
||||
nav_order: 8
|
||||
---
|
||||
|
||||
- [Technical questions](#technical-questions)
|
||||
- [Bugs and feature requests](#bugs-and-feature-requests)
|
||||
# Getting Help
|
||||
{: .no_toc }
|
||||
|
||||
Below are the various ways to get help:
|
||||
1. TOC
|
||||
{:toc}
|
||||
---
|
||||
|
||||
### Technical questions
|
||||
## Technical questions
|
||||
|
||||
For help with technical or algorithmic questions, visit
|
||||
[Stack Overflow](https://stackoverflow.com/questions/tagged/mediapipe) to find
|
||||
answers and support from the MediaPipe community.
|
||||
|
||||
### Bugs and feature requests
|
||||
## Bugs and feature requests
|
||||
|
||||
To report bugs or make feature requests,
|
||||
[file an issue on GitHub](https://github.com/google/mediapipe/issues).
|
||||
@@ -1,6 +1,18 @@
|
||||
## Installing MediaPipe
|
||||
---
|
||||
layout: default
|
||||
title: Installation
|
||||
parent: Getting Started
|
||||
nav_order: 6
|
||||
---
|
||||
|
||||
Note: To interoperate with OpenCV, OpenCV 3.x and above are preferred. OpenCV
|
||||
# Installation
|
||||
{: .no_toc }
|
||||
|
||||
1. TOC
|
||||
{:toc}
|
||||
---
|
||||
|
||||
Note: To interoperate with OpenCV, OpenCV 3.x to 4.1 are preferred. OpenCV
|
||||
2.x currently works but interoperability support may be deprecated in the
|
||||
future.
|
||||
|
||||
@@ -11,92 +23,209 @@ Note: To make Mediapipe work with TensorFlow, please set Python 3.7 as the
|
||||
default Python version and install the Python "six" library by running `pip3
|
||||
install --user six`.
|
||||
|
||||
Choose your operating system:
|
||||
## Installing on Debian and Ubuntu
|
||||
|
||||
- [Installing on Debian and Ubuntu](#installing-on-debian-and-ubuntu)
|
||||
- [Installing on CentOS](#installing-on-centos)
|
||||
- [Installing on macOS](#installing-on-macos)
|
||||
- [Installing on Windows Subsystem for Linux (WSL)](#installing-on-windows-subsystem-for-linux-wsl)
|
||||
- [Installing using Docker](#installing-using-docker)
|
||||
1. Install Bazelisk.
|
||||
|
||||
To build and run Android apps:
|
||||
Follow the official
|
||||
[Bazel documentation](https://docs.bazel.build/versions/master/install-bazelisk.html)
|
||||
to install Bazelisk.
|
||||
|
||||
- [Setting up Android SDK and NDK](#setting-up-android-sdk-and-ndk)
|
||||
- [Using MediaPipe with Gradle](#using-mediapipe-with-gradle)
|
||||
- [Using MediaPipe with Bazel](#using-mediapipe-with-bazel)
|
||||
|
||||
To build and run iOS apps:
|
||||
|
||||
- Please see the separate [iOS setup](./mediapipe_ios_setup.md) documentation.
|
||||
|
||||
### Installing on Debian and Ubuntu
|
||||
|
||||
1. Checkout MediaPipe repository.
|
||||
2. Checkout MediaPipe repository.
|
||||
|
||||
```bash
|
||||
$ cd $HOME
|
||||
$ git clone https://github.com/google/mediapipe.git
|
||||
|
||||
# Change directory into MediaPipe root directory
|
||||
$ cd mediapipe
|
||||
```
|
||||
|
||||
2. Install Bazel (version between 1.0.0 and 1.2.1).
|
||||
|
||||
Follow the official
|
||||
[Bazel documentation](https://docs.bazel.build/versions/master/install-ubuntu.html)
|
||||
to install Bazel manually. Note that MediaPipe doesn't support Bazel 2.0.0+
|
||||
yet.
|
||||
|
||||
3. Install OpenCV and FFmpeg.
|
||||
|
||||
Option 1. Use package manager tool to install the pre-compiled OpenCV
|
||||
libraries. FFmpeg will be installed via libopencv-video-dev.
|
||||
**Option 1**. Use package manager tool to install the pre-compiled OpenCV
|
||||
libraries. FFmpeg will be installed via `libopencv-video-dev`.
|
||||
|
||||
Note: Debian 9 and Ubuntu 16.04 provide OpenCV 2.4.9. You may want to take
|
||||
option 2 or 3 to install OpenCV 3 or above.
|
||||
OS | OpenCV
|
||||
-------------------- | ------
|
||||
Debian 9 (stretch) | 2.4
|
||||
Debian 10 (buster) | 3.2
|
||||
Debian 11 (bullseye) | 4.5
|
||||
Ubuntu 16.04 LTS | 2.4
|
||||
Ubuntu 18.04 LTS | 3.2
|
||||
Ubuntu 20.04 LTS | 4.2
|
||||
Ubuntu 20.04 LTS | 4.2
|
||||
Ubuntu 21.04 | 4.5
|
||||
|
||||
```bash
|
||||
$ sudo apt-get install libopencv-core-dev libopencv-highgui-dev \
|
||||
libopencv-calib3d-dev libopencv-features2d-dev \
|
||||
libopencv-imgproc-dev libopencv-video-dev
|
||||
$ sudo apt-get install -y \
|
||||
libopencv-core-dev \
|
||||
libopencv-highgui-dev \
|
||||
libopencv-calib3d-dev \
|
||||
libopencv-features2d-dev \
|
||||
libopencv-imgproc-dev \
|
||||
libopencv-video-dev
|
||||
```
|
||||
|
||||
Option 2. Run [`setup_opencv.sh`] to automatically build OpenCV from source
|
||||
and modify MediaPipe's OpenCV config.
|
||||
MediaPipe's [`opencv_linux.BUILD`] and [`WORKSPACE`] are already configured
|
||||
for OpenCV 2/3 and should work correctly on any architecture:
|
||||
|
||||
Option 3. Follow OpenCV's
|
||||
```bash
|
||||
# WORKSPACE
|
||||
new_local_repository(
|
||||
name = "linux_opencv",
|
||||
build_file = "@//third_party:opencv_linux.BUILD",
|
||||
path = "/usr",
|
||||
)
|
||||
|
||||
# opencv_linux.BUILD for OpenCV 2/3 installed from Debian package
|
||||
cc_library(
|
||||
name = "opencv",
|
||||
linkopts = [
|
||||
"-l:libopencv_core.so",
|
||||
"-l:libopencv_calib3d.so",
|
||||
"-l:libopencv_features2d.so",
|
||||
"-l:libopencv_highgui.so",
|
||||
"-l:libopencv_imgcodecs.so",
|
||||
"-l:libopencv_imgproc.so",
|
||||
"-l:libopencv_video.so",
|
||||
"-l:libopencv_videoio.so",
|
||||
],
|
||||
)
|
||||
```
|
||||
|
||||
For OpenCV 4 you need to modify [`opencv_linux.BUILD`] taking into account
|
||||
current architecture:
|
||||
|
||||
```bash
|
||||
# WORKSPACE
|
||||
new_local_repository(
|
||||
name = "linux_opencv",
|
||||
build_file = "@//third_party:opencv_linux.BUILD",
|
||||
path = "/usr",
|
||||
)
|
||||
|
||||
# opencv_linux.BUILD for OpenCV 4 installed from Debian package
|
||||
cc_library(
|
||||
name = "opencv",
|
||||
hdrs = glob([
|
||||
# Uncomment according to your multiarch value (gcc -print-multiarch):
|
||||
# "include/aarch64-linux-gnu/opencv4/opencv2/cvconfig.h",
|
||||
# "include/arm-linux-gnueabihf/opencv4/opencv2/cvconfig.h",
|
||||
# "include/x86_64-linux-gnu/opencv4/opencv2/cvconfig.h",
|
||||
"include/opencv4/opencv2/**/*.h*",
|
||||
]),
|
||||
includes = [
|
||||
# Uncomment according to your multiarch value (gcc -print-multiarch):
|
||||
# "include/aarch64-linux-gnu/opencv4/",
|
||||
# "include/arm-linux-gnueabihf/opencv4/",
|
||||
# "include/x86_64-linux-gnu/opencv4/",
|
||||
"include/opencv4/",
|
||||
],
|
||||
linkopts = [
|
||||
"-l:libopencv_core.so",
|
||||
"-l:libopencv_calib3d.so",
|
||||
"-l:libopencv_features2d.so",
|
||||
"-l:libopencv_highgui.so",
|
||||
"-l:libopencv_imgcodecs.so",
|
||||
"-l:libopencv_imgproc.so",
|
||||
"-l:libopencv_video.so",
|
||||
"-l:libopencv_videoio.so",
|
||||
],
|
||||
)
|
||||
```
|
||||
|
||||
**Option 2**. Run [`setup_opencv.sh`] to automatically build OpenCV from
|
||||
source and modify MediaPipe's OpenCV config. This option will do all steps
|
||||
defined in Option 3 automatically.
|
||||
|
||||
**Option 3**. Follow OpenCV's
|
||||
[documentation](https://docs.opencv.org/3.4.6/d7/d9f/tutorial_linux_install.html)
|
||||
to manually build OpenCV from source code.
|
||||
|
||||
Note: You may need to modify [`WORKSPACE`] and [`opencv_linux.BUILD`] to
|
||||
point MediaPipe to your own OpenCV libraries, e.g., if OpenCV 4 is installed
|
||||
in "/usr/local/", you need to update the "linux_opencv" new_local_repository
|
||||
rule in [`WORKSPACE`] and "opencv" cc_library rule in [`opencv_linux.BUILD`]
|
||||
like the following:
|
||||
You may need to modify [`WORKSPACE`] and [`opencv_linux.BUILD`] to point
|
||||
MediaPipe to your own OpenCV libraries. Assume OpenCV would be installed to
|
||||
`/usr/local/` which is recommended by default.
|
||||
|
||||
OpenCV 2/3 setup:
|
||||
|
||||
```bash
|
||||
# WORKSPACE
|
||||
new_local_repository(
|
||||
name = "linux_opencv",
|
||||
build_file = "@//third_party:opencv_linux.BUILD",
|
||||
path = "/usr/local",
|
||||
name = "linux_opencv",
|
||||
build_file = "@//third_party:opencv_linux.BUILD",
|
||||
path = "/usr/local",
|
||||
)
|
||||
|
||||
# opencv_linux.BUILD for OpenCV 2/3 installed to /usr/local
|
||||
cc_library(
|
||||
name = "opencv",
|
||||
srcs = glob(
|
||||
[
|
||||
"lib/libopencv_core.so",
|
||||
"lib/libopencv_highgui.so",
|
||||
"lib/libopencv_imgcodecs.so",
|
||||
"lib/libopencv_imgproc.so",
|
||||
"lib/libopencv_video.so",
|
||||
"lib/libopencv_videoio.so",
|
||||
],
|
||||
),
|
||||
hdrs = glob(["include/opencv4/**/*.h*"]),
|
||||
includes = ["include/opencv4/"],
|
||||
linkstatic = 1,
|
||||
visibility = ["//visibility:public"],
|
||||
name = "opencv",
|
||||
linkopts = [
|
||||
"-L/usr/local/lib",
|
||||
"-l:libopencv_core.so",
|
||||
"-l:libopencv_calib3d.so",
|
||||
"-l:libopencv_features2d.so",
|
||||
"-l:libopencv_highgui.so",
|
||||
"-l:libopencv_imgcodecs.so",
|
||||
"-l:libopencv_imgproc.so",
|
||||
"-l:libopencv_video.so",
|
||||
"-l:libopencv_videoio.so",
|
||||
],
|
||||
)
|
||||
```
|
||||
|
||||
OpenCV 4 setup:
|
||||
|
||||
```bash
|
||||
# WORKSPACE
|
||||
new_local_repository(
|
||||
name = "linux_opencv",
|
||||
build_file = "@//third_party:opencv_linux.BUILD",
|
||||
path = "/usr/local",
|
||||
)
|
||||
|
||||
# opencv_linux.BUILD for OpenCV 4 installed to /usr/local
|
||||
cc_library(
|
||||
name = "opencv",
|
||||
hdrs = glob([
|
||||
"include/opencv4/opencv2/**/*.h*",
|
||||
]),
|
||||
includes = [
|
||||
"include/opencv4/",
|
||||
],
|
||||
linkopts = [
|
||||
"-L/usr/local/lib",
|
||||
"-l:libopencv_core.so",
|
||||
"-l:libopencv_calib3d.so",
|
||||
"-l:libopencv_features2d.so",
|
||||
"-l:libopencv_highgui.so",
|
||||
"-l:libopencv_imgcodecs.so",
|
||||
"-l:libopencv_imgproc.so",
|
||||
"-l:libopencv_video.so",
|
||||
"-l:libopencv_videoio.so",
|
||||
],
|
||||
)
|
||||
```
|
||||
|
||||
Current FFmpeg setup is defined in [`ffmpeg_linux.BUILD`] and should work
|
||||
for any architecture:
|
||||
|
||||
```bash
|
||||
# WORKSPACE
|
||||
new_local_repository(
|
||||
name = "linux_ffmpeg",
|
||||
build_file = "@//third_party:ffmpeg_linux.BUILD",
|
||||
path = "/usr"
|
||||
)
|
||||
|
||||
# ffmpeg_linux.BUILD for FFmpeg installed from Debian package
|
||||
cc_library(
|
||||
name = "libffmpeg",
|
||||
linkopts = [
|
||||
"-l:libavcodec.so",
|
||||
"-l:libavformat.so",
|
||||
"-l:libavutil.so",
|
||||
],
|
||||
)
|
||||
```
|
||||
|
||||
@@ -111,11 +240,11 @@ To build and run iOS apps:
|
||||
# To compile with GPU support, replace
|
||||
--define MEDIAPIPE_DISABLE_GPU=1
|
||||
# with
|
||||
--copt -DMESA_EGL_NO_X11_HEADERS
|
||||
--copt -DMESA_EGL_NO_X11_HEADERS --copt -DEGL_NO_X11
|
||||
# when building GPU examples.
|
||||
```
|
||||
|
||||
5. Run the [Hello World desktop example](./hello_world_desktop.md).
|
||||
5. Run the [Hello World! in C++ example](./hello_world_cpp.md).
|
||||
|
||||
```bash
|
||||
$ export GLOG_logtostderr=1
|
||||
@@ -125,7 +254,7 @@ To build and run iOS apps:
|
||||
mediapipe/examples/desktop/hello_world:hello_world
|
||||
|
||||
# If you are running on Linux desktop with GPU support enabled (via mesa drivers)
|
||||
$ bazel run --copt -DMESA_EGL_NO_X11_HEADERS \
|
||||
$ bazel run --copt -DMESA_EGL_NO_X11_HEADERS --copt -DEGL_NO_X11 \
|
||||
mediapipe/examples/desktop/hello_world:hello_world
|
||||
|
||||
# Should print:
|
||||
@@ -141,9 +270,21 @@ To build and run iOS apps:
|
||||
# Hello World!
|
||||
```
|
||||
|
||||
### Installing on CentOS
|
||||
If you run into a build error, please read
|
||||
[Troubleshooting](./troubleshooting.md) to find the solutions of several common
|
||||
build issues.
|
||||
|
||||
1. Checkout MediaPipe repository.
|
||||
## Installing on CentOS
|
||||
|
||||
**Disclaimer**: Running MediaPipe on CentOS is experimental.
|
||||
|
||||
1. Install Bazelisk.
|
||||
|
||||
Follow the official
|
||||
[Bazel documentation](https://docs.bazel.build/versions/master/install-bazelisk.html)
|
||||
to install Bazelisk.
|
||||
|
||||
2. Checkout MediaPipe repository.
|
||||
|
||||
```bash
|
||||
$ git clone https://github.com/google/mediapipe.git
|
||||
@@ -152,13 +293,6 @@ To build and run iOS apps:
|
||||
$ cd mediapipe
|
||||
```
|
||||
|
||||
2. Install Bazel (version between 1.0.0 and 1.2.1).
|
||||
|
||||
Follow the official
|
||||
[Bazel documentation](https://docs.bazel.build/versions/master/install-redhat.html)
|
||||
to install Bazel manually. Note that MediaPipe doesn't support Bazel 2.0.0+
|
||||
yet.
|
||||
|
||||
3. Install OpenCV.
|
||||
|
||||
Option 1. Use package manager tool to install the pre-compiled version.
|
||||
@@ -172,11 +306,13 @@ To build and run iOS apps:
|
||||
|
||||
Option 2. Build OpenCV from source code.
|
||||
|
||||
Note: You may need to modify [`WORKSPACE`] and [`opencv_linux.BUILD`] to
|
||||
point MediaPipe to your own OpenCV libraries, e.g., if OpenCV 4 is installed
|
||||
in "/usr/local/", you need to update the "linux_opencv" new_local_repository
|
||||
rule in [`WORKSPACE`] and "opencv" cc_library rule in [`opencv_linux.BUILD`]
|
||||
like the following:
|
||||
Note: You may need to modify [`WORKSPACE`], [`opencv_linux.BUILD`] and
|
||||
[`ffmpeg_linux.BUILD`] to point MediaPipe to your own OpenCV and FFmpeg
|
||||
libraries. For example if OpenCV and FFmpeg are both manually installed in
|
||||
"/usr/local/", you will need to update: (1) the "linux_opencv" and
|
||||
"linux_ffmpeg" new_local_repository rules in [`WORKSPACE`], (2) the "opencv"
|
||||
cc_library rule in [`opencv_linux.BUILD`], and (3) the "libffmpeg"
|
||||
cc_library rule in [`ffmpeg_linux.BUILD`]. These 3 changes are shown below:
|
||||
|
||||
```bash
|
||||
new_local_repository(
|
||||
@@ -185,6 +321,12 @@ To build and run iOS apps:
|
||||
path = "/usr/local",
|
||||
)
|
||||
|
||||
new_local_repository(
|
||||
name = "linux_ffmpeg",
|
||||
build_file = "@//third_party:ffmpeg_linux.BUILD",
|
||||
path = "/usr/local",
|
||||
)
|
||||
|
||||
cc_library(
|
||||
name = "opencv",
|
||||
srcs = glob(
|
||||
@@ -197,14 +339,42 @@ To build and run iOS apps:
|
||||
"lib/libopencv_videoio.so",
|
||||
],
|
||||
),
|
||||
hdrs = glob(["include/opencv4/**/*.h*"]),
|
||||
includes = ["include/opencv4/"],
|
||||
hdrs = glob([
|
||||
# For OpenCV 3.x
|
||||
"include/opencv2/**/*.h*",
|
||||
# For OpenCV 4.x
|
||||
# "include/opencv4/opencv2/**/*.h*",
|
||||
]),
|
||||
includes = [
|
||||
# For OpenCV 3.x
|
||||
"include/",
|
||||
# For OpenCV 4.x
|
||||
# "include/opencv4/",
|
||||
],
|
||||
linkstatic = 1,
|
||||
visibility = ["//visibility:public"],
|
||||
)
|
||||
|
||||
cc_library(
|
||||
name = "libffmpeg",
|
||||
srcs = glob(
|
||||
[
|
||||
"lib/libav*.so",
|
||||
],
|
||||
),
|
||||
hdrs = glob(["include/libav*/*.h"]),
|
||||
includes = ["include"],
|
||||
linkopts = [
|
||||
"-lavcodec",
|
||||
"-lavformat",
|
||||
"-lavutil",
|
||||
],
|
||||
linkstatic = 1,
|
||||
visibility = ["//visibility:public"],
|
||||
)
|
||||
```
|
||||
|
||||
4. Run the [Hello World desktop example](./hello_world_desktop.md).
|
||||
4. Run the [Hello World! in C++ example](./hello_world_cpp.md).
|
||||
|
||||
```bash
|
||||
$ export GLOG_logtostderr=1
|
||||
@@ -225,7 +395,11 @@ To build and run iOS apps:
|
||||
# Hello World!
|
||||
```
|
||||
|
||||
### Installing on macOS
|
||||
If you run into a build error, please read
|
||||
[Troubleshooting](./troubleshooting.md) to find the solutions of several common
|
||||
build issues.
|
||||
|
||||
## Installing on macOS
|
||||
|
||||
1. Prework:
|
||||
|
||||
@@ -233,7 +407,13 @@ To build and run iOS apps:
|
||||
* Install [Xcode](https://developer.apple.com/xcode/) and its Command Line
|
||||
Tools by `xcode-select --install`.
|
||||
|
||||
2. Checkout MediaPipe repository.
|
||||
2. Install Bazelisk.
|
||||
|
||||
Follow the official
|
||||
[Bazel documentation](https://docs.bazel.build/versions/master/install-bazelisk.html)
|
||||
to install Bazelisk.
|
||||
|
||||
3. Checkout MediaPipe repository.
|
||||
|
||||
```bash
|
||||
$ git clone https://github.com/google/mediapipe.git
|
||||
@@ -241,28 +421,10 @@ To build and run iOS apps:
|
||||
$ cd mediapipe
|
||||
```
|
||||
|
||||
3. Install Bazel (version between 1.0.0 and 1.1.0).
|
||||
|
||||
Option 1. Use package manager tool to install Bazel 1.1.0
|
||||
|
||||
```bash
|
||||
# If Bazel 1.1.0+ was installed.
|
||||
$ brew uninstall bazel
|
||||
# Install Bazel 1.1.0
|
||||
$ brew install https://raw.githubusercontent.com/bazelbuild/homebrew-tap/f8a0fa981bcb1784a0d0823e14867b844e94fb3d/Formula/bazel.rb
|
||||
$ brew link bazel
|
||||
# Run 'bazel version' to check version of bazel
|
||||
```
|
||||
|
||||
Option 2. Follow the official
|
||||
[Bazel documentation](https://docs.bazel.build/versions/master/install-os-x.html#install-with-installer-mac-os-x)
|
||||
to install any version of Bazel manually. Note that MediaPipe doesn't
|
||||
support Bazel 1.1.0+ on macOS yet.
|
||||
|
||||
4. Install OpenCV and FFmpeg.
|
||||
|
||||
Option 1. Use HomeBrew package manager tool to install the pre-compiled
|
||||
OpenCV 3.4.5 libraries. FFmpeg will be installed via OpenCV.
|
||||
OpenCV 3 libraries. FFmpeg will be installed via OpenCV.
|
||||
|
||||
```bash
|
||||
$ brew install opencv@3
|
||||
@@ -328,7 +490,6 @@ To build and run iOS apps:
|
||||
linkstatic = 1,
|
||||
visibility = ["//visibility:public"],
|
||||
)
|
||||
|
||||
```
|
||||
|
||||
5. Make sure that Python 3 and the Python "six" library are installed.
|
||||
@@ -341,7 +502,7 @@ To build and run iOS apps:
|
||||
$ pip3 install --user six
|
||||
```
|
||||
|
||||
6. Run the [Hello World desktop example](./hello_world_desktop.md).
|
||||
6. Run the [Hello World! in C++ example](./hello_world_cpp.md).
|
||||
|
||||
```bash
|
||||
$ export GLOG_logtostderr=1
|
||||
@@ -362,7 +523,126 @@ To build and run iOS apps:
|
||||
# Hello World!
|
||||
```
|
||||
|
||||
### Installing on Windows Subsystem for Linux (WSL)
|
||||
If you run into a build error, please read
|
||||
[Troubleshooting](./troubleshooting.md) to find the solutions of several common
|
||||
build issues.
|
||||
|
||||
## Installing on Windows
|
||||
|
||||
**Disclaimer**: Running MediaPipe on Windows is experimental.
|
||||
|
||||
Note: building MediaPipe Android apps is still not possible on native
|
||||
Windows. Please do this in WSL instead and see the WSL setup instruction in the
|
||||
next section.
|
||||
|
||||
1. Install [MSYS2](https://www.msys2.org/) and edit the `%PATH%` environment
|
||||
variable.
|
||||
|
||||
If MSYS2 is installed to `C:\msys64`, add `C:\msys64\usr\bin` to your
|
||||
`%PATH%` environment variable.
|
||||
|
||||
2. Install necessary packages.
|
||||
|
||||
```
|
||||
C:\> pacman -S git patch unzip
|
||||
```
|
||||
|
||||
3. Install Python and allow the executable to edit the `%PATH%` environment
|
||||
variable.
|
||||
|
||||
Download Python Windows executable from
|
||||
https://www.python.org/downloads/windows/ and install.
|
||||
|
||||
4. Install Visual C++ Build Tools 2019 and WinSDK
|
||||
|
||||
Go to
|
||||
[the VisualStudio website](https://visualstudio.microsoft.com/visual-cpp-build-tools),
|
||||
download build tools, and install Microsoft Visual C++ 2019 Redistributable
|
||||
and Microsoft Build Tools 2019.
|
||||
|
||||
Download the WinSDK from
|
||||
[the official MicroSoft website](https://developer.microsoft.com/en-us/windows/downloads/windows-10-sdk/)
|
||||
and install.
|
||||
|
||||
5. Install Bazel or Bazelisk and add the location of the Bazel executable to
|
||||
the `%PATH%` environment variable.
|
||||
|
||||
Option 1. Follow
|
||||
[the official Bazel documentation](https://docs.bazel.build/versions/master/install-windows.html)
|
||||
to install Bazel 5.2.0 or higher.
|
||||
|
||||
Option 2. Follow the official
|
||||
[Bazel documentation](https://docs.bazel.build/versions/master/install-bazelisk.html)
|
||||
to install Bazelisk.
|
||||
|
||||
6. Set Bazel variables. Learn more details about
|
||||
["Build on Windows"](https://docs.bazel.build/versions/master/windows.html#build-c-with-msvc)
|
||||
in the Bazel official documentation.
|
||||
|
||||
```
|
||||
# Please find the exact paths and version numbers from your local version.
|
||||
C:\> set BAZEL_VS=C:\Program Files (x86)\Microsoft Visual Studio\2019\BuildTools
|
||||
C:\> set BAZEL_VC=C:\Program Files (x86)\Microsoft Visual Studio\2019\BuildTools\VC
|
||||
C:\> set BAZEL_VC_FULL_VERSION=<Your local VC version>
|
||||
C:\> set BAZEL_WINSDK_FULL_VERSION=<Your local WinSDK version>
|
||||
```
|
||||
|
||||
7. Checkout MediaPipe repository.
|
||||
|
||||
```
|
||||
C:\Users\Username\mediapipe_repo> git clone https://github.com/google/mediapipe.git
|
||||
|
||||
# Change directory into MediaPipe root directory
|
||||
C:\Users\Username\mediapipe_repo> cd mediapipe
|
||||
```
|
||||
|
||||
8. Install OpenCV.
|
||||
|
||||
Download the Windows executable from https://opencv.org/releases/ and
|
||||
install. We currently use OpenCV 3.4.10. Remember to edit the [`WORKSPACE`]
|
||||
file if OpenCV is not installed at `C:\opencv`.
|
||||
|
||||
```
|
||||
new_local_repository(
|
||||
name = "windows_opencv",
|
||||
build_file = "@//third_party:opencv_windows.BUILD",
|
||||
path = "C:\\<path to opencv>\\build",
|
||||
)
|
||||
```
|
||||
|
||||
9. Run the [Hello World! in C++ example](./hello_world_cpp.md).
|
||||
|
||||
Note: For building MediaPipe on Windows, please add `--action_env
|
||||
PYTHON_BIN_PATH="C://path//to//python.exe"` to the build command.
|
||||
Alternatively, you can follow
|
||||
[issue 724](https://github.com/google/mediapipe/issues/724) to fix the
|
||||
python configuration manually.
|
||||
|
||||
```
|
||||
C:\Users\Username\mediapipe_repo>bazel build -c opt --define MEDIAPIPE_DISABLE_GPU=1 --action_env PYTHON_BIN_PATH="C://python_36//python.exe" mediapipe/examples/desktop/hello_world
|
||||
|
||||
C:\Users\Username\mediapipe_repo>set GLOG_logtostderr=1
|
||||
|
||||
C:\Users\Username\mediapipe_repo>bazel-bin\mediapipe\examples\desktop\hello_world\hello_world.exe
|
||||
|
||||
# should print:
|
||||
# I20200514 20:43:12.277598 1200 hello_world.cc:56] Hello World!
|
||||
# I20200514 20:43:12.278597 1200 hello_world.cc:56] Hello World!
|
||||
# I20200514 20:43:12.279618 1200 hello_world.cc:56] Hello World!
|
||||
# I20200514 20:43:12.279618 1200 hello_world.cc:56] Hello World!
|
||||
# I20200514 20:43:12.279618 1200 hello_world.cc:56] Hello World!
|
||||
# I20200514 20:43:12.279618 1200 hello_world.cc:56] Hello World!
|
||||
# I20200514 20:43:12.279618 1200 hello_world.cc:56] Hello World!
|
||||
# I20200514 20:43:12.279618 1200 hello_world.cc:56] Hello World!
|
||||
# I20200514 20:43:12.279618 1200 hello_world.cc:56] Hello World!
|
||||
# I20200514 20:43:12.280613 1200 hello_world.cc:56] Hello World!
|
||||
```
|
||||
|
||||
If you run into a build error, please read
|
||||
[Troubleshooting](./troubleshooting.md) to find the solutions of several common
|
||||
build issues.
|
||||
|
||||
## Installing on Windows Subsystem for Linux (WSL)
|
||||
|
||||
Note: The pre-built OpenCV packages don't support cameras in WSL. Unless you
|
||||
[compile](https://funvision.blogspot.com/2019/12/opencv-web-camera-and-video-streams-in.html)
|
||||
@@ -377,7 +657,7 @@ cameras. Alternatively, you use a video file as input.
|
||||
|
||||
Note: Windows' and WSL’s adb versions must be the same version, e.g., if WSL
|
||||
has ADB 1.0.39, you need to download the corresponding Windows ADB from
|
||||
[here](https://dl.google.com/android/repository/platform-tools_r26.0.1-windows.zip).
|
||||
[here](https://dl.google.com/android/repository/platform-tools_r30.0.3-windows.zip).
|
||||
|
||||
3. Launch WSL.
|
||||
|
||||
@@ -391,19 +671,11 @@ cameras. Alternatively, you use a video file as input.
|
||||
username@DESKTOP-TMVLBJ1:~$ sudo apt-get update && sudo apt-get install -y build-essential git python zip adb openjdk-8-jdk
|
||||
```
|
||||
|
||||
5. Install Bazel (version between 1.0.0 and 1.2.1).
|
||||
5. Install Bazelisk.
|
||||
|
||||
```bash
|
||||
username@DESKTOP-TMVLBJ1:~$ curl -sLO --retry 5 --retry-max-time 10 \
|
||||
https://storage.googleapis.com/bazel/1.0.0/release/bazel-1.0.0-installer-linux-x86_64.sh && \
|
||||
sudo mkdir -p /usr/local/bazel/1.0.0 && \
|
||||
chmod 755 bazel-1.0.0-installer-linux-x86_64.sh && \
|
||||
sudo ./bazel-1.0.0-installer-linux-x86_64.sh --prefix=/usr/local/bazel/1.0.0 && \
|
||||
source /usr/local/bazel/1.0.0/lib/bazel/bin/bazel-complete.bash
|
||||
|
||||
username@DESKTOP-TMVLBJ1:~$ /usr/local/bazel/1.0.0/lib/bazel/bin/bazel version && \
|
||||
alias bazel='/usr/local/bazel/1.0.0/lib/bazel/bin/bazel'
|
||||
```
|
||||
Follow the official
|
||||
[Bazel documentation](https://docs.bazel.build/versions/master/install-bazelisk.html)
|
||||
to install Bazelisk.
|
||||
|
||||
6. Checkout MediaPipe repository.
|
||||
|
||||
@@ -463,7 +735,7 @@ cameras. Alternatively, you use a video file as input.
|
||||
)
|
||||
```
|
||||
|
||||
8. Run the [Hello World desktop example](./hello_world_desktop.md).
|
||||
8. Run the [Hello World! in C++ example](./hello_world_cpp.md).
|
||||
|
||||
```bash
|
||||
username@DESKTOP-TMVLBJ1:~/mediapipe$ export GLOG_logtostderr=1
|
||||
@@ -485,7 +757,11 @@ cameras. Alternatively, you use a video file as input.
|
||||
# Hello World!
|
||||
```
|
||||
|
||||
### Installing using Docker
|
||||
If you run into a build error, please
|
||||
read [Troubleshooting](./troubleshooting.md) to find the solutions of several
|
||||
common build issues.
|
||||
|
||||
## Installing using Docker
|
||||
|
||||
This will use a Docker image that will isolate mediapipe's installation from the rest of the system.
|
||||
|
||||
@@ -515,12 +791,12 @@ This will use a Docker image that will isolate mediapipe's installation from the
|
||||
# Successfully tagged mediapipe:latest
|
||||
```
|
||||
|
||||
3. Run the [Hello World desktop example](./hello_world_desktop.md).
|
||||
3. Run the [Hello World! in C++ example](./hello_world_cpp.md).
|
||||
|
||||
```bash
|
||||
$ docker run -it --name mediapipe mediapipe:latest
|
||||
|
||||
root@bca08b91ff63:/mediapipe# GLOG_logtostderr=1 bazel run --define MEDIAPIPE_DISABLE_GPU=1 mediapipe/examples/desktop/hello_world:hello_world
|
||||
root@bca08b91ff63:/mediapipe# GLOG_logtostderr=1 bazel run --define MEDIAPIPE_DISABLE_GPU=1 mediapipe/examples/desktop/hello_world
|
||||
|
||||
# Should print:
|
||||
# Hello World!
|
||||
@@ -535,7 +811,11 @@ This will use a Docker image that will isolate mediapipe's installation from the
|
||||
# Hello World!
|
||||
```
|
||||
|
||||
4. Build Mediapipe [Android demos](./examples.md).
|
||||
If you run into a build error, please
|
||||
read [Troubleshooting](./troubleshooting.md) to find the solutions of several
|
||||
common build issues.
|
||||
|
||||
4. Build a MediaPipe Android example.
|
||||
|
||||
```bash
|
||||
$ docker run -it --name mediapipe mediapipe:latest
|
||||
@@ -543,7 +823,7 @@ This will use a Docker image that will isolate mediapipe's installation from the
|
||||
root@bca08b91ff63:/mediapipe# bash ./setup_android_sdk_and_ndk.sh
|
||||
|
||||
# Should print:
|
||||
# Android NDK is now installed. Consider setting $ANDROID_NDK_HOME environment variable to be /root/Android/Sdk/ndk-bundle/android-ndk-r18b
|
||||
# Android NDK is now installed. Consider setting $ANDROID_NDK_HOME environment variable to be /root/Android/Sdk/ndk-bundle/android-ndk-r19c
|
||||
# Set android_ndk_repository and android_sdk_repository in WORKSPACE
|
||||
# Done
|
||||
|
||||
@@ -572,147 +852,9 @@ This will use a Docker image that will isolate mediapipe's installation from the
|
||||
docker run -i -t mediapipe:latest
|
||||
``` -->
|
||||
|
||||
### Setting up Android SDK and NDK
|
||||
|
||||
Requirements:
|
||||
|
||||
* Java Runtime.
|
||||
* Android SDK release 28.0.3 and above.
|
||||
* Android NDK r17c and above.
|
||||
|
||||
MediaPipe recommends setting up Android SDK and NDK via Android Studio, and see
|
||||
[next section](#setting-up-android-studio-with-mediapipe) for Android Studio
|
||||
setup. However, if you prefer using MediaPipe without Android Studio, please run
|
||||
[`setup_android_sdk_and_ndk.sh`] to download and setup Android SDK and NDK
|
||||
before building any Android example apps.
|
||||
|
||||
If Android SDK and NDK are already installed (e.g., by Android Studio), set
|
||||
$ANDROID_HOME and $ANDROID_NDK_HOME to point to the installed SDK and NDK.
|
||||
|
||||
```bash
|
||||
export ANDROID_HOME=<path to the Android SDK>
|
||||
export ANDROID_NDK_HOME=<path to the Android NDK>
|
||||
```
|
||||
|
||||
In order to use MediaPipe on earlier Android versions, MediaPipe needs to switch
|
||||
to a lower Android API level. You can achieve this by specifying `api_level =
|
||||
<api level integer>` in android_ndk_repository() and/or android_sdk_repository()
|
||||
in the [`WORKSPACE`] file.
|
||||
|
||||
Please verify all the necessary packages are installed.
|
||||
|
||||
* Android SDK Platform API Level 28 or 29
|
||||
* Android SDK Build-Tools 28 or 29
|
||||
* Android SDK Platform-Tools 28 or 29
|
||||
* Android SDK Tools 26.1.1
|
||||
* Android NDK 17c or above
|
||||
|
||||
### Using MediaPipe with Gradle
|
||||
|
||||
MediaPipe can be used within an existing project, such as a Gradle project,
|
||||
using the MediaPipe AAR target defined in mediapipe_aar.bzl. Please see the
|
||||
separate [MediaPipe Android Archive Library](./android_archive_library.md)
|
||||
documentation.
|
||||
|
||||
### Using MediaPipe with Bazel
|
||||
|
||||
The MediaPipe project can be imported to Android Studio using the Bazel plugins.
|
||||
This allows the MediaPipe examples and demos to be built and modified in Android
|
||||
Studio. To incorporate MediaPipe into an existing Android Studio project, see:
|
||||
"Using MediaPipe with Gradle". The steps below use Android Studio 3.5 to build
|
||||
and install a MediaPipe example app.
|
||||
|
||||
1. Install and launch Android Studio 3.5.
|
||||
|
||||
2. Select `Configure` | `SDK Manager` | `SDK Platforms`.
|
||||
|
||||
* Verify that Android SDK Platform API Level 28 or 29 is installed.
|
||||
* Take note of the Android SDK Location, e.g.,
|
||||
`/usr/local/home/Android/Sdk`.
|
||||
|
||||
3. Select `Configure` | `SDK Manager` | `SDK Tools`.
|
||||
|
||||
* Verify that Android SDK Build-Tools 28 or 29 is installed.
|
||||
* Verify that Android SDK Platform-Tools 28 or 29 is installed.
|
||||
* Verify that Android SDK Tools 26.1.1 is installed.
|
||||
* Verify that Android NDK 17c or above is installed.
|
||||
* Take note of the Android NDK Location, e.g.,
|
||||
`/usr/local/home/Android/Sdk/ndk-bundle` or
|
||||
`/usr/local/home/Android/Sdk/ndk/20.0.5594570`.
|
||||
|
||||
4. Set environment variables `$ANDROID_HOME` and `$ANDROID_NDK_HOME` to point
|
||||
to the installed SDK and NDK.
|
||||
|
||||
```bash
|
||||
export ANDROID_HOME=/usr/local/home/Android/Sdk
|
||||
|
||||
# If the NDK libraries are installed by a previous version of Android Studio, do
|
||||
export ANDROID_NDK_HOME=/usr/local/home/Android/Sdk/ndk-bundle
|
||||
# If the NDK libraries are installed by Android Studio 3.5, do
|
||||
export ANDROID_NDK_HOME=/usr/local/home/Android/Sdk/ndk/<version number>
|
||||
```
|
||||
|
||||
5. Select `Configure` | `Plugins` install `Bazel`.
|
||||
|
||||
6. On Linux, select `File` | `Settings`| `Bazel settings`. On macos, select
|
||||
`Android Studio` | `Preferences` | `Bazel settings`. Then, modify `Bazel
|
||||
binary location` to be the same as the output of `$ which bazel`.
|
||||
|
||||
7. Select `Import Bazel Project`.
|
||||
|
||||
* Select `Workspace`: `/path/to/mediapipe` and select `Next`.
|
||||
* Select `Generate from BUILD file`: `/path/to/mediapipe/BUILD` and select `Next`.
|
||||
* Modify `Project View` to be the following and select `Finish`.
|
||||
|
||||
```
|
||||
directories:
|
||||
# read project settings, e.g., .bazelrc
|
||||
.
|
||||
-mediapipe/objc
|
||||
-mediapipe/examples/ios
|
||||
|
||||
targets:
|
||||
//mediapipe/examples/android/...:all
|
||||
//mediapipe/java/...:all
|
||||
|
||||
android_sdk_platform: android-29
|
||||
```
|
||||
|
||||
8. Select `Bazel` | `Sync` | `Sync project with Build files`.
|
||||
|
||||
Note: Even after doing step 4, if you still see the error:
|
||||
`"no such package '@androidsdk//': Either the path
|
||||
attribute of android_sdk_repository or the ANDROID_HOME environment variable
|
||||
must be set."`, please modify the **WORKSPACE** file to point
|
||||
to your SDK and NDK library locations, as below:
|
||||
|
||||
```
|
||||
android_sdk_repository(
|
||||
name = "androidsdk",
|
||||
path = "/path/to/android/sdk"
|
||||
)
|
||||
|
||||
android_ndk_repository(
|
||||
name = "androidndk",
|
||||
path = "/path/to/android/ndk"
|
||||
)
|
||||
```
|
||||
|
||||
9. Connect an Android device to the workstation.
|
||||
|
||||
10. Select `Run...` | `Edit Configurations...`.
|
||||
|
||||
* Select `Templates` | `Bazel Command`.
|
||||
* Enter Target Expression:
|
||||
`//mediapipe/examples/android/src/java/com/google/mediapipe/apps/facedetectioncpu`
|
||||
* Enter Bazel command: `mobile-install`.
|
||||
* Enter Bazel flags: `-c opt --config=android_arm64`.
|
||||
* Press the `[+]` button to add the new configuration.
|
||||
* Select `Run` to run the example app on the connected Android device.
|
||||
|
||||
[`WORKSPACE`]: https://github.com/google/mediapipe/tree/master/WORKSPACE
|
||||
[`WORKSPACE`]: https://github.com/google/mediapipe/blob/master/WORKSPACE
|
||||
[`opencv_linux.BUILD`]: https://github.com/google/mediapipe/tree/master/third_party/opencv_linux.BUILD
|
||||
[`ffmpeg_linux.BUILD`]:https://github.com/google/mediapipe/tree/master/third_party/ffmpeg_linux.BUILD
|
||||
[`opencv_macos.BUILD`]: https://github.com/google/mediapipe/tree/master/third_party/opencv_macos.BUILD
|
||||
[`ffmpeg_macos.BUILD`]:https://github.com/google/mediapipe/tree/master/third_party/ffmpeg_macos.BUILD
|
||||
[`setup_opencv.sh`]: https://github.com/google/mediapipe/tree/master/setup_opencv.sh
|
||||
[`setup_android_sdk_and_ndk.sh`]: https://github.com/google/mediapipe/tree/master/setup_android_sdk_and_ndk.sh
|
||||
[`setup_opencv.sh`]: https://github.com/google/mediapipe/blob/master/setup_opencv.sh
|
||||
@@ -0,0 +1,230 @@
|
||||
---
|
||||
layout: default
|
||||
title: MediaPipe on iOS
|
||||
parent: Getting Started
|
||||
has_children: true
|
||||
has_toc: false
|
||||
nav_order: 2
|
||||
---
|
||||
|
||||
# MediaPipe on iOS
|
||||
{: .no_toc }
|
||||
|
||||
1. TOC
|
||||
{:toc}
|
||||
---
|
||||
|
||||
Please follow instructions below to build iOS example apps in the supported
|
||||
MediaPipe [solutions](../solutions/solutions.md). To learn more about these
|
||||
example apps, start from, start from
|
||||
[Hello World! on iOS](./hello_world_ios.md).
|
||||
|
||||
## Building iOS example apps
|
||||
|
||||
### Prerequisite
|
||||
|
||||
1. Install MediaPipe following these [instructions](./install.md).
|
||||
|
||||
2. Install [Xcode](https://developer.apple.com/xcode/), then install the
|
||||
Command Line Tools using:
|
||||
|
||||
```bash
|
||||
xcode-select --install
|
||||
```
|
||||
|
||||
3. Install [Bazelisk](https://github.com/bazelbuild/bazelisk)
|
||||
.
|
||||
|
||||
We recommend using [Homebrew](https://brew.sh/) to get the latest versions.
|
||||
|
||||
```bash
|
||||
brew install bazelisk
|
||||
```
|
||||
|
||||
4. Set Python 3.7 as the default Python version and install the Python "six"
|
||||
library. This is needed for TensorFlow.
|
||||
|
||||
```bash
|
||||
pip3 install --user six
|
||||
```
|
||||
|
||||
5. Clone the MediaPipe repository.
|
||||
|
||||
```bash
|
||||
git clone https://github.com/google/mediapipe.git
|
||||
```
|
||||
|
||||
### Set up a bundle ID prefix
|
||||
|
||||
All iOS apps must have a bundle ID, and you must have a provisioning profile
|
||||
that lets you install an app with that ID onto your phone. To avoid clashes
|
||||
between different MediaPipe users, you need to configure a unique prefix for the
|
||||
bundle IDs of our iOS demo apps.
|
||||
|
||||
If you have a custom provisioning profile, see
|
||||
[Custom provisioning](#custom-provisioning) below.
|
||||
|
||||
Otherwise, run this command to generate a unique prefix:
|
||||
|
||||
```bash
|
||||
python3 mediapipe/examples/ios/link_local_profiles.py
|
||||
```
|
||||
|
||||
### Create an Xcode project
|
||||
|
||||
This allows you to edit and debug one of the example apps in Xcode. It also
|
||||
allows you to make use of automatic provisioning (see later section).
|
||||
|
||||
1. We will use a tool called [Tulsi](https://tulsi.bazel.build/) for generating
|
||||
Xcode projects from Bazel build configurations.
|
||||
|
||||
```bash
|
||||
# cd out of the mediapipe directory, then:
|
||||
git clone https://github.com/bazelbuild/tulsi.git
|
||||
cd tulsi
|
||||
# remove Xcode version from Tulsi's .bazelrc (see http://github.com/bazelbuild/tulsi#building-and-installing):
|
||||
sed -i .orig '/xcode_version/d' .bazelrc
|
||||
# build and run Tulsi:
|
||||
sh build_and_run.sh
|
||||
```
|
||||
|
||||
This will install `Tulsi.app` inside the `Applications` directory in your
|
||||
home directory.
|
||||
|
||||
2. Open `mediapipe/Mediapipe.tulsiproj` using the Tulsi app.
|
||||
|
||||
Tip: If Tulsi displays an error saying "Bazel could not be found", press the
|
||||
"Bazel..." button in the Packages tab and select the `bazel` executable in
|
||||
your homebrew `/bin/` directory.
|
||||
|
||||
3. Select the MediaPipe config in the Configs tab, then press the Generate
|
||||
button below. You will be asked for a location to save the Xcode project.
|
||||
Once the project is generated, it will be opened in Xcode.
|
||||
|
||||
If you get an error about bundle IDs, see the
|
||||
[previous section](#set-up-a-bundle-id-prefix).
|
||||
|
||||
### Set up provisioning
|
||||
|
||||
To install applications on an iOS device, you need a provisioning profile. There
|
||||
are two options:
|
||||
|
||||
1. Automatic provisioning. This allows you to build and install an app to your
|
||||
personal device. The provisining profile is managed by Xcode, and has to be
|
||||
updated often (it is valid for about a week).
|
||||
|
||||
2. Custom provisioning. This uses a provisioning profile associated with an
|
||||
Apple developer account. These profiles have a longer validity period and
|
||||
can target multiple devices, but you need a paid developer account with
|
||||
Apple to obtain one.
|
||||
|
||||
#### Automatic provisioning
|
||||
|
||||
1. Create an Xcode project for MediaPipe, as discussed
|
||||
[earlier](#create-an-xcode-project).
|
||||
|
||||
2. In the project navigator in the left sidebar, select the "Mediapipe"
|
||||
project.
|
||||
|
||||
3. Select one of the application targets, e.g. HandTrackingGpuApp.
|
||||
|
||||
4. Select the "Signing & Capabilities" tab.
|
||||
|
||||
5. Check "Automatically manage signing", and confirm the dialog box.
|
||||
|
||||
6. Select "_Your Name_ (Personal Team)" in the Team pop-up menu.
|
||||
|
||||
7. This set-up needs to be done once for each application you want to install.
|
||||
Repeat steps 3-6 as needed.
|
||||
|
||||
This generates provisioning profiles for each app you have selected. Now we need
|
||||
to tell Bazel to use them. We have provided a script to make this easier.
|
||||
|
||||
1. In the terminal, to the `mediapipe` directory where you cloned the
|
||||
repository.
|
||||
|
||||
2. Run this command:
|
||||
|
||||
```bash
|
||||
python3 mediapipe/examples/ios/link_local_profiles.py
|
||||
```
|
||||
|
||||
This will find and link the provisioning profile for all applications for which
|
||||
you have enabled automatic provisioning in Xcode.
|
||||
|
||||
Note: once a profile expires, Xcode will generate a new one; you must then run
|
||||
this script again to link the updated profiles.
|
||||
|
||||
#### Custom provisioning
|
||||
|
||||
1. Obtain a provisioning profile from Apple.
|
||||
|
||||
Tip: You can use this command to see the provisioning profiles you have
|
||||
previously downloaded using Xcode: `open ~/Library/MobileDevice/"Provisioning
|
||||
Profiles"`. If there are none, generate and download a profile on
|
||||
[Apple's developer site](https://developer.apple.com/account/resources/).
|
||||
|
||||
1. Symlink or copy your provisioning profile to
|
||||
`mediapipe/mediapipe/provisioning_profile.mobileprovision`.
|
||||
|
||||
```bash
|
||||
cd mediapipe
|
||||
ln -s ~/Downloads/MyProvisioningProfile.mobileprovision mediapipe/provisioning_profile.mobileprovision
|
||||
```
|
||||
|
||||
Note: if you had previously set up automatic provisioning, you should remove the
|
||||
`provisioning_profile.mobileprovision` symlink in each example's directory,
|
||||
since it will take precedence over the common one. You can also overwrite it
|
||||
with you own profile if you need a different profile for different apps.
|
||||
|
||||
1. Open `mediapipe/examples/ios/bundle_id.bzl`, and change the
|
||||
`BUNDLE_ID_PREFIX` to a prefix associated with your provisioning profile.
|
||||
|
||||
### Build and run an app using Xcode
|
||||
|
||||
1. Create the Xcode project, and make sure you have set up either automatic or
|
||||
custom provisioning.
|
||||
|
||||
2. You can now select any of the MediaPipe demos in the target menu, and build
|
||||
and run them as normal.
|
||||
|
||||
Note: When you ask Xcode to run an app, by default it will use the Debug
|
||||
configuration. Some of our demos are computationally heavy; you may want to use
|
||||
the Release configuration for better performance.
|
||||
|
||||
Note: Due to an imcoptibility caused by one of our dependencies, MediaPipe
|
||||
cannot be used for apps running on the iPhone Simulator on Apple Silicon (M1).
|
||||
|
||||
Tip: To switch build configuration in Xcode, click on the target menu, choose
|
||||
"Edit Scheme...", select the Run action, and switch the Build Configuration from
|
||||
Debug to Release. Note that this is set independently for each target.
|
||||
|
||||
Tip: On the device, in Settings > General > Device Management, make sure the
|
||||
developer (yourself) is trusted.
|
||||
|
||||
### Build an app using the command line
|
||||
|
||||
1. Make sure you have set up either automatic or custom provisioning.
|
||||
|
||||
2. Using [MediaPipe Hands](../solutions/hands.md) for example, run:
|
||||
|
||||
```bash
|
||||
bazel build -c opt --config=ios_arm64 mediapipe/examples/ios/handtrackinggpu:HandTrackingGpuApp
|
||||
```
|
||||
|
||||
You may see a permission request from `codesign` in order to sign the app.
|
||||
|
||||
Tip: If you are using custom provisioning, you can run this
|
||||
[script](https://github.com/google/mediapipe/blob/master/build_ios_examples.sh)
|
||||
to build all MediaPipe iOS example apps.
|
||||
|
||||
3. In Xcode, open the `Devices and Simulators` window (command-shift-2).
|
||||
|
||||
4. Make sure your device is connected. You will see a list of installed apps.
|
||||
Press the "+" button under the list, and select the `.ipa` file built by
|
||||
Bazel.
|
||||
|
||||
5. You can now run the app on your device.
|
||||
|
||||
Tip: On the device, in Settings > General > Device Management, make sure the
|
||||
developer (yourself) is trusted.
|
||||
@@ -0,0 +1,102 @@
|
||||
---
|
||||
layout: default
|
||||
title: MediaPipe in JavaScript
|
||||
parent: Getting Started
|
||||
nav_order: 4
|
||||
---
|
||||
|
||||
# MediaPipe in JavaScript
|
||||
{: .no_toc }
|
||||
|
||||
1. TOC
|
||||
{:toc}
|
||||
---
|
||||
|
||||
## Ready-to-use JavaScript Solutions
|
||||
|
||||
MediaPipe currently offers the following solutions:
|
||||
|
||||
Solution | NPM Package | Example
|
||||
--------------------------- | --------------------------------------- | -------
|
||||
[Face Mesh][F-pg] | [@mediapipe/face_mesh][F-npm] | [mediapipe.dev/demo/face_mesh][F-demo]
|
||||
[Face Detection][Fd-pg] | [@mediapipe/face_detection][Fd-npm] | [mediapipe.dev/demo/face_detection][Fd-demo]
|
||||
[Hands][H-pg] | [@mediapipe/hands][H-npm] | [mediapipe.dev/demo/hands][H-demo]
|
||||
[Holistic][Ho-pg] | [@mediapipe/holistic][Ho-npm] | [mediapipe.dev/demo/holistic][Ho-demo]
|
||||
[Objectron][Ob-pg] | [@mediapipe/objectron][Ob-npm] | [mediapipe.dev/demo/objectron][Ob-demo]
|
||||
[Pose][P-pg] | [@mediapipe/pose][P-npm] | [mediapipe.dev/demo/pose][P-demo]
|
||||
[Selfie Segmentation][S-pg] | [@mediapipe/selfie_segmentation][S-npm] | [mediapipe.dev/demo/selfie_segmentation][S-demo]
|
||||
|
||||
Click on a solution link above for more information, including API and code
|
||||
snippets.
|
||||
|
||||
### Supported plaforms:
|
||||
|
||||
| Browser | Platform | Notes |
|
||||
| ------- | ----------------------- | -------------------------------------- |
|
||||
| Chrome | Android / Windows / Mac | Pixel 4 and older unsupported. Fuschia |
|
||||
| | | unsupported. |
|
||||
| Chrome | iOS | Camera unavailable in Chrome on iOS. |
|
||||
| Safari | iPad/iPhone/Mac | iOS and Safari on iPad / iPhone / |
|
||||
| | | MacBook |
|
||||
|
||||
The quickest way to get acclimated is to look at the examples above. Each demo
|
||||
has a link to a [CodePen][codepen] so that you can edit the code and try it
|
||||
yourself. We have included a number of utility packages to help you get started:
|
||||
|
||||
* [@mediapipe/drawing_utils][draw-npm] - Utilities to draw landmarks and
|
||||
connectors.
|
||||
* [@mediapipe/camera_utils][cam-npm] - Utilities to operate the camera.
|
||||
* [@mediapipe/control_utils][ctrl-npm] - Utilities to show sliders and FPS
|
||||
widgets.
|
||||
|
||||
Note: See these demos and more at [MediaPipe on CodePen][codepen]
|
||||
|
||||
All of these solutions are staged in [NPM][npm]. You can install any package
|
||||
locally with `npm install`. Example:
|
||||
|
||||
```
|
||||
npm install @mediapipe/holistic.
|
||||
```
|
||||
|
||||
If you would rather not stage these locally, you can rely on a CDN (e.g.,
|
||||
[jsDelivr](https://www.jsdelivr.com/)). This will allow you to add scripts
|
||||
directly to your HTML:
|
||||
|
||||
```
|
||||
<head>
|
||||
<script src="https://cdn.jsdelivr.net/npm/@mediapipe/[email protected]/drawing_utils.js" crossorigin="anonymous"></script>
|
||||
<script src="https://cdn.jsdelivr.net/npm/@mediapipe/[email protected]/holistic.js" crossorigin="anonymous"></script>
|
||||
</head>
|
||||
```
|
||||
|
||||
Note: You can specify version numbers to both NPM and jsdelivr. They are
|
||||
structured as `<major>.<minor>.<build>`. To prevent breaking changes from
|
||||
affecting your work, restrict your request to a `<minor>` number. e.g.,
|
||||
`@mediapipe/[email protected]`.
|
||||
|
||||
[Ho-pg]: ../solutions/holistic#javascript-solution-api
|
||||
[F-pg]: ../solutions/face_mesh#javascript-solution-api
|
||||
[Fd-pg]: ../solutions/face_detection#javascript-solution-api
|
||||
[H-pg]: ../solutions/hands#javascript-solution-api
|
||||
[Ob-pg]: ../solutions/objectron#javascript-solution-api
|
||||
[P-pg]: ../solutions/pose#javascript-solution-api
|
||||
[S-pg]: ../solutions/selfie_segmentation#javascript-solution-api
|
||||
[Ho-npm]: https://www.npmjs.com/package/@mediapipe/holistic
|
||||
[F-npm]: https://www.npmjs.com/package/@mediapipe/face_mesh
|
||||
[Fd-npm]: https://www.npmjs.com/package/@mediapipe/face_detection
|
||||
[H-npm]: https://www.npmjs.com/package/@mediapipe/hands
|
||||
[Ob-npm]: https://www.npmjs.com/package/@mediapipe/objectron
|
||||
[P-npm]: https://www.npmjs.com/package/@mediapipe/pose
|
||||
[S-npm]: https://www.npmjs.com/package/@mediapipe/selfie_segmentation
|
||||
[draw-npm]: https://www.npmjs.com/package/@mediapipe/drawing_utils
|
||||
[cam-npm]: https://www.npmjs.com/package/@mediapipe/camera_utils
|
||||
[ctrl-npm]: https://www.npmjs.com/package/@mediapipe/control_utils
|
||||
[Ho-demo]: https://mediapipe.dev/demo/holistic
|
||||
[F-demo]: https://mediapipe.dev/demo/face_mesh
|
||||
[Fd-demo]: https://mediapipe.dev/demo/face_detection
|
||||
[H-demo]: https://mediapipe.dev/demo/hands
|
||||
[Ob-demo]: https://mediapipe.dev/demo/objectron
|
||||
[P-demo]: https://mediapipe.dev/demo/pose
|
||||
[S-demo]: https://mediapipe.dev/demo/selfie_segmentation
|
||||
[npm]: https://www.npmjs.com/package/@mediapipe
|
||||
[codepen]: https://code.mediapipe.dev/codepen
|
||||
@@ -0,0 +1,143 @@
|
||||
---
|
||||
layout: default
|
||||
title: MediaPipe in Python
|
||||
parent: Getting Started
|
||||
has_children: true
|
||||
has_toc: false
|
||||
nav_order: 3
|
||||
---
|
||||
|
||||
# MediaPipe in Python
|
||||
{: .no_toc }
|
||||
|
||||
1. TOC
|
||||
{:toc}
|
||||
---
|
||||
|
||||
## Ready-to-use Python Solutions
|
||||
|
||||
MediaPipe offers ready-to-use yet customizable Python solutions as a prebuilt
|
||||
Python package. MediaPipe Python package is available on
|
||||
[PyPI](https://pypi.org/project/mediapipe/) for Linux, macOS and Windows.
|
||||
|
||||
You can, for instance, activate a Python virtual environment:
|
||||
|
||||
```bash
|
||||
$ python3 -m venv mp_env && source mp_env/bin/activate
|
||||
```
|
||||
|
||||
Install MediaPipe Python package and start Python interpreter:
|
||||
|
||||
```bash
|
||||
(mp_env)$ pip install mediapipe
|
||||
(mp_env)$ python3
|
||||
```
|
||||
|
||||
In Python interpreter, import the package and start using one of the solutions:
|
||||
|
||||
```python
|
||||
import mediapipe as mp
|
||||
mp_face_mesh = mp.solutions.face_mesh
|
||||
```
|
||||
|
||||
Tip: Use command `deactivate` to later exit the Python virtual environment.
|
||||
|
||||
To learn more about configuration options and usage examples, please find
|
||||
details in each solution via the links below:
|
||||
|
||||
* [MediaPipe Face Detection](../solutions/face_detection#python-solution-api)
|
||||
* [MediaPipe Face Mesh](../solutions/face_mesh#python-solution-api)
|
||||
* [MediaPipe Hands](../solutions/hands#python-solution-api)
|
||||
* [MediaPipe Holistic](../solutions/holistic#python-solution-api)
|
||||
* [MediaPipe Objectron](../solutions/objectron#python-solution-api)
|
||||
* [MediaPipe Pose](../solutions/pose#python-solution-api)
|
||||
* [MediaPipe Selfie Segmentation](../solutions/selfie_segmentation#python-solution-api)
|
||||
|
||||
## MediaPipe on Google Colab
|
||||
|
||||
* [MediaPipe Face Detection Colab](https://mediapipe.page.link/face_detection_py_colab)
|
||||
* [MediaPipe Face Mesh Colab](https://mediapipe.page.link/face_mesh_py_colab)
|
||||
* [MediaPipe Hands Colab](https://mediapipe.page.link/hands_py_colab)
|
||||
* [MediaPipe Holistic Colab](https://mediapipe.page.link/holistic_py_colab)
|
||||
* [MediaPipe Objectron Colab](https://mediapipe.page.link/objectron_py_colab)
|
||||
* [MediaPipe Pose Colab](https://mediapipe.page.link/pose_py_colab)
|
||||
* [MediaPipe Pose Classification Colab (Basic)](https://mediapipe.page.link/pose_classification_basic)
|
||||
* [MediaPipe Pose Classification Colab (Extended)](https://mediapipe.page.link/pose_classification_extended)
|
||||
* [MediaPipe Selfie Segmentation Colab](https://mediapipe.page.link/selfie_segmentation_py_colab)
|
||||
|
||||
## MediaPipe Python Framework
|
||||
|
||||
The ready-to-use solutions are built upon the MediaPipe Python framework, which
|
||||
can be used by advanced users to run their own MediaPipe graphs in Python.
|
||||
Please see [here](./python_framework.md) for more info.
|
||||
|
||||
## Building MediaPipe Python Package
|
||||
|
||||
Follow the steps below only if you have local changes and need to build the
|
||||
Python package from source. Otherwise, we strongly encourage our users to simply
|
||||
run `pip install mediapipe` to use the ready-to-use solutions, more convenient
|
||||
and much faster.
|
||||
|
||||
MediaPipe PyPI currently doesn't provide aarch64 Python wheel
|
||||
files. For building and using MediaPipe Python on aarch64 Linux systems such as
|
||||
Nvidia Jetson and Raspberry Pi, please read
|
||||
[here](https://github.com/jiuqiant/mediapipe-python-aarch64).
|
||||
|
||||
1. Make sure that Bazel and OpenCV are correctly installed and configured for
|
||||
MediaPipe. Please see [Installation](./install.md) for how to setup Bazel
|
||||
and OpenCV for MediaPipe on Linux and macOS.
|
||||
|
||||
2. Install the following dependencies.
|
||||
|
||||
Debian or Ubuntu:
|
||||
|
||||
```bash
|
||||
$ sudo apt install python3-dev
|
||||
$ sudo apt install python3-venv
|
||||
$ sudo apt install -y protobuf-compiler
|
||||
|
||||
# If you need to build opencv from source.
|
||||
$ sudo apt install cmake
|
||||
```
|
||||
|
||||
macOS:
|
||||
|
||||
```bash
|
||||
$ brew install protobuf
|
||||
|
||||
# If you need to build opencv from source.
|
||||
$ brew install cmake
|
||||
```
|
||||
|
||||
Windows:
|
||||
|
||||
Download the latest protoc win64 zip from
|
||||
[the Protobuf GitHub repo](https://github.com/protocolbuffers/protobuf/releases),
|
||||
unzip the file, and copy the protoc.exe executable to a preferred location.
|
||||
Please ensure that location is added into the Path environment variable.
|
||||
|
||||
3. Activate a Python virtual environment.
|
||||
|
||||
```bash
|
||||
$ python3 -m venv mp_env && source mp_env/bin/activate
|
||||
```
|
||||
|
||||
4. In the virtual environment, go to the MediaPipe repo directory.
|
||||
|
||||
5. Install the required Python packages.
|
||||
|
||||
```bash
|
||||
(mp_env)mediapipe$ pip3 install -r requirements.txt
|
||||
```
|
||||
|
||||
6. Build and install MediaPipe package.
|
||||
|
||||
```bash
|
||||
(mp_env)mediapipe$ python3 setup.py install --link-opencv
|
||||
```
|
||||
|
||||
or
|
||||
|
||||
```bash
|
||||
(mp_env)mediapipe$ python3 setup.py bdist_wheel
|
||||
```
|
||||
@@ -0,0 +1,269 @@
|
||||
---
|
||||
layout: default
|
||||
title: MediaPipe Python Framework
|
||||
parent: MediaPipe in Python
|
||||
grand_parent: Getting Started
|
||||
nav_order: 1
|
||||
---
|
||||
|
||||
# MediaPipe Python Framework
|
||||
{: .no_toc }
|
||||
|
||||
1. TOC
|
||||
{:toc}
|
||||
---
|
||||
|
||||
The MediaPipe Python framework grants direct access to the core components of
|
||||
the MediaPipe C++ framework such as Timestamp, Packet, and CalculatorGraph,
|
||||
whereas the
|
||||
[ready-to-use Python solutions](./python.md#ready-to-use-python-solutions) hide
|
||||
the technical details of the framework and simply return the readable model
|
||||
inference results back to the callers.
|
||||
|
||||
MediaPipe framework sits on top of
|
||||
[the pybind11 library](https://pybind11.readthedocs.io/en/stable/index.html).
|
||||
The C++ core framework is exposed in Python via a C++/Python language binding.
|
||||
The content below assumes that the reader already has a basic understanding of
|
||||
the MediaPipe C++ framework. Otherwise, you can find useful information in
|
||||
[Framework Concepts](../framework_concepts/framework_concepts.md).
|
||||
|
||||
### Packet
|
||||
|
||||
The packet is the basic data flow unit in MediaPipe. A packet consists of a
|
||||
numeric timestamp and a shared pointer to an immutable payload. In Python, a
|
||||
MediaPipe packet can be created by calling one of the packet creator methods in
|
||||
the
|
||||
[`mp.packet_creator`](https://github.com/google/mediapipe/tree/master/mediapipe/python/pybind/packet_creator.cc)
|
||||
module. Correspondingly, the packet payload can be retrieved by using one of the
|
||||
packet getter methods in the
|
||||
[`mp.packet_getter`](https://github.com/google/mediapipe/tree/master/mediapipe/python/pybind/packet_getter.cc)
|
||||
module. Note that the packet payload becomes **immutable** after packet
|
||||
creation. Thus, the modification of the retrieved packet content doesn't affect
|
||||
the actual payload in the packet. MediaPipe framework Python API supports the
|
||||
most commonly used data types of MediaPipe (e.g., ImageFrame, Matrix, Protocol
|
||||
Buffers, and the primitive data types) in the core binding. The comprehensive
|
||||
table below shows the type mappings between the Python and the C++ data type
|
||||
along with the packet creator and the content getter method for each data type
|
||||
supported by the MediaPipe Python framework API.
|
||||
|
||||
Python Data Type | C++ Data Type | Packet Creator | Content Getter
|
||||
------------------------------------ | ----------------------------- | ------------------------------------------------------------------------------------------------------------------------------------------------------------ | --------------
|
||||
bool | bool | create_bool(True) | get_bool(packet)
|
||||
int or np.intc | int_t | create_int(1) | get_int(packet)
|
||||
int or np.int8 | int8_t | create_int8(2**7-1) | get_int(packet)
|
||||
int or np.int16 | int16_t | create_int16(2**15-1) | get_int(packet)
|
||||
int or np.int32 | int32_t | create_int32(2**31-1) | get_int(packet)
|
||||
int or np.int64 | int64_t | create_int64(2**63-1) | get_int(packet)
|
||||
int or np.uint8 | uint8_t | create_uint8(2**8-1) | get_uint(packet)
|
||||
int or np.uint16 | uint16_t | create_uint16(2**16-1) | get_uint(packet)
|
||||
int or np.uint32 | uint32_t | create_uint32(2**32-1) | get_uint(packet)
|
||||
int or np.uint64 | uint64_t | create_uint64(2**64-1) | get_uint(packet)
|
||||
float or np.float32 | float | create_float(1.1) | get_float(packet)
|
||||
float or np.double | double | create_double(1.1) | get_float(packet)
|
||||
str (UTF-8) | std::string | create_string('abc') | get_str(packet)
|
||||
bytes | std::string | create_string(b'\xd0\xd0\xd0') | get_bytes(packet)
|
||||
mp.Packet | mp::Packet | create_packet(p) | get_packet(packet)
|
||||
List\[bool\] | std::vector\<bool\> | create_bool_vector(\[True, False\]) | get_bool_list(packet)
|
||||
List\[int\] or List\[np.intc\] | int\[\] | create_int_array(\[1, 2, 3\]) | get_int_list(packet, size=10)
|
||||
List\[int\] or List\[np.intc\] | std::vector\<int\> | create_int_vector(\[1, 2, 3\]) | get_int_list(packet)
|
||||
List\[float\] or List\[np.float\] | float\[\] | create_float_arrary(\[0.1, 0.2\]) | get_float_list(packet, size=10)
|
||||
List\[float\] or List\[np.float\] | std::vector\<float\> | create_float_vector(\[0.1, 0.2\]) | get_float_list(packet, size=10)
|
||||
List\[str\] | std::vector\<std::string\> | create_string_vector(\['a'\]) | get_str_list(packet)
|
||||
List\[mp.Packet\] | std::vector\<mp::Packet\> | create_packet_vector(<br> \[packet1, packet2\]) | get_packet_list(p)
|
||||
Mapping\[str, Packet\] | std::map<std::string, Packet> | create_string_to_packet_map(<br> {'a': packet1, 'b': packet2}) | get_str_to_packet_dict(packet)
|
||||
np.ndarray<br>(cv.mat and PIL.Image) | mp::ImageFrame | create_image_frame(<br> format=ImageFormat.SRGB,<br> data=mat) | get_image_frame(packet)
|
||||
np.ndarray | mp::Matrix | create_matrix(data) | get_matrix(packet)
|
||||
Google Proto Message | Google Proto Message | create_proto(proto) | get_proto(packet)
|
||||
List\[Proto\] | std::vector\<Proto\> | n/a | get_proto_list(packet)
|
||||
|
||||
It's not uncommon that users create custom C++ classes and and send those into
|
||||
the graphs and calculators. To allow the custom classes to be used in Python
|
||||
with MediaPipe, you may extend the Packet API for a new data type in the
|
||||
following steps:
|
||||
|
||||
1. Write the pybind11
|
||||
[class binding code](https://pybind11.readthedocs.io/en/stable/advanced/classes.html)
|
||||
or
|
||||
[a custom type caster](https://pybind11.readthedocs.io/en/stable/advanced/cast/custom.html?highlight=custom%20type%20caster)
|
||||
for the custom type in a cc file.
|
||||
|
||||
```c++
|
||||
#include "path/to/my_type/header/file.h"
|
||||
#include "pybind11/pybind11.h"
|
||||
|
||||
namespace py = pybind11;
|
||||
|
||||
PYBIND11_MODULE(my_type_binding, m) {
|
||||
// Write binding code or a custom type caster for MyType.
|
||||
py::class_<MyType>(m, "MyType")
|
||||
.def(py::init<>())
|
||||
.def(...);
|
||||
}
|
||||
```
|
||||
|
||||
2. Create a new packet creator and getter method of the custom type in a
|
||||
separate cc file.
|
||||
|
||||
```c++
|
||||
#include "path/to/my_type/header/file.h"
|
||||
#include "mediapipe/framework/packet.h"
|
||||
#include "pybind11/pybind11.h"
|
||||
|
||||
namespace mediapipe {
|
||||
namespace py = pybind11;
|
||||
|
||||
PYBIND11_MODULE(my_packet_methods, m) {
|
||||
m.def(
|
||||
"create_my_type",
|
||||
[](const MyType& my_type) { return MakePacket<MyType>(my_type); });
|
||||
|
||||
m.def(
|
||||
"get_my_type",
|
||||
[](const Packet& packet) {
|
||||
if(!packet.ValidateAsType<MyType>().ok()) {
|
||||
PyErr_SetString(PyExc_ValueError, "Packet data type mismatch.");
|
||||
return py::error_already_set();
|
||||
}
|
||||
return packet.Get<MyType>();
|
||||
});
|
||||
}
|
||||
} // namespace mediapipe
|
||||
```
|
||||
|
||||
3. Add two bazel build rules for the custom type binding and the new packet
|
||||
methods in the BUILD file.
|
||||
|
||||
```
|
||||
load("@pybind11_bazel//:build_defs.bzl", "pybind_extension")
|
||||
|
||||
pybind_extension(
|
||||
name = "my_type_binding",
|
||||
srcs = ["my_type_binding.cc"],
|
||||
deps = [":my_type"],
|
||||
)
|
||||
|
||||
pybind_extension(
|
||||
name = "my_packet_methods",
|
||||
srcs = ["my_packet_methods.cc"],
|
||||
deps = [
|
||||
":my_type",
|
||||
"//mediapipe/framework:packet"
|
||||
],
|
||||
)
|
||||
```
|
||||
|
||||
4. Build the pybind extension targets (with the suffix .so) by Bazel and move the generated dynamic libraries into one of the $LD_LIBRARY_PATH dirs.
|
||||
|
||||
5. Use the binding modules in Python.
|
||||
|
||||
```python
|
||||
import my_type_binding
|
||||
import my_packet_methods
|
||||
|
||||
packet = my_packet_methods.create_my_type(my_type_binding.MyType())
|
||||
my_type = my_packet_methods.get_my_type(packet)
|
||||
```
|
||||
|
||||
### Timestamp
|
||||
|
||||
Each packet contains a timestamp that is in units of microseconds. In Python,
|
||||
the Packet API provides a convenience method `packet.at()` to define the numeric
|
||||
timestamp of a packet. More generally, `packet.timestamp` is the packet class
|
||||
property for accessing the underlying timestamp. To convert an Unix epoch to a
|
||||
MediaPipe timestamp,
|
||||
[the Timestamp API](https://github.com/google/mediapipe/tree/master/mediapipe/python/pybind/timestamp.cc)
|
||||
offers a method `mp.Timestamp.from_seconds()` for this purpose.
|
||||
|
||||
### ImageFrame
|
||||
|
||||
ImageFrame is the container for storing an image or a video frame. Formats
|
||||
supported by ImageFrame are listed in
|
||||
[the ImageFormat enum](https://github.com/google/mediapipe/tree/master/mediapipe/python/pybind/image_frame.cc#l=170).
|
||||
Pixels are encoded row-major with interleaved color components, and ImageFrame
|
||||
supports uint8, uint16, and float as its data types. MediaPipe provides
|
||||
[an ImageFrame Python API](https://github.com/google/mediapipe/tree/master/mediapipe/python/pybind/image_frame.cc)
|
||||
to access the ImageFrame C++ class. In Python, the easiest way to retrieve the
|
||||
pixel data is to call `image_frame.numpy_view()` to get a numpy ndarray. Note
|
||||
that the returned numpy ndarray, a reference to the internal pixel data, is
|
||||
unwritable. If the callers need to modify the numpy ndarray, it's required to
|
||||
explicitly call a copy operation to obtain a copy. When MediaPipe takes a numpy
|
||||
ndarray to make an ImageFrame, it assumes that the data is stored contiguously.
|
||||
Correspondingly, the pixel data of an ImageFrame will be realigned to be
|
||||
contiguous when it's returned to the Python side.
|
||||
|
||||
### Graph
|
||||
|
||||
In MediaPipe, all processing takes places within the context of a
|
||||
CalculatorGraph.
|
||||
[The CalculatorGraph Python API](https://github.com/google/mediapipe/tree/master/mediapipe/python/pybind/calculator_graph.cc)
|
||||
is a direct binding to the C++ CalculatorGraph class. The major difference is
|
||||
the CalculatorGraph Python API raises a Python error instead of returning a
|
||||
non-OK Status when an error occurs. Therefore, as a Python user, you can handle
|
||||
the exceptions as you normally do. The life cycle of a CalculatorGraph contains
|
||||
three stages: initialization and setup, graph run, and graph shutdown.
|
||||
|
||||
1. Initialize a CalculatorGraph with a CalculatorGraphConfig protobuf or binary
|
||||
protobuf file, and provide callback method(s) to observe the output
|
||||
stream(s).
|
||||
|
||||
Option 1. Initialize a CalculatorGraph with a CalculatorGraphConfig protobuf
|
||||
or its text representation, and observe the output stream(s):
|
||||
|
||||
```python
|
||||
import mediapipe as mp
|
||||
|
||||
config_text = """
|
||||
input_stream: 'in_stream'
|
||||
output_stream: 'out_stream'
|
||||
node {
|
||||
calculator: 'PassThroughCalculator'
|
||||
input_stream: 'in_stream'
|
||||
output_stream: 'out_stream'
|
||||
}
|
||||
"""
|
||||
graph = mp.CalculatorGraph(graph_config=config_text)
|
||||
output_packets = []
|
||||
graph.observe_output_stream(
|
||||
'out_stream',
|
||||
lambda stream_name, packet:
|
||||
output_packets.append(mp.packet_getter.get_str(packet)))
|
||||
```
|
||||
|
||||
Option 2. Initialize a CalculatorGraph with with a binary protobuf file, and
|
||||
observe the output stream(s).
|
||||
|
||||
```python
|
||||
import mediapipe as mp
|
||||
# resources dependency
|
||||
|
||||
graph = mp.CalculatorGraph(
|
||||
binary_graph=os.path.join(
|
||||
resources.GetRunfilesDir(), 'path/to/your/graph.binarypb'))
|
||||
graph.observe_output_stream(
|
||||
'out_stream',
|
||||
lambda stream_name, packet: print(f'Get {packet} from {stream_name}'))
|
||||
```
|
||||
|
||||
2. Start the graph run and feed packets into the graph.
|
||||
|
||||
```python
|
||||
graph.start_run()
|
||||
|
||||
graph.add_packet_to_input_stream(
|
||||
'in_stream', mp.packet_creator.create_string('abc').at(0))
|
||||
|
||||
rgb_img = cv2.cvtColor(cv2.imread('/path/to/your/image.png'), cv2.COLOR_BGR2RGB)
|
||||
graph.add_packet_to_input_stream(
|
||||
'in_stream',
|
||||
mp.packet_creator.create_image_frame(image_format=mp.ImageFormat.SRGB,
|
||||
data=rgb_img).at(1))
|
||||
```
|
||||
|
||||
3. Close the graph after finish. You may restart the graph for another graph
|
||||
run after the call to `close()`.
|
||||
|
||||
```python
|
||||
graph.close()
|
||||
```
|
||||
|
||||
The Python script can be run by your local Python runtime.
|
||||
@@ -1,12 +1,144 @@
|
||||
# Troubleshooting
|
||||
---
|
||||
layout: default
|
||||
title: Troubleshooting
|
||||
parent: Getting Started
|
||||
nav_order: 10
|
||||
---
|
||||
|
||||
- [Native method not found](#native-method-not-found)
|
||||
- [No registered calculator found](#no-registered-calculator-found)
|
||||
- [Out Of Memory error](#out-of-memory-error)
|
||||
- [Graph hangs](#graph-hangs)
|
||||
- [Calculator is scheduled infrequently](#calculator-is-scheduled-infrequently)
|
||||
- [Output timing is uneven](#output-timing-is-uneven)
|
||||
- [CalculatorGraph lags behind inputs](#calculatorgraph-lags-behind-inputs)
|
||||
# Troubleshooting
|
||||
{: .no_toc }
|
||||
|
||||
1. TOC
|
||||
{:toc}
|
||||
---
|
||||
|
||||
## Missing Python binary path
|
||||
|
||||
The error message:
|
||||
|
||||
```
|
||||
ERROR: An error occurred during the fetch of repository 'local_execution_config_python':
|
||||
Traceback (most recent call last):
|
||||
File "/sandbox_path/external/org_tensorflow/third_party/py/python_configure.bzl", line 208
|
||||
get_python_bin(repository_ctx)
|
||||
...
|
||||
Repository command failed
|
||||
```
|
||||
|
||||
usually indicates that Bazel fails to find the local Python binary. To solve
|
||||
this issue, please first find where the python binary is and then add
|
||||
`--action_env PYTHON_BIN_PATH=<path to python binary>` to the Bazel command. For
|
||||
example, you can switch to use the system default python3 binary by the
|
||||
following command:
|
||||
|
||||
```
|
||||
bazel build -c opt \
|
||||
--define MEDIAPIPE_DISABLE_GPU=1 \
|
||||
--action_env PYTHON_BIN_PATH=$(which python3) \
|
||||
mediapipe/examples/desktop/hello_world
|
||||
```
|
||||
|
||||
## Missing necessary Python packages
|
||||
|
||||
The error message:
|
||||
|
||||
```
|
||||
ImportError: No module named numpy
|
||||
Is numpy installed?
|
||||
```
|
||||
|
||||
usually indicates that certain Python packages are not installed. Please run
|
||||
`pip install` or `pip3 install` depending on your Python binary version to
|
||||
install those packages.
|
||||
|
||||
## Fail to fetch remote dependency repositories
|
||||
|
||||
The error message:
|
||||
|
||||
```
|
||||
ERROR: An error occurred during the fetch of repository 'org_tensorflow':
|
||||
java.io.IOException: Error downloading [https://mirror.bazel.build/github.com/tensorflow/tensorflow/archive/77e9ffb9b2bfb1a4f7056e62d84039626923e328.tar.gz, https://github.com/tensorflow/tensorflow/archive/77e9ffb9b2bfb1a4f7056e62d84039626923e328.tar.gz] to /sandbox_path/external/org_tensorflow/77e9ffb9b2bfb1a4f7056e62d84039626923e328.tar.gz: Tried to reconnect at offset 9,944,151 but server didn't support it
|
||||
|
||||
or
|
||||
|
||||
WARNING: Download from https://storage.googleapis.com/mirror.tensorflow.org/github.com/bazelbuild/rules_swift/releases/download/0.12.1/rules_swift.0.12.1.tar.gz failed: class java.net.ConnectException Connection timed out (Connection timed out)
|
||||
```
|
||||
|
||||
usually indicates that Bazel fails to download necessary dependency repositories
|
||||
that MediaPipe needs. MedaiPipe has several dependency repositories that are
|
||||
hosted by Google sites. In some regions, you may need to set up a network proxy
|
||||
or use a VPN to access those resources. You may also need to append
|
||||
`--host_jvm_args "-DsocksProxyHost=<ip address> -DsocksProxyPort=<port number>"`
|
||||
to the Bazel command. See
|
||||
[this GitHub issue](https://github.com/google/mediapipe/issues/581#issuecomment-610356857)
|
||||
for more details.
|
||||
|
||||
If you believe that it's not a network issue, another possibility is that some
|
||||
resources could be temporarily unavailable, please run `bazel clean --expunge`
|
||||
and retry it later. If it's still not working, please file a GitHub issue with
|
||||
the detailed error message.
|
||||
|
||||
## Incorrect MediaPipe OpenCV config
|
||||
|
||||
The error message:
|
||||
|
||||
```
|
||||
error: undefined reference to 'cv::String::deallocate()'
|
||||
error: undefined reference to 'cv::String::allocate(unsigned long)'
|
||||
error: undefined reference to 'cv::VideoCapture::VideoCapture(cv::String const&)'
|
||||
...
|
||||
error: undefined reference to 'cv::putText(cv::InputOutputArray const&, cv::String const&, cv::Point, int, double, cv::Scalar, int, int, bool)'
|
||||
```
|
||||
|
||||
usually indicates that OpenCV is not properly configured for MediaPipe. Please
|
||||
take a look at the "Install OpenCV and FFmpeg" sections in
|
||||
[Installation](./install.md) to see how to modify MediaPipe's WORKSPACE and
|
||||
linux_opencv/macos_opencv/windows_opencv.BUILD files for your local opencv
|
||||
libraries. [This GitHub issue](https://github.com/google/mediapipe/issues/666)
|
||||
may also help.
|
||||
|
||||
## Python pip install failure
|
||||
|
||||
The error message:
|
||||
|
||||
```
|
||||
ERROR: Could not find a version that satisfies the requirement mediapipe
|
||||
ERROR: No matching distribution found for mediapipe
|
||||
```
|
||||
|
||||
after running `pip install mediapipe` usually indicates that there is no qualified MediaPipe Python for your system.
|
||||
Please note that MediaPipe Python PyPI officially supports the **64-bit**
|
||||
version of Python 3.7 to 3.10 on the following OS:
|
||||
|
||||
- x86_64 Linux
|
||||
- x86_64 macOS 10.15+
|
||||
- amd64 Windows
|
||||
|
||||
If the OS is currently supported and you still see this error, please make sure
|
||||
that both the Python and pip binary are for Python 3.7 to 3.10. Otherwise,
|
||||
please consider building the MediaPipe Python package locally by following the
|
||||
instructions [here](python.md#building-mediapipe-python-package).
|
||||
|
||||
## Python DLL load failure on Windows
|
||||
|
||||
The error message:
|
||||
|
||||
```
|
||||
ImportError: DLL load failed: The specified module could not be found
|
||||
```
|
||||
|
||||
usually indicates that the local Windows system is missing Visual C++
|
||||
redistributable packages and/or Visual C++ runtime DLLs. This can be solved by
|
||||
either installing the official
|
||||
[vc_redist.x64.exe](https://support.microsoft.com/en-us/topic/the-latest-supported-visual-c-downloads-2647da03-1eea-4433-9aff-95f26a218cc0)
|
||||
or installing the "msvc-runtime" Python package by running
|
||||
|
||||
```bash
|
||||
$ python -m pip install msvc-runtime
|
||||
```
|
||||
|
||||
Please note that the "msvc-runtime" Python package is not released or maintained
|
||||
by Microsoft.
|
||||
|
||||
## Native method not found
|
||||
|
||||
@@ -55,7 +187,7 @@ running MediaPipe graph. This can occur for a number of reasons, such as:
|
||||
|
||||
For problem (1), it may be necessary to drop some old packets in older to
|
||||
process the more recent packets. For some hints, see:
|
||||
[How to process realtime input streams](how_to_questions.md).
|
||||
[`How to process realtime input streams`].
|
||||
|
||||
For problem (2), it could be that one input stream is lacking packets for some
|
||||
reason. A device or a calculator may be misconfigured or may produce packets
|
||||
@@ -63,7 +195,7 @@ only sporadically. This can cause downstream calculators to wait for many
|
||||
packets that will never arrive, which in turn causes packets to accumulate on
|
||||
some of their input streams. MediaPipe addresses this sort of problem using
|
||||
"timestamp bounds". For some hints see:
|
||||
[How to process realtime input streams](how_to_questions.md).
|
||||
[`How to process realtime input streams`].
|
||||
|
||||
The MediaPipe setting [`CalculatorGraphConfig::max_queue_size`] limits the
|
||||
number of packets enqueued on any input stream by throttling inputs to the
|
||||
@@ -122,14 +254,14 @@ each packet as early as possible. Normally the lowest possible latency is the
|
||||
total time required by each calculator along a "critical path" of successive
|
||||
calculators. The latency of the a MediaPipe graph could be worse than the ideal
|
||||
due to delays introduced to display frames a even intervals as described in
|
||||
[Output timing is uneven](troubleshooting.md?cl=252235797#output-timing-is-uneven).
|
||||
[Output timing is uneven](#output-timing-is-uneven).
|
||||
|
||||
If some of the calculators in the graph cannot keep pace with the realtime input
|
||||
streams, then latency will continue to increase, and it becomes necessary to
|
||||
drop some input packets. The recommended technique is to use the MediaPipe
|
||||
calculators designed specifically for this purpose such as
|
||||
[`FlowLimiterCalculator`] as described in
|
||||
[How to process realtime input streams](how_to_questions.md).
|
||||
[`How to process realtime input streams`].
|
||||
|
||||
[`CalculatorGraphConfig`]: https://github.com/google/mediapipe/tree/master/mediapipe/framework/calculator.proto
|
||||
[`CalculatorGraphConfig::max_queue_size`]: https://github.com/google/mediapipe/tree/master/mediapipe/framework/calculator.proto
|
||||
@@ -142,3 +274,4 @@ calculators designed specifically for this purpose such as
|
||||
[`Timestamp::Done`]: https://github.com/google/mediapipe/tree/master/mediapipe/framework/timestamp.h
|
||||
[`CalculatorBase::Close`]: https://github.com/google/mediapipe/tree/master/mediapipe/framework/calculator_base.h
|
||||
[`FlowLimiterCalculator`]: https://github.com/google/mediapipe/tree/master/mediapipe/calculators/core/flow_limiter_calculator.cc
|
||||
[`How to process realtime input streams`]: faq.md#how-to-process-realtime-input-streams
|
||||
+156
@@ -0,0 +1,156 @@
|
||||
---
|
||||
layout: default
|
||||
title: Home
|
||||
nav_order: 1
|
||||
---
|
||||
|
||||

|
||||
|
||||
--------------------------------------------------------------------------------
|
||||
|
||||
## Live ML anywhere
|
||||
|
||||
[MediaPipe](https://google.github.io/mediapipe/) offers cross-platform, customizable
|
||||
ML solutions for live and streaming media.
|
||||
|
||||
 | 
|
||||
:------------------------------------------------------------------------------------------------------------: | :----------------------------------------------------:
|
||||
***End-to-End acceleration***: *Built-in fast ML inference and processing accelerated even on common hardware* | ***Build once, deploy anywhere***: *Unified solution works across Android, iOS, desktop/cloud, web and IoT*
|
||||
 | 
|
||||
***Ready-to-use solutions***: *Cutting-edge ML solutions demonstrating full power of the framework* | ***Free and open source***: *Framework and solutions both under Apache 2.0, fully extensible and customizable*
|
||||
|
||||
## ML solutions in MediaPipe
|
||||
|
||||
Face Detection | Face Mesh | Iris | Hands | Pose | Holistic
|
||||
:----------------------------------------------------------------------------------------------------------------------------: | :-------------------------------------------------------------------------------------------------------------: | :-------------------------------------------------------------------------------------------------------: | :--------------------------------------------------------------------------------------------------------: | :-------------------------------------------------------------------------------------------------------: | :------:
|
||||
[](https://google.github.io/mediapipe/solutions/face_detection) | [](https://google.github.io/mediapipe/solutions/face_mesh) | [](https://google.github.io/mediapipe/solutions/iris) | [](https://google.github.io/mediapipe/solutions/hands) | [](https://google.github.io/mediapipe/solutions/pose) | [](https://google.github.io/mediapipe/solutions/holistic)
|
||||
|
||||
Hair Segmentation | Object Detection | Box Tracking | Instant Motion Tracking | Objectron | KNIFT
|
||||
:-------------------------------------------------------------------------------------------------------------------------------------: | :----------------------------------------------------------------------------------------------------------------------------------: | :-------------------------------------------------------------------------------------------------------------------------: | :---------------------------------------------------------------------------------------------------------------------------------------------------: | :-------------------------------------------------------------------------------------------------------------------: | :---:
|
||||
[](https://google.github.io/mediapipe/solutions/hair_segmentation) | [](https://google.github.io/mediapipe/solutions/object_detection) | [](https://google.github.io/mediapipe/solutions/box_tracking) | [](https://google.github.io/mediapipe/solutions/instant_motion_tracking) | [](https://google.github.io/mediapipe/solutions/objectron) | [](https://google.github.io/mediapipe/solutions/knift)
|
||||
|
||||
<!-- []() in the first cell is needed to preserve table formatting in GitHub Pages. -->
|
||||
<!-- Whenever this table is updated, paste a copy to solutions/solutions.md. -->
|
||||
|
||||
[]() | [Android](https://google.github.io/mediapipe/getting_started/android) | [iOS](https://google.github.io/mediapipe/getting_started/ios) | [C++](https://google.github.io/mediapipe/getting_started/cpp) | [Python](https://google.github.io/mediapipe/getting_started/python) | [JS](https://google.github.io/mediapipe/getting_started/javascript) | [Coral](https://github.com/google/mediapipe/tree/master/mediapipe/examples/coral/README.md)
|
||||
:---------------------------------------------------------------------------------------- | :-------------------------------------------------------------: | :-----------------------------------------------------: | :-----------------------------------------------------: | :-----------------------------------------------------------: | :-----------------------------------------------------------: | :--------------------------------------------------------------------:
|
||||
[Face Detection](https://google.github.io/mediapipe/solutions/face_detection) | ✅ | ✅ | ✅ | ✅ | ✅ | ✅
|
||||
[Face Mesh](https://google.github.io/mediapipe/solutions/face_mesh) | ✅ | ✅ | ✅ | ✅ | ✅ |
|
||||
[Iris](https://google.github.io/mediapipe/solutions/iris) | ✅ | ✅ | ✅ | | |
|
||||
[Hands](https://google.github.io/mediapipe/solutions/hands) | ✅ | ✅ | ✅ | ✅ | ✅ |
|
||||
[Pose](https://google.github.io/mediapipe/solutions/pose) | ✅ | ✅ | ✅ | ✅ | ✅ |
|
||||
[Holistic](https://google.github.io/mediapipe/solutions/holistic) | ✅ | ✅ | ✅ | ✅ | ✅ |
|
||||
[Selfie Segmentation](https://google.github.io/mediapipe/solutions/selfie_segmentation) | ✅ | ✅ | ✅ | ✅ | ✅ |
|
||||
[Hair Segmentation](https://google.github.io/mediapipe/solutions/hair_segmentation) | ✅ | | ✅ | | |
|
||||
[Object Detection](https://google.github.io/mediapipe/solutions/object_detection) | ✅ | ✅ | ✅ | | | ✅
|
||||
[Box Tracking](https://google.github.io/mediapipe/solutions/box_tracking) | ✅ | ✅ | ✅ | | |
|
||||
[Instant Motion Tracking](https://google.github.io/mediapipe/solutions/instant_motion_tracking) | ✅ | | | | |
|
||||
[Objectron](https://google.github.io/mediapipe/solutions/objectron) | ✅ | | ✅ | ✅ | ✅ |
|
||||
[KNIFT](https://google.github.io/mediapipe/solutions/knift) | ✅ | | | | |
|
||||
[AutoFlip](https://google.github.io/mediapipe/solutions/autoflip) | | | ✅ | | |
|
||||
[MediaSequence](https://google.github.io/mediapipe/solutions/media_sequence) | | | ✅ | | |
|
||||
[YouTube 8M](https://google.github.io/mediapipe/solutions/youtube_8m) | | | ✅ | | |
|
||||
|
||||
See also
|
||||
[MediaPipe Models and Model Cards](https://google.github.io/mediapipe/solutions/models)
|
||||
for ML models released in MediaPipe.
|
||||
|
||||
## Getting started
|
||||
|
||||
To start using MediaPipe
|
||||
[solutions](https://google.github.io/mediapipe/solutions/solutions) with only a few
|
||||
lines code, see example code and demos in
|
||||
[MediaPipe in Python](https://google.github.io/mediapipe/getting_started/python) and
|
||||
[MediaPipe in JavaScript](https://google.github.io/mediapipe/getting_started/javascript).
|
||||
|
||||
To use MediaPipe in C++, Android and iOS, which allow further customization of
|
||||
the [solutions](https://google.github.io/mediapipe/solutions/solutions) as well as
|
||||
building your own, learn how to
|
||||
[install](https://google.github.io/mediapipe/getting_started/install) MediaPipe and
|
||||
start building example applications in
|
||||
[C++](https://google.github.io/mediapipe/getting_started/cpp),
|
||||
[Android](https://google.github.io/mediapipe/getting_started/android) and
|
||||
[iOS](https://google.github.io/mediapipe/getting_started/ios).
|
||||
|
||||
The source code is hosted in the
|
||||
[MediaPipe Github repository](https://github.com/google/mediapipe), and you can
|
||||
run code search using
|
||||
[Google Open Source Code Search](https://cs.opensource.google/mediapipe/mediapipe).
|
||||
|
||||
## Publications
|
||||
|
||||
* [Bringing artworks to life with AR](https://developers.googleblog.com/2021/07/bringing-artworks-to-life-with-ar.html)
|
||||
in Google Developers Blog
|
||||
* [Prosthesis control via Mirru App using MediaPipe hand tracking](https://developers.googleblog.com/2021/05/control-your-mirru-prosthesis-with-mediapipe-hand-tracking.html)
|
||||
in Google Developers Blog
|
||||
* [SignAll SDK: Sign language interface using MediaPipe is now available for
|
||||
developers](https://developers.googleblog.com/2021/04/signall-sdk-sign-language-interface-using-mediapipe-now-available.html)
|
||||
in Google Developers Blog
|
||||
* [MediaPipe Holistic - Simultaneous Face, Hand and Pose Prediction, on Device](https://ai.googleblog.com/2020/12/mediapipe-holistic-simultaneous-face.html)
|
||||
in Google AI Blog
|
||||
* [Background Features in Google Meet, Powered by Web ML](https://ai.googleblog.com/2020/10/background-features-in-google-meet.html)
|
||||
in Google AI Blog
|
||||
* [MediaPipe 3D Face Transform](https://developers.googleblog.com/2020/09/mediapipe-3d-face-transform.html)
|
||||
in Google Developers Blog
|
||||
* [Instant Motion Tracking With MediaPipe](https://developers.googleblog.com/2020/08/instant-motion-tracking-with-mediapipe.html)
|
||||
in Google Developers Blog
|
||||
* [BlazePose - On-device Real-time Body Pose Tracking](https://ai.googleblog.com/2020/08/on-device-real-time-body-pose-tracking.html)
|
||||
in Google AI Blog
|
||||
* [MediaPipe Iris: Real-time Eye Tracking and Depth Estimation](https://ai.googleblog.com/2020/08/mediapipe-iris-real-time-iris-tracking.html)
|
||||
in Google AI Blog
|
||||
* [MediaPipe KNIFT: Template-based feature matching](https://developers.googleblog.com/2020/04/mediapipe-knift-template-based-feature-matching.html)
|
||||
in Google Developers Blog
|
||||
* [Alfred Camera: Smart camera features using MediaPipe](https://developers.googleblog.com/2020/03/alfred-camera-smart-camera-features-using-mediapipe.html)
|
||||
in Google Developers Blog
|
||||
* [Real-Time 3D Object Detection on Mobile Devices with MediaPipe](https://ai.googleblog.com/2020/03/real-time-3d-object-detection-on-mobile.html)
|
||||
in Google AI Blog
|
||||
* [AutoFlip: An Open Source Framework for Intelligent Video Reframing](https://ai.googleblog.com/2020/02/autoflip-open-source-framework-for.html)
|
||||
in Google AI Blog
|
||||
* [MediaPipe on the Web](https://developers.googleblog.com/2020/01/mediapipe-on-web.html)
|
||||
in Google Developers Blog
|
||||
* [Object Detection and Tracking using MediaPipe](https://developers.googleblog.com/2019/12/object-detection-and-tracking-using-mediapipe.html)
|
||||
in Google Developers Blog
|
||||
* [On-Device, Real-Time Hand Tracking with MediaPipe](https://ai.googleblog.com/2019/08/on-device-real-time-hand-tracking-with.html)
|
||||
in Google AI Blog
|
||||
* [MediaPipe: A Framework for Building Perception Pipelines](https://arxiv.org/abs/1906.08172)
|
||||
|
||||
## Videos
|
||||
|
||||
* [YouTube Channel](https://www.youtube.com/c/MediaPipe)
|
||||
|
||||
## Events
|
||||
|
||||
* [MediaPipe Seattle Meetup, Google Building Waterside, 13 Feb 2020](https://mediapipe.page.link/seattle2020)
|
||||
* [AI Nextcon 2020, 12-16 Feb 2020, Seattle](http://aisea20.xnextcon.com/)
|
||||
* [MediaPipe Madrid Meetup, 16 Dec 2019](https://www.meetup.com/Madrid-AI-Developers-Group/events/266329088/)
|
||||
* [MediaPipe London Meetup, Google 123 Building, 12 Dec 2019](https://www.meetup.com/London-AI-Tech-Talk/events/266329038)
|
||||
* [ML Conference, Berlin, 11 Dec 2019](https://mlconference.ai/machine-learning-advanced-development/mediapipe-building-real-time-cross-platform-mobile-web-edge-desktop-video-audio-ml-pipelines/)
|
||||
* [MediaPipe Berlin Meetup, Google Berlin, 11 Dec 2019](https://www.meetup.com/Berlin-AI-Tech-Talk/events/266328794/)
|
||||
* [The 3rd Workshop on YouTube-8M Large Scale Video Understanding Workshop,
|
||||
Seoul, Korea ICCV
|
||||
2019](https://research.google.com/youtube8m/workshop2019/index.html)
|
||||
* [AI DevWorld 2019, 10 Oct 2019, San Jose, CA](https://aidevworld.com)
|
||||
* [Google Industry Workshop at ICIP 2019, 24 Sept 2019, Taipei, Taiwan](http://2019.ieeeicip.org/?action=page4&id=14#Google)
|
||||
([presentation](https://docs.google.com/presentation/d/e/2PACX-1vRIBBbO_LO9v2YmvbHHEt1cwyqH6EjDxiILjuT0foXy1E7g6uyh4CesB2DkkEwlRDO9_lWfuKMZx98T/pub?start=false&loop=false&delayms=3000&slide=id.g556cc1a659_0_5))
|
||||
* [Open sourced at CVPR 2019, 17~20 June, Long Beach, CA](https://sites.google.com/corp/view/perception-cv4arvr/mediapipe)
|
||||
|
||||
## Community
|
||||
|
||||
* [Awesome MediaPipe](https://mediapipe.page.link/awesome-mediapipe) - A
|
||||
curated list of awesome MediaPipe related frameworks, libraries and software
|
||||
* [Slack community](https://mediapipe.page.link/joinslack) for MediaPipe users
|
||||
* [Discuss](https://groups.google.com/forum/#!forum/mediapipe) - General
|
||||
community discussion around MediaPipe
|
||||
|
||||
## Alpha disclaimer
|
||||
|
||||
MediaPipe is currently in alpha at v0.7. We may be still making breaking API
|
||||
changes and expect to get to stable APIs by v1.0.
|
||||
|
||||
## Contributing
|
||||
|
||||
We welcome contributions. Please follow these
|
||||
[guidelines](https://github.com/google/mediapipe/blob/master/CONTRIBUTING.md).
|
||||
|
||||
We use GitHub issues for tracking requests and bugs. Please post questions to
|
||||
the MediaPipe Stack Overflow with a `mediapipe` tag.
|
||||
@@ -0,0 +1,3 @@
|
||||
MediaPipe
|
||||
=====================================
|
||||
Please see https://docs.mediapipe.dev.
|
||||
@@ -0,0 +1,362 @@
|
||||
---
|
||||
layout: default
|
||||
title: AutoFlip (Saliency-aware Video Cropping)
|
||||
parent: Solutions
|
||||
nav_order: 14
|
||||
---
|
||||
|
||||
# AutoFlip: Saliency-aware Video Cropping
|
||||
{: .no_toc }
|
||||
|
||||
<details close markdown="block">
|
||||
<summary>
|
||||
Table of contents
|
||||
</summary>
|
||||
{: .text-delta }
|
||||
1. TOC
|
||||
{:toc}
|
||||
</details>
|
||||
---
|
||||
|
||||
## Overview
|
||||
|
||||
AutoFlip is an automatic video cropping pipeline built on top of MediaPipe. This
|
||||
example focuses on demonstrating how to use AutoFlip to convert an input video
|
||||
to arbitrary aspect ratios.
|
||||
|
||||
For overall context on AutoFlip, please read this
|
||||
[Google AI Blog](https://ai.googleblog.com/2020/02/autoflip-open-source-framework-for.html).
|
||||
|
||||
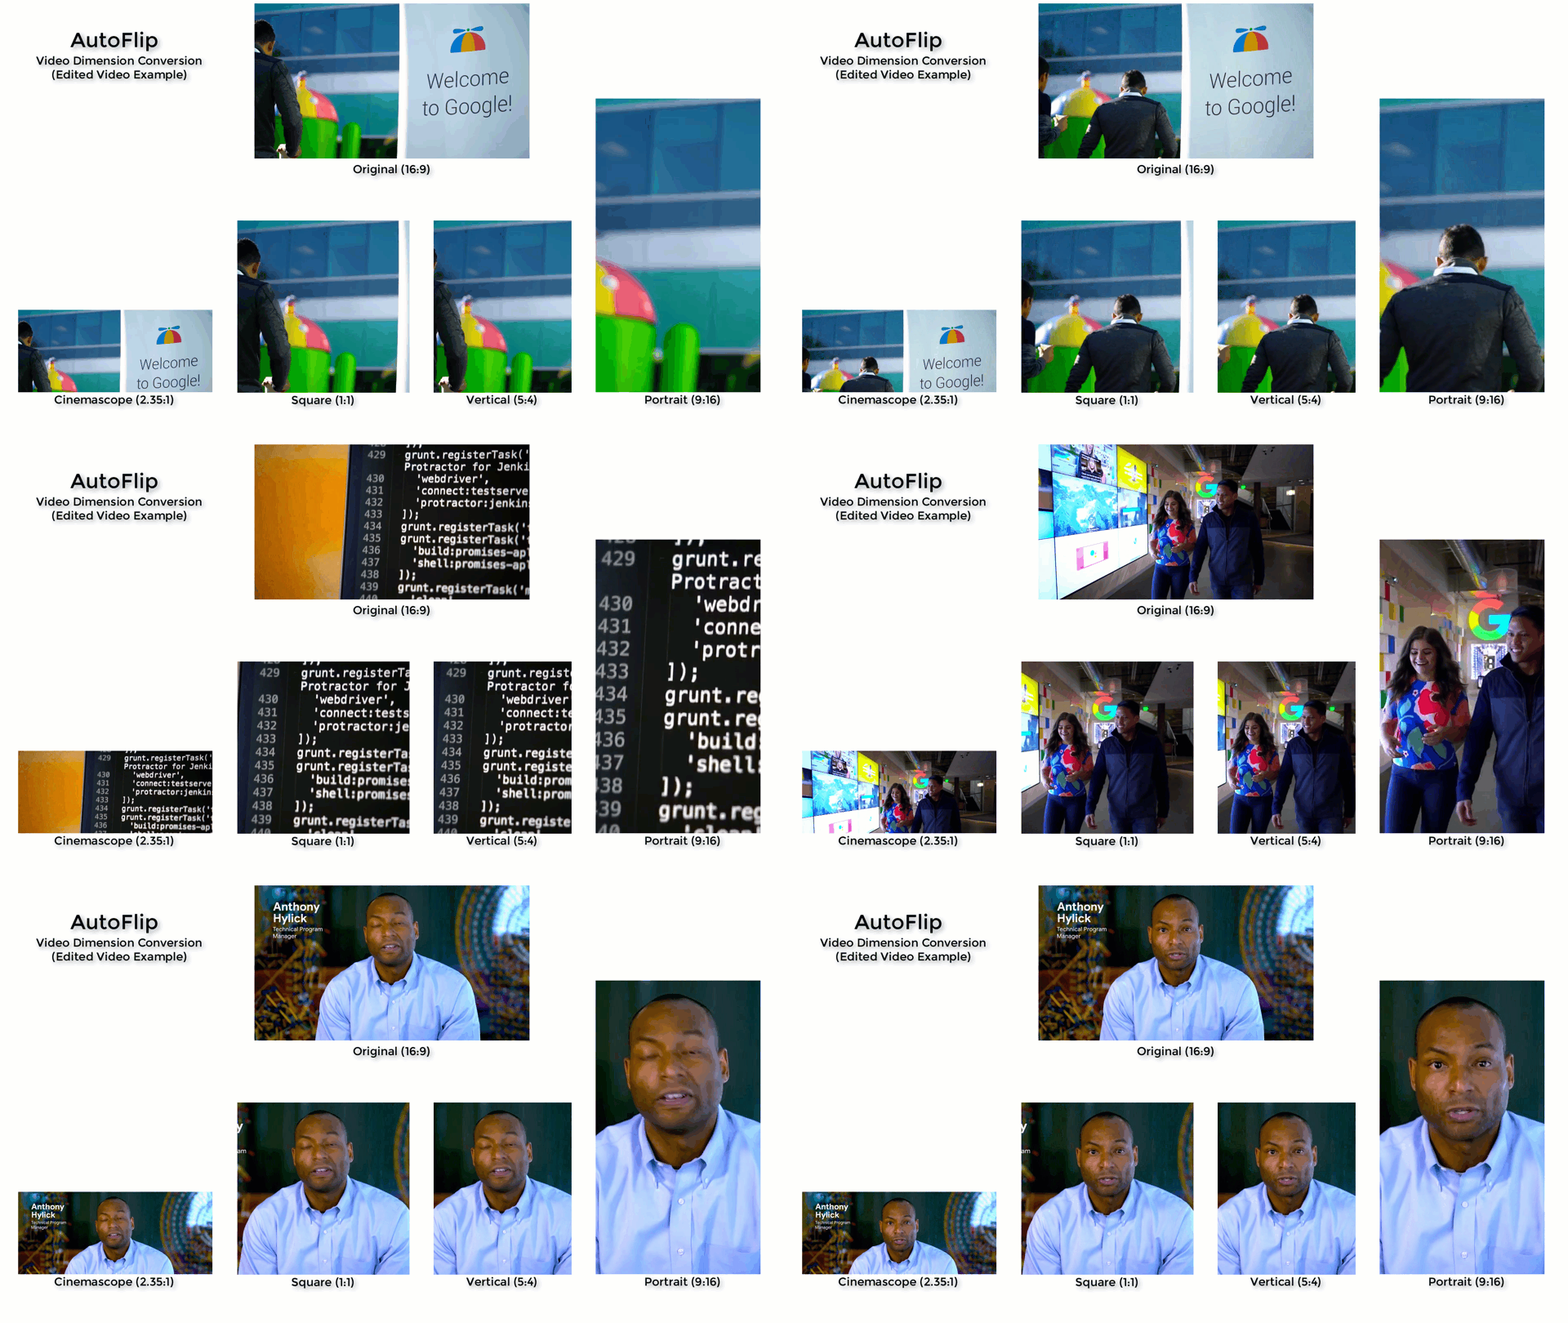
|
||||
|
||||
## Building
|
||||
|
||||
Run the following command to build the AutoFlip pipeline:
|
||||
|
||||
Note: AutoFlip currently only works with OpenCV 3. Please verify your OpenCV
|
||||
version beforehand.
|
||||
|
||||
```bash
|
||||
bazel build -c opt --define MEDIAPIPE_DISABLE_GPU=1 mediapipe/examples/desktop/autoflip:run_autoflip
|
||||
```
|
||||
|
||||
## Running
|
||||
|
||||
```bash
|
||||
GLOG_logtostderr=1 bazel-bin/mediapipe/examples/desktop/autoflip/run_autoflip \
|
||||
--calculator_graph_config_file=mediapipe/examples/desktop/autoflip/autoflip_graph.pbtxt \
|
||||
--input_side_packets=input_video_path=/absolute/path/to/the/local/video/file,output_video_path=/absolute/path/to/save/the/output/video/file,aspect_ratio=1:1
|
||||
```
|
||||
|
||||
Use the `aspect_ratio` flag to provide the output aspect ratio. The format
|
||||
should be `width:height`, where the `width` and `height` are two positive
|
||||
integers. AutoFlip supports both landscape-to-portrait and portrait-to-landscape
|
||||
conversions. The pipeline internally compares the target aspect ratio against
|
||||
the original one, and determines the correct conversion automatically.
|
||||
|
||||
We have put a couple test videos under this
|
||||
[Google Drive folder](https://drive.google.com/corp/drive/u/0/folders/1KK9LV--Ey0UEVpxssVLhVl7dypgJSQgk).
|
||||
You could download the videos into your local file system, then modify the
|
||||
command above accordingly to run AutoFlip against the videos.
|
||||
|
||||
## MediaPipe Graph
|
||||
|
||||
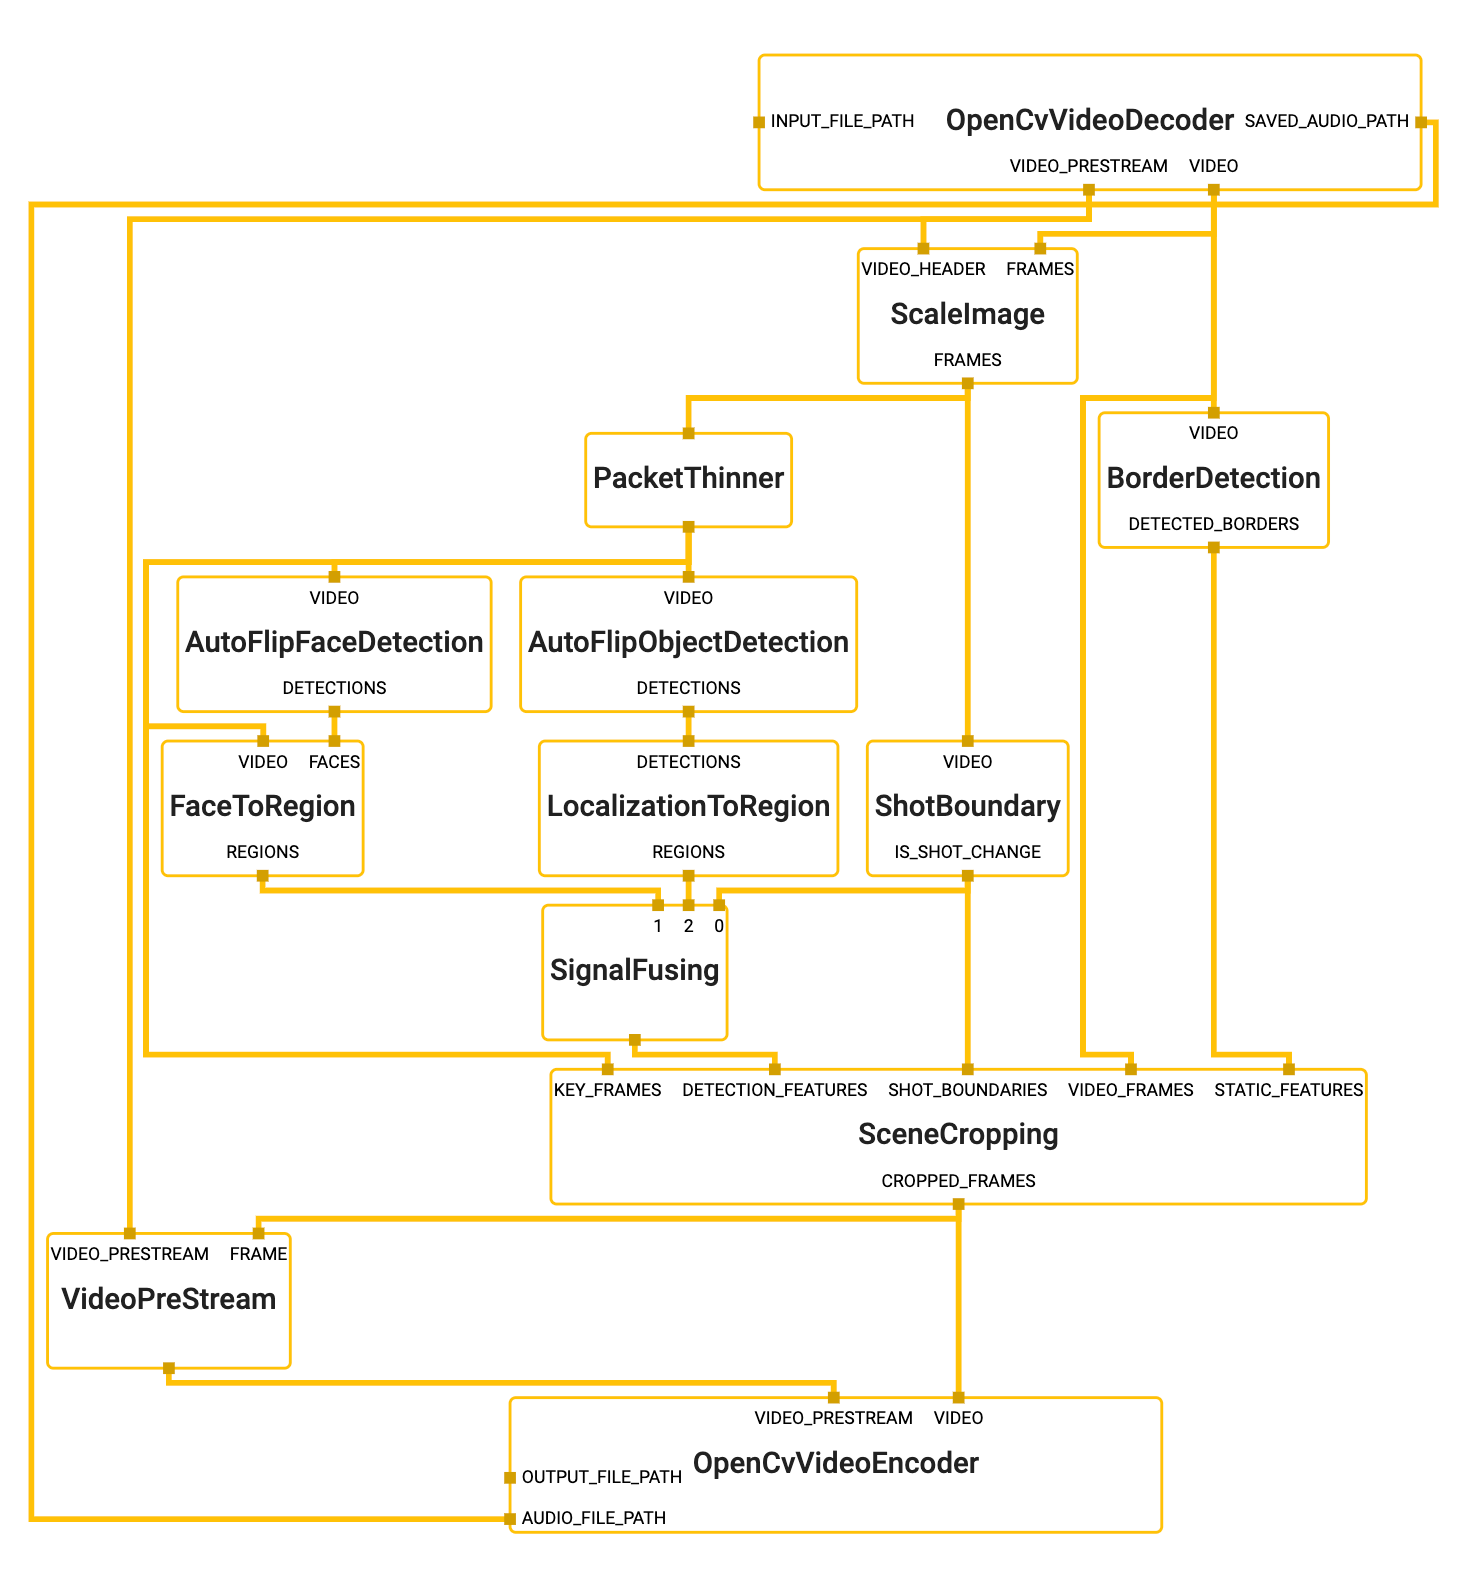
|
||||
|
||||
To visualize the graph as shown above, copy the text specification of the graph
|
||||
below and paste it into [MediaPipe Visualizer](https://viz.mediapipe.dev).
|
||||
|
||||
```bash
|
||||
# Autoflip graph that only renders the final cropped video. For use with
|
||||
# end user applications.
|
||||
max_queue_size: -1
|
||||
|
||||
# VIDEO_PREP: Decodes an input video file into images and a video header.
|
||||
node {
|
||||
calculator: "OpenCvVideoDecoderCalculator"
|
||||
input_side_packet: "INPUT_FILE_PATH:input_video_path"
|
||||
output_stream: "VIDEO:video_raw"
|
||||
output_stream: "VIDEO_PRESTREAM:video_header"
|
||||
output_side_packet: "SAVED_AUDIO_PATH:audio_path"
|
||||
}
|
||||
|
||||
# VIDEO_PREP: Scale the input video before feature extraction.
|
||||
node {
|
||||
calculator: "ScaleImageCalculator"
|
||||
input_stream: "FRAMES:video_raw"
|
||||
input_stream: "VIDEO_HEADER:video_header"
|
||||
output_stream: "FRAMES:video_frames_scaled"
|
||||
node_options: {
|
||||
[type.googleapis.com/mediapipe.ScaleImageCalculatorOptions]: {
|
||||
preserve_aspect_ratio: true
|
||||
output_format: SRGB
|
||||
target_width: 480
|
||||
algorithm: DEFAULT_WITHOUT_UPSCALE
|
||||
}
|
||||
}
|
||||
}
|
||||
|
||||
# VIDEO_PREP: Create a low frame rate stream for feature extraction.
|
||||
node {
|
||||
calculator: "PacketThinnerCalculator"
|
||||
input_stream: "video_frames_scaled"
|
||||
output_stream: "video_frames_scaled_downsampled"
|
||||
node_options: {
|
||||
[type.googleapis.com/mediapipe.PacketThinnerCalculatorOptions]: {
|
||||
thinner_type: ASYNC
|
||||
period: 200000
|
||||
}
|
||||
}
|
||||
}
|
||||
|
||||
# DETECTION: find borders around the video and major background color.
|
||||
node {
|
||||
calculator: "BorderDetectionCalculator"
|
||||
input_stream: "VIDEO:video_raw"
|
||||
output_stream: "DETECTED_BORDERS:borders"
|
||||
}
|
||||
|
||||
# DETECTION: find shot/scene boundaries on the full frame rate stream.
|
||||
node {
|
||||
calculator: "ShotBoundaryCalculator"
|
||||
input_stream: "VIDEO:video_frames_scaled"
|
||||
output_stream: "IS_SHOT_CHANGE:shot_change"
|
||||
options {
|
||||
[type.googleapis.com/mediapipe.autoflip.ShotBoundaryCalculatorOptions] {
|
||||
min_shot_span: 0.2
|
||||
min_motion: 0.3
|
||||
window_size: 15
|
||||
min_shot_measure: 10
|
||||
min_motion_with_shot_measure: 0.05
|
||||
}
|
||||
}
|
||||
}
|
||||
|
||||
# DETECTION: find faces on the down sampled stream
|
||||
node {
|
||||
calculator: "AutoFlipFaceDetectionSubgraph"
|
||||
input_stream: "VIDEO:video_frames_scaled_downsampled"
|
||||
output_stream: "DETECTIONS:face_detections"
|
||||
}
|
||||
node {
|
||||
calculator: "FaceToRegionCalculator"
|
||||
input_stream: "VIDEO:video_frames_scaled_downsampled"
|
||||
input_stream: "FACES:face_detections"
|
||||
output_stream: "REGIONS:face_regions"
|
||||
}
|
||||
|
||||
# DETECTION: find objects on the down sampled stream
|
||||
node {
|
||||
calculator: "AutoFlipObjectDetectionSubgraph"
|
||||
input_stream: "VIDEO:video_frames_scaled_downsampled"
|
||||
output_stream: "DETECTIONS:object_detections"
|
||||
}
|
||||
node {
|
||||
calculator: "LocalizationToRegionCalculator"
|
||||
input_stream: "DETECTIONS:object_detections"
|
||||
output_stream: "REGIONS:object_regions"
|
||||
options {
|
||||
[type.googleapis.com/mediapipe.autoflip.LocalizationToRegionCalculatorOptions] {
|
||||
output_all_signals: true
|
||||
}
|
||||
}
|
||||
}
|
||||
|
||||
# SIGNAL FUSION: Combine detections (with weights) on each frame
|
||||
node {
|
||||
calculator: "SignalFusingCalculator"
|
||||
input_stream: "shot_change"
|
||||
input_stream: "face_regions"
|
||||
input_stream: "object_regions"
|
||||
output_stream: "salient_regions"
|
||||
options {
|
||||
[type.googleapis.com/mediapipe.autoflip.SignalFusingCalculatorOptions] {
|
||||
signal_settings {
|
||||
type { standard: FACE_CORE_LANDMARKS }
|
||||
min_score: 0.85
|
||||
max_score: 0.9
|
||||
is_required: false
|
||||
}
|
||||
signal_settings {
|
||||
type { standard: FACE_ALL_LANDMARKS }
|
||||
min_score: 0.8
|
||||
max_score: 0.85
|
||||
is_required: false
|
||||
}
|
||||
signal_settings {
|
||||
type { standard: FACE_FULL }
|
||||
min_score: 0.8
|
||||
max_score: 0.85
|
||||
is_required: false
|
||||
}
|
||||
signal_settings {
|
||||
type: { standard: HUMAN }
|
||||
min_score: 0.75
|
||||
max_score: 0.8
|
||||
is_required: false
|
||||
}
|
||||
signal_settings {
|
||||
type: { standard: PET }
|
||||
min_score: 0.7
|
||||
max_score: 0.75
|
||||
is_required: false
|
||||
}
|
||||
signal_settings {
|
||||
type: { standard: CAR }
|
||||
min_score: 0.7
|
||||
max_score: 0.75
|
||||
is_required: false
|
||||
}
|
||||
signal_settings {
|
||||
type: { standard: OBJECT }
|
||||
min_score: 0.1
|
||||
max_score: 0.2
|
||||
is_required: false
|
||||
}
|
||||
}
|
||||
}
|
||||
}
|
||||
|
||||
# CROPPING: make decisions about how to crop each frame.
|
||||
node {
|
||||
calculator: "SceneCroppingCalculator"
|
||||
input_side_packet: "EXTERNAL_ASPECT_RATIO:aspect_ratio"
|
||||
input_stream: "VIDEO_FRAMES:video_raw"
|
||||
input_stream: "KEY_FRAMES:video_frames_scaled_downsampled"
|
||||
input_stream: "DETECTION_FEATURES:salient_regions"
|
||||
input_stream: "STATIC_FEATURES:borders"
|
||||
input_stream: "SHOT_BOUNDARIES:shot_change"
|
||||
output_stream: "CROPPED_FRAMES:cropped_frames"
|
||||
node_options: {
|
||||
[type.googleapis.com/mediapipe.autoflip.SceneCroppingCalculatorOptions]: {
|
||||
max_scene_size: 600
|
||||
key_frame_crop_options: {
|
||||
score_aggregation_type: CONSTANT
|
||||
}
|
||||
scene_camera_motion_analyzer_options: {
|
||||
motion_stabilization_threshold_percent: 0.5
|
||||
salient_point_bound: 0.499
|
||||
}
|
||||
padding_parameters: {
|
||||
blur_cv_size: 200
|
||||
overlay_opacity: 0.6
|
||||
}
|
||||
target_size_type: MAXIMIZE_TARGET_DIMENSION
|
||||
}
|
||||
}
|
||||
}
|
||||
|
||||
# ENCODING(required): encode the video stream for the final cropped output.
|
||||
node {
|
||||
calculator: "VideoPreStreamCalculator"
|
||||
# Fetch frame format and dimension from input frames.
|
||||
input_stream: "FRAME:cropped_frames"
|
||||
# Copying frame rate and duration from original video.
|
||||
input_stream: "VIDEO_PRESTREAM:video_header"
|
||||
output_stream: "output_frames_video_header"
|
||||
}
|
||||
|
||||
node {
|
||||
calculator: "OpenCvVideoEncoderCalculator"
|
||||
input_stream: "VIDEO:cropped_frames"
|
||||
input_stream: "VIDEO_PRESTREAM:output_frames_video_header"
|
||||
input_side_packet: "OUTPUT_FILE_PATH:output_video_path"
|
||||
input_side_packet: "AUDIO_FILE_PATH:audio_path"
|
||||
node_options: {
|
||||
[type.googleapis.com/mediapipe.OpenCvVideoEncoderCalculatorOptions]: {
|
||||
codec: "avc1"
|
||||
video_format: "mp4"
|
||||
}
|
||||
}
|
||||
}
|
||||
```
|
||||
|
||||
## Advanced Parameters
|
||||
|
||||
### Required vs. Best-Effort Saliency Features
|
||||
|
||||
AutoFlip allows users to implement and specify custom features to be used in the
|
||||
camera trajectory computation. If the user would like to detect and preserve
|
||||
scenes of lions in a wildlife protection video, for example, they could
|
||||
implement and add a feature detection calculator for lions into the pipeline.
|
||||
Refer to `AutoFlipFaceDetectionSubgraph` and `FaceToRegionCalculator`, or
|
||||
`AutoFlipObjectDetectionSubgraph` and `LocalizationToRegionCalculator` for
|
||||
examples of how to create new feature detection calculators.
|
||||
|
||||
After adding different feature signals into the graph, use the
|
||||
`SignalFusingCalculator` node to specify types and weights for different feature
|
||||
signals. For example, in the graph above, we specified a `face_region` and an
|
||||
`object_region` input streams, to represent face signals and agnostic object
|
||||
signals, respectively.
|
||||
|
||||
The larger the weight, the more important the features will be considered when
|
||||
AutoFlip computes the camera trajectory. Use the `is_required` flag to mark a
|
||||
feature as a hard constraint, in which case the computed camera trajectory will
|
||||
try best to cover these feature types in the cropped videos. If for some reason
|
||||
the required features cannot be all covered (for example, when they are too
|
||||
spread out in the video), AutoFlip will apply a padding effect to cover as much
|
||||
salient content as possible. See an illustration below.
|
||||
|
||||
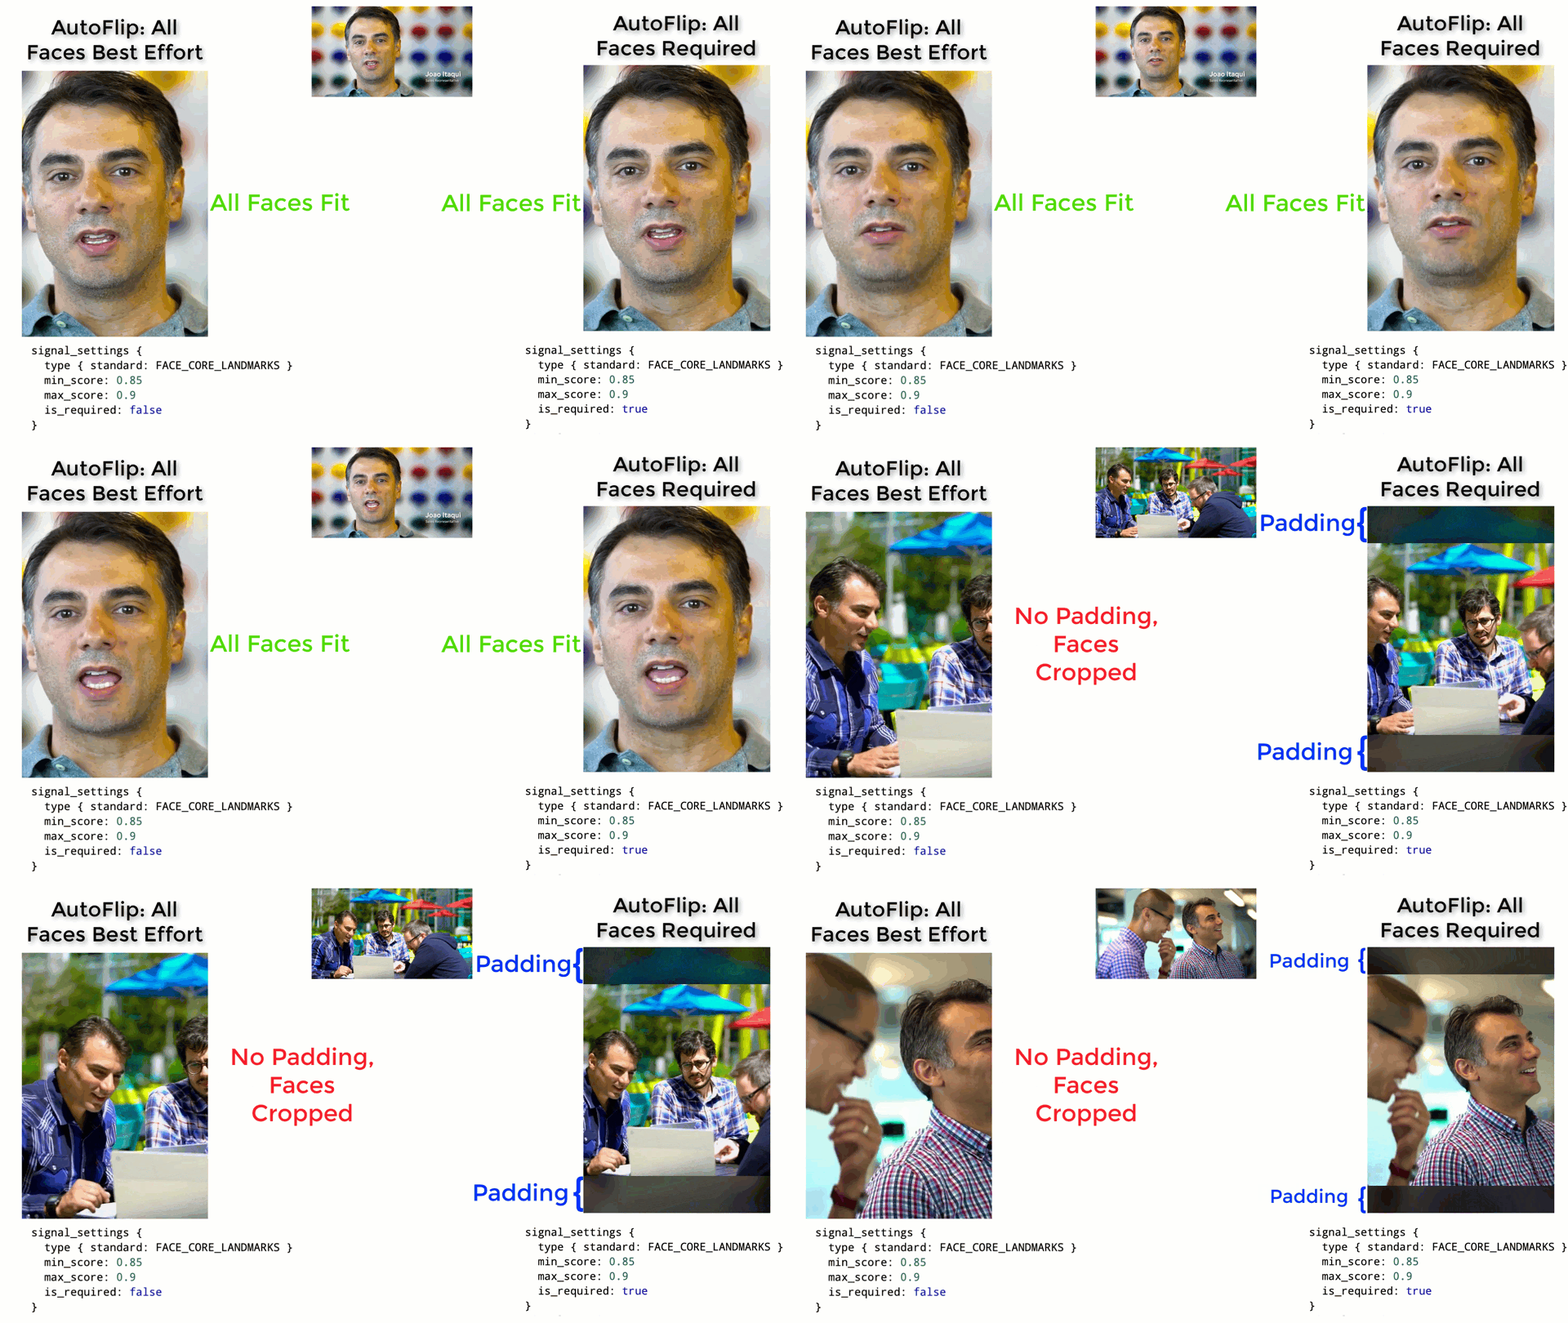
|
||||
|
||||
### Stable vs Tracking Camera Motion
|
||||
|
||||
AutoFlip makes a decision on each scene whether to have the cropped viewpoint
|
||||
follow an object or if the crop should remain stable (centered on detected
|
||||
objects). The parameter `motion_stabilization_threshold_percent` value is used
|
||||
to make the decision to track action or keep the camera stable. If, over the
|
||||
duration of the scene, all detected focus objects remain within this ratio of
|
||||
the frame (e.g. 0.5 = 50% or 1920 * .5 = 960 pixels on 1080p video) then the
|
||||
camera is held steady. Otherwise the camera tracks activity within the frame.
|
||||
|
||||
### Snap To Center
|
||||
|
||||
For some scenes the camera viewpoint will remain stable at the center of
|
||||
activity (see `motion_stabilization_threshold_percent` setting). In this case,
|
||||
if the determined best stable viewpoint is within
|
||||
`snap_center_max_distance_percent` of the frame's center the camera will be
|
||||
shifted to be locked to the center of the frame. This setting is useful for
|
||||
videos where the camera operator did a good job already centering content or if
|
||||
titles and logos are expected to appear in the center of the frame. It may be
|
||||
less useful on raw content where objects are not already well positioned on
|
||||
screen.
|
||||
|
||||
### Visualization to Facilitate Debugging
|
||||
|
||||
`SceneCroppingCalculator` provides two extra output streams
|
||||
`KEY_FRAME_CROP_REGION_VIZ_FRAMES` and `SALIENT_POINT_FRAME_VIZ_FRAMES` to
|
||||
visualize the cropping window as well as salient points detected on each frame.
|
||||
You could modify the `SceneCroppingCalculator` node like below to enable these
|
||||
two output streams.
|
||||
|
||||
```bash
|
||||
node {
|
||||
calculator: "SceneCroppingCalculator"
|
||||
input_side_packet: "EXTERNAL_ASPECT_RATIO:aspect_ratio"
|
||||
input_stream: "VIDEO_FRAMES:video_raw"
|
||||
input_stream: "KEY_FRAMES:video_frames_scaled_downsampled"
|
||||
input_stream: "DETECTION_FEATURES:salient_regions"
|
||||
input_stream: "STATIC_FEATURES:borders"
|
||||
input_stream: "SHOT_BOUNDARIES:shot_change"
|
||||
output_stream: "CROPPED_FRAMES:cropped_frames"
|
||||
output_stream: "KEY_FRAME_CROP_REGION_VIZ_FRAMES:key_frame_crop_viz_frames"
|
||||
output_stream: "SALIENT_POINT_FRAME_VIZ_FRAMES:salient_point_viz_frames"
|
||||
node_options: {
|
||||
[type.googleapis.com/mediapipe.autoflip.SceneCroppingCalculatorOptions]: {
|
||||
max_scene_size: 600
|
||||
key_frame_crop_options: {
|
||||
score_aggregation_type: CONSTANT
|
||||
}
|
||||
scene_camera_motion_analyzer_options: {
|
||||
motion_stabilization_threshold_percent: 0.5
|
||||
salient_point_bound: 0.499
|
||||
}
|
||||
padding_parameters: {
|
||||
blur_cv_size: 200
|
||||
overlay_opacity: 0.6
|
||||
}
|
||||
target_size_type: MAXIMIZE_TARGET_DIMENSION
|
||||
}
|
||||
}
|
||||
}
|
||||
```
|
||||
@@ -0,0 +1,151 @@
|
||||
---
|
||||
layout: default
|
||||
title: Box Tracking
|
||||
parent: Solutions
|
||||
nav_order: 10
|
||||
---
|
||||
|
||||
# MediaPipe Box Tracking
|
||||
{: .no_toc }
|
||||
|
||||
<details close markdown="block">
|
||||
<summary>
|
||||
Table of contents
|
||||
</summary>
|
||||
{: .text-delta }
|
||||
1. TOC
|
||||
{:toc}
|
||||
</details>
|
||||
---
|
||||
|
||||
## Overview
|
||||
|
||||
MediaPipe Box Tracking has been powering real-time tracking in
|
||||
[Motion Stills](https://ai.googleblog.com/2016/12/get-moving-with-new-motion-stills.html),
|
||||
[YouTube's privacy blur](https://youtube-creators.googleblog.com/2016/02/blur-moving-objects-in-your-video-with.html),
|
||||
and [Google Lens](https://lens.google.com/) for several years, leveraging
|
||||
classic computer vision approaches.
|
||||
|
||||
The box tracking solution consumes image frames from a video or camera stream,
|
||||
and starting box positions with timestamps, indicating 2D regions of interest to
|
||||
track, and computes the tracked box positions for each frame. In this specific
|
||||
use case, the starting box positions come from object detection, but the
|
||||
starting position can also be provided manually by the user or another system.
|
||||
Our solution consists of three main components: a motion analysis component, a
|
||||
flow packager component, and a box tracking component. Each component is
|
||||
encapsulated as a MediaPipe calculator, and the box tracking solution as a whole
|
||||
is represented as a MediaPipe
|
||||
[subgraph](https://github.com/google/mediapipe/tree/master/mediapipe/graphs/tracking/subgraphs/box_tracking_gpu.pbtxt).
|
||||
|
||||
Note: To visualize a graph, copy the graph and paste it into
|
||||
[MediaPipe Visualizer](https://viz.mediapipe.dev/).
|
||||
|
||||
In the
|
||||
[box tracking subgraph](https://github.com/google/mediapipe/tree/master/mediapipe/graphs/tracking/subgraphs/box_tracking_gpu.pbtxt),
|
||||
the MotionAnalysis calculator extracts features (e.g. high-gradient corners)
|
||||
across the image, tracks those features over time, classifies them into
|
||||
foreground and background features, and estimates both local motion vectors and
|
||||
the global motion model. The FlowPackager calculator packs the estimated motion
|
||||
metadata into an efficient format. The BoxTracker calculator takes this motion
|
||||
metadata from the FlowPackager calculator and the position of starting boxes,
|
||||
and tracks the boxes over time. Using solely the motion data (without the need
|
||||
for the RGB frames) produced by the MotionAnalysis calculator, the BoxTracker
|
||||
calculator tracks individual objects or regions while discriminating from
|
||||
others. Please see
|
||||
[Object Detection and Tracking using MediaPipe](https://developers.googleblog.com/2019/12/object-detection-and-tracking-using-mediapipe.html)
|
||||
in Google Developers Blog for more details.
|
||||
|
||||
An advantage of our architecture is that by separating motion analysis into a
|
||||
dedicated MediaPipe calculator and tracking features over the whole image, we
|
||||
enable great flexibility and constant computation independent of the number of
|
||||
regions tracked! By not having to rely on the RGB frames during tracking, our
|
||||
tracking solution provides the flexibility to cache the metadata across a batch
|
||||
of frame. Caching enables tracking of regions both backwards and forwards in
|
||||
time; or even sync directly to a specified timestamp for tracking with random
|
||||
access.
|
||||
|
||||
## Object Detection and Tracking
|
||||
|
||||
MediaPipe Box Tracking can be paired with ML inference, resulting in valuable
|
||||
and efficient pipelines. For instance, box tracking can be paired with ML-based
|
||||
object detection to create an object detection and tracking pipeline. With
|
||||
tracking, this pipeline offers several advantages over running detection per
|
||||
frame (e.g., [MediaPipe Object Detection](./object_detection.md)):
|
||||
|
||||
* It provides instance based tracking, i.e. the object ID is maintained across
|
||||
frames.
|
||||
* Detection does not have to run every frame. This enables running heavier
|
||||
detection models that are more accurate while keeping the pipeline
|
||||
lightweight and real-time on mobile devices.
|
||||
* Object localization is temporally consistent with the help of tracking,
|
||||
meaning less jitter is observable across frames.
|
||||
|
||||
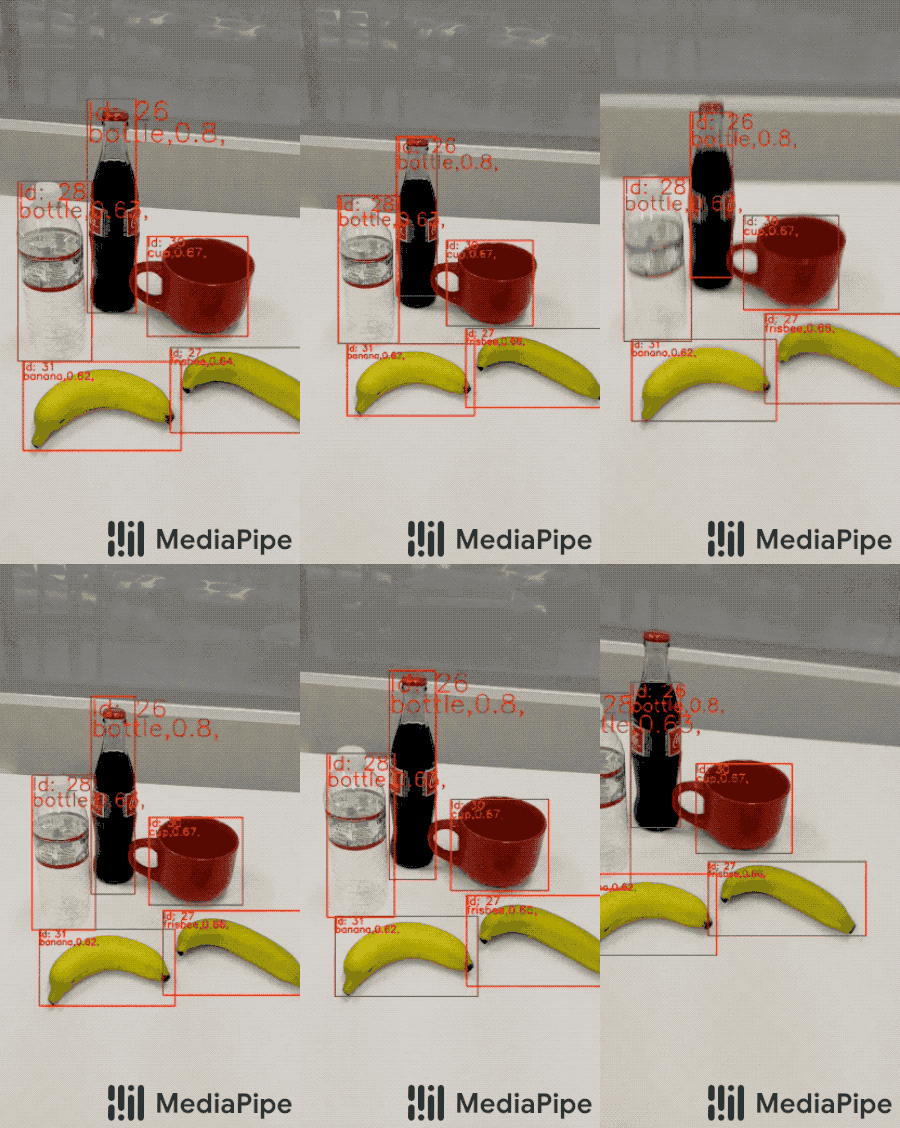 |
|
||||
:----------------------------------------------------------------------------------: |
|
||||
*Fig 1. Box tracking paired with ML-based object detection.* |
|
||||
|
||||
The object detection and tracking pipeline can be implemented as a MediaPipe
|
||||
[graph](https://github.com/google/mediapipe/tree/master/mediapipe/graphs/tracking/object_detection_tracking_mobile_gpu.pbtxt),
|
||||
which internally utilizes an
|
||||
[object detection subgraph](https://github.com/google/mediapipe/tree/master/mediapipe/graphs/tracking/subgraphs/object_detection_gpu.pbtxt),
|
||||
an
|
||||
[object tracking subgraph](https://github.com/google/mediapipe/tree/master/mediapipe/graphs/tracking/subgraphs/object_tracking_gpu.pbtxt),
|
||||
and a
|
||||
[renderer subgraph](https://github.com/google/mediapipe/tree/master/mediapipe/graphs/tracking/subgraphs/renderer_gpu.pbtxt).
|
||||
|
||||
In general, the object detection subgraph (which performs ML model inference
|
||||
internally) runs only upon request, e.g. at an arbitrary frame rate or triggered
|
||||
by specific signals. More specifically, in this particular
|
||||
[graph](https://github.com/google/mediapipe/tree/master/mediapipe/graphs/tracking/object_detection_tracking_mobile_gpu.pbtxt)
|
||||
a PacketResampler calculator temporally subsamples the incoming video frames to
|
||||
0.5 fps before they are passed into the object detection subgraph. This frame
|
||||
rate can be configured differently as an option in PacketResampler.
|
||||
|
||||
The object tracking subgraph runs in real-time on every incoming frame to track
|
||||
the detected objects. It expands the
|
||||
[box tracking subgraph](https://github.com/google/mediapipe/tree/master/mediapipe/graphs/tracking/subgraphs/box_tracking_gpu.pbtxt)
|
||||
with additional functionality: when new detections arrive it uses IoU
|
||||
(Intersection over Union) to associate the current tracked objects/boxes with
|
||||
new detections to remove obsolete or duplicated boxes.
|
||||
|
||||
## Example Apps
|
||||
|
||||
Please first see general instructions for
|
||||
[Android](../getting_started/android.md), [iOS](../getting_started/ios.md) and
|
||||
[desktop](../getting_started/cpp.md) on how to build MediaPipe examples.
|
||||
|
||||
Note: To visualize a graph, copy the graph and paste it into
|
||||
[MediaPipe Visualizer](https://viz.mediapipe.dev/). For more information on how
|
||||
to visualize its associated subgraphs, please see
|
||||
[visualizer documentation](../tools/visualizer.md).
|
||||
|
||||
### Mobile
|
||||
|
||||
Note: Object detection is using TensorFlow Lite on GPU while tracking is on CPU.
|
||||
|
||||
* Graph:
|
||||
[`mediapipe/graphs/tracking/object_detection_tracking_mobile_gpu.pbtxt`](https://github.com/google/mediapipe/tree/master/mediapipe/graphs/tracking/object_detection_tracking_mobile_gpu.pbtxt)
|
||||
* Android target:
|
||||
[(or download prebuilt ARM64 APK)](https://drive.google.com/open?id=1UXL9jX4Wpp34TsiVogugV3J3T9_C5UK-)
|
||||
[`mediapipe/examples/android/src/java/com/google/mediapipe/apps/objecttrackinggpu:objecttrackinggpu`](https://github.com/google/mediapipe/tree/master/mediapipe/examples/android/src/java/com/google/mediapipe/apps/objecttrackinggpu/BUILD)
|
||||
* iOS target: Not available
|
||||
|
||||
### Desktop
|
||||
|
||||
* Running on CPU (both for object detection using TensorFlow Lite and
|
||||
tracking):
|
||||
* Graph:
|
||||
[`mediapipe/graphs/tracking/object_detection_tracking_desktop_live.pbtxt`](https://github.com/google/mediapipe/tree/master/mediapipe/graphs/tracking/object_detection_tracking_desktop_live.pbtxt)
|
||||
* Target:
|
||||
[`mediapipe/examples/desktop/object_tracking:object_tracking_cpu`](https://github.com/google/mediapipe/tree/master/mediapipe/examples/desktop/object_tracking/BUILD)
|
||||
* Running on GPU: Not available
|
||||
|
||||
## Resources
|
||||
|
||||
* Google Developers Blog:
|
||||
[Object Detection and Tracking using MediaPipe](https://developers.googleblog.com/2019/12/object-detection-and-tracking-using-mediapipe.html)
|
||||
* Google AI Blog:
|
||||
[Get moving with the new Motion Stills](https://ai.googleblog.com/2016/12/get-moving-with-new-motion-stills.html)
|
||||
* YouTube Creator Blog: [Blur moving objects in your video with the new Custom
|
||||
blurring tool on
|
||||
YouTube](https://youtube-creators.googleblog.com/2016/02/blur-moving-objects-in-your-video-with.html)
|
||||
@@ -0,0 +1,492 @@
|
||||
---
|
||||
layout: default
|
||||
title: Face Detection
|
||||
parent: Solutions
|
||||
nav_order: 1
|
||||
---
|
||||
|
||||
# MediaPipe Face Detection
|
||||
{: .no_toc }
|
||||
|
||||
<details close markdown="block">
|
||||
<summary>
|
||||
Table of contents
|
||||
</summary>
|
||||
{: .text-delta }
|
||||
1. TOC
|
||||
{:toc}
|
||||
</details>
|
||||
---
|
||||
|
||||
## Overview
|
||||
|
||||
MediaPipe Face Detection is an ultrafast face detection solution that comes with
|
||||
6 landmarks and multi-face support. It is based on
|
||||
[BlazeFace](https://arxiv.org/abs/1907.05047), a lightweight and well-performing
|
||||
face detector tailored for mobile GPU inference. The detector's super-realtime
|
||||
performance enables it to be applied to any live viewfinder experience that
|
||||
requires an accurate facial region of interest as an input for other
|
||||
task-specific models, such as 3D facial keypoint estimation (e.g.,
|
||||
[MediaPipe Face Mesh](./face_mesh.md)), facial features or expression
|
||||
classification, and face region segmentation. BlazeFace uses a lightweight
|
||||
feature extraction network inspired by, but distinct from
|
||||
[MobileNetV1/V2](https://ai.googleblog.com/2018/04/mobilenetv2-next-generation-of-on.html),
|
||||
a GPU-friendly anchor scheme modified from
|
||||
[Single Shot MultiBox Detector (SSD)](https://arxiv.org/abs/1512.02325), and an
|
||||
improved tie resolution strategy alternative to non-maximum suppression. For
|
||||
more information about BlazeFace, please see the [Resources](#resources)
|
||||
section.
|
||||
|
||||
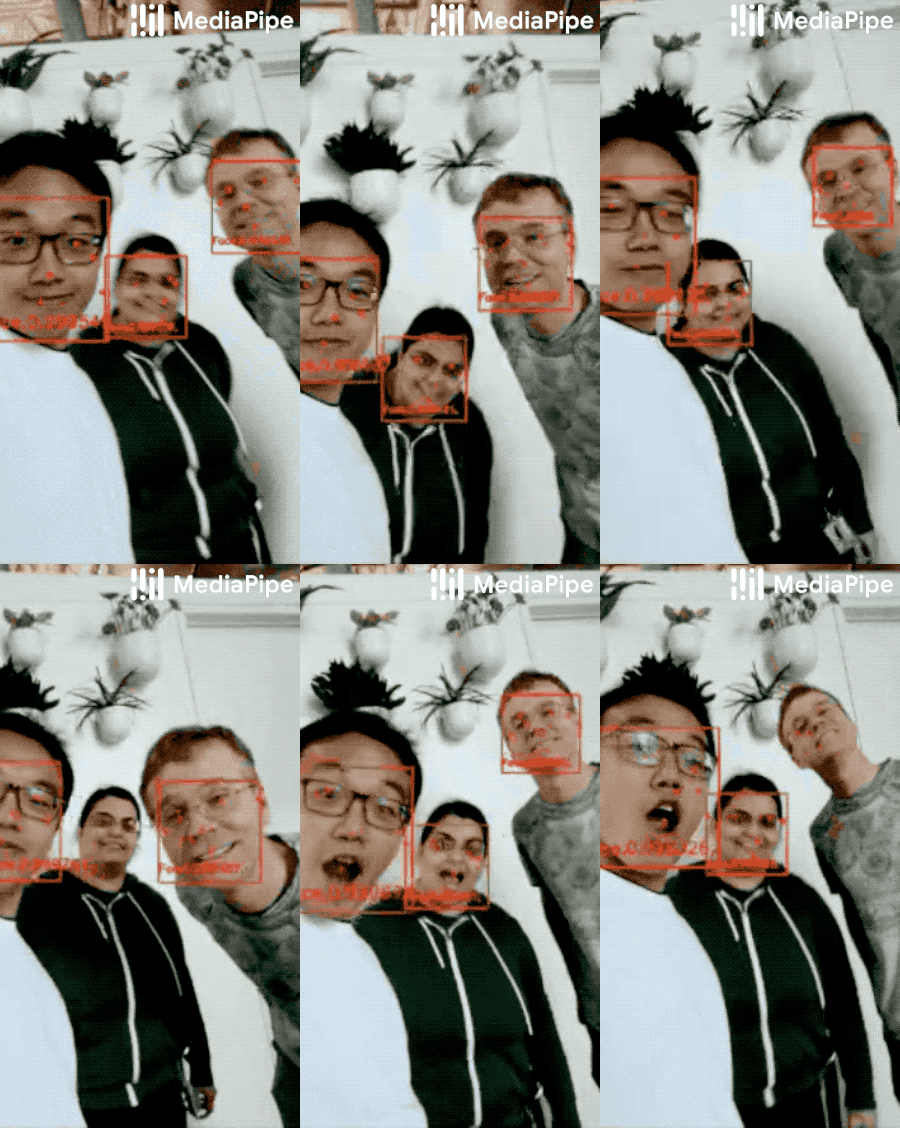
|
||||
|
||||
## Solution APIs
|
||||
|
||||
### Configuration Options
|
||||
|
||||
Naming style and availability may differ slightly across platforms/languages.
|
||||
|
||||
#### model_selection
|
||||
|
||||
An integer index `0` or `1`. Use `0` to select a short-range model that works
|
||||
best for faces within 2 meters from the camera, and `1` for a full-range model
|
||||
best for faces within 5 meters. For the full-range option, a sparse model is
|
||||
used for its improved inference speed. Please refer to the
|
||||
[model cards](./models.md#face_detection) for details. Default to `0` if not
|
||||
specified.
|
||||
|
||||
#### min_detection_confidence
|
||||
|
||||
Minimum confidence value (`[0.0, 1.0]`) from the face detection model for the
|
||||
detection to be considered successful. Default to `0.5`.
|
||||
|
||||
### Output
|
||||
|
||||
Naming style may differ slightly across platforms/languages.
|
||||
|
||||
#### detections
|
||||
|
||||
Collection of detected faces, where each face is represented as a detection
|
||||
proto message that contains a bounding box and 6 key points (right eye, left
|
||||
eye, nose tip, mouth center, right ear tragion, and left ear tragion). The
|
||||
bounding box is composed of `xmin` and `width` (both normalized to `[0.0, 1.0]`
|
||||
by the image width) and `ymin` and `height` (both normalized to `[0.0, 1.0]` by
|
||||
the image height). Each key point is composed of `x` and `y`, which are
|
||||
normalized to `[0.0, 1.0]` by the image width and height respectively.
|
||||
|
||||
### Python Solution API
|
||||
|
||||
Please first follow general [instructions](../getting_started/python.md) to
|
||||
install MediaPipe Python package, then learn more in the companion
|
||||
[Python Colab](#resources) and the usage example below.
|
||||
|
||||
Supported configuration options:
|
||||
|
||||
* [model_selection](#model_selection)
|
||||
* [min_detection_confidence](#min_detection_confidence)
|
||||
|
||||
```python
|
||||
import cv2
|
||||
import mediapipe as mp
|
||||
mp_face_detection = mp.solutions.face_detection
|
||||
mp_drawing = mp.solutions.drawing_utils
|
||||
|
||||
# For static images:
|
||||
IMAGE_FILES = []
|
||||
with mp_face_detection.FaceDetection(
|
||||
model_selection=1, min_detection_confidence=0.5) as face_detection:
|
||||
for idx, file in enumerate(IMAGE_FILES):
|
||||
image = cv2.imread(file)
|
||||
# Convert the BGR image to RGB and process it with MediaPipe Face Detection.
|
||||
results = face_detection.process(cv2.cvtColor(image, cv2.COLOR_BGR2RGB))
|
||||
|
||||
# Draw face detections of each face.
|
||||
if not results.detections:
|
||||
continue
|
||||
annotated_image = image.copy()
|
||||
for detection in results.detections:
|
||||
print('Nose tip:')
|
||||
print(mp_face_detection.get_key_point(
|
||||
detection, mp_face_detection.FaceKeyPoint.NOSE_TIP))
|
||||
mp_drawing.draw_detection(annotated_image, detection)
|
||||
cv2.imwrite('/tmp/annotated_image' + str(idx) + '.png', annotated_image)
|
||||
|
||||
# For webcam input:
|
||||
cap = cv2.VideoCapture(0)
|
||||
with mp_face_detection.FaceDetection(
|
||||
model_selection=0, min_detection_confidence=0.5) as face_detection:
|
||||
while cap.isOpened():
|
||||
success, image = cap.read()
|
||||
if not success:
|
||||
print("Ignoring empty camera frame.")
|
||||
# If loading a video, use 'break' instead of 'continue'.
|
||||
continue
|
||||
|
||||
# To improve performance, optionally mark the image as not writeable to
|
||||
# pass by reference.
|
||||
image.flags.writeable = False
|
||||
image = cv2.cvtColor(image, cv2.COLOR_BGR2RGB)
|
||||
results = face_detection.process(image)
|
||||
|
||||
# Draw the face detection annotations on the image.
|
||||
image.flags.writeable = True
|
||||
image = cv2.cvtColor(image, cv2.COLOR_RGB2BGR)
|
||||
if results.detections:
|
||||
for detection in results.detections:
|
||||
mp_drawing.draw_detection(image, detection)
|
||||
# Flip the image horizontally for a selfie-view display.
|
||||
cv2.imshow('MediaPipe Face Detection', cv2.flip(image, 1))
|
||||
if cv2.waitKey(5) & 0xFF == 27:
|
||||
break
|
||||
cap.release()
|
||||
```
|
||||
|
||||
### JavaScript Solution API
|
||||
|
||||
Please first see general [introduction](../getting_started/javascript.md) on
|
||||
MediaPipe in JavaScript, then learn more in the companion [web demo](#resources)
|
||||
and the following usage example.
|
||||
|
||||
Supported configuration options:
|
||||
|
||||
* [modelSelection](#model_selection)
|
||||
* [minDetectionConfidence](#min_detection_confidence)
|
||||
|
||||
```html
|
||||
<!DOCTYPE html>
|
||||
<html>
|
||||
<head>
|
||||
<meta charset="utf-8">
|
||||
<script src="https://cdn.jsdelivr.net/npm/@mediapipe/camera_utils/camera_utils.js" crossorigin="anonymous"></script>
|
||||
<script src="https://cdn.jsdelivr.net/npm/@mediapipe/control_utils/control_utils.js" crossorigin="anonymous"></script>
|
||||
<script src="https://cdn.jsdelivr.net/npm/@mediapipe/drawing_utils/drawing_utils.js" crossorigin="anonymous"></script>
|
||||
<script src="https://cdn.jsdelivr.net/npm/@mediapipe/face_detection/face_detection.js" crossorigin="anonymous"></script>
|
||||
</head>
|
||||
|
||||
<body>
|
||||
<div class="container">
|
||||
<video class="input_video"></video>
|
||||
<canvas class="output_canvas" width="1280px" height="720px"></canvas>
|
||||
</div>
|
||||
</body>
|
||||
</html>
|
||||
```
|
||||
|
||||
```javascript
|
||||
<script type="module">
|
||||
const videoElement = document.getElementsByClassName('input_video')[0];
|
||||
const canvasElement = document.getElementsByClassName('output_canvas')[0];
|
||||
const canvasCtx = canvasElement.getContext('2d');
|
||||
|
||||
function onResults(results) {
|
||||
// Draw the overlays.
|
||||
canvasCtx.save();
|
||||
canvasCtx.clearRect(0, 0, canvasElement.width, canvasElement.height);
|
||||
canvasCtx.drawImage(
|
||||
results.image, 0, 0, canvasElement.width, canvasElement.height);
|
||||
if (results.detections.length > 0) {
|
||||
drawingUtils.drawRectangle(
|
||||
canvasCtx, results.detections[0].boundingBox,
|
||||
{color: 'blue', lineWidth: 4, fillColor: '#00000000'});
|
||||
drawingUtils.drawLandmarks(canvasCtx, results.detections[0].landmarks, {
|
||||
color: 'red',
|
||||
radius: 5,
|
||||
});
|
||||
}
|
||||
canvasCtx.restore();
|
||||
}
|
||||
|
||||
const faceDetection = new FaceDetection({locateFile: (file) => {
|
||||
return `https://cdn.jsdelivr.net/npm/@mediapipe/[email protected]/${file}`;
|
||||
}});
|
||||
faceDetection.setOptions({
|
||||
modelSelection: 0,
|
||||
minDetectionConfidence: 0.5
|
||||
});
|
||||
faceDetection.onResults(onResults);
|
||||
|
||||
const camera = new Camera(videoElement, {
|
||||
onFrame: async () => {
|
||||
await faceDetection.send({image: videoElement});
|
||||
},
|
||||
width: 1280,
|
||||
height: 720
|
||||
});
|
||||
camera.start();
|
||||
</script>
|
||||
```
|
||||
|
||||
### Android Solution API
|
||||
|
||||
Please first follow general
|
||||
[instructions](../getting_started/android_solutions.md) to add MediaPipe Gradle
|
||||
dependencies and try the Android Solution API in the companion
|
||||
[example Android Studio project](https://github.com/google/mediapipe/tree/master/mediapipe/examples/android/solutions/facedetection),
|
||||
and learn more in the usage example below.
|
||||
|
||||
Supported configuration options:
|
||||
|
||||
* [staticImageMode](#static_image_mode)
|
||||
* [modelSelection](#model_selection)
|
||||
|
||||
#### Camera Input
|
||||
|
||||
```java
|
||||
// For camera input and result rendering with OpenGL.
|
||||
FaceDetectionOptions faceDetectionOptions =
|
||||
FaceDetectionOptions.builder()
|
||||
.setStaticImageMode(false)
|
||||
.setModelSelection(0).build();
|
||||
FaceDetection faceDetection = new FaceDetection(this, faceDetectionOptions);
|
||||
faceDetection.setErrorListener(
|
||||
(message, e) -> Log.e(TAG, "MediaPipe Face Detection error:" + message));
|
||||
|
||||
// Initializes a new CameraInput instance and connects it to MediaPipe Face Detection Solution.
|
||||
CameraInput cameraInput = new CameraInput(this);
|
||||
cameraInput.setNewFrameListener(
|
||||
textureFrame -> faceDetection.send(textureFrame));
|
||||
|
||||
// Initializes a new GlSurfaceView with a ResultGlRenderer<FaceDetectionResult> instance
|
||||
// that provides the interfaces to run user-defined OpenGL rendering code.
|
||||
// See mediapipe/examples/android/solutions/facedetection/src/main/java/com/google/mediapipe/examples/facedetection/FaceDetectionResultGlRenderer.java
|
||||
// as an example.
|
||||
SolutionGlSurfaceView<FaceDetectionResult> glSurfaceView =
|
||||
new SolutionGlSurfaceView<>(
|
||||
this, faceDetection.getGlContext(), faceDetection.getGlMajorVersion());
|
||||
glSurfaceView.setSolutionResultRenderer(new FaceDetectionResultGlRenderer());
|
||||
glSurfaceView.setRenderInputImage(true);
|
||||
faceDetection.setResultListener(
|
||||
faceDetectionResult -> {
|
||||
if (faceDetectionResult.multiFaceDetections().isEmpty()) {
|
||||
return;
|
||||
}
|
||||
RelativeKeypoint noseTip =
|
||||
faceDetectionResult
|
||||
.multiFaceDetections()
|
||||
.get(0)
|
||||
.getLocationData()
|
||||
.getRelativeKeypoints(FaceKeypoint.NOSE_TIP);
|
||||
Log.i(
|
||||
TAG,
|
||||
String.format(
|
||||
"MediaPipe Face Detection nose tip normalized coordinates (value range: [0, 1]): x=%f, y=%f",
|
||||
noseTip.getX(), noseTip.getY()));
|
||||
// Request GL rendering.
|
||||
glSurfaceView.setRenderData(faceDetectionResult);
|
||||
glSurfaceView.requestRender();
|
||||
});
|
||||
|
||||
// The runnable to start camera after the GLSurfaceView is attached.
|
||||
glSurfaceView.post(
|
||||
() ->
|
||||
cameraInput.start(
|
||||
this,
|
||||
faceDetection.getGlContext(),
|
||||
CameraInput.CameraFacing.FRONT,
|
||||
glSurfaceView.getWidth(),
|
||||
glSurfaceView.getHeight()));
|
||||
```
|
||||
|
||||
#### Image Input
|
||||
|
||||
```java
|
||||
// For reading images from gallery and drawing the output in an ImageView.
|
||||
FaceDetectionOptions faceDetectionOptions =
|
||||
FaceDetectionOptions.builder()
|
||||
.setStaticImageMode(true)
|
||||
.setModelSelection(0).build();
|
||||
FaceDetection faceDetection = new FaceDetection(this, faceDetectionOptions);
|
||||
|
||||
// Connects MediaPipe Face Detection Solution to the user-defined ImageView
|
||||
// instance that allows users to have the custom drawing of the output landmarks
|
||||
// on it. See mediapipe/examples/android/solutions/facedetection/src/main/java/com/google/mediapipe/examples/facedetection/FaceDetectionResultImageView.java
|
||||
// as an example.
|
||||
FaceDetectionResultImageView imageView = new FaceDetectionResultImageView(this);
|
||||
faceDetection.setResultListener(
|
||||
faceDetectionResult -> {
|
||||
if (faceDetectionResult.multiFaceDetections().isEmpty()) {
|
||||
return;
|
||||
}
|
||||
int width = faceDetectionResult.inputBitmap().getWidth();
|
||||
int height = faceDetectionResult.inputBitmap().getHeight();
|
||||
RelativeKeypoint noseTip =
|
||||
faceDetectionResult
|
||||
.multiFaceDetections()
|
||||
.get(0)
|
||||
.getLocationData()
|
||||
.getRelativeKeypoints(FaceKeypoint.NOSE_TIP);
|
||||
Log.i(
|
||||
TAG,
|
||||
String.format(
|
||||
"MediaPipe Face Detection nose tip coordinates (pixel values): x=%f, y=%f",
|
||||
noseTip.getX() * width, noseTip.getY() * height));
|
||||
// Request canvas drawing.
|
||||
imageView.setFaceDetectionResult(faceDetectionResult);
|
||||
runOnUiThread(() -> imageView.update());
|
||||
});
|
||||
faceDetection.setErrorListener(
|
||||
(message, e) -> Log.e(TAG, "MediaPipe Face Detection error:" + message));
|
||||
|
||||
// ActivityResultLauncher to get an image from the gallery as Bitmap.
|
||||
ActivityResultLauncher<Intent> imageGetter =
|
||||
registerForActivityResult(
|
||||
new ActivityResultContracts.StartActivityForResult(),
|
||||
result -> {
|
||||
Intent resultIntent = result.getData();
|
||||
if (resultIntent != null && result.getResultCode() == RESULT_OK) {
|
||||
Bitmap bitmap = null;
|
||||
try {
|
||||
bitmap =
|
||||
MediaStore.Images.Media.getBitmap(
|
||||
this.getContentResolver(), resultIntent.getData());
|
||||
// Please also rotate the Bitmap based on its orientation.
|
||||
} catch (IOException e) {
|
||||
Log.e(TAG, "Bitmap reading error:" + e);
|
||||
}
|
||||
if (bitmap != null) {
|
||||
faceDetection.send(bitmap);
|
||||
}
|
||||
}
|
||||
});
|
||||
Intent pickImageIntent = new Intent(Intent.ACTION_PICK);
|
||||
pickImageIntent.setDataAndType(MediaStore.Images.Media.INTERNAL_CONTENT_URI, "image/*");
|
||||
imageGetter.launch(pickImageIntent);
|
||||
```
|
||||
|
||||
#### Video Input
|
||||
|
||||
```java
|
||||
// For video input and result rendering with OpenGL.
|
||||
FaceDetectionOptions faceDetectionOptions =
|
||||
FaceDetectionOptions.builder()
|
||||
.setStaticImageMode(false)
|
||||
.setModelSelection(0).build();
|
||||
FaceDetection faceDetection = new FaceDetection(this, faceDetectionOptions);
|
||||
faceDetection.setErrorListener(
|
||||
(message, e) -> Log.e(TAG, "MediaPipe Face Detection error:" + message));
|
||||
|
||||
// Initializes a new VideoInput instance and connects it to MediaPipe Face Detection Solution.
|
||||
VideoInput videoInput = new VideoInput(this);
|
||||
videoInput.setNewFrameListener(
|
||||
textureFrame -> faceDetection.send(textureFrame));
|
||||
|
||||
// Initializes a new GlSurfaceView with a ResultGlRenderer<FaceDetectionResult> instance
|
||||
// that provides the interfaces to run user-defined OpenGL rendering code.
|
||||
// See mediapipe/examples/android/solutions/facedetection/src/main/java/com/google/mediapipe/examples/facedetection/FaceDetectionResultGlRenderer.java
|
||||
// as an example.
|
||||
SolutionGlSurfaceView<FaceDetectionResult> glSurfaceView =
|
||||
new SolutionGlSurfaceView<>(
|
||||
this, faceDetection.getGlContext(), faceDetection.getGlMajorVersion());
|
||||
glSurfaceView.setSolutionResultRenderer(new FaceDetectionResultGlRenderer());
|
||||
glSurfaceView.setRenderInputImage(true);
|
||||
|
||||
faceDetection.setResultListener(
|
||||
faceDetectionResult -> {
|
||||
if (faceDetectionResult.multiFaceDetections().isEmpty()) {
|
||||
return;
|
||||
}
|
||||
RelativeKeypoint noseTip =
|
||||
faceDetectionResult
|
||||
.multiFaceDetections()
|
||||
.get(0)
|
||||
.getLocationData()
|
||||
.getRelativeKeypoints(FaceKeypoint.NOSE_TIP);
|
||||
Log.i(
|
||||
TAG,
|
||||
String.format(
|
||||
"MediaPipe Face Detection nose tip normalized coordinates (value range: [0, 1]): x=%f, y=%f",
|
||||
noseTip.getX(), noseTip.getY()));
|
||||
// Request GL rendering.
|
||||
glSurfaceView.setRenderData(faceDetectionResult);
|
||||
glSurfaceView.requestRender();
|
||||
});
|
||||
|
||||
ActivityResultLauncher<Intent> videoGetter =
|
||||
registerForActivityResult(
|
||||
new ActivityResultContracts.StartActivityForResult(),
|
||||
result -> {
|
||||
Intent resultIntent = result.getData();
|
||||
if (resultIntent != null) {
|
||||
if (result.getResultCode() == RESULT_OK) {
|
||||
glSurfaceView.post(
|
||||
() ->
|
||||
videoInput.start(
|
||||
this,
|
||||
resultIntent.getData(),
|
||||
faceDetection.getGlContext(),
|
||||
glSurfaceView.getWidth(),
|
||||
glSurfaceView.getHeight()));
|
||||
}
|
||||
}
|
||||
});
|
||||
Intent pickVideoIntent = new Intent(Intent.ACTION_PICK);
|
||||
pickVideoIntent.setDataAndType(MediaStore.Video.Media.INTERNAL_CONTENT_URI, "video/*");
|
||||
videoGetter.launch(pickVideoIntent);
|
||||
```
|
||||
|
||||
## Example Apps
|
||||
|
||||
Please first see general instructions for
|
||||
[Android](../getting_started/android.md), [iOS](../getting_started/ios.md) and
|
||||
[desktop](../getting_started/cpp.md) on how to build MediaPipe examples.
|
||||
|
||||
Note: To visualize a graph, copy the graph and paste it into
|
||||
[MediaPipe Visualizer](https://viz.mediapipe.dev/). For more information on how
|
||||
to visualize its associated subgraphs, please see
|
||||
[visualizer documentation](../tools/visualizer.md).
|
||||
|
||||
### Mobile
|
||||
|
||||
#### GPU Pipeline
|
||||
|
||||
* Graph:
|
||||
[`mediapipe/graphs/face_detection/face_detection_mobile_gpu.pbtxt`](https://github.com/google/mediapipe/tree/master/mediapipe/graphs/face_detection/face_detection_mobile_gpu.pbtxt)
|
||||
* Android target:
|
||||
[(or download prebuilt ARM64 APK)](https://drive.google.com/open?id=1DZTCy1gp238kkMnu4fUkwI3IrF77Mhy5)
|
||||
[`mediapipe/examples/android/src/java/com/google/mediapipe/apps/facedetectiongpu:facedetectiongpu`](https://github.com/google/mediapipe/tree/master/mediapipe/examples/android/src/java/com/google/mediapipe/apps/facedetectiongpu/BUILD)
|
||||
* iOS target:
|
||||
[`mediapipe/examples/ios/facedetectiongpu:FaceDetectionGpuApp`](https://github.com/google/mediapipe/tree/master/mediapipe/examples/ios/facedetectiongpu/BUILD)
|
||||
|
||||
#### CPU Pipeline
|
||||
|
||||
This is very similar to the [GPU pipeline](#gpu-pipeline) except that at the
|
||||
beginning and the end of the pipeline it performs GPU-to-CPU and CPU-to-GPU
|
||||
image transfer respectively. As a result, the rest of graph, which shares the
|
||||
same configuration as the GPU pipeline, runs entirely on CPU.
|
||||
|
||||
* Graph:
|
||||
[`mediapipe/graphs/face_detection/face_detection_mobile_cpu.pbtxt`](https://github.com/google/mediapipe/tree/master/mediapipe/graphs/face_detection/face_detection_mobile_cpu.pbtxt)
|
||||
* Android target:
|
||||
[(or download prebuilt ARM64 APK)](https://drive.google.com/open?id=1npiZY47jbO5m2YaL63o5QoCQs40JC6C7)
|
||||
[`mediapipe/examples/android/src/java/com/google/mediapipe/apps/facedetectioncpu:facedetectioncpu`](https://github.com/google/mediapipe/tree/master/mediapipe/examples/android/src/java/com/google/mediapipe/apps/facedetectioncpu/BUILD)
|
||||
* iOS target:
|
||||
[`mediapipe/examples/ios/facedetectioncpu:FaceDetectionCpuApp`](https://github.com/google/mediapipe/tree/master/mediapipe/examples/ios/facedetectioncpu/BUILD)
|
||||
|
||||
### Desktop
|
||||
|
||||
* Running on CPU:
|
||||
* Graph:
|
||||
[`mediapipe/graphs/face_detection/face_detection_desktop_live.pbtxt`](https://github.com/google/mediapipe/tree/master/mediapipe/graphs/face_detection/face_detection_desktop_live.pbtxt)
|
||||
* Target:
|
||||
[`mediapipe/examples/desktop/face_detection:face_detection_cpu`](https://github.com/google/mediapipe/tree/master/mediapipe/examples/desktop/face_detection/BUILD)
|
||||
* Running on GPU
|
||||
* Graph:
|
||||
[`mediapipe/graphs/face_detection/face_detection_mobile_gpu.pbtxt`](https://github.com/google/mediapipe/tree/master/mediapipe/graphs/face_detection/face_detection_mobile_gpu.pbtxt)
|
||||
* Target:
|
||||
[`mediapipe/examples/desktop/face_detection:face_detection_gpu`](https://github.com/google/mediapipe/tree/master/mediapipe/examples/desktop/face_detection/BUILD)
|
||||
|
||||
### Coral
|
||||
|
||||
Please refer to
|
||||
[these instructions](https://github.com/google/mediapipe/tree/master/mediapipe/examples/coral/README.md)
|
||||
to cross-compile and run MediaPipe examples on the
|
||||
[Coral Dev Board](https://coral.ai/products/dev-board).
|
||||
|
||||
## Resources
|
||||
|
||||
* Paper:
|
||||
[BlazeFace: Sub-millisecond Neural Face Detection on Mobile GPUs](https://arxiv.org/abs/1907.05047)
|
||||
([presentation](https://docs.google.com/presentation/d/1YCtASfnYyZtH-41QvnW5iZxELFnf0MF-pPWSLGj8yjQ/present?slide=id.g5bc8aeffdd_1_0))
|
||||
([poster](https://drive.google.com/file/d/1u6aB6wxDY7X2TmeUUKgFydulNtXkb3pu/view))
|
||||
* [Models and model cards](./models.md#face_detection)
|
||||
* [Web demo](https://code.mediapipe.dev/codepen/face_detection)
|
||||
* [Python Colab](https://mediapipe.page.link/face_detection_py_colab)
|
||||
@@ -0,0 +1,764 @@
|
||||
---
|
||||
layout: default
|
||||
title: Face Mesh
|
||||
parent: Solutions
|
||||
nav_order: 2
|
||||
---
|
||||
|
||||
# MediaPipe Face Mesh
|
||||
{: .no_toc }
|
||||
|
||||
<details close markdown="block">
|
||||
<summary>
|
||||
Table of contents
|
||||
</summary>
|
||||
{: .text-delta }
|
||||
1. TOC
|
||||
{:toc}
|
||||
</details>
|
||||
---
|
||||
|
||||
## Overview
|
||||
|
||||
MediaPipe Face Mesh is a solution that estimates 468 3D face landmarks in
|
||||
real-time even on mobile devices. It employs machine learning (ML) to infer the
|
||||
3D facial surface, requiring only a single camera input without the need for a
|
||||
dedicated depth sensor. Utilizing lightweight model architectures together with
|
||||
GPU acceleration throughout the pipeline, the solution delivers real-time
|
||||
performance critical for live experiences.
|
||||
|
||||
Additionally, the solution is bundled with the Face Transform module that
|
||||
bridges the gap between the face landmark estimation and useful real-time
|
||||
augmented reality (AR) applications. It establishes a metric 3D space and uses
|
||||
the face landmark screen positions to estimate a face transform within that
|
||||
space. The face transform data consists of common 3D primitives, including a
|
||||
face pose transformation matrix and a triangular face mesh. Under the hood, a
|
||||
lightweight statistical analysis method called
|
||||
[Procrustes Analysis](https://en.wikipedia.org/wiki/Procrustes_analysis) is
|
||||
employed to drive a robust, performant and portable logic. The analysis runs on
|
||||
CPU and has a minimal speed/memory footprint on top of the ML model inference.
|
||||
|
||||
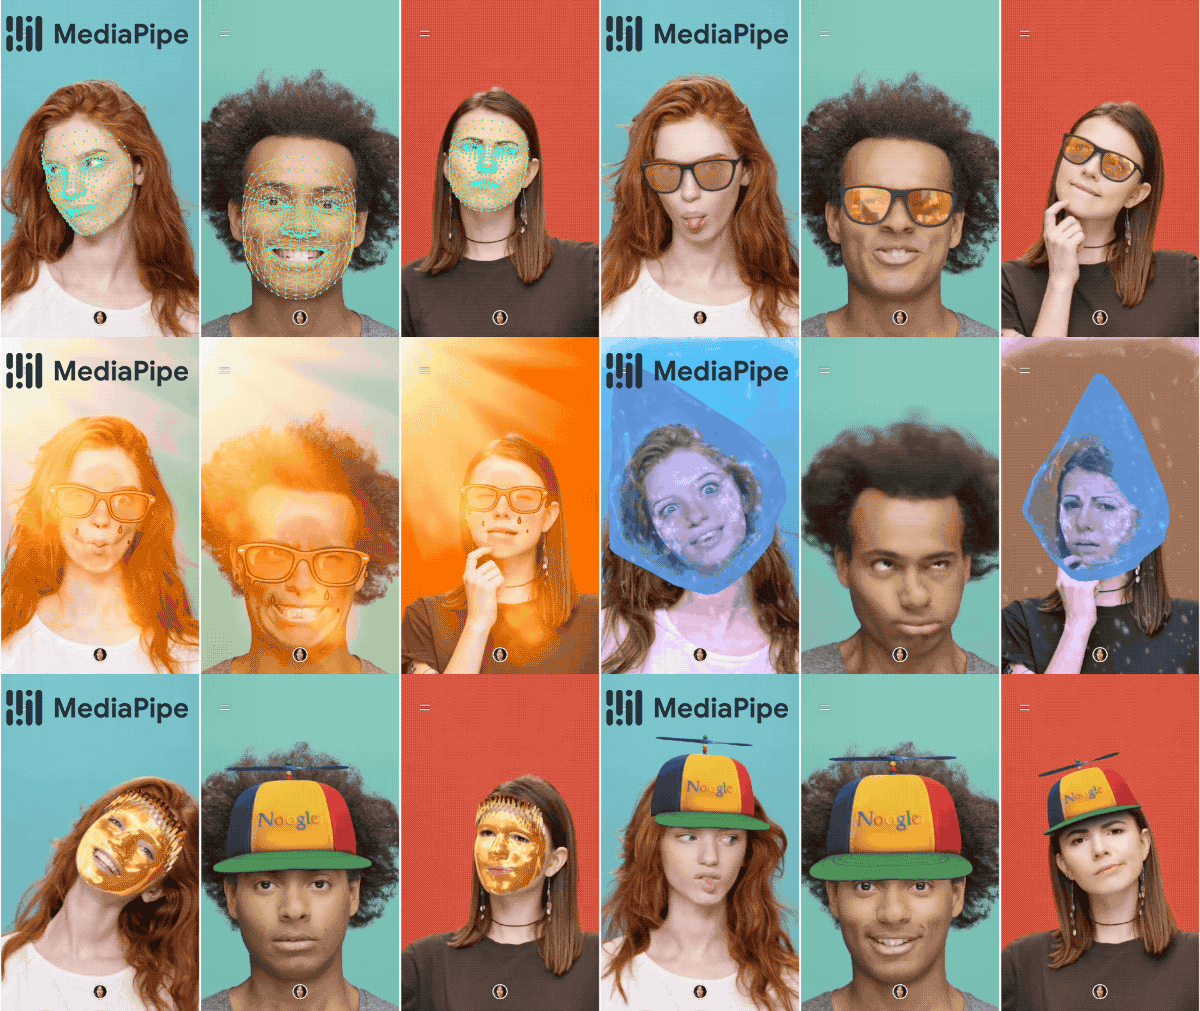 |
|
||||
:-------------------------------------------------------------: |
|
||||
*Fig 1. AR effects utilizing the 3D facial surface.* |
|
||||
|
||||
## ML Pipeline
|
||||
|
||||
Our ML pipeline consists of two real-time deep neural network models that work
|
||||
together: A detector that operates on the full image and computes face locations
|
||||
and a 3D face landmark model that operates on those locations and predicts the
|
||||
approximate 3D surface via regression. Having the face accurately cropped
|
||||
drastically reduces the need for common data augmentations like affine
|
||||
transformations consisting of rotations, translation and scale changes. Instead
|
||||
it allows the network to dedicate most of its capacity towards coordinate
|
||||
prediction accuracy. In addition, in our pipeline the crops can also be
|
||||
generated based on the face landmarks identified in the previous frame, and only
|
||||
when the landmark model could no longer identify face presence is the face
|
||||
detector invoked to relocalize the face. This strategy is similar to that
|
||||
employed in our [MediaPipe Hands](./hands.md) solution, which uses a palm
|
||||
detector together with a hand landmark model.
|
||||
|
||||
The pipeline is implemented as a MediaPipe
|
||||
[graph](https://github.com/google/mediapipe/tree/master/mediapipe/graphs/face_mesh/face_mesh_mobile.pbtxt)
|
||||
that uses a
|
||||
[face landmark subgraph](https://github.com/google/mediapipe/tree/master/mediapipe/modules/face_landmark/face_landmark_front_gpu.pbtxt)
|
||||
from the
|
||||
[face landmark module](https://github.com/google/mediapipe/tree/master/mediapipe/modules/face_landmark),
|
||||
and renders using a dedicated
|
||||
[face renderer subgraph](https://github.com/google/mediapipe/tree/master/mediapipe/graphs/face_mesh/subgraphs/face_renderer_gpu.pbtxt).
|
||||
The
|
||||
[face landmark subgraph](https://github.com/google/mediapipe/tree/master/mediapipe/modules/face_landmark/face_landmark_front_gpu.pbtxt)
|
||||
internally uses a
|
||||
[face_detection_subgraph](https://github.com/google/mediapipe/tree/master/mediapipe/modules/face_detection/face_detection_short_range_gpu.pbtxt)
|
||||
from the
|
||||
[face detection module](https://github.com/google/mediapipe/tree/master/mediapipe/modules/face_detection).
|
||||
|
||||
Note: To visualize a graph, copy the graph and paste it into
|
||||
[MediaPipe Visualizer](https://viz.mediapipe.dev/). For more information on how
|
||||
to visualize its associated subgraphs, please see
|
||||
[visualizer documentation](../tools/visualizer.md).
|
||||
|
||||
### Models
|
||||
|
||||
#### Face Detection Model
|
||||
|
||||
The face detector is the same [BlazeFace](https://arxiv.org/abs/1907.05047)
|
||||
model used in [MediaPipe Face Detection](./face_detection.md). Please refer to
|
||||
[MediaPipe Face Detection](./face_detection.md) for details.
|
||||
|
||||
#### Face Landmark Model
|
||||
|
||||
For 3D face landmarks we employed transfer learning and trained a network with
|
||||
several objectives: the network simultaneously predicts 3D landmark coordinates
|
||||
on synthetic rendered data and 2D semantic contours on annotated real-world
|
||||
data. The resulting network provided us with reasonable 3D landmark predictions
|
||||
not just on synthetic but also on real-world data.
|
||||
|
||||
The 3D landmark network receives as input a cropped video frame without
|
||||
additional depth input. The model outputs the positions of the 3D points, as
|
||||
well as the probability of a face being present and reasonably aligned in the
|
||||
input. A common alternative approach is to predict a 2D heatmap for each
|
||||
landmark, but it is not amenable to depth prediction and has high computational
|
||||
costs for so many points. We further improve the accuracy and robustness of our
|
||||
model by iteratively bootstrapping and refining predictions. That way we can
|
||||
grow our dataset to increasingly challenging cases, such as grimaces, oblique
|
||||
angle and occlusions.
|
||||
|
||||
You can find more information about the face landmark model in this
|
||||
[paper](https://arxiv.org/abs/1907.06724).
|
||||
|
||||
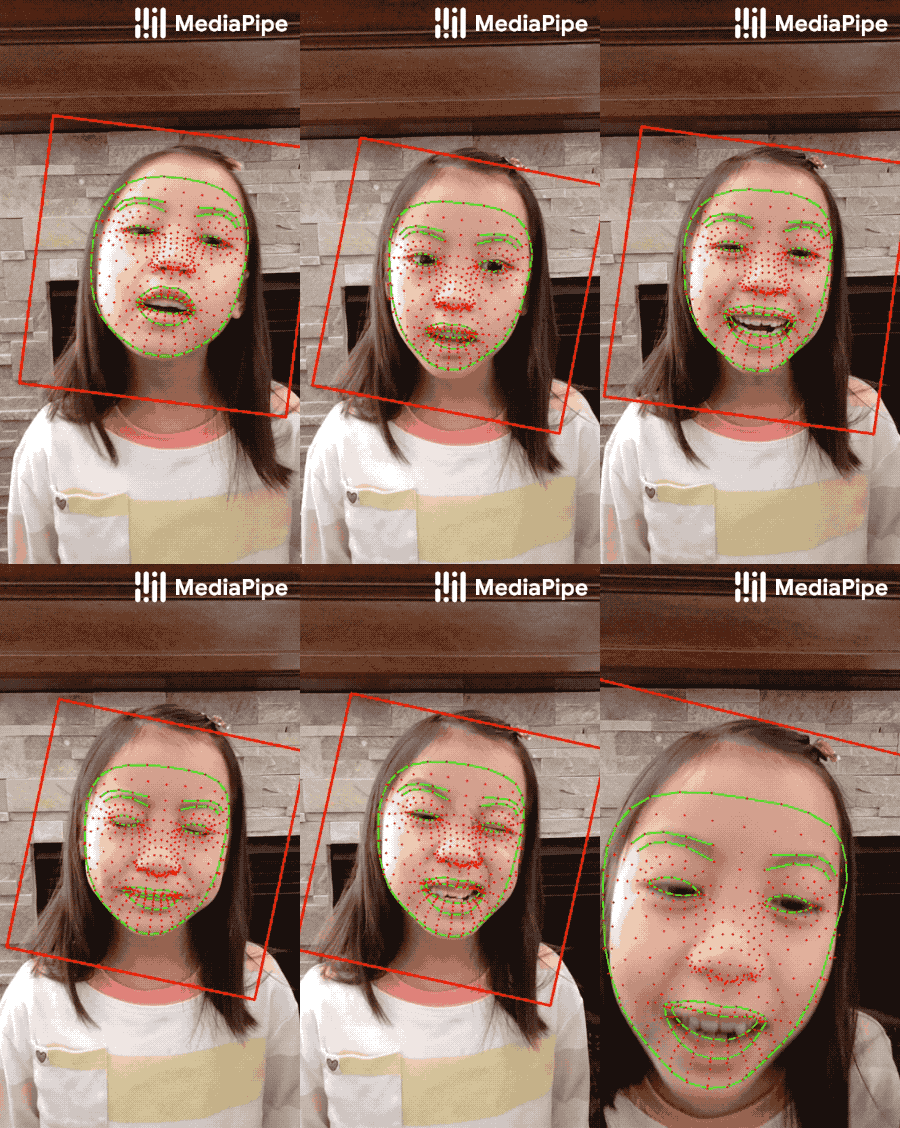 |
|
||||
:------------------------------------------------------------------------: |
|
||||
*Fig 2. Face landmarks: the red box indicates the cropped area as input to the landmark model, the red dots represent the 468 landmarks in 3D, and the green lines connecting landmarks illustrate the contours around the eyes, eyebrows, lips and the entire face.* |
|
||||
|
||||
#### Attention Mesh Model
|
||||
|
||||
In addition to the [Face Landmark Model](#face-landmark-model) we provide
|
||||
another model that applies
|
||||
[attention](https://en.wikipedia.org/wiki/Attention_(machine_learning)) to
|
||||
semantically meaningful face regions, and therefore predicting landmarks more
|
||||
accurately around lips, eyes and irises, at the expense of more compute. It
|
||||
enables applications like AR makeup and AR puppeteering.
|
||||
|
||||
The attention mesh model can be selected in the Solution APIs via the
|
||||
[refine_landmarks](#refine_landmarks) option. You can also find more information
|
||||
about the model in this [paper](https://arxiv.org/abs/2006.10962).
|
||||
|
||||
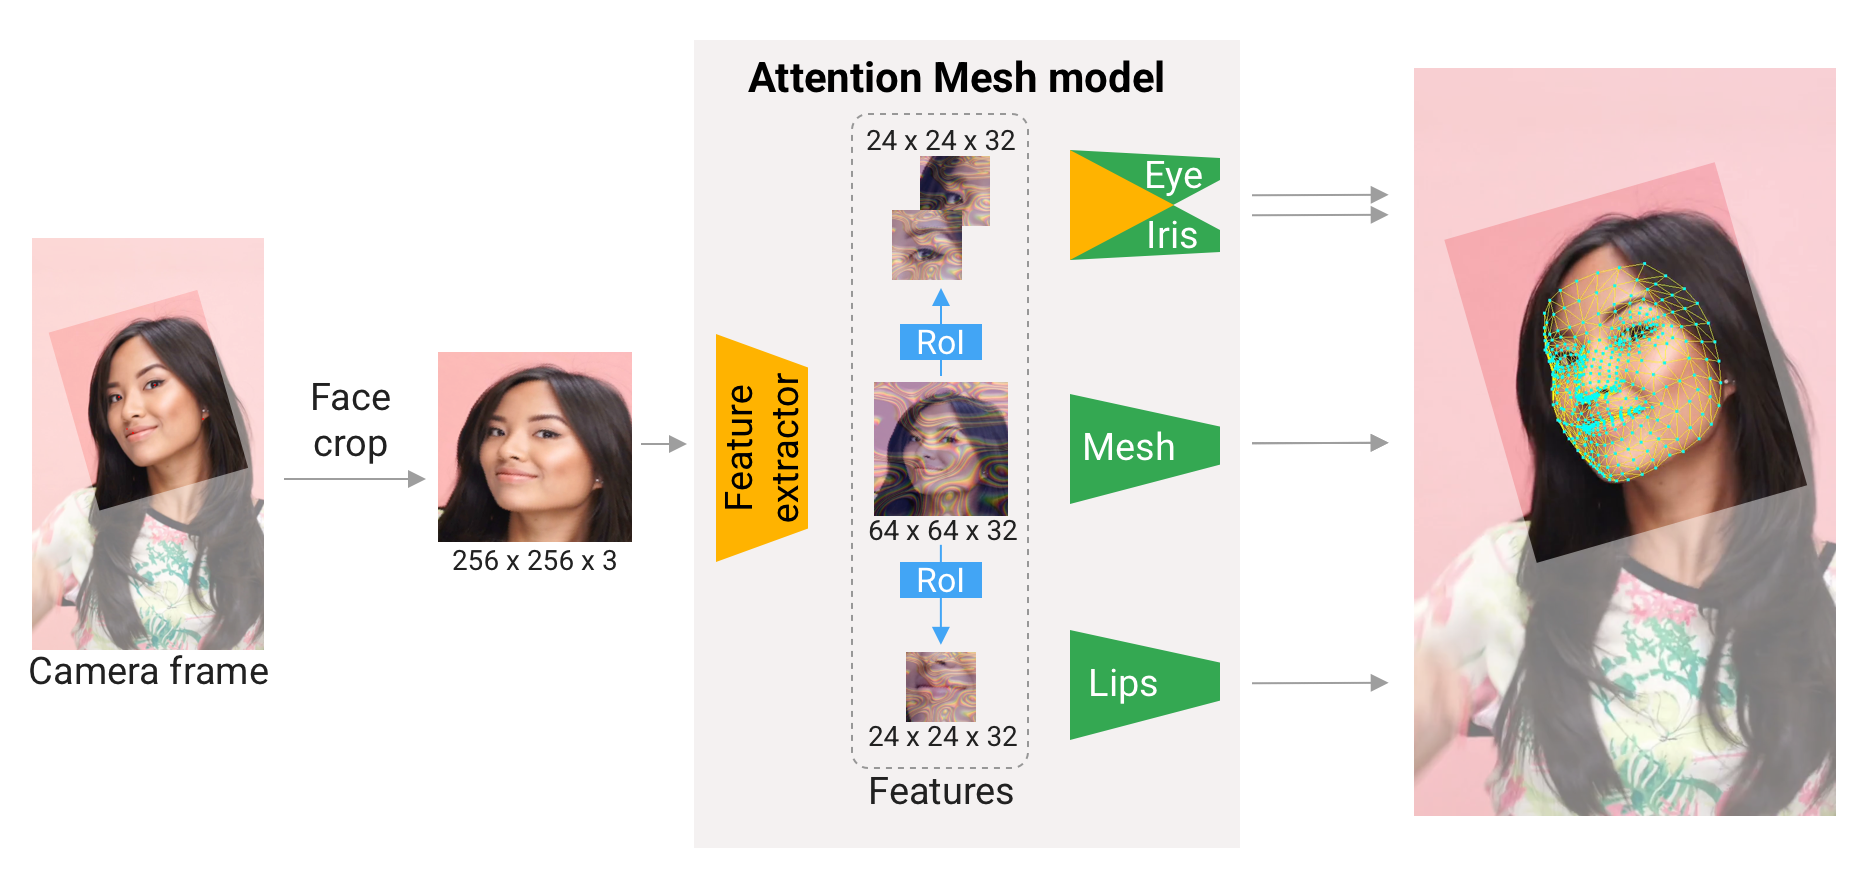 |
|
||||
:---------------------------------------------------------------------------: |
|
||||
*Fig 3. Attention Mesh: Overview of model architecture.* |
|
||||
|
||||
## Face Transform Module
|
||||
|
||||
The [Face Landmark Model](#face-landmark-model) performs a single-camera face landmark
|
||||
detection in the screen coordinate space: the X- and Y- coordinates are
|
||||
normalized screen coordinates, while the Z coordinate is relative and is scaled
|
||||
as the X coodinate under the
|
||||
[weak perspective projection camera model](https://en.wikipedia.org/wiki/3D_projection#Weak_perspective_projection).
|
||||
This format is well-suited for some applications, however it does not directly
|
||||
enable the full spectrum of augmented reality (AR) features like aligning a
|
||||
virtual 3D object with a detected face.
|
||||
|
||||
The
|
||||
[Face Transform module](https://github.com/google/mediapipe/tree/master/mediapipe/modules/face_geometry)
|
||||
moves away from the screen coordinate space towards a metric 3D space and
|
||||
provides necessary primitives to handle a detected face as a regular 3D object.
|
||||
By design, you'll be able to use a perspective camera to project the final 3D
|
||||
scene back into the screen coordinate space with a guarantee that the face
|
||||
landmark positions are not changed.
|
||||
|
||||
### Key Concepts
|
||||
|
||||
#### Metric 3D Space
|
||||
|
||||
The **Metric 3D space** established within the Face Transform module is a
|
||||
right-handed orthonormal metric 3D coordinate space. Within the space, there is
|
||||
a **virtual perspective camera** located at the space origin and pointed in the
|
||||
negative direction of the Z-axis. In the current pipeline, it is assumed that
|
||||
the input camera frames are observed by exactly this virtual camera and
|
||||
therefore its parameters are later used to convert the screen landmark
|
||||
coordinates back into the Metric 3D space. The *virtual camera parameters* can
|
||||
be set freely, however for better results it is advised to set them as close to
|
||||
the *real physical camera parameters* as possible.
|
||||
|
||||
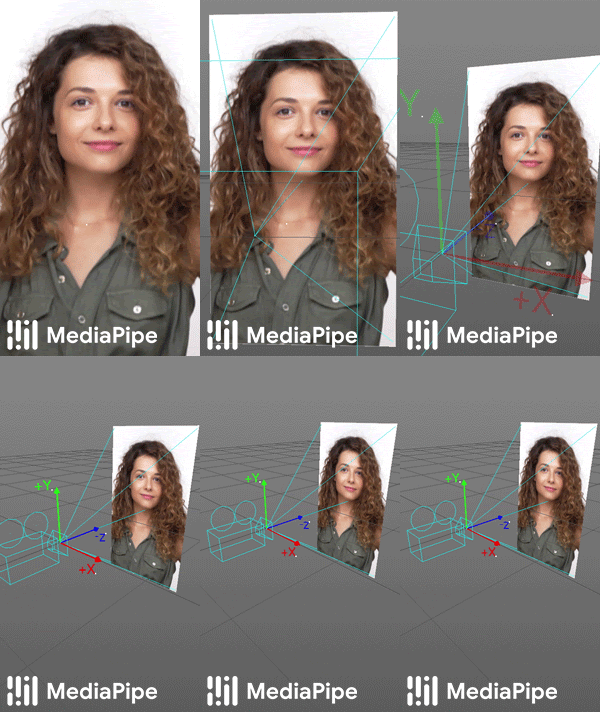 |
|
||||
:-------------------------------------------------------------------------------: |
|
||||
*Fig 4. A visualization of multiple key elements in the Metric 3D space.* |
|
||||
|
||||
#### Canonical Face Model
|
||||
|
||||
The **Canonical Face Model** is a static 3D model of a human face, which follows
|
||||
the 468 3D face landmark topology of the
|
||||
[Face Landmark Model](#face-landmark-model). The model bears two important
|
||||
functions:
|
||||
|
||||
- **Defines metric units**: the scale of the canonical face model defines the
|
||||
metric units of the Metric 3D space. A metric unit used by the
|
||||
[default canonical face model](https://github.com/google/mediapipe/tree/master/mediapipe/modules/face_geometry/data/canonical_face_model.fbx)
|
||||
is a centimeter;
|
||||
- **Bridges static and runtime spaces**: the face pose transformation matrix
|
||||
is - in fact - a linear map from the canonical face model into the runtime
|
||||
face landmark set estimated on each frame. This way, virtual 3D assets
|
||||
modeled around the canonical face model can be aligned with a tracked face
|
||||
by applying the face pose transformation matrix to them.
|
||||
|
||||
### Components
|
||||
|
||||
#### Transform Pipeline
|
||||
|
||||
The **Transform Pipeline** is a key component, which is responsible for
|
||||
estimating the face transform objects within the Metric 3D space. On each frame,
|
||||
the following steps are executed in the given order:
|
||||
|
||||
- Face landmark screen coordinates are converted into the Metric 3D space
|
||||
coordinates;
|
||||
- Face pose transformation matrix is estimated as a rigid linear mapping from
|
||||
the canonical face metric landmark set into the runtime face metric landmark
|
||||
set in a way that minimizes a difference between the two;
|
||||
- A face mesh is created using the runtime face metric landmarks as the vertex
|
||||
positions (XYZ), while both the vertex texture coordinates (UV) and the
|
||||
triangular topology are inherited from the canonical face model.
|
||||
|
||||
The transform pipeline is implemented as a MediaPipe
|
||||
[calculator](https://github.com/google/mediapipe/tree/master/mediapipe/modules/face_geometry/geometry_pipeline_calculator.cc).
|
||||
For your convenience, this calculator is bundled together with corresponding
|
||||
metadata into a unified MediaPipe
|
||||
[subgraph](https://github.com/google/mediapipe/tree/master/mediapipe/modules/face_geometry/face_geometry_from_landmarks.pbtxt).
|
||||
The face transform format is defined as a Protocol Buffer
|
||||
[message](https://github.com/google/mediapipe/tree/master/mediapipe/modules/face_geometry/protos/face_geometry.proto).
|
||||
|
||||
#### Effect Renderer
|
||||
|
||||
The **Effect Renderer** is a component, which serves as a working example of a
|
||||
face effect renderer. It targets the *OpenGL ES 2.0* API to enable a real-time
|
||||
performance on mobile devices and supports the following rendering modes:
|
||||
|
||||
- **3D object rendering mode**: a virtual object is aligned with a detected
|
||||
face to emulate an object attached to the face (example: glasses);
|
||||
- **Face mesh rendering mode**: a texture is stretched on top of the face mesh
|
||||
surface to emulate a face painting technique.
|
||||
|
||||
In both rendering modes, the face mesh is first rendered as an occluder straight
|
||||
into the depth buffer. This step helps to create a more believable effect via
|
||||
hiding invisible elements behind the face surface.
|
||||
|
||||
The effect renderer is implemented as a MediaPipe
|
||||
[calculator](https://github.com/google/mediapipe/tree/master/mediapipe/modules/face_geometry/effect_renderer_calculator.cc).
|
||||
|
||||
| 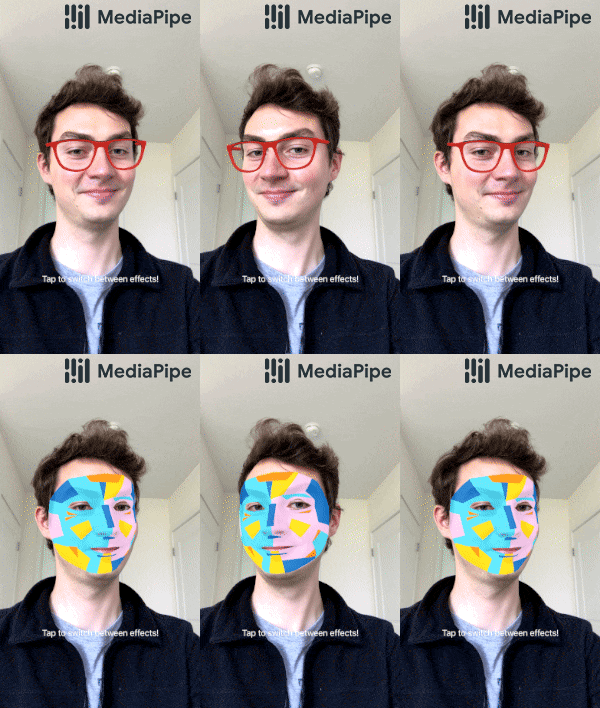 |
|
||||
| :---------------------------------------------------------------------: |
|
||||
| *Fig 5. An example of face effects rendered by the Face Transform Effect Renderer.* |
|
||||
|
||||
## Solution APIs
|
||||
|
||||
### Configuration Options
|
||||
|
||||
Naming style and availability may differ slightly across platforms/languages.
|
||||
|
||||
#### static_image_mode
|
||||
|
||||
If set to `false`, the solution treats the input images as a video stream. It
|
||||
will try to detect faces in the first input images, and upon a successful
|
||||
detection further localizes the face landmarks. In subsequent images, once all
|
||||
[max_num_faces](#max_num_faces) faces are detected and the corresponding face
|
||||
landmarks are localized, it simply tracks those landmarks without invoking
|
||||
another detection until it loses track of any of the faces. This reduces latency
|
||||
and is ideal for processing video frames. If set to `true`, face detection runs
|
||||
on every input image, ideal for processing a batch of static, possibly
|
||||
unrelated, images. Default to `false`.
|
||||
|
||||
#### max_num_faces
|
||||
|
||||
Maximum number of faces to detect. Default to `1`.
|
||||
|
||||
#### refine_landmarks
|
||||
|
||||
Whether to further refine the landmark coordinates around the eyes and lips, and
|
||||
output additional landmarks around the irises by applying the
|
||||
[Attention Mesh Model](#attention-mesh-model). Default to `false`.
|
||||
|
||||
#### min_detection_confidence
|
||||
|
||||
Minimum confidence value (`[0.0, 1.0]`) from the face detection model for the
|
||||
detection to be considered successful. Default to `0.5`.
|
||||
|
||||
#### min_tracking_confidence
|
||||
|
||||
Minimum confidence value (`[0.0, 1.0]`) from the landmark-tracking model for the
|
||||
face landmarks to be considered tracked successfully, or otherwise face
|
||||
detection will be invoked automatically on the next input image. Setting it to a
|
||||
higher value can increase robustness of the solution, at the expense of a higher
|
||||
latency. Ignored if [static_image_mode](#static_image_mode) is `true`, where
|
||||
face detection simply runs on every image. Default to `0.5`.
|
||||
|
||||
### Output
|
||||
|
||||
Naming style may differ slightly across platforms/languages.
|
||||
|
||||
#### multi_face_landmarks
|
||||
|
||||
Collection of detected/tracked faces, where each face is represented as a list
|
||||
of 468 face landmarks and each landmark is composed of `x`, `y` and `z`. `x` and
|
||||
`y` are normalized to `[0.0, 1.0]` by the image width and height respectively.
|
||||
`z` represents the landmark depth with the depth at center of the head being the
|
||||
origin, and the smaller the value the closer the landmark is to the camera. The
|
||||
magnitude of `z` uses roughly the same scale as `x`.
|
||||
|
||||
### Python Solution API
|
||||
|
||||
Please first follow general [instructions](../getting_started/python.md) to
|
||||
install MediaPipe Python package, then learn more in the companion
|
||||
[Python Colab](#resources) and the usage example below.
|
||||
|
||||
Supported configuration options:
|
||||
|
||||
* [static_image_mode](#static_image_mode)
|
||||
* [max_num_faces](#max_num_faces)
|
||||
* [refine_landmarks](#refine_landmarks)
|
||||
* [min_detection_confidence](#min_detection_confidence)
|
||||
* [min_tracking_confidence](#min_tracking_confidence)
|
||||
|
||||
```python
|
||||
import cv2
|
||||
import mediapipe as mp
|
||||
mp_drawing = mp.solutions.drawing_utils
|
||||
mp_drawing_styles = mp.solutions.drawing_styles
|
||||
mp_face_mesh = mp.solutions.face_mesh
|
||||
|
||||
# For static images:
|
||||
IMAGE_FILES = []
|
||||
drawing_spec = mp_drawing.DrawingSpec(thickness=1, circle_radius=1)
|
||||
with mp_face_mesh.FaceMesh(
|
||||
static_image_mode=True,
|
||||
max_num_faces=1,
|
||||
refine_landmarks=True,
|
||||
min_detection_confidence=0.5) as face_mesh:
|
||||
for idx, file in enumerate(IMAGE_FILES):
|
||||
image = cv2.imread(file)
|
||||
# Convert the BGR image to RGB before processing.
|
||||
results = face_mesh.process(cv2.cvtColor(image, cv2.COLOR_BGR2RGB))
|
||||
|
||||
# Print and draw face mesh landmarks on the image.
|
||||
if not results.multi_face_landmarks:
|
||||
continue
|
||||
annotated_image = image.copy()
|
||||
for face_landmarks in results.multi_face_landmarks:
|
||||
print('face_landmarks:', face_landmarks)
|
||||
mp_drawing.draw_landmarks(
|
||||
image=annotated_image,
|
||||
landmark_list=face_landmarks,
|
||||
connections=mp_face_mesh.FACEMESH_TESSELATION,
|
||||
landmark_drawing_spec=None,
|
||||
connection_drawing_spec=mp_drawing_styles
|
||||
.get_default_face_mesh_tesselation_style())
|
||||
mp_drawing.draw_landmarks(
|
||||
image=annotated_image,
|
||||
landmark_list=face_landmarks,
|
||||
connections=mp_face_mesh.FACEMESH_CONTOURS,
|
||||
landmark_drawing_spec=None,
|
||||
connection_drawing_spec=mp_drawing_styles
|
||||
.get_default_face_mesh_contours_style())
|
||||
mp_drawing.draw_landmarks(
|
||||
image=annotated_image,
|
||||
landmark_list=face_landmarks,
|
||||
connections=mp_face_mesh.FACEMESH_IRISES,
|
||||
landmark_drawing_spec=None,
|
||||
connection_drawing_spec=mp_drawing_styles
|
||||
.get_default_face_mesh_iris_connections_style())
|
||||
cv2.imwrite('/tmp/annotated_image' + str(idx) + '.png', annotated_image)
|
||||
|
||||
# For webcam input:
|
||||
drawing_spec = mp_drawing.DrawingSpec(thickness=1, circle_radius=1)
|
||||
cap = cv2.VideoCapture(0)
|
||||
with mp_face_mesh.FaceMesh(
|
||||
max_num_faces=1,
|
||||
refine_landmarks=True,
|
||||
min_detection_confidence=0.5,
|
||||
min_tracking_confidence=0.5) as face_mesh:
|
||||
while cap.isOpened():
|
||||
success, image = cap.read()
|
||||
if not success:
|
||||
print("Ignoring empty camera frame.")
|
||||
# If loading a video, use 'break' instead of 'continue'.
|
||||
continue
|
||||
|
||||
# To improve performance, optionally mark the image as not writeable to
|
||||
# pass by reference.
|
||||
image.flags.writeable = False
|
||||
image = cv2.cvtColor(image, cv2.COLOR_BGR2RGB)
|
||||
results = face_mesh.process(image)
|
||||
|
||||
# Draw the face mesh annotations on the image.
|
||||
image.flags.writeable = True
|
||||
image = cv2.cvtColor(image, cv2.COLOR_RGB2BGR)
|
||||
if results.multi_face_landmarks:
|
||||
for face_landmarks in results.multi_face_landmarks:
|
||||
mp_drawing.draw_landmarks(
|
||||
image=image,
|
||||
landmark_list=face_landmarks,
|
||||
connections=mp_face_mesh.FACEMESH_TESSELATION,
|
||||
landmark_drawing_spec=None,
|
||||
connection_drawing_spec=mp_drawing_styles
|
||||
.get_default_face_mesh_tesselation_style())
|
||||
mp_drawing.draw_landmarks(
|
||||
image=image,
|
||||
landmark_list=face_landmarks,
|
||||
connections=mp_face_mesh.FACEMESH_CONTOURS,
|
||||
landmark_drawing_spec=None,
|
||||
connection_drawing_spec=mp_drawing_styles
|
||||
.get_default_face_mesh_contours_style())
|
||||
mp_drawing.draw_landmarks(
|
||||
image=image,
|
||||
landmark_list=face_landmarks,
|
||||
connections=mp_face_mesh.FACEMESH_IRISES,
|
||||
landmark_drawing_spec=None,
|
||||
connection_drawing_spec=mp_drawing_styles
|
||||
.get_default_face_mesh_iris_connections_style())
|
||||
# Flip the image horizontally for a selfie-view display.
|
||||
cv2.imshow('MediaPipe Face Mesh', cv2.flip(image, 1))
|
||||
if cv2.waitKey(5) & 0xFF == 27:
|
||||
break
|
||||
cap.release()
|
||||
```
|
||||
|
||||
### JavaScript Solution API
|
||||
|
||||
Please first see general [introduction](../getting_started/javascript.md) on
|
||||
MediaPipe in JavaScript, then learn more in the companion [web demo](#resources)
|
||||
and the following usage example.
|
||||
|
||||
Supported configuration options:
|
||||
|
||||
* [maxNumFaces](#max_num_faces)
|
||||
* [refineLandmarks](#refine_landmarks)
|
||||
* [minDetectionConfidence](#min_detection_confidence)
|
||||
* [minTrackingConfidence](#min_tracking_confidence)
|
||||
|
||||
```html
|
||||
<!DOCTYPE html>
|
||||
<html>
|
||||
<head>
|
||||
<meta charset="utf-8">
|
||||
<script src="https://cdn.jsdelivr.net/npm/@mediapipe/camera_utils/camera_utils.js" crossorigin="anonymous"></script>
|
||||
<script src="https://cdn.jsdelivr.net/npm/@mediapipe/control_utils/control_utils.js" crossorigin="anonymous"></script>
|
||||
<script src="https://cdn.jsdelivr.net/npm/@mediapipe/drawing_utils/drawing_utils.js" crossorigin="anonymous"></script>
|
||||
<script src="https://cdn.jsdelivr.net/npm/@mediapipe/face_mesh/face_mesh.js" crossorigin="anonymous"></script>
|
||||
</head>
|
||||
|
||||
<body>
|
||||
<div class="container">
|
||||
<video class="input_video"></video>
|
||||
<canvas class="output_canvas" width="1280px" height="720px"></canvas>
|
||||
</div>
|
||||
</body>
|
||||
</html>
|
||||
```
|
||||
|
||||
```javascript
|
||||
<script type="module">
|
||||
const videoElement = document.getElementsByClassName('input_video')[0];
|
||||
const canvasElement = document.getElementsByClassName('output_canvas')[0];
|
||||
const canvasCtx = canvasElement.getContext('2d');
|
||||
|
||||
function onResults(results) {
|
||||
canvasCtx.save();
|
||||
canvasCtx.clearRect(0, 0, canvasElement.width, canvasElement.height);
|
||||
canvasCtx.drawImage(
|
||||
results.image, 0, 0, canvasElement.width, canvasElement.height);
|
||||
if (results.multiFaceLandmarks) {
|
||||
for (const landmarks of results.multiFaceLandmarks) {
|
||||
drawConnectors(canvasCtx, landmarks, FACEMESH_TESSELATION,
|
||||
{color: '#C0C0C070', lineWidth: 1});
|
||||
drawConnectors(canvasCtx, landmarks, FACEMESH_RIGHT_EYE, {color: '#FF3030'});
|
||||
drawConnectors(canvasCtx, landmarks, FACEMESH_RIGHT_EYEBROW, {color: '#FF3030'});
|
||||
drawConnectors(canvasCtx, landmarks, FACEMESH_RIGHT_IRIS, {color: '#FF3030'});
|
||||
drawConnectors(canvasCtx, landmarks, FACEMESH_LEFT_EYE, {color: '#30FF30'});
|
||||
drawConnectors(canvasCtx, landmarks, FACEMESH_LEFT_EYEBROW, {color: '#30FF30'});
|
||||
drawConnectors(canvasCtx, landmarks, FACEMESH_LEFT_IRIS, {color: '#30FF30'});
|
||||
drawConnectors(canvasCtx, landmarks, FACEMESH_FACE_OVAL, {color: '#E0E0E0'});
|
||||
drawConnectors(canvasCtx, landmarks, FACEMESH_LIPS, {color: '#E0E0E0'});
|
||||
}
|
||||
}
|
||||
canvasCtx.restore();
|
||||
}
|
||||
|
||||
const faceMesh = new FaceMesh({locateFile: (file) => {
|
||||
return `https://cdn.jsdelivr.net/npm/@mediapipe/face_mesh/${file}`;
|
||||
}});
|
||||
faceMesh.setOptions({
|
||||
maxNumFaces: 1,
|
||||
refineLandmarks: true,
|
||||
minDetectionConfidence: 0.5,
|
||||
minTrackingConfidence: 0.5
|
||||
});
|
||||
faceMesh.onResults(onResults);
|
||||
|
||||
const camera = new Camera(videoElement, {
|
||||
onFrame: async () => {
|
||||
await faceMesh.send({image: videoElement});
|
||||
},
|
||||
width: 1280,
|
||||
height: 720
|
||||
});
|
||||
camera.start();
|
||||
</script>
|
||||
```
|
||||
|
||||
### Android Solution API
|
||||
|
||||
Please first follow general
|
||||
[instructions](../getting_started/android_solutions.md) to add MediaPipe Gradle
|
||||
dependencies and try the Android Solution API in the companion
|
||||
[example Android Studio project](https://github.com/google/mediapipe/tree/master/mediapipe/examples/android/solutions/facemesh),
|
||||
and learn more in the usage example below.
|
||||
|
||||
Supported configuration options:
|
||||
|
||||
* [staticImageMode](#static_image_mode)
|
||||
* [maxNumFaces](#max_num_faces)
|
||||
* [refineLandmarks](#refine_landmarks)
|
||||
* runOnGpu: Run the pipeline and the model inference on GPU or CPU.
|
||||
|
||||
#### Camera Input
|
||||
|
||||
```java
|
||||
// For camera input and result rendering with OpenGL.
|
||||
FaceMeshOptions faceMeshOptions =
|
||||
FaceMeshOptions.builder()
|
||||
.setStaticImageMode(false)
|
||||
.setRefineLandmarks(true)
|
||||
.setMaxNumFaces(1)
|
||||
.setRunOnGpu(true).build();
|
||||
FaceMesh faceMesh = new FaceMesh(this, faceMeshOptions);
|
||||
faceMesh.setErrorListener(
|
||||
(message, e) -> Log.e(TAG, "MediaPipe Face Mesh error:" + message));
|
||||
|
||||
// Initializes a new CameraInput instance and connects it to MediaPipe Face Mesh Solution.
|
||||
CameraInput cameraInput = new CameraInput(this);
|
||||
cameraInput.setNewFrameListener(
|
||||
textureFrame -> faceMesh.send(textureFrame));
|
||||
|
||||
// Initializes a new GlSurfaceView with a ResultGlRenderer<FaceMeshResult> instance
|
||||
// that provides the interfaces to run user-defined OpenGL rendering code.
|
||||
// See mediapipe/examples/android/solutions/facemesh/src/main/java/com/google/mediapipe/examples/facemesh/FaceMeshResultGlRenderer.java
|
||||
// as an example.
|
||||
SolutionGlSurfaceView<FaceMeshResult> glSurfaceView =
|
||||
new SolutionGlSurfaceView<>(
|
||||
this, faceMesh.getGlContext(), faceMesh.getGlMajorVersion());
|
||||
glSurfaceView.setSolutionResultRenderer(new FaceMeshResultGlRenderer());
|
||||
glSurfaceView.setRenderInputImage(true);
|
||||
|
||||
faceMesh.setResultListener(
|
||||
faceMeshResult -> {
|
||||
NormalizedLandmark noseLandmark =
|
||||
result.multiFaceLandmarks().get(0).getLandmarkList().get(1);
|
||||
Log.i(
|
||||
TAG,
|
||||
String.format(
|
||||
"MediaPipe Face Mesh nose normalized coordinates (value range: [0, 1]): x=%f, y=%f",
|
||||
noseLandmark.getX(), noseLandmark.getY()));
|
||||
// Request GL rendering.
|
||||
glSurfaceView.setRenderData(faceMeshResult);
|
||||
glSurfaceView.requestRender();
|
||||
});
|
||||
|
||||
// The runnable to start camera after the GLSurfaceView is attached.
|
||||
glSurfaceView.post(
|
||||
() ->
|
||||
cameraInput.start(
|
||||
this,
|
||||
faceMesh.getGlContext(),
|
||||
CameraInput.CameraFacing.FRONT,
|
||||
glSurfaceView.getWidth(),
|
||||
glSurfaceView.getHeight()));
|
||||
```
|
||||
|
||||
#### Image Input
|
||||
|
||||
```java
|
||||
// For reading images from gallery and drawing the output in an ImageView.
|
||||
FaceMeshOptions faceMeshOptions =
|
||||
FaceMeshOptions.builder()
|
||||
.setStaticImageMode(true)
|
||||
.setRefineLandmarks(true)
|
||||
.setMaxNumFaces(1)
|
||||
.setRunOnGpu(true).build();
|
||||
FaceMesh faceMesh = new FaceMesh(this, faceMeshOptions);
|
||||
|
||||
// Connects MediaPipe Face Mesh Solution to the user-defined ImageView instance
|
||||
// that allows users to have the custom drawing of the output landmarks on it.
|
||||
// See mediapipe/examples/android/solutions/facemesh/src/main/java/com/google/mediapipe/examples/facemesh/FaceMeshResultImageView.java
|
||||
// as an example.
|
||||
FaceMeshResultImageView imageView = new FaceMeshResultImageView(this);
|
||||
faceMesh.setResultListener(
|
||||
faceMeshResult -> {
|
||||
int width = faceMeshResult.inputBitmap().getWidth();
|
||||
int height = faceMeshResult.inputBitmap().getHeight();
|
||||
NormalizedLandmark noseLandmark =
|
||||
result.multiFaceLandmarks().get(0).getLandmarkList().get(1);
|
||||
Log.i(
|
||||
TAG,
|
||||
String.format(
|
||||
"MediaPipe Face Mesh nose coordinates (pixel values): x=%f, y=%f",
|
||||
noseLandmark.getX() * width, noseLandmark.getY() * height));
|
||||
// Request canvas drawing.
|
||||
imageView.setFaceMeshResult(faceMeshResult);
|
||||
runOnUiThread(() -> imageView.update());
|
||||
});
|
||||
faceMesh.setErrorListener(
|
||||
(message, e) -> Log.e(TAG, "MediaPipe Face Mesh error:" + message));
|
||||
|
||||
// ActivityResultLauncher to get an image from the gallery as Bitmap.
|
||||
ActivityResultLauncher<Intent> imageGetter =
|
||||
registerForActivityResult(
|
||||
new ActivityResultContracts.StartActivityForResult(),
|
||||
result -> {
|
||||
Intent resultIntent = result.getData();
|
||||
if (resultIntent != null && result.getResultCode() == RESULT_OK) {
|
||||
Bitmap bitmap = null;
|
||||
try {
|
||||
bitmap =
|
||||
MediaStore.Images.Media.getBitmap(
|
||||
this.getContentResolver(), resultIntent.getData());
|
||||
// Please also rotate the Bitmap based on its orientation.
|
||||
} catch (IOException e) {
|
||||
Log.e(TAG, "Bitmap reading error:" + e);
|
||||
}
|
||||
if (bitmap != null) {
|
||||
faceMesh.send(bitmap);
|
||||
}
|
||||
}
|
||||
});
|
||||
Intent pickImageIntent = new Intent(Intent.ACTION_PICK);
|
||||
pickImageIntent.setDataAndType(MediaStore.Images.Media.INTERNAL_CONTENT_URI, "image/*");
|
||||
imageGetter.launch(pickImageIntent);
|
||||
```
|
||||
|
||||
#### Video Input
|
||||
|
||||
```java
|
||||
// For video input and result rendering with OpenGL.
|
||||
FaceMeshOptions faceMeshOptions =
|
||||
FaceMeshOptions.builder()
|
||||
.setStaticImageMode(false)
|
||||
.setRefineLandmarks(true)
|
||||
.setMaxNumFaces(1)
|
||||
.setRunOnGpu(true).build();
|
||||
FaceMesh faceMesh = new FaceMesh(this, faceMeshOptions);
|
||||
faceMesh.setErrorListener(
|
||||
(message, e) -> Log.e(TAG, "MediaPipe Face Mesh error:" + message));
|
||||
|
||||
// Initializes a new VideoInput instance and connects it to MediaPipe Face Mesh Solution.
|
||||
VideoInput videoInput = new VideoInput(this);
|
||||
videoInput.setNewFrameListener(
|
||||
textureFrame -> faceMesh.send(textureFrame));
|
||||
|
||||
// Initializes a new GlSurfaceView with a ResultGlRenderer<FaceMeshResult> instance
|
||||
// that provides the interfaces to run user-defined OpenGL rendering code.
|
||||
// See mediapipe/examples/android/solutions/facemesh/src/main/java/com/google/mediapipe/examples/facemesh/FaceMeshResultGlRenderer.java
|
||||
// as an example.
|
||||
SolutionGlSurfaceView<FaceMeshResult> glSurfaceView =
|
||||
new SolutionGlSurfaceView<>(
|
||||
this, faceMesh.getGlContext(), faceMesh.getGlMajorVersion());
|
||||
glSurfaceView.setSolutionResultRenderer(new FaceMeshResultGlRenderer());
|
||||
glSurfaceView.setRenderInputImage(true);
|
||||
|
||||
faceMesh.setResultListener(
|
||||
faceMeshResult -> {
|
||||
NormalizedLandmark noseLandmark =
|
||||
result.multiFaceLandmarks().get(0).getLandmarkList().get(1);
|
||||
Log.i(
|
||||
TAG,
|
||||
String.format(
|
||||
"MediaPipe Face Mesh nose normalized coordinates (value range: [0, 1]): x=%f, y=%f",
|
||||
noseLandmark.getX(), noseLandmark.getY()));
|
||||
// Request GL rendering.
|
||||
glSurfaceView.setRenderData(faceMeshResult);
|
||||
glSurfaceView.requestRender();
|
||||
});
|
||||
|
||||
ActivityResultLauncher<Intent> videoGetter =
|
||||
registerForActivityResult(
|
||||
new ActivityResultContracts.StartActivityForResult(),
|
||||
result -> {
|
||||
Intent resultIntent = result.getData();
|
||||
if (resultIntent != null) {
|
||||
if (result.getResultCode() == RESULT_OK) {
|
||||
glSurfaceView.post(
|
||||
() ->
|
||||
videoInput.start(
|
||||
this,
|
||||
resultIntent.getData(),
|
||||
faceMesh.getGlContext(),
|
||||
glSurfaceView.getWidth(),
|
||||
glSurfaceView.getHeight()));
|
||||
}
|
||||
}
|
||||
});
|
||||
Intent pickVideoIntent = new Intent(Intent.ACTION_PICK);
|
||||
pickVideoIntent.setDataAndType(MediaStore.Video.Media.INTERNAL_CONTENT_URI, "video/*");
|
||||
videoGetter.launch(pickVideoIntent);
|
||||
```
|
||||
|
||||
## Example Apps
|
||||
|
||||
Please first see general instructions for
|
||||
[Android](../getting_started/android.md), [iOS](../getting_started/ios.md) and
|
||||
[desktop](../getting_started/cpp.md) on how to build MediaPipe examples.
|
||||
|
||||
Note: To visualize a graph, copy the graph and paste it into
|
||||
[MediaPipe Visualizer](https://viz.mediapipe.dev/). For more information on how
|
||||
to visualize its associated subgraphs, please see
|
||||
[visualizer documentation](../tools/visualizer.md).
|
||||
|
||||
### Face Landmark Example
|
||||
|
||||
Face landmark example showcases real-time, cross-platform face landmark
|
||||
detection. For visual reference, please refer to *Fig. 2*.
|
||||
|
||||
#### Mobile
|
||||
|
||||
* Graph:
|
||||
[`mediapipe/graphs/face_mesh/face_mesh_mobile.pbtxt`](https://github.com/google/mediapipe/tree/master/mediapipe/graphs/face_mesh/face_mesh_mobile.pbtxt)
|
||||
* Android target:
|
||||
[(or download prebuilt ARM64 APK)](https://drive.google.com/open?id=1pUmd7CXCL_onYMbsZo5p91cH0oNnR4gi)
|
||||
[`mediapipe/examples/android/src/java/com/google/mediapipe/apps/facemeshgpu:facemeshgpu`](https://github.com/google/mediapipe/tree/master/mediapipe/examples/android/src/java/com/google/mediapipe/apps/facemeshgpu/BUILD)
|
||||
* iOS target:
|
||||
[`mediapipe/examples/ios/facemeshgpu:FaceMeshGpuApp`](http:/mediapipe/examples/ios/facemeshgpu/BUILD)
|
||||
|
||||
Tip: Maximum number of faces to detect/process is set to 1 by default. To change
|
||||
it, for Android modify `NUM_FACES` in
|
||||
[MainActivity.java](https://github.com/google/mediapipe/tree/master/mediapipe/examples/android/src/java/com/google/mediapipe/apps/facemeshgpu/MainActivity.java),
|
||||
and for iOS modify `kNumFaces` in
|
||||
[FaceMeshGpuViewController.mm](https://github.com/google/mediapipe/tree/master/mediapipe/examples/ios/facemeshgpu/FaceMeshGpuViewController.mm).
|
||||
|
||||
#### Desktop
|
||||
|
||||
* Running on CPU
|
||||
* Graph:
|
||||
[`mediapipe/graphs/face_mesh/face_mesh_desktop_live.pbtxt`](https://github.com/google/mediapipe/tree/master/mediapipe/graphs/face_mesh/face_mesh_desktop_live.pbtxt)
|
||||
* Target:
|
||||
[`mediapipe/examples/desktop/face_mesh:face_mesh_cpu`](https://github.com/google/mediapipe/tree/master/mediapipe/examples/desktop/face_mesh/BUILD)
|
||||
* Running on GPU
|
||||
* Graph:
|
||||
[`mediapipe/graphs/face_mesh/face_mesh_desktop_live_gpu.pbtxt`](https://github.com/google/mediapipe/tree/master/mediapipe/graphs/face_mesh/face_mesh_desktop_live_gpu.pbtxt)
|
||||
* Target:
|
||||
[`mediapipe/examples/desktop/face_mesh:face_mesh_gpu`](https://github.com/google/mediapipe/tree/master/mediapipe/examples/desktop/face_mesh/BUILD)
|
||||
|
||||
Tip: Maximum number of faces to detect/process is set to 1 by default. To change
|
||||
it, in the graph file modify the option of `ConstantSidePacketCalculator`.
|
||||
|
||||
### Face Effect Example
|
||||
|
||||
Face effect example showcases real-time mobile face effect application use case
|
||||
for the Face Mesh solution. To enable a better user experience, this example
|
||||
only works for a single face. For visual reference, please refer to *Fig. 4*.
|
||||
|
||||
#### Mobile
|
||||
|
||||
* Graph:
|
||||
[`mediapipe/graphs/face_effect/face_effect_gpu.pbtxt`](https://github.com/google/mediapipe/tree/master/mediapipe/graphs/face_effect/face_effect_gpu.pbtxt)
|
||||
* Android target:
|
||||
[(or download prebuilt ARM64 APK)](https://drive.google.com/file/d/1ccnaDnffEuIXriBZr2SK_Eu4FpO7K44s)
|
||||
[`mediapipe/examples/android/src/java/com/google/mediapipe/apps/faceeffect`](https://github.com/google/mediapipe/tree/master/mediapipe/examples/android/src/java/com/google/mediapipe/apps/faceeffect/BUILD)
|
||||
* iOS target:
|
||||
[`mediapipe/examples/ios/faceeffect`](http:/mediapipe/examples/ios/faceeffect/BUILD)
|
||||
|
||||
## Resources
|
||||
|
||||
* Google AI Blog:
|
||||
[Real-Time AR Self-Expression with Machine Learning](https://ai.googleblog.com/2019/03/real-time-ar-self-expression-with.html)
|
||||
* TensorFlow Blog:
|
||||
[Face and hand tracking in the browser with MediaPipe and TensorFlow.js](https://blog.tensorflow.org/2020/03/face-and-hand-tracking-in-browser-with-mediapipe-and-tensorflowjs.html)
|
||||
* Google Developers Blog:
|
||||
[MediaPipe 3D Face Transform](https://developers.googleblog.com/2020/09/mediapipe-3d-face-transform.html)
|
||||
* Paper:
|
||||
[Real-time Facial Surface Geometry from Monocular Video on Mobile GPUs](https://arxiv.org/abs/1907.06724)
|
||||
([poster](https://docs.google.com/presentation/d/1-LWwOMO9TzEVdrZ1CS1ndJzciRHfYDJfbSxH_ke_JRg/present?slide=id.g5986dd4b4c_4_212))
|
||||
* Canonical face model:
|
||||
[FBX](https://github.com/google/mediapipe/tree/master/mediapipe/modules/face_geometry/data/canonical_face_model.fbx),
|
||||
[OBJ](https://github.com/google/mediapipe/tree/master/mediapipe/modules/face_geometry/data/canonical_face_model.obj),
|
||||
[UV visualization](https://github.com/google/mediapipe/tree/master/mediapipe/modules/face_geometry/data/canonical_face_model_uv_visualization.png)
|
||||
* [Models and model cards](./models.md#face_mesh)
|
||||
* [Web demo](https://code.mediapipe.dev/codepen/face_mesh)
|
||||
* [Python Colab](https://mediapipe.page.link/face_mesh_py_colab)
|
||||
@@ -0,0 +1,69 @@
|
||||
---
|
||||
layout: default
|
||||
title: Hair Segmentation
|
||||
parent: Solutions
|
||||
nav_order: 8
|
||||
---
|
||||
|
||||
# MediaPipe Hair Segmentation
|
||||
{: .no_toc }
|
||||
|
||||
<details close markdown="block">
|
||||
<summary>
|
||||
Table of contents
|
||||
</summary>
|
||||
{: .text-delta }
|
||||
1. TOC
|
||||
{:toc}
|
||||
</details>
|
||||
---
|
||||
|
||||
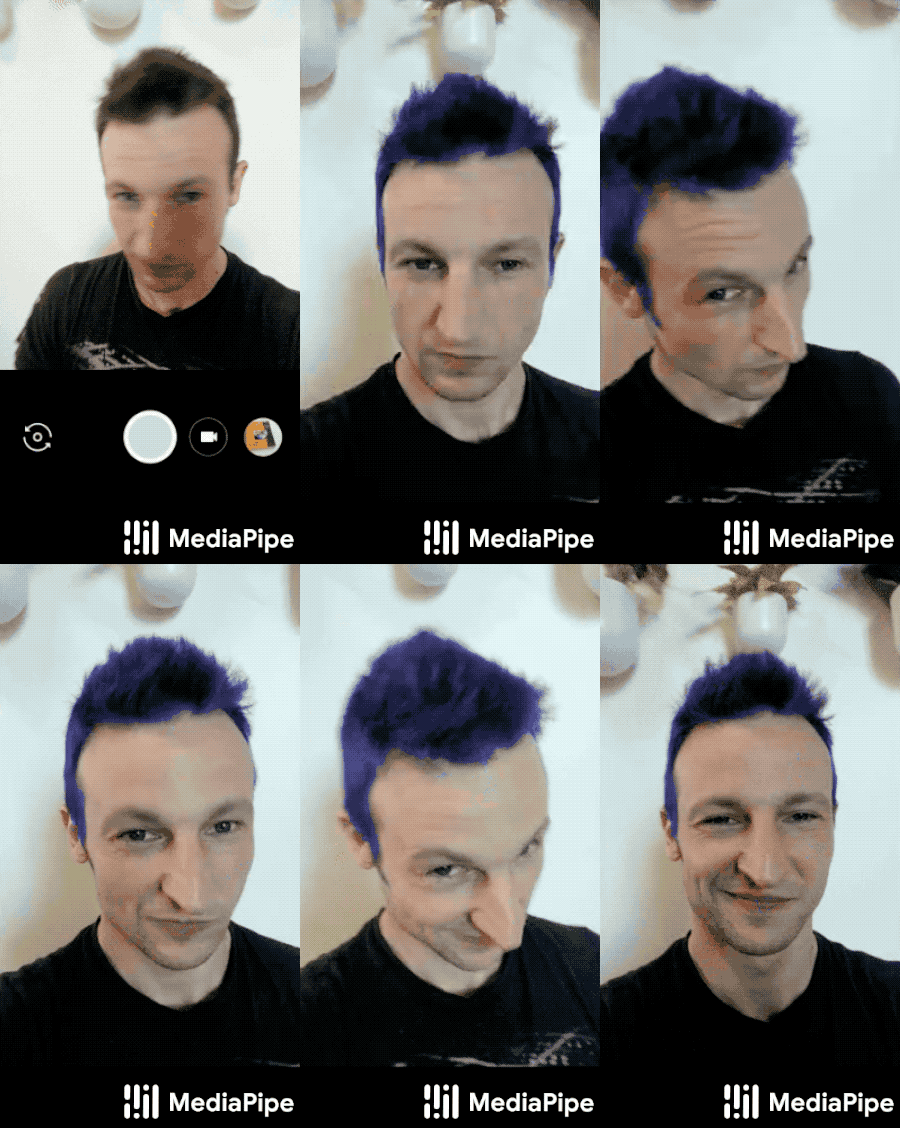
|
||||
|
||||
## Example Apps
|
||||
|
||||
Please first see general instructions for
|
||||
[Android](../getting_started/android.md), [iOS](../getting_started/ios.md) and
|
||||
[desktop](../getting_started/cpp.md) on how to build MediaPipe examples.
|
||||
|
||||
Note: To visualize a graph, copy the graph and paste it into
|
||||
[MediaPipe Visualizer](https://viz.mediapipe.dev/). For more information on how
|
||||
to visualize its associated subgraphs, please see
|
||||
[visualizer documentation](../tools/visualizer.md).
|
||||
|
||||
### Mobile
|
||||
|
||||
* Graph:
|
||||
[`mediapipe/graphs/hair_segmentation/hair_segmentation_mobile_gpu.pbtxt`](https://github.com/google/mediapipe/tree/master/mediapipe/graphs/hair_segmentation/hair_segmentation_mobile_gpu.pbtxt)
|
||||
* Android target:
|
||||
[(or download prebuilt ARM64 APK)](https://drive.google.com/open?id=1mmLtyL8IRfCUbqqu0-E-Hgjr_e6P3XAy)
|
||||
[`mediapipe/examples/android/src/java/com/google/mediapipe/apps/hairsegmentationgpu:hairsegmentationgpu`](https://github.com/google/mediapipe/tree/master/mediapipe/examples/android/src/java/com/google/mediapipe/apps/hairsegmentationgpu/BUILD)
|
||||
* iOS target: Not available
|
||||
|
||||
### Desktop
|
||||
|
||||
* Running on CPU: Not available
|
||||
* Running on GPU
|
||||
* Graph:
|
||||
[`mediapipe/graphs/hair_segmentation/hair_segmentation_mobile_gpu.pbtxt`](https://github.com/google/mediapipe/tree/master/mediapipe/graphs/hair_segmentation/hair_segmentation_mobile_gpu.pbtxt)
|
||||
* Target:
|
||||
[`mediapipe/examples/desktop/hair_segmentation:hair_segmentation_gpu`](https://github.com/google/mediapipe/tree/master/mediapipe/examples/desktop/hair_segmentation/BUILD)
|
||||
|
||||
### Web
|
||||
|
||||
Use [this link](https://viz.mediapipe.dev/demo/hair_segmentation) to load a demo
|
||||
in the MediaPipe Visualizer, and over there click the "Runner" icon in the top
|
||||
bar like shown below. The demos use your webcam video as input, which is
|
||||
processed all locally in real-time and never leaves your device. Please see
|
||||
[MediaPipe on the Web](https://developers.googleblog.com/2020/01/mediapipe-on-web.html)
|
||||
in Google Developers Blog for details.
|
||||
|
||||
|
||||
|
||||
## Resources
|
||||
|
||||
* Paper:
|
||||
[Real-time Hair segmentation and recoloring on Mobile GPUs](https://arxiv.org/abs/1907.06740)
|
||||
([presentation](https://drive.google.com/file/d/1C8WYlWdDRNtU1_pYBvkkG5Z5wqYqf0yj/view))
|
||||
([supplementary video](https://drive.google.com/file/d/1LPtM99Ch2ogyXYbDNpEqnUfhFq0TfLuf/view))
|
||||
* [Models and model cards](./models.md#hair_segmentation)
|
||||
@@ -0,0 +1,662 @@
|
||||
---
|
||||
layout: default
|
||||
title: Hands
|
||||
parent: Solutions
|
||||
nav_order: 4
|
||||
---
|
||||
|
||||
# MediaPipe Hands
|
||||
{: .no_toc }
|
||||
|
||||
<details close markdown="block">
|
||||
<summary>
|
||||
Table of contents
|
||||
</summary>
|
||||
{: .text-delta }
|
||||
1. TOC
|
||||
{:toc}
|
||||
</details>
|
||||
---
|
||||
|
||||
## Overview
|
||||
|
||||
The ability to perceive the shape and motion of hands can be a vital component
|
||||
in improving the user experience across a variety of technological domains and
|
||||
platforms. For example, it can form the basis for sign language understanding
|
||||
and hand gesture control, and can also enable the overlay of digital content and
|
||||
information on top of the physical world in augmented reality. While coming
|
||||
naturally to people, robust real-time hand perception is a decidedly challenging
|
||||
computer vision task, as hands often occlude themselves or each other (e.g.
|
||||
finger/palm occlusions and hand shakes) and lack high contrast patterns.
|
||||
|
||||
MediaPipe Hands is a high-fidelity hand and finger tracking solution. It employs
|
||||
machine learning (ML) to infer 21 3D landmarks of a hand from just a single
|
||||
frame. Whereas current state-of-the-art approaches rely primarily on powerful
|
||||
desktop environments for inference, our method achieves real-time performance on
|
||||
a mobile phone, and even scales to multiple hands. We hope that providing this
|
||||
hand perception functionality to the wider research and development community
|
||||
will result in an emergence of creative use cases, stimulating new applications
|
||||
and new research avenues.
|
||||
|
||||
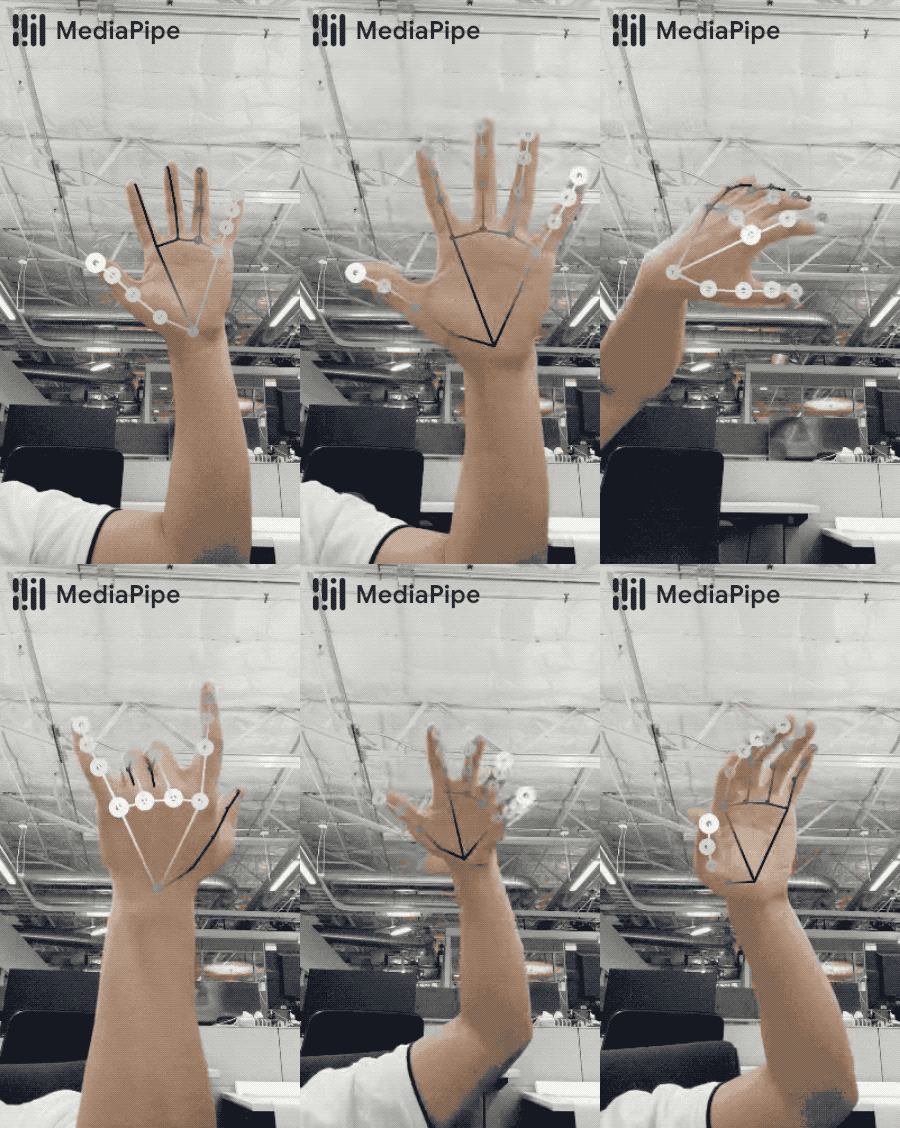 |
|
||||
:------------------------------------------------------------------------------------: |
|
||||
*Fig 1. Tracked 3D hand landmarks are represented by dots in different shades, with the brighter ones denoting landmarks closer to the camera.* |
|
||||
|
||||
## ML Pipeline
|
||||
|
||||
MediaPipe Hands utilizes an ML pipeline consisting of multiple models working
|
||||
together: A palm detection model that operates on the full image and returns an
|
||||
oriented hand bounding box. A hand landmark model that operates on the cropped
|
||||
image region defined by the palm detector and returns high-fidelity 3D hand
|
||||
keypoints. This strategy is similar to that employed in our
|
||||
[MediaPipe Face Mesh](./face_mesh.md) solution, which uses a face detector
|
||||
together with a face landmark model.
|
||||
|
||||
Providing the accurately cropped hand image to the hand landmark model
|
||||
drastically reduces the need for data augmentation (e.g. rotations, translation
|
||||
and scale) and instead allows the network to dedicate most of its capacity
|
||||
towards coordinate prediction accuracy. In addition, in our pipeline the crops
|
||||
can also be generated based on the hand landmarks identified in the previous
|
||||
frame, and only when the landmark model could no longer identify hand presence
|
||||
is palm detection invoked to relocalize the hand.
|
||||
|
||||
The pipeline is implemented as a MediaPipe
|
||||
[graph](https://github.com/google/mediapipe/tree/master/mediapipe/graphs/hand_tracking/hand_tracking_mobile.pbtxt)
|
||||
that uses a
|
||||
[hand landmark tracking subgraph](https://github.com/google/mediapipe/tree/master/mediapipe/modules/hand_landmark/hand_landmark_tracking_gpu.pbtxt)
|
||||
from the
|
||||
[hand landmark module](https://github.com/google/mediapipe/tree/master/mediapipe/modules/hand_landmark),
|
||||
and renders using a dedicated
|
||||
[hand renderer subgraph](https://github.com/google/mediapipe/tree/master/mediapipe/graphs/hand_tracking/subgraphs/hand_renderer_gpu.pbtxt).
|
||||
The
|
||||
[hand landmark tracking subgraph](https://github.com/google/mediapipe/tree/master/mediapipe/modules/hand_landmark/hand_landmark_tracking_gpu.pbtxt)
|
||||
internally uses a
|
||||
[hand landmark subgraph](https://github.com/google/mediapipe/tree/master/mediapipe/modules/hand_landmark/hand_landmark_gpu.pbtxt)
|
||||
from the same module and a
|
||||
[palm detection subgraph](https://github.com/google/mediapipe/tree/master/mediapipe/modules/palm_detection/palm_detection_gpu.pbtxt)
|
||||
from the
|
||||
[palm detection module](https://github.com/google/mediapipe/tree/master/mediapipe/modules/palm_detection).
|
||||
|
||||
Note: To visualize a graph, copy the graph and paste it into
|
||||
[MediaPipe Visualizer](https://viz.mediapipe.dev/). For more information on how
|
||||
to visualize its associated subgraphs, please see
|
||||
[visualizer documentation](../tools/visualizer.md).
|
||||
|
||||
## Models
|
||||
|
||||
### Palm Detection Model
|
||||
|
||||
To detect initial hand locations, we designed a
|
||||
[single-shot detector](https://arxiv.org/abs/1512.02325) model optimized for
|
||||
mobile real-time uses in a manner similar to the face detection model in
|
||||
[MediaPipe Face Mesh](./face_mesh.md). Detecting hands is a decidedly complex
|
||||
task: our
|
||||
[lite model](https://storage.googleapis.com/mediapipe-assets/palm_detection_lite.tflite)
|
||||
and
|
||||
[full model](https://storage.googleapis.com/mediapipe-assets/palm_detection_full.tflite)
|
||||
have to work across a variety of hand sizes with a large scale span (~20x)
|
||||
relative to the image frame and be able to detect occluded and self-occluded
|
||||
hands. Whereas faces have high contrast patterns, e.g., in the eye and mouth
|
||||
region, the lack of such features in hands makes it comparatively difficult to
|
||||
detect them reliably from their visual features alone. Instead, providing
|
||||
additional context, like arm, body, or person features, aids accurate hand
|
||||
localization.
|
||||
|
||||
Our method addresses the above challenges using different strategies. First, we
|
||||
train a palm detector instead of a hand detector, since estimating bounding
|
||||
boxes of rigid objects like palms and fists is significantly simpler than
|
||||
detecting hands with articulated fingers. In addition, as palms are smaller
|
||||
objects, the non-maximum suppression algorithm works well even for two-hand
|
||||
self-occlusion cases, like handshakes. Moreover, palms can be modelled using
|
||||
square bounding boxes (anchors in ML terminology) ignoring other aspect ratios,
|
||||
and therefore reducing the number of anchors by a factor of 3-5. Second, an
|
||||
encoder-decoder feature extractor is used for bigger scene context awareness
|
||||
even for small objects (similar to the RetinaNet approach). Lastly, we minimize
|
||||
the focal loss during training to support a large amount of anchors resulting
|
||||
from the high scale variance.
|
||||
|
||||
With the above techniques, we achieve an average precision of 95.7% in palm
|
||||
detection. Using a regular cross entropy loss and no decoder gives a baseline of
|
||||
just 86.22%.
|
||||
|
||||
### Hand Landmark Model
|
||||
|
||||
After the palm detection over the whole image our subsequent hand landmark
|
||||
[model](https://storage.googleapis.com/mediapipe-assets/hand_landmark_full.tflite)
|
||||
performs precise keypoint localization of 21 3D hand-knuckle coordinates inside
|
||||
the detected hand regions via regression, that is direct coordinate prediction.
|
||||
The model learns a consistent internal hand pose representation and is robust
|
||||
even to partially visible hands and self-occlusions.
|
||||
|
||||
To obtain ground truth data, we have manually annotated ~30K real-world images
|
||||
with 21 3D coordinates, as shown below (we take Z-value from image depth map, if
|
||||
it exists per corresponding coordinate). To better cover the possible hand poses
|
||||
and provide additional supervision on the nature of hand geometry, we also
|
||||
render a high-quality synthetic hand model over various backgrounds and map it
|
||||
to the corresponding 3D coordinates.
|
||||
|
||||
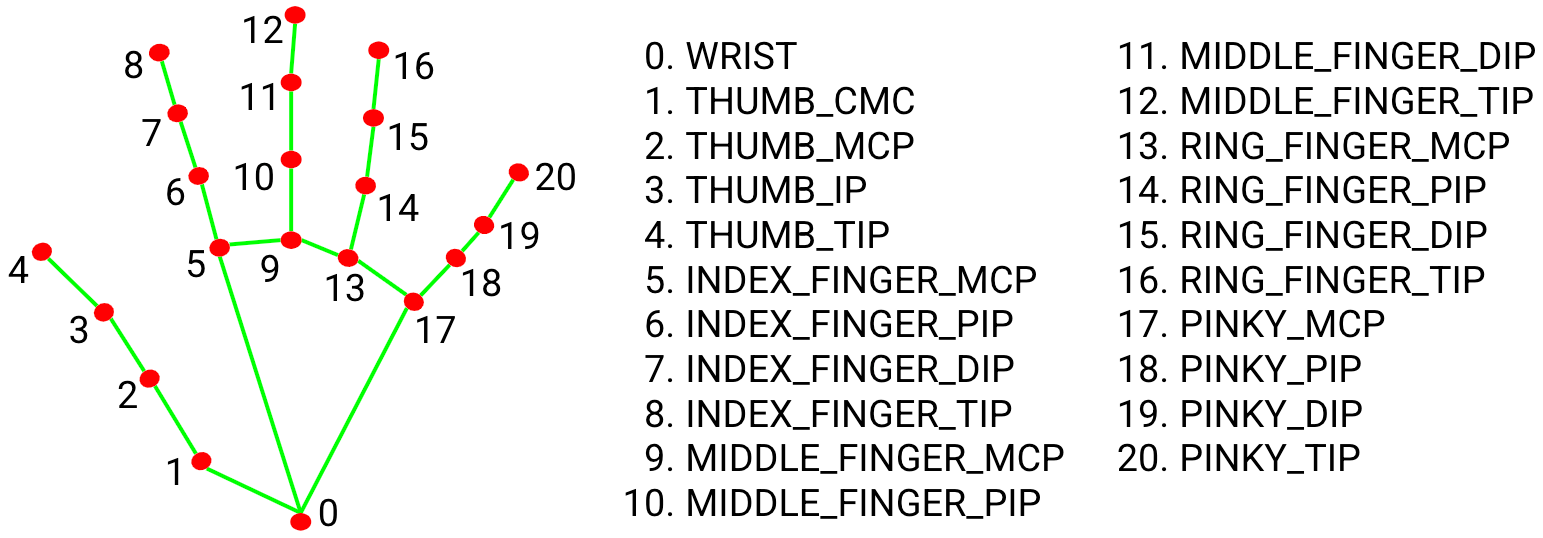 |
|
||||
:--------------------------------------------------------: |
|
||||
*Fig 2. 21 hand landmarks.* |
|
||||
|
||||
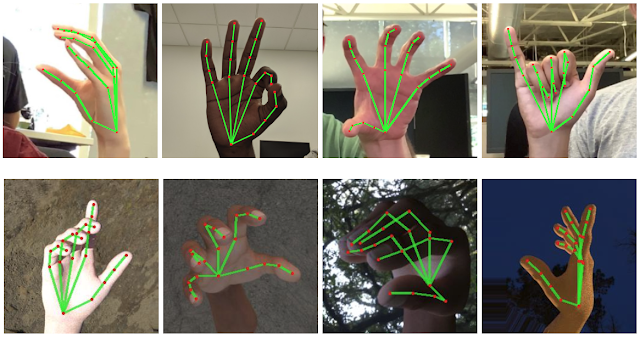 |
|
||||
:-------------------------------------------------------------------------: |
|
||||
*Fig 3. Top: Aligned hand crops passed to the tracking network with ground truth annotation. Bottom: Rendered synthetic hand images with ground truth annotation.* |
|
||||
|
||||
## Solution APIs
|
||||
|
||||
### Configuration Options
|
||||
|
||||
Naming style and availability may differ slightly across platforms/languages.
|
||||
|
||||
#### static_image_mode
|
||||
|
||||
If set to `false`, the solution treats the input images as a video stream. It
|
||||
will try to detect hands in the first input images, and upon a successful
|
||||
detection further localizes the hand landmarks. In subsequent images, once all
|
||||
[max_num_hands](#max_num_hands) hands are detected and the corresponding hand
|
||||
landmarks are localized, it simply tracks those landmarks without invoking
|
||||
another detection until it loses track of any of the hands. This reduces latency
|
||||
and is ideal for processing video frames. If set to `true`, hand detection runs
|
||||
on every input image, ideal for processing a batch of static, possibly
|
||||
unrelated, images. Default to `false`.
|
||||
|
||||
#### max_num_hands
|
||||
|
||||
Maximum number of hands to detect. Default to `2`.
|
||||
|
||||
#### model_complexity
|
||||
|
||||
Complexity of the hand landmark model: `0` or `1`. Landmark accuracy as well as
|
||||
inference latency generally go up with the model complexity. Default to `1`.
|
||||
|
||||
#### min_detection_confidence
|
||||
|
||||
Minimum confidence value (`[0.0, 1.0]`) from the hand detection model for the
|
||||
detection to be considered successful. Default to `0.5`.
|
||||
|
||||
#### min_tracking_confidence:
|
||||
|
||||
Minimum confidence value (`[0.0, 1.0]`) from the landmark-tracking model for the
|
||||
hand landmarks to be considered tracked successfully, or otherwise hand
|
||||
detection will be invoked automatically on the next input image. Setting it to a
|
||||
higher value can increase robustness of the solution, at the expense of a higher
|
||||
latency. Ignored if [static_image_mode](#static_image_mode) is `true`, where
|
||||
hand detection simply runs on every image. Default to `0.5`.
|
||||
|
||||
### Output
|
||||
|
||||
Naming style may differ slightly across platforms/languages.
|
||||
|
||||
#### multi_hand_landmarks
|
||||
|
||||
Collection of detected/tracked hands, where each hand is represented as a list
|
||||
of 21 hand landmarks and each landmark is composed of `x`, `y` and `z`. `x` and
|
||||
`y` are normalized to `[0.0, 1.0]` by the image width and height respectively.
|
||||
`z` represents the landmark depth with the depth at the wrist being the origin,
|
||||
and the smaller the value the closer the landmark is to the camera. The
|
||||
magnitude of `z` uses roughly the same scale as `x`.
|
||||
|
||||
#### multi_hand_world_landmarks
|
||||
|
||||
Collection of detected/tracked hands, where each hand is represented as a list
|
||||
of 21 hand landmarks in world coordinates. Each landmark is composed of `x`, `y`
|
||||
and `z`: real-world 3D coordinates in meters with the origin at the hand's
|
||||
approximate geometric center.
|
||||
|
||||
#### multi_handedness
|
||||
|
||||
Collection of handedness of the detected/tracked hands (i.e. is it a left or
|
||||
right hand). Each hand is composed of `label` and `score`. `label` is a string
|
||||
of value either `"Left"` or `"Right"`. `score` is the estimated probability of
|
||||
the predicted handedness and is always greater than or equal to `0.5` (and the
|
||||
opposite handedness has an estimated probability of `1 - score`).
|
||||
|
||||
Note that handedness is determined assuming the input image is mirrored, i.e.,
|
||||
taken with a front-facing/selfie camera with images flipped horizontally. If it
|
||||
is not the case, please swap the handedness output in the application.
|
||||
|
||||
### Python Solution API
|
||||
|
||||
Please first follow general [instructions](../getting_started/python.md) to
|
||||
install MediaPipe Python package, then learn more in the companion
|
||||
[Python Colab](#resources) and the usage example below.
|
||||
|
||||
Supported configuration options:
|
||||
|
||||
* [static_image_mode](#static_image_mode)
|
||||
* [max_num_hands](#max_num_hands)
|
||||
* [model_complexity](#model_complexity)
|
||||
* [min_detection_confidence](#min_detection_confidence)
|
||||
* [min_tracking_confidence](#min_tracking_confidence)
|
||||
|
||||
```python
|
||||
import cv2
|
||||
import mediapipe as mp
|
||||
mp_drawing = mp.solutions.drawing_utils
|
||||
mp_drawing_styles = mp.solutions.drawing_styles
|
||||
mp_hands = mp.solutions.hands
|
||||
|
||||
# For static images:
|
||||
IMAGE_FILES = []
|
||||
with mp_hands.Hands(
|
||||
static_image_mode=True,
|
||||
max_num_hands=2,
|
||||
min_detection_confidence=0.5) as hands:
|
||||
for idx, file in enumerate(IMAGE_FILES):
|
||||
# Read an image, flip it around y-axis for correct handedness output (see
|
||||
# above).
|
||||
image = cv2.flip(cv2.imread(file), 1)
|
||||
# Convert the BGR image to RGB before processing.
|
||||
results = hands.process(cv2.cvtColor(image, cv2.COLOR_BGR2RGB))
|
||||
|
||||
# Print handedness and draw hand landmarks on the image.
|
||||
print('Handedness:', results.multi_handedness)
|
||||
if not results.multi_hand_landmarks:
|
||||
continue
|
||||
image_height, image_width, _ = image.shape
|
||||
annotated_image = image.copy()
|
||||
for hand_landmarks in results.multi_hand_landmarks:
|
||||
print('hand_landmarks:', hand_landmarks)
|
||||
print(
|
||||
f'Index finger tip coordinates: (',
|
||||
f'{hand_landmarks.landmark[mp_hands.HandLandmark.INDEX_FINGER_TIP].x * image_width}, '
|
||||
f'{hand_landmarks.landmark[mp_hands.HandLandmark.INDEX_FINGER_TIP].y * image_height})'
|
||||
)
|
||||
mp_drawing.draw_landmarks(
|
||||
annotated_image,
|
||||
hand_landmarks,
|
||||
mp_hands.HAND_CONNECTIONS,
|
||||
mp_drawing_styles.get_default_hand_landmarks_style(),
|
||||
mp_drawing_styles.get_default_hand_connections_style())
|
||||
cv2.imwrite(
|
||||
'/tmp/annotated_image' + str(idx) + '.png', cv2.flip(annotated_image, 1))
|
||||
# Draw hand world landmarks.
|
||||
if not results.multi_hand_world_landmarks:
|
||||
continue
|
||||
for hand_world_landmarks in results.multi_hand_world_landmarks:
|
||||
mp_drawing.plot_landmarks(
|
||||
hand_world_landmarks, mp_hands.HAND_CONNECTIONS, azimuth=5)
|
||||
|
||||
# For webcam input:
|
||||
cap = cv2.VideoCapture(0)
|
||||
with mp_hands.Hands(
|
||||
model_complexity=0,
|
||||
min_detection_confidence=0.5,
|
||||
min_tracking_confidence=0.5) as hands:
|
||||
while cap.isOpened():
|
||||
success, image = cap.read()
|
||||
if not success:
|
||||
print("Ignoring empty camera frame.")
|
||||
# If loading a video, use 'break' instead of 'continue'.
|
||||
continue
|
||||
|
||||
# To improve performance, optionally mark the image as not writeable to
|
||||
# pass by reference.
|
||||
image.flags.writeable = False
|
||||
image = cv2.cvtColor(image, cv2.COLOR_BGR2RGB)
|
||||
results = hands.process(image)
|
||||
|
||||
# Draw the hand annotations on the image.
|
||||
image.flags.writeable = True
|
||||
image = cv2.cvtColor(image, cv2.COLOR_RGB2BGR)
|
||||
if results.multi_hand_landmarks:
|
||||
for hand_landmarks in results.multi_hand_landmarks:
|
||||
mp_drawing.draw_landmarks(
|
||||
image,
|
||||
hand_landmarks,
|
||||
mp_hands.HAND_CONNECTIONS,
|
||||
mp_drawing_styles.get_default_hand_landmarks_style(),
|
||||
mp_drawing_styles.get_default_hand_connections_style())
|
||||
# Flip the image horizontally for a selfie-view display.
|
||||
cv2.imshow('MediaPipe Hands', cv2.flip(image, 1))
|
||||
if cv2.waitKey(5) & 0xFF == 27:
|
||||
break
|
||||
cap.release()
|
||||
```
|
||||
|
||||
### JavaScript Solution API
|
||||
|
||||
Please first see general [introduction](../getting_started/javascript.md) on
|
||||
MediaPipe in JavaScript, then learn more in the companion [web demo](#resources)
|
||||
and a [fun application], and the following usage example.
|
||||
|
||||
Supported configuration options:
|
||||
|
||||
* [maxNumHands](#max_num_hands)
|
||||
* [modelComplexity](#model_complexity)
|
||||
* [minDetectionConfidence](#min_detection_confidence)
|
||||
* [minTrackingConfidence](#min_tracking_confidence)
|
||||
|
||||
```html
|
||||
<!DOCTYPE html>
|
||||
<html>
|
||||
<head>
|
||||
<meta charset="utf-8">
|
||||
<script src="https://cdn.jsdelivr.net/npm/@mediapipe/camera_utils/camera_utils.js" crossorigin="anonymous"></script>
|
||||
<script src="https://cdn.jsdelivr.net/npm/@mediapipe/control_utils/control_utils.js" crossorigin="anonymous"></script>
|
||||
<script src="https://cdn.jsdelivr.net/npm/@mediapipe/drawing_utils/drawing_utils.js" crossorigin="anonymous"></script>
|
||||
<script src="https://cdn.jsdelivr.net/npm/@mediapipe/hands/hands.js" crossorigin="anonymous"></script>
|
||||
</head>
|
||||
|
||||
<body>
|
||||
<div class="container">
|
||||
<video class="input_video"></video>
|
||||
<canvas class="output_canvas" width="1280px" height="720px"></canvas>
|
||||
</div>
|
||||
</body>
|
||||
</html>
|
||||
```
|
||||
|
||||
```javascript
|
||||
<script type="module">
|
||||
const videoElement = document.getElementsByClassName('input_video')[0];
|
||||
const canvasElement = document.getElementsByClassName('output_canvas')[0];
|
||||
const canvasCtx = canvasElement.getContext('2d');
|
||||
|
||||
function onResults(results) {
|
||||
canvasCtx.save();
|
||||
canvasCtx.clearRect(0, 0, canvasElement.width, canvasElement.height);
|
||||
canvasCtx.drawImage(
|
||||
results.image, 0, 0, canvasElement.width, canvasElement.height);
|
||||
if (results.multiHandLandmarks) {
|
||||
for (const landmarks of results.multiHandLandmarks) {
|
||||
drawConnectors(canvasCtx, landmarks, HAND_CONNECTIONS,
|
||||
{color: '#00FF00', lineWidth: 5});
|
||||
drawLandmarks(canvasCtx, landmarks, {color: '#FF0000', lineWidth: 2});
|
||||
}
|
||||
}
|
||||
canvasCtx.restore();
|
||||
}
|
||||
|
||||
const hands = new Hands({locateFile: (file) => {
|
||||
return `https://cdn.jsdelivr.net/npm/@mediapipe/hands/${file}`;
|
||||
}});
|
||||
hands.setOptions({
|
||||
maxNumHands: 2,
|
||||
modelComplexity: 1,
|
||||
minDetectionConfidence: 0.5,
|
||||
minTrackingConfidence: 0.5
|
||||
});
|
||||
hands.onResults(onResults);
|
||||
|
||||
const camera = new Camera(videoElement, {
|
||||
onFrame: async () => {
|
||||
await hands.send({image: videoElement});
|
||||
},
|
||||
width: 1280,
|
||||
height: 720
|
||||
});
|
||||
camera.start();
|
||||
</script>
|
||||
```
|
||||
|
||||
### Android Solution API
|
||||
|
||||
Please first follow general
|
||||
[instructions](../getting_started/android_solutions.md) to add MediaPipe Gradle
|
||||
dependencies and try the Android Solution API in the companion
|
||||
[example Android Studio project](https://github.com/google/mediapipe/tree/master/mediapipe/examples/android/solutions/hands),
|
||||
and learn more in the usage example below.
|
||||
|
||||
Supported configuration options:
|
||||
|
||||
* [staticImageMode](#static_image_mode)
|
||||
* [maxNumHands](#max_num_hands)
|
||||
* runOnGpu: Run the pipeline and the model inference on GPU or CPU.
|
||||
|
||||
#### Camera Input
|
||||
|
||||
```java
|
||||
// For camera input and result rendering with OpenGL.
|
||||
HandsOptions handsOptions =
|
||||
HandsOptions.builder()
|
||||
.setStaticImageMode(false)
|
||||
.setMaxNumHands(2)
|
||||
.setRunOnGpu(true).build();
|
||||
Hands hands = new Hands(this, handsOptions);
|
||||
hands.setErrorListener(
|
||||
(message, e) -> Log.e(TAG, "MediaPipe Hands error:" + message));
|
||||
|
||||
// Initializes a new CameraInput instance and connects it to MediaPipe Hands Solution.
|
||||
CameraInput cameraInput = new CameraInput(this);
|
||||
cameraInput.setNewFrameListener(
|
||||
textureFrame -> hands.send(textureFrame));
|
||||
|
||||
// Initializes a new GlSurfaceView with a ResultGlRenderer<HandsResult> instance
|
||||
// that provides the interfaces to run user-defined OpenGL rendering code.
|
||||
// See mediapipe/examples/android/solutions/hands/src/main/java/com/google/mediapipe/examples/hands/HandsResultGlRenderer.java
|
||||
// as an example.
|
||||
SolutionGlSurfaceView<HandsResult> glSurfaceView =
|
||||
new SolutionGlSurfaceView<>(
|
||||
this, hands.getGlContext(), hands.getGlMajorVersion());
|
||||
glSurfaceView.setSolutionResultRenderer(new HandsResultGlRenderer());
|
||||
glSurfaceView.setRenderInputImage(true);
|
||||
|
||||
hands.setResultListener(
|
||||
handsResult -> {
|
||||
if (result.multiHandLandmarks().isEmpty()) {
|
||||
return;
|
||||
}
|
||||
NormalizedLandmark wristLandmark =
|
||||
handsResult.multiHandLandmarks().get(0).getLandmarkList().get(HandLandmark.WRIST);
|
||||
Log.i(
|
||||
TAG,
|
||||
String.format(
|
||||
"MediaPipe Hand wrist normalized coordinates (value range: [0, 1]): x=%f, y=%f",
|
||||
wristLandmark.getX(), wristLandmark.getY()));
|
||||
// Request GL rendering.
|
||||
glSurfaceView.setRenderData(handsResult);
|
||||
glSurfaceView.requestRender();
|
||||
});
|
||||
|
||||
// The runnable to start camera after the GLSurfaceView is attached.
|
||||
glSurfaceView.post(
|
||||
() ->
|
||||
cameraInput.start(
|
||||
this,
|
||||
hands.getGlContext(),
|
||||
CameraInput.CameraFacing.FRONT,
|
||||
glSurfaceView.getWidth(),
|
||||
glSurfaceView.getHeight()));
|
||||
```
|
||||
|
||||
#### Image Input
|
||||
|
||||
```java
|
||||
// For reading images from gallery and drawing the output in an ImageView.
|
||||
HandsOptions handsOptions =
|
||||
HandsOptions.builder()
|
||||
.setStaticImageMode(true)
|
||||
.setMaxNumHands(2)
|
||||
.setRunOnGpu(true).build();
|
||||
Hands hands = new Hands(this, handsOptions);
|
||||
|
||||
// Connects MediaPipe Hands Solution to the user-defined ImageView instance that
|
||||
// allows users to have the custom drawing of the output landmarks on it.
|
||||
// See mediapipe/examples/android/solutions/hands/src/main/java/com/google/mediapipe/examples/hands/HandsResultImageView.java
|
||||
// as an example.
|
||||
HandsResultImageView imageView = new HandsResultImageView(this);
|
||||
hands.setResultListener(
|
||||
handsResult -> {
|
||||
if (result.multiHandLandmarks().isEmpty()) {
|
||||
return;
|
||||
}
|
||||
int width = handsResult.inputBitmap().getWidth();
|
||||
int height = handsResult.inputBitmap().getHeight();
|
||||
NormalizedLandmark wristLandmark =
|
||||
handsResult.multiHandLandmarks().get(0).getLandmarkList().get(HandLandmark.WRIST);
|
||||
Log.i(
|
||||
TAG,
|
||||
String.format(
|
||||
"MediaPipe Hand wrist coordinates (pixel values): x=%f, y=%f",
|
||||
wristLandmark.getX() * width, wristLandmark.getY() * height));
|
||||
// Request canvas drawing.
|
||||
imageView.setHandsResult(handsResult);
|
||||
runOnUiThread(() -> imageView.update());
|
||||
});
|
||||
hands.setErrorListener(
|
||||
(message, e) -> Log.e(TAG, "MediaPipe Hands error:" + message));
|
||||
|
||||
// ActivityResultLauncher to get an image from the gallery as Bitmap.
|
||||
ActivityResultLauncher<Intent> imageGetter =
|
||||
registerForActivityResult(
|
||||
new ActivityResultContracts.StartActivityForResult(),
|
||||
result -> {
|
||||
Intent resultIntent = result.getData();
|
||||
if (resultIntent != null && result.getResultCode() == RESULT_OK) {
|
||||
Bitmap bitmap = null;
|
||||
try {
|
||||
bitmap =
|
||||
MediaStore.Images.Media.getBitmap(
|
||||
this.getContentResolver(), resultIntent.getData());
|
||||
// Please also rotate the Bitmap based on its orientation.
|
||||
} catch (IOException e) {
|
||||
Log.e(TAG, "Bitmap reading error:" + e);
|
||||
}
|
||||
if (bitmap != null) {
|
||||
hands.send(bitmap);
|
||||
}
|
||||
}
|
||||
});
|
||||
Intent pickImageIntent = new Intent(Intent.ACTION_PICK);
|
||||
pickImageIntent.setDataAndType(MediaStore.Images.Media.INTERNAL_CONTENT_URI, "image/*");
|
||||
imageGetter.launch(pickImageIntent);
|
||||
```
|
||||
|
||||
#### Video Input
|
||||
|
||||
```java
|
||||
// For video input and result rendering with OpenGL.
|
||||
HandsOptions handsOptions =
|
||||
HandsOptions.builder()
|
||||
.setStaticImageMode(false)
|
||||
.setMaxNumHands(2)
|
||||
.setRunOnGpu(true).build();
|
||||
Hands hands = new Hands(this, handsOptions);
|
||||
hands.setErrorListener(
|
||||
(message, e) -> Log.e(TAG, "MediaPipe Hands error:" + message));
|
||||
|
||||
// Initializes a new VideoInput instance and connects it to MediaPipe Hands Solution.
|
||||
VideoInput videoInput = new VideoInput(this);
|
||||
videoInput.setNewFrameListener(
|
||||
textureFrame -> hands.send(textureFrame));
|
||||
|
||||
// Initializes a new GlSurfaceView with a ResultGlRenderer<HandsResult> instance
|
||||
// that provides the interfaces to run user-defined OpenGL rendering code.
|
||||
// See mediapipe/examples/android/solutions/hands/src/main/java/com/google/mediapipe/examples/hands/HandsResultGlRenderer.java
|
||||
// as an example.
|
||||
SolutionGlSurfaceView<HandsResult> glSurfaceView =
|
||||
new SolutionGlSurfaceView<>(
|
||||
this, hands.getGlContext(), hands.getGlMajorVersion());
|
||||
glSurfaceView.setSolutionResultRenderer(new HandsResultGlRenderer());
|
||||
glSurfaceView.setRenderInputImage(true);
|
||||
|
||||
hands.setResultListener(
|
||||
handsResult -> {
|
||||
if (result.multiHandLandmarks().isEmpty()) {
|
||||
return;
|
||||
}
|
||||
NormalizedLandmark wristLandmark =
|
||||
handsResult.multiHandLandmarks().get(0).getLandmarkList().get(HandLandmark.WRIST);
|
||||
Log.i(
|
||||
TAG,
|
||||
String.format(
|
||||
"MediaPipe Hand wrist normalized coordinates (value range: [0, 1]): x=%f, y=%f",
|
||||
wristLandmark.getX(), wristLandmark.getY()));
|
||||
// Request GL rendering.
|
||||
glSurfaceView.setRenderData(handsResult);
|
||||
glSurfaceView.requestRender();
|
||||
});
|
||||
|
||||
ActivityResultLauncher<Intent> videoGetter =
|
||||
registerForActivityResult(
|
||||
new ActivityResultContracts.StartActivityForResult(),
|
||||
result -> {
|
||||
Intent resultIntent = result.getData();
|
||||
if (resultIntent != null) {
|
||||
if (result.getResultCode() == RESULT_OK) {
|
||||
glSurfaceView.post(
|
||||
() ->
|
||||
videoInput.start(
|
||||
this,
|
||||
resultIntent.getData(),
|
||||
hands.getGlContext(),
|
||||
glSurfaceView.getWidth(),
|
||||
glSurfaceView.getHeight()));
|
||||
}
|
||||
}
|
||||
});
|
||||
Intent pickVideoIntent = new Intent(Intent.ACTION_PICK);
|
||||
pickVideoIntent.setDataAndType(MediaStore.Video.Media.INTERNAL_CONTENT_URI, "video/*");
|
||||
videoGetter.launch(pickVideoIntent);
|
||||
```
|
||||
|
||||
## Example Apps
|
||||
|
||||
Please first see general instructions for
|
||||
[Android](../getting_started/android.md), [iOS](../getting_started/ios.md) and
|
||||
[desktop](../getting_started/cpp.md) on how to build MediaPipe examples.
|
||||
|
||||
Note: To visualize a graph, copy the graph and paste it into
|
||||
[MediaPipe Visualizer](https://viz.mediapipe.dev/). For more information on how
|
||||
to visualize its associated subgraphs, please see
|
||||
[visualizer documentation](../tools/visualizer.md).
|
||||
|
||||
### Mobile
|
||||
|
||||
#### Main Example
|
||||
|
||||
* Graph:
|
||||
[`mediapipe/graphs/hand_tracking/hand_tracking_mobile.pbtxt`](https://github.com/google/mediapipe/tree/master/mediapipe/graphs/hand_tracking/hand_tracking_mobile.pbtxt)
|
||||
* Android target:
|
||||
[(or download prebuilt ARM64 APK)](https://drive.google.com/open?id=1uCjS0y0O0dTDItsMh8x2cf4-l3uHW1vE)
|
||||
[`mediapipe/examples/android/src/java/com/google/mediapipe/apps/handtrackinggpu:handtrackinggpu`](https://github.com/google/mediapipe/tree/master/mediapipe/examples/android/src/java/com/google/mediapipe/apps/handtrackinggpu/BUILD)
|
||||
* iOS target:
|
||||
[`mediapipe/examples/ios/handtrackinggpu:HandTrackingGpuApp`](https://github.com/google/mediapipe/tree/master/mediapipe/examples/ios/handtrackinggpu/BUILD)
|
||||
|
||||
Tip: Maximum number of hands to detect/process is set to 2 by default. To change
|
||||
it, for Android modify `NUM_HANDS` in
|
||||
[MainActivity.java](https://github.com/google/mediapipe/tree/master/mediapipe/examples/android/src/java/com/google/mediapipe/apps/handtrackinggpu/MainActivity.java),
|
||||
and for iOS modify `kNumHands` in
|
||||
[HandTrackingViewController.mm](https://github.com/google/mediapipe/tree/master/mediapipe/examples/ios/handtrackinggpu/HandTrackingViewController.mm).
|
||||
|
||||
#### Palm/Hand Detection Only (no landmarks)
|
||||
|
||||
* Graph:
|
||||
[`mediapipe/graphs/hand_tracking/hand_detection_mobile.pbtxt`](https://github.com/google/mediapipe/tree/master/mediapipe/graphs/hand_tracking/hand_detection_mobile.pbtxt)
|
||||
* Android target:
|
||||
[(or download prebuilt ARM64 APK)](https://drive.google.com/open?id=1qUlTtH7Ydg-wl_H6VVL8vueu2UCTu37E)
|
||||
[`mediapipe/examples/android/src/java/com/google/mediapipe/apps/handdetectiongpu:handdetectiongpu`](https://github.com/google/mediapipe/tree/master/mediapipe/examples/android/src/java/com/google/mediapipe/apps/handdetectiongpu/BUILD)
|
||||
* iOS target:
|
||||
[`mediapipe/examples/ios/handdetectiongpu:HandDetectionGpuApp`](https://github.com/google/mediapipe/tree/master/mediapipe/examples/ios/handdetectiongpu/BUILD)
|
||||
|
||||
### Desktop
|
||||
|
||||
* Running on CPU
|
||||
* Graph:
|
||||
[`mediapipe/graphs/hand_tracking/hand_tracking_desktop_live.pbtxt`](https://github.com/google/mediapipe/tree/master/mediapipe/graphs/hand_tracking/hand_tracking_desktop_live.pbtxt)
|
||||
* Target:
|
||||
[`mediapipe/examples/desktop/hand_tracking:hand_tracking_cpu`](https://github.com/google/mediapipe/tree/master/mediapipe/examples/desktop/hand_tracking/BUILD)
|
||||
* Running on GPU
|
||||
* Graph:
|
||||
[`mediapipe/graphs/hand_tracking/hand_tracking_desktop_live_gpu.pbtxt`](https://github.com/google/mediapipe/tree/master/mediapipe/graphs/hand_tracking/hand_tracking_desktop_gpu.pbtxt)
|
||||
* Target:
|
||||
[`mediapipe/examples/desktop/hand_tracking:hand_tracking_gpu`](https://github.com/google/mediapipe/tree/master/mediapipe/examples/desktop/hand_tracking/BUILD)
|
||||
|
||||
Tip: Maximum number of hands to detect/process is set to 2 by default. To change
|
||||
it, in the graph file modify the option of `ConstantSidePacketCalculator`.
|
||||
|
||||
## Resources
|
||||
|
||||
* Google AI Blog:
|
||||
[On-Device, Real-Time Hand Tracking with MediaPipe](https://ai.googleblog.com/2019/08/on-device-real-time-hand-tracking-with.html)
|
||||
* TensorFlow Blog:
|
||||
[Face and hand tracking in the browser with MediaPipe and TensorFlow.js](https://blog.tensorflow.org/2020/03/face-and-hand-tracking-in-browser-with-mediapipe-and-tensorflowjs.html)
|
||||
* Paper:
|
||||
[MediaPipe Hands: On-device Real-time Hand Tracking](https://arxiv.org/abs/2006.10214)
|
||||
([presentation](https://www.youtube.com/watch?v=I-UOrvxxXEk))
|
||||
* [Models and model cards](./models.md#hands)
|
||||
* [Web demo](https://code.mediapipe.dev/codepen/hands)
|
||||
* [Fun application](https://code.mediapipe.dev/codepen/defrost)
|
||||
* [Python Colab](https://mediapipe.page.link/hands_py_colab)
|
||||
@@ -0,0 +1,492 @@
|
||||
---
|
||||
layout: default
|
||||
title: Holistic
|
||||
parent: Solutions
|
||||
nav_order: 6
|
||||
---
|
||||
|
||||
# MediaPipe Holistic
|
||||
{: .no_toc }
|
||||
|
||||
<details close markdown="block">
|
||||
<summary>
|
||||
Table of contents
|
||||
</summary>
|
||||
{: .text-delta }
|
||||
1. TOC
|
||||
{:toc}
|
||||
</details>
|
||||
---
|
||||
|
||||
## Overview
|
||||
|
||||
Live perception of simultaneous [human pose](./pose.md),
|
||||
[face landmarks](./face_mesh.md), and [hand tracking](./hands.md) in real-time
|
||||
on mobile devices can enable various modern life applications: fitness and sport
|
||||
analysis, gesture control and sign language recognition, augmented reality
|
||||
try-on and effects. MediaPipe already offers fast and accurate, yet separate,
|
||||
solutions for these tasks. Combining them all in real-time into a semantically
|
||||
consistent end-to-end solution is a uniquely difficult problem requiring
|
||||
simultaneous inference of multiple, dependent neural networks.
|
||||
|
||||
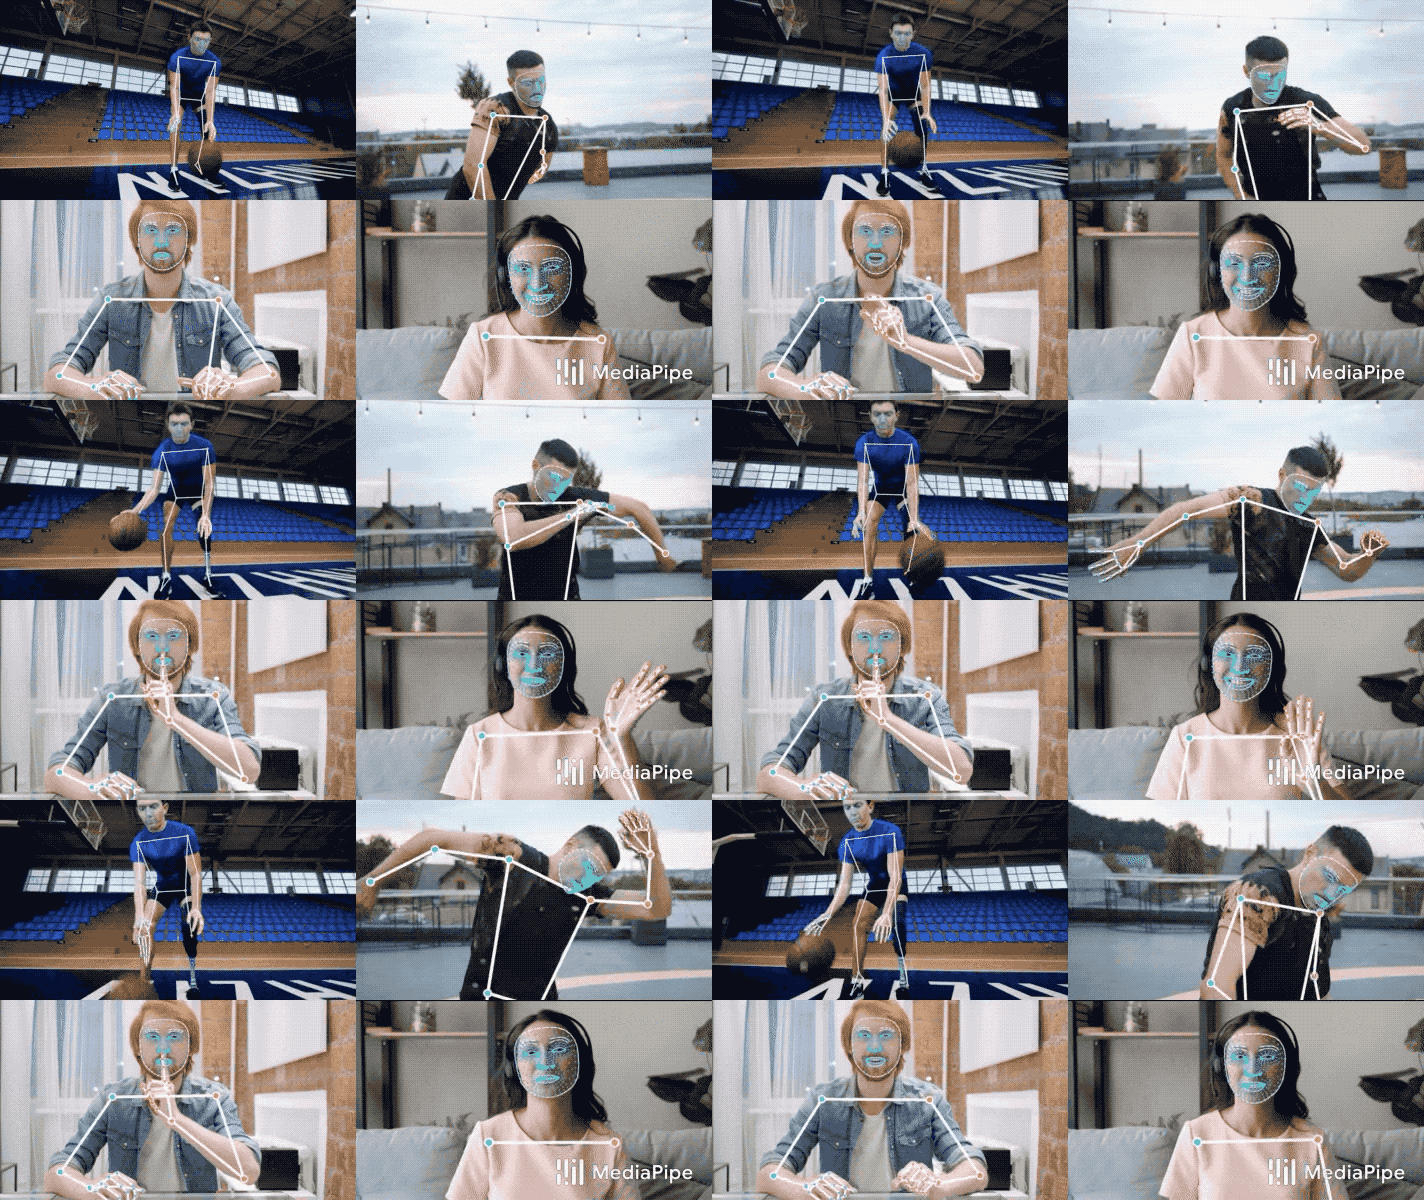 |
|
||||
:----------------------------------------------------------------------------------------------------: |
|
||||
*Fig 1. Example of MediaPipe Holistic.* |
|
||||
|
||||
## ML Pipeline
|
||||
|
||||
The MediaPipe Holistic pipeline integrates separate models for
|
||||
[pose](./pose.md), [face](./face_mesh.md) and [hand](./hands.md) components,
|
||||
each of which are optimized for their particular domain. However, because of
|
||||
their different specializations, the input to one component is not well-suited
|
||||
for the others. The pose estimation model, for example, takes a lower, fixed
|
||||
resolution video frame (256x256) as input. But if one were to crop the hand and
|
||||
face regions from that image to pass to their respective models, the image
|
||||
resolution would be too low for accurate articulation. Therefore, we designed
|
||||
MediaPipe Holistic as a multi-stage pipeline, which treats the different regions
|
||||
using a region appropriate image resolution.
|
||||
|
||||
First, we estimate the human pose (top of Fig 2) with [BlazePose](./pose.md)’s
|
||||
pose detector and subsequent landmark model. Then, using the inferred pose
|
||||
landmarks we derive three regions of interest (ROI) crops for each hand (2x) and
|
||||
the face, and employ a re-crop model to improve the ROI. We then crop the
|
||||
full-resolution input frame to these ROIs and apply task-specific face and hand
|
||||
models to estimate their corresponding landmarks. Finally, we merge all
|
||||
landmarks with those of the pose model to yield the full 540+ landmarks.
|
||||
|
||||
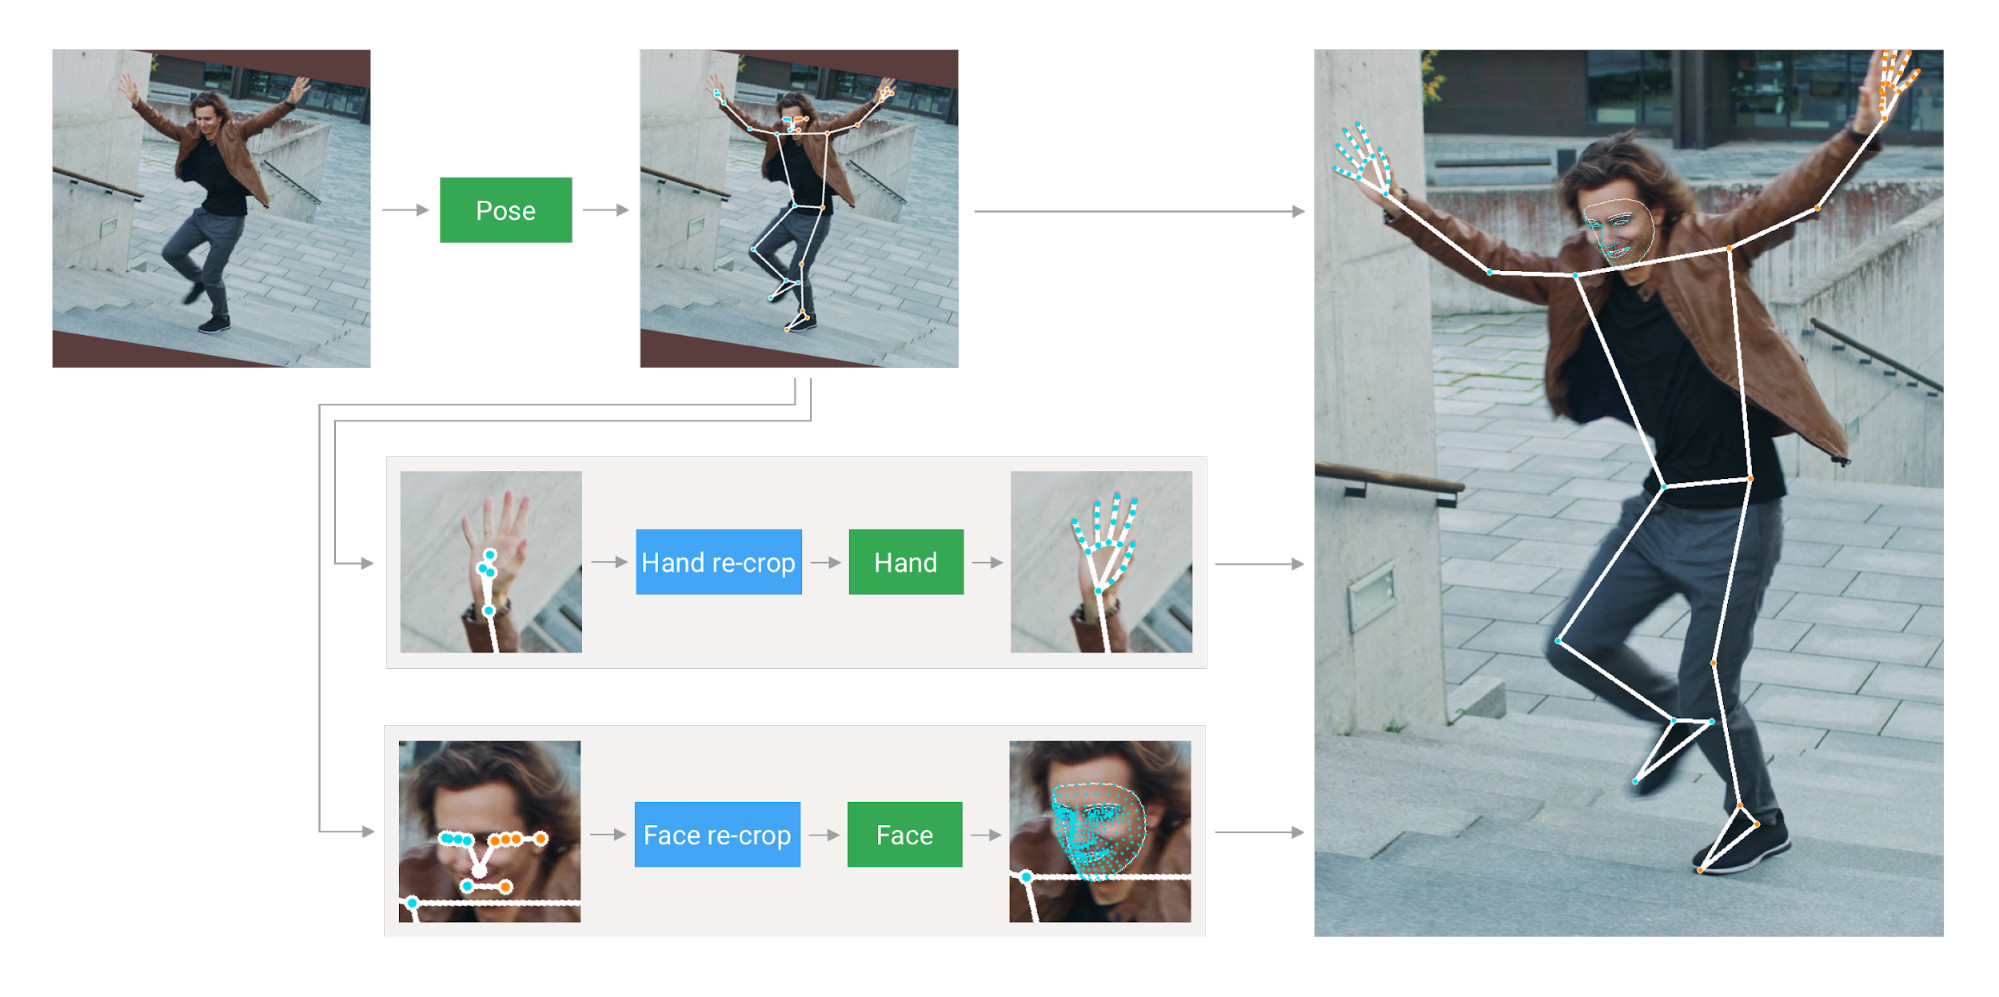 |
|
||||
:------------------------------------------------------------------------------: |
|
||||
*Fig 2. MediaPipe Holistic Pipeline Overview.* |
|
||||
|
||||
To streamline the identification of ROIs for face and hands, we utilize a
|
||||
tracking approach similar to the one we use for standalone
|
||||
[face](./face_mesh.md) and [hand](./hands.md) pipelines. It assumes that the
|
||||
object doesn't move significantly between frames and uses estimation from the
|
||||
previous frame as a guide to the object region on the current one. However,
|
||||
during fast movements, the tracker can lose the target, which requires the
|
||||
detector to re-localize it in the image. MediaPipe Holistic uses
|
||||
[pose](./pose.md) prediction (on every frame) as an additional ROI prior to
|
||||
reduce the response time of the pipeline when reacting to fast movements. This
|
||||
also enables the model to retain semantic consistency across the body and its
|
||||
parts by preventing a mixup between left and right hands or body parts of one
|
||||
person in the frame with another.
|
||||
|
||||
In addition, the resolution of the input frame to the pose model is low enough
|
||||
that the resulting ROIs for face and hands are still too inaccurate to guide the
|
||||
re-cropping of those regions, which require a precise input crop to remain
|
||||
lightweight. To close this accuracy gap we use lightweight face and hand re-crop
|
||||
models that play the role of
|
||||
[spatial transformers](https://arxiv.org/abs/1506.02025) and cost only ~10% of
|
||||
corresponding model's inference time.
|
||||
|
||||
The pipeline is implemented as a MediaPipe
|
||||
[graph](https://github.com/google/mediapipe/tree/master/mediapipe/graphs/holistic_tracking/holistic_tracking_gpu.pbtxt)
|
||||
that uses a
|
||||
[holistic landmark subgraph](https://github.com/google/mediapipe/tree/master/mediapipe/modules/holistic_landmark/holistic_landmark_gpu.pbtxt)
|
||||
from the
|
||||
[holistic landmark module](https://github.com/google/mediapipe/tree/master/mediapipe/modules/holistic_landmark)
|
||||
and renders using a dedicated
|
||||
[holistic renderer subgraph](https://github.com/google/mediapipe/tree/master/mediapipe/graphs/holistic_tracking/holistic_tracking_to_render_data.pbtxt).
|
||||
The
|
||||
[holistic landmark subgraph](https://github.com/google/mediapipe/tree/master/mediapipe/modules/holistic_landmark/holistic_landmark_gpu.pbtxt)
|
||||
internally uses a
|
||||
[pose landmark module](https://github.com/google/mediapipe/tree/master/mediapipe/modules/pose_landmark)
|
||||
,
|
||||
[hand landmark module](https://github.com/google/mediapipe/tree/master/mediapipe/modules/hand_landmark)
|
||||
and
|
||||
[face landmark module](https://github.com/google/mediapipe/tree/master/mediapipe/modules/face_landmark/).
|
||||
Please check them for implementation details.
|
||||
|
||||
Note: To visualize a graph, copy the graph and paste it into
|
||||
[MediaPipe Visualizer](https://viz.mediapipe.dev/). For more information on how
|
||||
to visualize its associated subgraphs, please see
|
||||
[visualizer documentation](../tools/visualizer.md).
|
||||
|
||||
## Models
|
||||
|
||||
### Landmark Models
|
||||
|
||||
MediaPipe Holistic utilizes the pose, face and hand landmark models in
|
||||
[MediaPipe Pose](./pose.md), [MediaPipe Face Mesh](./face_mesh.md) and
|
||||
[MediaPipe Hands](./hands.md) respectively to generate a total of 543 landmarks
|
||||
(33 pose landmarks, 468 face landmarks, and 21 hand landmarks per hand).
|
||||
|
||||
### Hand Recrop Model
|
||||
|
||||
For cases when the accuracy of the pose model is low enough that the resulting
|
||||
ROIs for hands are still too inaccurate we run the additional lightweight hand
|
||||
re-crop model that play the role of
|
||||
[spatial transformer](https://arxiv.org/abs/1506.02025) and cost only ~10% of
|
||||
hand model inference time.
|
||||
|
||||
## Solution APIs
|
||||
|
||||
### Cross-platform Configuration Options
|
||||
|
||||
Naming style and availability may differ slightly across platforms/languages.
|
||||
|
||||
#### static_image_mode
|
||||
|
||||
If set to `false`, the solution treats the input images as a video stream. It
|
||||
will try to detect the most prominent person in the very first images, and upon
|
||||
a successful detection further localizes the pose and other landmarks. In
|
||||
subsequent images, it then simply tracks those landmarks without invoking
|
||||
another detection until it loses track, on reducing computation and latency. If
|
||||
set to `true`, person detection runs every input image, ideal for processing a
|
||||
batch of static, possibly unrelated, images. Default to `false`.
|
||||
|
||||
#### model_complexity
|
||||
|
||||
Complexity of the pose landmark model: `0`, `1` or `2`. Landmark accuracy as
|
||||
well as inference latency generally go up with the model complexity. Default to
|
||||
`1`.
|
||||
|
||||
#### smooth_landmarks
|
||||
|
||||
If set to `true`, the solution filters pose landmarks across different input
|
||||
images to reduce jitter, but ignored if [static_image_mode](#static_image_mode)
|
||||
is also set to `true`. Default to `true`.
|
||||
|
||||
#### enable_segmentation
|
||||
|
||||
If set to `true`, in addition to the pose, face and hand landmarks the solution
|
||||
also generates the segmentation mask. Default to `false`.
|
||||
|
||||
#### smooth_segmentation
|
||||
|
||||
If set to `true`, the solution filters segmentation masks across different input
|
||||
images to reduce jitter. Ignored if [enable_segmentation](#enable_segmentation)
|
||||
is `false` or [static_image_mode](#static_image_mode) is `true`. Default to
|
||||
`true`.
|
||||
|
||||
#### refine_face_landmarks
|
||||
|
||||
Whether to further refine the landmark coordinates around the eyes and lips, and
|
||||
output additional landmarks around the irises. Default to `false`.
|
||||
|
||||
#### min_detection_confidence
|
||||
|
||||
Minimum confidence value (`[0.0, 1.0]`) from the person-detection model for the
|
||||
detection to be considered successful. Default to `0.5`.
|
||||
|
||||
#### min_tracking_confidence
|
||||
|
||||
Minimum confidence value (`[0.0, 1.0]`) from the landmark-tracking model for the
|
||||
pose landmarks to be considered tracked successfully, or otherwise person
|
||||
detection will be invoked automatically on the next input image. Setting it to a
|
||||
higher value can increase robustness of the solution, at the expense of a higher
|
||||
latency. Ignored if [static_image_mode](#static_image_mode) is `true`, where
|
||||
person detection simply runs on every image. Default to `0.5`.
|
||||
|
||||
### Output
|
||||
|
||||
Naming style may differ slightly across platforms/languages.
|
||||
|
||||
#### pose_landmarks
|
||||
|
||||
A list of pose landmarks. Each landmark consists of the following:
|
||||
|
||||
* `x` and `y`: Landmark coordinates normalized to `[0.0, 1.0]` by the image
|
||||
width and height respectively.
|
||||
* `z`: Should be discarded as currently the model is not fully trained to
|
||||
predict depth, but this is something on the roadmap.
|
||||
* `visibility`: A value in `[0.0, 1.0]` indicating the likelihood of the
|
||||
landmark being visible (present and not occluded) in the image.
|
||||
|
||||
#### pose_world_landmarks
|
||||
|
||||
Another list of pose landmarks in world coordinates. Each landmark consists of
|
||||
the following:
|
||||
|
||||
* `x`, `y` and `z`: Real-world 3D coordinates in meters with the origin at the
|
||||
center between hips.
|
||||
* `visibility`: Identical to that defined in the corresponding
|
||||
[pose_landmarks](#pose_landmarks).
|
||||
|
||||
#### face_landmarks
|
||||
|
||||
A list of 468 face landmarks. Each landmark consists of `x`, `y` and `z`. `x`
|
||||
and `y` are normalized to `[0.0, 1.0]` by the image width and height
|
||||
respectively. `z` represents the landmark depth with the depth at center of the
|
||||
head being the origin, and the smaller the value the closer the landmark is to
|
||||
the camera. The magnitude of `z` uses roughly the same scale as `x`.
|
||||
|
||||
#### left_hand_landmarks
|
||||
|
||||
A list of 21 hand landmarks on the left hand. Each landmark consists of `x`, `y`
|
||||
and `z`. `x` and `y` are normalized to `[0.0, 1.0]` by the image width and
|
||||
height respectively. `z` represents the landmark depth with the depth at the
|
||||
wrist being the origin, and the smaller the value the closer the landmark is to
|
||||
the camera. The magnitude of `z` uses roughly the same scale as `x`.
|
||||
|
||||
#### right_hand_landmarks
|
||||
|
||||
A list of 21 hand landmarks on the right hand, in the same representation as
|
||||
[left_hand_landmarks](#left_hand_landmarks).
|
||||
|
||||
#### segmentation_mask
|
||||
|
||||
The output segmentation mask, predicted only when
|
||||
[enable_segmentation](#enable_segmentation) is set to `true`. The mask has the
|
||||
same width and height as the input image, and contains values in `[0.0, 1.0]`
|
||||
where `1.0` and `0.0` indicate high certainty of a "human" and "background"
|
||||
pixel respectively. Please refer to the platform-specific usage examples below
|
||||
for usage details.
|
||||
|
||||
### Python Solution API
|
||||
|
||||
Please first follow general [instructions](../getting_started/python.md) to
|
||||
install MediaPipe Python package, then learn more in the companion
|
||||
[Python Colab](#resources) and the usage example below.
|
||||
|
||||
Supported configuration options:
|
||||
|
||||
* [static_image_mode](#static_image_mode)
|
||||
* [model_complexity](#model_complexity)
|
||||
* [smooth_landmarks](#smooth_landmarks)
|
||||
* [enable_segmentation](#enable_segmentation)
|
||||
* [smooth_segmentation](#smooth_segmentation)
|
||||
* [refine_face_landmarks](#refine_face_landmarks)
|
||||
* [min_detection_confidence](#min_detection_confidence)
|
||||
* [min_tracking_confidence](#min_tracking_confidence)
|
||||
|
||||
```python
|
||||
import cv2
|
||||
import mediapipe as mp
|
||||
mp_drawing = mp.solutions.drawing_utils
|
||||
mp_drawing_styles = mp.solutions.drawing_styles
|
||||
mp_holistic = mp.solutions.holistic
|
||||
|
||||
# For static images:
|
||||
IMAGE_FILES = []
|
||||
with mp_holistic.Holistic(
|
||||
static_image_mode=True,
|
||||
model_complexity=2,
|
||||
enable_segmentation=True,
|
||||
refine_face_landmarks=True) as holistic:
|
||||
for idx, file in enumerate(IMAGE_FILES):
|
||||
image = cv2.imread(file)
|
||||
image_height, image_width, _ = image.shape
|
||||
# Convert the BGR image to RGB before processing.
|
||||
results = holistic.process(cv2.cvtColor(image, cv2.COLOR_BGR2RGB))
|
||||
|
||||
if results.pose_landmarks:
|
||||
print(
|
||||
f'Nose coordinates: ('
|
||||
f'{results.pose_landmarks.landmark[mp_holistic.PoseLandmark.NOSE].x * image_width}, '
|
||||
f'{results.pose_landmarks.landmark[mp_holistic.PoseLandmark.NOSE].y * image_height})'
|
||||
)
|
||||
|
||||
annotated_image = image.copy()
|
||||
# Draw segmentation on the image.
|
||||
# To improve segmentation around boundaries, consider applying a joint
|
||||
# bilateral filter to "results.segmentation_mask" with "image".
|
||||
condition = np.stack((results.segmentation_mask,) * 3, axis=-1) > 0.1
|
||||
bg_image = np.zeros(image.shape, dtype=np.uint8)
|
||||
bg_image[:] = BG_COLOR
|
||||
annotated_image = np.where(condition, annotated_image, bg_image)
|
||||
# Draw pose, left and right hands, and face landmarks on the image.
|
||||
mp_drawing.draw_landmarks(
|
||||
annotated_image,
|
||||
results.face_landmarks,
|
||||
mp_holistic.FACEMESH_TESSELATION,
|
||||
landmark_drawing_spec=None,
|
||||
connection_drawing_spec=mp_drawing_styles
|
||||
.get_default_face_mesh_tesselation_style())
|
||||
mp_drawing.draw_landmarks(
|
||||
annotated_image,
|
||||
results.pose_landmarks,
|
||||
mp_holistic.POSE_CONNECTIONS,
|
||||
landmark_drawing_spec=mp_drawing_styles.
|
||||
get_default_pose_landmarks_style())
|
||||
cv2.imwrite('/tmp/annotated_image' + str(idx) + '.png', annotated_image)
|
||||
# Plot pose world landmarks.
|
||||
mp_drawing.plot_landmarks(
|
||||
results.pose_world_landmarks, mp_holistic.POSE_CONNECTIONS)
|
||||
|
||||
# For webcam input:
|
||||
cap = cv2.VideoCapture(0)
|
||||
with mp_holistic.Holistic(
|
||||
min_detection_confidence=0.5,
|
||||
min_tracking_confidence=0.5) as holistic:
|
||||
while cap.isOpened():
|
||||
success, image = cap.read()
|
||||
if not success:
|
||||
print("Ignoring empty camera frame.")
|
||||
# If loading a video, use 'break' instead of 'continue'.
|
||||
continue
|
||||
|
||||
# To improve performance, optionally mark the image as not writeable to
|
||||
# pass by reference.
|
||||
image.flags.writeable = False
|
||||
image = cv2.cvtColor(image, cv2.COLOR_BGR2RGB)
|
||||
results = holistic.process(image)
|
||||
|
||||
# Draw landmark annotation on the image.
|
||||
image.flags.writeable = True
|
||||
image = cv2.cvtColor(image, cv2.COLOR_RGB2BGR)
|
||||
mp_drawing.draw_landmarks(
|
||||
image,
|
||||
results.face_landmarks,
|
||||
mp_holistic.FACEMESH_CONTOURS,
|
||||
landmark_drawing_spec=None,
|
||||
connection_drawing_spec=mp_drawing_styles
|
||||
.get_default_face_mesh_contours_style())
|
||||
mp_drawing.draw_landmarks(
|
||||
image,
|
||||
results.pose_landmarks,
|
||||
mp_holistic.POSE_CONNECTIONS,
|
||||
landmark_drawing_spec=mp_drawing_styles
|
||||
.get_default_pose_landmarks_style())
|
||||
# Flip the image horizontally for a selfie-view display.
|
||||
cv2.imshow('MediaPipe Holistic', cv2.flip(image, 1))
|
||||
if cv2.waitKey(5) & 0xFF == 27:
|
||||
break
|
||||
cap.release()
|
||||
```
|
||||
|
||||
### JavaScript Solution API
|
||||
|
||||
Please first see general [introduction](../getting_started/javascript.md) on
|
||||
MediaPipe in JavaScript, then learn more in the companion [web demo](#resources)
|
||||
and the following usage example.
|
||||
|
||||
Supported configuration options:
|
||||
|
||||
* [modelComplexity](#model_complexity)
|
||||
* [smoothLandmarks](#smooth_landmarks)
|
||||
* [enableSegmentation](#enable_segmentation)
|
||||
* [smoothSegmentation](#smooth_segmentation)
|
||||
* [refineFaceLandmarks](#refineFaceLandmarks)
|
||||
* [minDetectionConfidence](#min_detection_confidence)
|
||||
* [minTrackingConfidence](#min_tracking_confidence)
|
||||
|
||||
```html
|
||||
<!DOCTYPE html>
|
||||
<html>
|
||||
<head>
|
||||
<meta charset="utf-8">
|
||||
<script src="https://cdn.jsdelivr.net/npm/@mediapipe/camera_utils/camera_utils.js" crossorigin="anonymous"></script>
|
||||
<script src="https://cdn.jsdelivr.net/npm/@mediapipe/control_utils/control_utils.js" crossorigin="anonymous"></script>
|
||||
<script src="https://cdn.jsdelivr.net/npm/@mediapipe/drawing_utils/drawing_utils.js" crossorigin="anonymous"></script>
|
||||
<script src="https://cdn.jsdelivr.net/npm/@mediapipe/holistic/holistic.js" crossorigin="anonymous"></script>
|
||||
</head>
|
||||
|
||||
<body>
|
||||
<div class="container">
|
||||
<video class="input_video"></video>
|
||||
<canvas class="output_canvas" width="1280px" height="720px"></canvas>
|
||||
</div>
|
||||
</body>
|
||||
</html>
|
||||
```
|
||||
|
||||
```javascript
|
||||
<script type="module">
|
||||
const videoElement = document.getElementsByClassName('input_video')[0];
|
||||
const canvasElement = document.getElementsByClassName('output_canvas')[0];
|
||||
const canvasCtx = canvasElement.getContext('2d');
|
||||
|
||||
function onResults(results) {
|
||||
canvasCtx.save();
|
||||
canvasCtx.clearRect(0, 0, canvasElement.width, canvasElement.height);
|
||||
canvasCtx.drawImage(results.segmentationMask, 0, 0,
|
||||
canvasElement.width, canvasElement.height);
|
||||
|
||||
// Only overwrite existing pixels.
|
||||
canvasCtx.globalCompositeOperation = 'source-in';
|
||||
canvasCtx.fillStyle = '#00FF00';
|
||||
canvasCtx.fillRect(0, 0, canvasElement.width, canvasElement.height);
|
||||
|
||||
// Only overwrite missing pixels.
|
||||
canvasCtx.globalCompositeOperation = 'destination-atop';
|
||||
canvasCtx.drawImage(
|
||||
results.image, 0, 0, canvasElement.width, canvasElement.height);
|
||||
|
||||
canvasCtx.globalCompositeOperation = 'source-over';
|
||||
drawConnectors(canvasCtx, results.poseLandmarks, POSE_CONNECTIONS,
|
||||
{color: '#00FF00', lineWidth: 4});
|
||||
drawLandmarks(canvasCtx, results.poseLandmarks,
|
||||
{color: '#FF0000', lineWidth: 2});
|
||||
drawConnectors(canvasCtx, results.faceLandmarks, FACEMESH_TESSELATION,
|
||||
{color: '#C0C0C070', lineWidth: 1});
|
||||
drawConnectors(canvasCtx, results.leftHandLandmarks, HAND_CONNECTIONS,
|
||||
{color: '#CC0000', lineWidth: 5});
|
||||
drawLandmarks(canvasCtx, results.leftHandLandmarks,
|
||||
{color: '#00FF00', lineWidth: 2});
|
||||
drawConnectors(canvasCtx, results.rightHandLandmarks, HAND_CONNECTIONS,
|
||||
{color: '#00CC00', lineWidth: 5});
|
||||
drawLandmarks(canvasCtx, results.rightHandLandmarks,
|
||||
{color: '#FF0000', lineWidth: 2});
|
||||
canvasCtx.restore();
|
||||
}
|
||||
|
||||
const holistic = new Holistic({locateFile: (file) => {
|
||||
return `https://cdn.jsdelivr.net/npm/@mediapipe/holistic/${file}`;
|
||||
}});
|
||||
holistic.setOptions({
|
||||
modelComplexity: 1,
|
||||
smoothLandmarks: true,
|
||||
enableSegmentation: true,
|
||||
smoothSegmentation: true,
|
||||
refineFaceLandmarks: true,
|
||||
minDetectionConfidence: 0.5,
|
||||
minTrackingConfidence: 0.5
|
||||
});
|
||||
holistic.onResults(onResults);
|
||||
|
||||
const camera = new Camera(videoElement, {
|
||||
onFrame: async () => {
|
||||
await holistic.send({image: videoElement});
|
||||
},
|
||||
width: 1280,
|
||||
height: 720
|
||||
});
|
||||
camera.start();
|
||||
</script>
|
||||
```
|
||||
|
||||
## Example Apps
|
||||
|
||||
Please first see general instructions for
|
||||
[Android](../getting_started/android.md), [iOS](../getting_started/ios.md), and
|
||||
[desktop](../getting_started/cpp.md) on how to build MediaPipe examples.
|
||||
|
||||
Note: To visualize a graph, copy the graph and paste it into
|
||||
[MediaPipe Visualizer](https://viz.mediapipe.dev/). For more information on how
|
||||
to visualize its associated subgraphs, please see
|
||||
[visualizer documentation](../tools/visualizer.md).
|
||||
|
||||
### Mobile
|
||||
|
||||
* Graph:
|
||||
[`mediapipe/graphs/holistic_tracking/holistic_tracking_gpu.pbtxt`](https://github.com/google/mediapipe/tree/master/mediapipe/graphs/holistic_tracking/holistic_tracking_gpu.pbtxt)
|
||||
* Android target:
|
||||
[(or download prebuilt ARM64 APK)](https://drive.google.com/file/d/1o-Trp2GIRitA0OvmZWUQjVMa476xpfgK/view?usp=sharing)
|
||||
[`mediapipe/examples/android/src/java/com/google/mediapipe/apps/holistictrackinggpu:holistictrackinggpu`](https://github.com/google/mediapipe/tree/master/mediapipe/examples/android/src/java/com/google/mediapipe/apps/holistictrackinggpu/BUILD)
|
||||
* iOS target:
|
||||
[`mediapipe/examples/ios/holistictrackinggpu:HolisticTrackingGpuApp`](http:/mediapipe/examples/ios/holistictrackinggpu/BUILD)
|
||||
|
||||
### Desktop
|
||||
|
||||
Please first see general instructions for [desktop](../getting_started/cpp.md)
|
||||
on how to build MediaPipe examples.
|
||||
|
||||
* Running on CPU
|
||||
* Graph:
|
||||
[`mediapipe/graphs/holistic_tracking/holistic_tracking_cpu.pbtxt`](https://github.com/google/mediapipe/tree/master/mediapipe/graphs/holistic_tracking/holistic_tracking_cpu.pbtxt)
|
||||
* Target:
|
||||
[`mediapipe/examples/desktop/holistic_tracking:holistic_tracking_cpu`](https://github.com/google/mediapipe/tree/master/mediapipe/examples/desktop/holistic_tracking/BUILD)
|
||||
* Running on GPU
|
||||
* Graph:
|
||||
[`mediapipe/graphs/holistic_tracking/holistic_tracking_gpu.pbtxt`](https://github.com/google/mediapipe/tree/master/mediapipe/graphs/holistic_tracking/holistic_tracking_gpu.pbtxt)
|
||||
* Target:
|
||||
[`mediapipe/examples/desktop/holistic_tracking:holistic_tracking_gpu`](https://github.com/google/mediapipe/tree/master/mediapipe/examples/desktop/holistic_tracking/BUILD)
|
||||
|
||||
## Resources
|
||||
|
||||
* Google AI Blog:
|
||||
[MediaPipe Holistic - Simultaneous Face, Hand and Pose Prediction, on Device](https://ai.googleblog.com/2020/12/mediapipe-holistic-simultaneous-face.html)
|
||||
* [Models and model cards](./models.md#holistic)
|
||||
* [Web demo](https://code.mediapipe.dev/codepen/holistic)
|
||||
* [Python Colab](https://mediapipe.page.link/holistic_py_colab)
|
||||
@@ -0,0 +1,146 @@
|
||||
---
|
||||
layout: default
|
||||
title: Instant Motion Tracking
|
||||
parent: Solutions
|
||||
nav_order: 11
|
||||
---
|
||||
|
||||
# MediaPipe Instant Motion Tracking
|
||||
{: .no_toc }
|
||||
|
||||
<details close markdown="block">
|
||||
<summary>
|
||||
Table of contents
|
||||
</summary>
|
||||
{: .text-delta }
|
||||
1. TOC
|
||||
{:toc}
|
||||
</details>
|
||||
---
|
||||
|
||||
## Overview
|
||||
|
||||
Augmented Reality (AR) technology creates fun, engaging, and immersive user
|
||||
experiences. The ability to perform AR tracking across devices and platforms,
|
||||
without initialization, remains important to power AR applications at scale.
|
||||
|
||||
MediaPipe Instant Motion Tracking provides AR tracking across devices and
|
||||
platforms without initialization or calibration. It is built upon the
|
||||
[MediaPipe Box Tracking](./box_tracking.md) solution. With Instant Motion
|
||||
Tracking, you can easily place virtual 2D and 3D content on static or moving
|
||||
surfaces, allowing them to seamlessly interact with the real-world environment.
|
||||
|
||||
 |
|
||||
:-----------------------------------------------------------------------: |
|
||||
*Fig 1. Instant Motion Tracking is used to augment the world with a 3D sticker.* |
|
||||
|
||||
## Pipeline
|
||||
|
||||
The Instant Motion Tracking pipeline is implemented as a MediaPipe
|
||||
[graph](https://github.com/google/mediapipe/tree/master/mediapipe/graphs/instant_motion_tracking/instant_motion_tracking.pbtxt),
|
||||
which internally utilizes a
|
||||
[RegionTrackingSubgraph](https://github.com/google/mediapipe/tree/master/mediapipe/graphs/instant_motion_tracking/subgraphs/region_tracking.pbtxt)
|
||||
in order to perform anchor tracking for each individual 3D sticker.
|
||||
|
||||
We first use a
|
||||
[StickerManagerCalculator](https://github.com/google/mediapipe/tree/master/mediapipe/graphs/instant_motion_tracking/calculators/sticker_manager_calculator.cc)
|
||||
to prepare the individual sticker data for the rest of the application. This
|
||||
information is then sent to the
|
||||
[RegionTrackingSubgraph](https://github.com/google/mediapipe/tree/master/mediapipe/graphs/instant_motion_tracking/subgraphs/region_tracking.pbtxt)
|
||||
that performs 3D region tracking for sticker placement and rendering. Once
|
||||
acquired, our tracked sticker regions are sent with user transformations (i.e.
|
||||
gestures from the user to rotate and zoom the sticker) and IMU data to the
|
||||
[MatricesManagerCalculator](https://github.com/google/mediapipe/tree/master/mediapipe/graphs/instant_motion_tracking/calculators/matrices_manager_calculator.cc),
|
||||
which turns all our sticker transformation data into a set of model matrices.
|
||||
This data is handled directly by our
|
||||
[GlAnimationOverlayCalculator](https://github.com/google/mediapipe/tree/master/mediapipe/graphs/object_detection_3d/calculators/gl_animation_overlay_calculator.cc)
|
||||
as an input stream, which will render the provided texture and object file using
|
||||
our matrix specifications. The output of
|
||||
[GlAnimationOverlayCalculator](https://github.com/google/mediapipe/tree/master/mediapipe/graphs/object_detection_3d/calculators/gl_animation_overlay_calculator.cc)
|
||||
is a video stream depicting the virtual 3D content rendered on top of the real
|
||||
world, creating immersive AR experiences for users.
|
||||
|
||||
## Using Instant Motion Tracking
|
||||
|
||||
With the Instant Motion Tracking MediaPipe [graph](https://github.com/google/mediapipe/tree/master/mediapipe/graphs/instant_motion_tracking/instant_motion_tracking.pbtxt),
|
||||
an application can create an interactive and realistic AR experience by
|
||||
specifying the required input streams, side packets, and output streams.
|
||||
The input streams are the following:
|
||||
|
||||
* Input Video (GpuBuffer): Video frames to render augmented stickers onto.
|
||||
* Rotation Matrix (9-element Float Array): The 3x3 row-major rotation
|
||||
matrix from the device IMU to determine proper orientation of the device.
|
||||
* Sticker Proto String (String): A string representing the
|
||||
serialized [sticker buffer protobuf message](https://github.com/google/mediapipe/tree/master/mediapipe/graphs/instant_motion_tracking/calculators/sticker_buffer.proto),
|
||||
containing a list of all stickers and their attributes.
|
||||
* Each sticker in the Protobuffer has a unique ID to find associated
|
||||
anchors and transforms, an initial anchor placement in a normalized [0.0, 1.0]
|
||||
3D space, a user rotation and user scaling transform on the sticker,
|
||||
and an integer indicating which type of objects to render for the
|
||||
sticker (e.g. 3D asset or GIF).
|
||||
* Sticker Sentinel (Integer): When an anchor must be initially placed or
|
||||
repositioned, this value must be changed to the ID of the anchor to reset from
|
||||
the sticker buffer protobuf message. If no valid ID is provided, the system
|
||||
will simply maintain tracking.
|
||||
|
||||
Side packets are also an integral part of the Instant Motion Tracking solution
|
||||
to provide device-specific information for the rendering system:
|
||||
|
||||
* Field of View (Float): The field of view of the camera in radians.
|
||||
* Aspect Ratio (Float): The aspect ratio (width / height) of the camera frames
|
||||
(this ratio corresponds to the image frames themselves, not necessarily the
|
||||
screen bounds).
|
||||
* Object Asset (String): The
|
||||
[GlAnimationOverlayCalculator](https://github.com/google/mediapipe/tree/master/mediapipe/graphs/object_detection_3d/calculators/gl_animation_overlay_calculator.cc)
|
||||
must be provided with an associated asset file name pointing to the 3D model
|
||||
to render in the viewfinder.
|
||||
* (Optional) Texture (ImageFrame on Android, GpuBuffer on iOS): Textures for
|
||||
the
|
||||
[GlAnimationOverlayCalculator](https://github.com/google/mediapipe/tree/master/mediapipe/graphs/object_detection_3d/calculators/gl_animation_overlay_calculator.cc)
|
||||
can be provided either via an input stream (dynamic texturing) or as a side
|
||||
packet (unchanging texture).
|
||||
|
||||
The rendering system for the Instant Motion Tracking is powered by OpenGL. For
|
||||
more information regarding the structure of model matrices and OpenGL rendering,
|
||||
please visit [OpenGL Wiki](https://www.khronos.org/opengl/wiki/). With the
|
||||
specifications above, the Instant Motion Tracking capabilities can be adapted to
|
||||
any device that is able to run the MediaPipe framework with a working IMU system
|
||||
and connected camera.
|
||||
|
||||
## Example Apps
|
||||
|
||||
Please first see general instructions for
|
||||
[Android](../getting_started/android.md) on how to build MediaPipe examples.
|
||||
|
||||
* Graph: [mediapipe/graphs/instant_motion_tracking/instant_motion_tracking.pbtxt](https://github.com/google/mediapipe/tree/master/mediapipe/graphs/instant_motion_tracking/instant_motion_tracking.pbtxt)
|
||||
|
||||
* Android target (or download prebuilt [ARM64 APK](https://drive.google.com/file/d/1KnaBBoKpCHR73nOBJ4fL_YdWVTAcwe6L/view?usp=sharing)):
|
||||
[`mediapipe/examples/android/src/java/com/google/mediapipe/apps/instantmotiontracking:instantmotiontracking`](https://github.com/google/mediapipe/tree/master/mediapipe/examples/android/src/java/com/google/mediapipe/apps/instantmotiontracking/BUILD)
|
||||
|
||||
* Assets rendered by the [GlAnimationOverlayCalculator](https://github.com/google/mediapipe/tree/master/mediapipe/graphs/object_detection_3d/calculators/gl_animation_overlay_calculator.cc) must be preprocessed into an OpenGL-ready custom .uuu format. This can be done
|
||||
for user assets as follows:
|
||||
> First run
|
||||
>
|
||||
> ```shell
|
||||
> ./mediapipe/graphs/object_detection_3d/obj_parser/obj_cleanup.sh [INPUT_DIR] [INTERMEDIATE_OUTPUT_DIR]
|
||||
> ```
|
||||
> and then run
|
||||
>
|
||||
> ```build
|
||||
> bazel run -c opt mediapipe/graphs/object_detection_3d/obj_parser:ObjParser -- input_dir=[INTERMEDIATE_OUTPUT_DIR] output_dir=[OUTPUT_DIR]
|
||||
> ```
|
||||
> INPUT_DIR should be the folder with initial asset .obj files to be processed,
|
||||
> and OUTPUT_DIR is the folder where the processed asset .uuu file will be placed.
|
||||
>
|
||||
> Note: ObjParser combines all .obj files found in the given directory into a
|
||||
> single .uuu animation file, using the order given by sorting the filenames alphanumerically. Also the ObjParser directory inputs must be given as
|
||||
> absolute paths, not relative paths. See parser utility library at [`mediapipe/graphs/object_detection_3d/obj_parser/`](https://github.com/google/mediapipe/tree/master/mediapipe/graphs/object_detection_3d/obj_parser/) for more details.
|
||||
|
||||
## Resources
|
||||
|
||||
* Google Developers Blog:
|
||||
[Instant Motion Tracking With MediaPipe](https://developers.googleblog.com/2020/08/instant-motion-tracking-with-mediapipe.html)
|
||||
* Google AI Blog:
|
||||
[The Instant Motion Tracking Behind Motion Stills AR](https://ai.googleblog.com/2018/02/the-instant-motion-tracking-behind.html)
|
||||
* Paper:
|
||||
[Instant Motion Tracking and Its Applications to Augmented Reality](https://arxiv.org/abs/1907.06796)
|
||||
@@ -0,0 +1,215 @@
|
||||
---
|
||||
layout: default
|
||||
title: Iris
|
||||
parent: Solutions
|
||||
nav_order: 3
|
||||
---
|
||||
|
||||
# MediaPipe Iris
|
||||
{: .no_toc }
|
||||
|
||||
<details close markdown="block">
|
||||
<summary>
|
||||
Table of contents
|
||||
</summary>
|
||||
{: .text-delta }
|
||||
1. TOC
|
||||
{:toc}
|
||||
</details>
|
||||
---
|
||||
|
||||
## Overview
|
||||
|
||||
A wide range of real-world applications, including computational photography
|
||||
(glint reflection) and augmented reality effects (virtual avatars) rely on
|
||||
accurately tracking the iris within an eye. This is a challenging task to solve
|
||||
on mobile devices, due to the limited computing resources, variable light
|
||||
conditions and the presence of occlusions, such as hair or people squinting.
|
||||
Iris tracking can also be utilized to determine the metric distance of the
|
||||
camera to the user. This can improve a variety of use cases, ranging from
|
||||
virtual try-on of properly sized glasses and hats to accessibility features that
|
||||
adopt the font size depending on the viewer’s distance. Often, sophisticated
|
||||
specialized hardware is employed to compute the metric distance, limiting the
|
||||
range of devices on which the solution could be applied.
|
||||
|
||||
MediaPipe Iris is a ML solution for accurate iris estimation, able to track
|
||||
landmarks involving the iris, pupil and the eye contours using a single RGB
|
||||
camera, in real-time, without the need for specialized hardware. Through use of
|
||||
iris landmarks, the solution is also able to determine the metric distance
|
||||
between the subject and the camera with relative error less than 10%. Note that
|
||||
iris tracking does not infer the location at which people are looking, nor does
|
||||
it provide any form of identity recognition. With the cross-platfrom capability
|
||||
of the MediaPipe framework, MediaPipe Iris can run on most modern
|
||||
[mobile phones](#mobile), [desktops/laptops](#desktop) and even on the
|
||||
[web](#web).
|
||||
|
||||
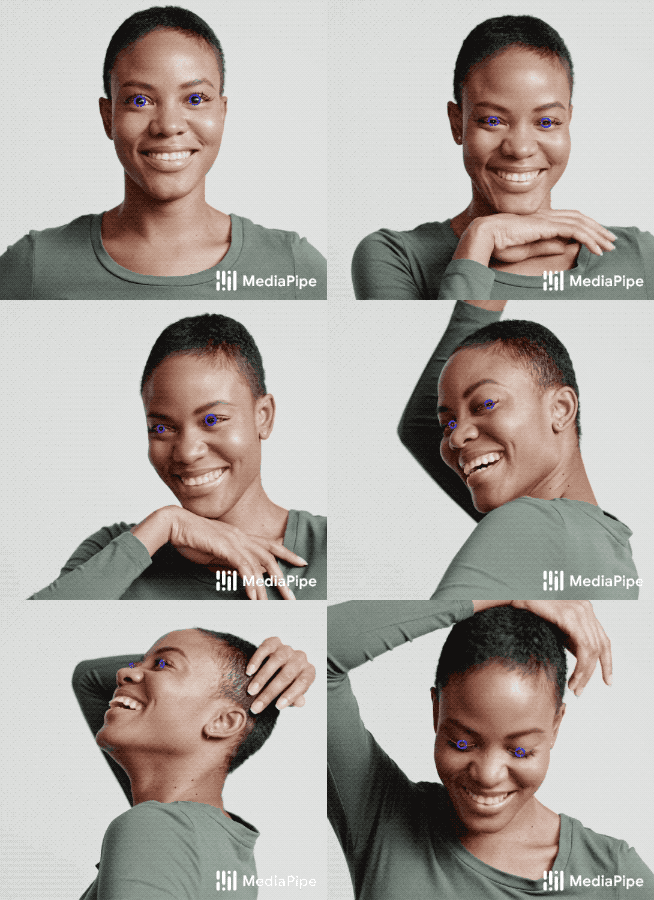 |
|
||||
:------------------------------------------------------------------------: |
|
||||
*Fig 1. Example of MediaPipe Iris: eyelid (red) and iris (blue) contours.* |
|
||||
|
||||
## ML Pipeline
|
||||
|
||||
The first step in the pipeline leverages [MediaPipe Face Mesh](./face_mesh.md),
|
||||
which generates a mesh of the approximate face geometry. From this mesh, we
|
||||
isolate the eye region in the original image for use in the subsequent iris
|
||||
tracking step.
|
||||
|
||||
The pipeline is implemented as a MediaPipe
|
||||
[graph](https://github.com/google/mediapipe/tree/master/mediapipe/graphs/iris_tracking/iris_tracking_gpu.pbtxt)
|
||||
that uses a
|
||||
[face landmark subgraph](https://github.com/google/mediapipe/tree/master/mediapipe/modules/face_landmark/face_landmark_front_gpu.pbtxt)
|
||||
from the
|
||||
[face landmark module](https://github.com/google/mediapipe/tree/master/mediapipe/modules/face_landmark),
|
||||
an
|
||||
[iris landmark subgraph](https://github.com/google/mediapipe/tree/master/mediapipe/modules/iris_landmark/iris_landmark_left_and_right_gpu.pbtxt)
|
||||
from the
|
||||
[iris landmark module](https://github.com/google/mediapipe/tree/master/mediapipe/modules/iris_landmark),
|
||||
and renders using a dedicated
|
||||
[iris-and-depth renderer subgraph](https://github.com/google/mediapipe/tree/master/mediapipe/graphs/iris_tracking/subgraphs/iris_and_depth_renderer_gpu.pbtxt).
|
||||
The
|
||||
[face landmark subgraph](https://github.com/google/mediapipe/tree/master/mediapipe/modules/face_landmark/face_landmark_front_gpu.pbtxt)
|
||||
internally uses a
|
||||
[face detection subgraph](https://github.com/google/mediapipe/tree/master/mediapipe/modules/face_detection/face_detection_short_range_gpu.pbtxt)
|
||||
from the
|
||||
[face detection module](https://github.com/google/mediapipe/tree/master/mediapipe/modules/face_detection).
|
||||
|
||||
Note: To visualize a graph, copy the graph and paste it into
|
||||
[MediaPipe Visualizer](https://viz.mediapipe.dev/). For more information on how
|
||||
to visualize its associated subgraphs, please see
|
||||
[visualizer documentation](../tools/visualizer.md).
|
||||
|
||||
The output of the pipeline is a set of 478 3D landmarks, including 468 face
|
||||
landmarks from [MediaPipe Face Mesh](./face_mesh.md), with those around the eyes
|
||||
further refined (see Fig 2), and 10 additional iris landmarks appended at the
|
||||
end (5 for each eye, and see Fig 2 also).
|
||||
|
||||
## Models
|
||||
|
||||
### Face Detection Model
|
||||
|
||||
The face detector is the same [BlazeFace](https://arxiv.org/abs/1907.05047)
|
||||
model used in [MediaPipe Face Detection](./face_detection.md).
|
||||
|
||||
### Face Landmark Model
|
||||
|
||||
The face landmark model is the same as in [MediaPipe Face Mesh](./face_mesh.md).
|
||||
You can also find more details in this
|
||||
[paper](https://arxiv.org/abs/1907.06724).
|
||||
|
||||
### Iris Landmark Model
|
||||
|
||||
The iris model takes an image patch of the eye region and estimates both the eye
|
||||
landmarks (along the eyelid) and iris landmarks (along ths iris contour). You
|
||||
can find more details in this [paper](https://arxiv.org/abs/2006.11341).
|
||||
|
||||
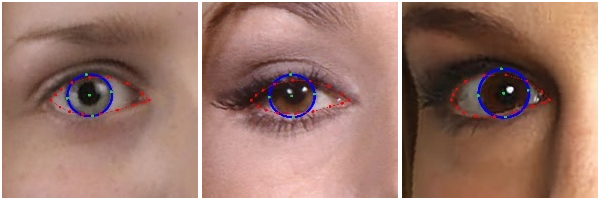 |
|
||||
:----------------------------------------------------------------------------------------------------: |
|
||||
*Fig 2. Eye landmarks (red) and iris landmarks (green).* |
|
||||
|
||||
## Depth-from-Iris
|
||||
|
||||
MediaPipe Iris is able to determine the metric distance of a subject to the
|
||||
camera with less than 10% error, without requiring any specialized hardware.
|
||||
This is done by relying on the fact that the horizontal iris diameter of the
|
||||
human eye remains roughly constant at 11.7±0.5 mm across a wide population,
|
||||
along with some simple geometric arguments. For more details please refer to our
|
||||
[Google AI Blog post](https://ai.googleblog.com/2020/08/mediapipe-iris-real-time-iris-tracking.html).
|
||||
|
||||
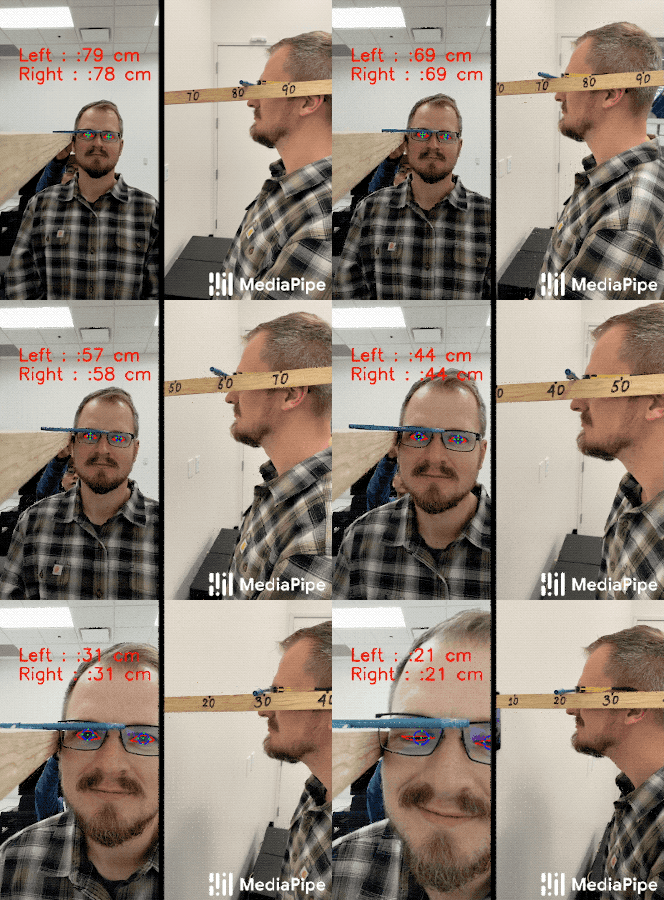 |
|
||||
:--------------------------------------------------------------------------------------------: |
|
||||
*Fig 3. (Left) MediaPipe Iris predicting metric distance in cm on a Pixel 2 from iris tracking without use of a depth sensor. (Right) Ground-truth depth.* |
|
||||
|
||||
## Example Apps
|
||||
|
||||
Please first see general instructions for
|
||||
[Android](../getting_started/android.md), [iOS](../getting_started/ios.md) and
|
||||
[desktop](../getting_started/cpp.md) on how to build MediaPipe examples.
|
||||
|
||||
Note: To visualize a graph, copy the graph and paste it into
|
||||
[MediaPipe Visualizer](https://viz.mediapipe.dev/). For more information on how
|
||||
to visualize its associated subgraphs, please see
|
||||
[visualizer documentation](../tools/visualizer.md).
|
||||
|
||||
### Mobile
|
||||
|
||||
* Graph:
|
||||
[`mediapipe/graphs/iris_tracking/iris_tracking_gpu.pbtxt`](https://github.com/google/mediapipe/tree/master/mediapipe/graphs/iris_tracking/iris_tracking_gpu.pbtxt)
|
||||
* Android target:
|
||||
[(or download prebuilt ARM64 APK)](https://drive.google.com/file/d/1cywcNtqk764TlZf1lvSTV4F3NGB2aL1R/view?usp=sharing)
|
||||
[`mediapipe/examples/android/src/java/com/google/mediapipe/apps/iristrackinggpu:iristrackinggpu`](https://github.com/google/mediapipe/tree/master/mediapipe/examples/android/src/java/com/google/mediapipe/apps/iristrackinggpu/BUILD)
|
||||
* iOS target:
|
||||
[`mediapipe/examples/ios/iristrackinggpu:IrisTrackingGpuApp`](http:/mediapipe/examples/ios/iristrackinggpu/BUILD)
|
||||
|
||||
### Desktop
|
||||
|
||||
#### Live Camera Input
|
||||
|
||||
Please first see general instructions for [desktop](../getting_started/cpp.md)
|
||||
on how to build MediaPipe examples.
|
||||
|
||||
* Running on CPU
|
||||
* Graph:
|
||||
[`mediapipe/graphs/iris_tracking/iris_tracking_cpu.pbtxt`](https://github.com/google/mediapipe/tree/master/mediapipe/graphs/iris_tracking/iris_tracking_cpu.pbtxt)
|
||||
* Target:
|
||||
[`mediapipe/examples/desktop/iris_tracking:iris_tracking_cpu`](https://github.com/google/mediapipe/tree/master/mediapipe/examples/desktop/iris_tracking/BUILD)
|
||||
* Running on GPU
|
||||
* Graph:
|
||||
[`mediapipe/graphs/iris_tracking/iris_tracking_gpu.pbtxt`](https://github.com/google/mediapipe/tree/master/mediapipe/graphs/iris_tracking/iris_tracking_gpu.pbtxt)
|
||||
* Target:
|
||||
[`mediapipe/examples/desktop/iris_tracking:iris_tracking_gpu`](https://github.com/google/mediapipe/tree/master/mediapipe/examples/desktop/iris_tracking/BUILD)
|
||||
|
||||
#### Video File Input
|
||||
|
||||
1. To build the application, run:
|
||||
|
||||
```bash
|
||||
bazel build -c opt --define MEDIAPIPE_DISABLE_GPU=1 mediapipe/examples/desktop/iris_tracking:iris_tracking_cpu_video_input
|
||||
```
|
||||
|
||||
2. To run the application, replace `<input video path>` and `<output video
|
||||
path>` in the command below with your own paths:
|
||||
|
||||
```
|
||||
bazel-bin/mediapipe/examples/desktop/iris_tracking/iris_tracking_cpu_video_input \
|
||||
--calculator_graph_config_file=mediapipe/graphs/iris_tracking/iris_tracking_cpu_video_input.pbtxt \
|
||||
--input_side_packets=input_video_path=<input video path>,output_video_path=<output video path>
|
||||
```
|
||||
|
||||
#### Single-image Depth Estimation
|
||||
|
||||
1. To build the application, run:
|
||||
|
||||
```bash
|
||||
bazel build -c opt --define MEDIAPIPE_DISABLE_GPU=1 mediapipe/examples/desktop/iris_tracking:iris_depth_from_image_desktop
|
||||
```
|
||||
|
||||
2. To run the application, replace `<input image path>` and `<output image
|
||||
path>` in the command below with your own paths:
|
||||
|
||||
```bash
|
||||
GLOG_logtostderr=1 bazel-bin/mediapipe/examples/desktop/iris_tracking/iris_depth_from_image_desktop \
|
||||
--input_image_path=<input image path> --output_image_path=<output image path>
|
||||
```
|
||||
|
||||
### Web
|
||||
|
||||
You can use the following links to load a demo in the MediaPipe Visualizer, and
|
||||
over there click the "Runner" icon in the top bar like shown below. The demos
|
||||
use your webcam video as input, which is processed all locally in real-time and
|
||||
never leaves your device. Please see
|
||||
[MediaPipe on the Web](https://developers.googleblog.com/2020/01/mediapipe-on-web.html)
|
||||
in Google Developers Blog for details.
|
||||
|
||||

|
||||
|
||||
* [MediaPipe Iris](https://viz.mediapipe.dev/demo/iris_tracking)
|
||||
* [MediaPipe Iris: Depth-from-Iris](https://viz.mediapipe.dev/demo/iris_depth)
|
||||
|
||||
## Resources
|
||||
|
||||
* Google AI Blog:
|
||||
[MediaPipe Iris: Real-time Eye Tracking and Depth Estimation](https://ai.googleblog.com/2020/08/mediapipe-iris-real-time-iris-tracking.html)
|
||||
* Paper:
|
||||
[Real-time Pupil Tracking from Monocular Video for Digital Puppetry](https://arxiv.org/abs/2006.11341)
|
||||
([presentation](https://youtu.be/cIhXkiiapQI))
|
||||
* [Models and model cards](./models.md#iris)
|
||||
@@ -0,0 +1,148 @@
|
||||
---
|
||||
layout: default
|
||||
title: KNIFT (Template-based Feature Matching)
|
||||
parent: Solutions
|
||||
nav_order: 13
|
||||
---
|
||||
|
||||
# MediaPipe KNIFT
|
||||
{: .no_toc }
|
||||
|
||||
<details close markdown="block">
|
||||
<summary>
|
||||
Table of contents
|
||||
</summary>
|
||||
{: .text-delta }
|
||||
1. TOC
|
||||
{:toc}
|
||||
</details>
|
||||
---
|
||||
|
||||
## Overview
|
||||
|
||||
MediaPipe KNIFT is a template-based feature matching solution using KNIFT
|
||||
(Keypoint Neural Invariant Feature Transform).
|
||||
|
||||
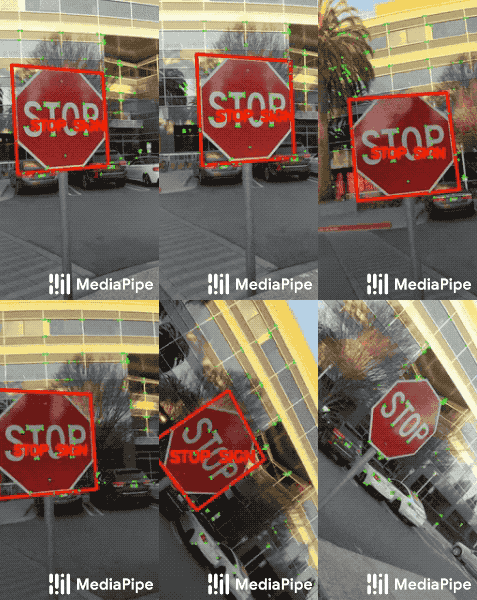 |
|
||||
:-----------------------------------------------------------------------: |
|
||||
*Fig 1. Matching a real Stop Sign with a Stop Sign template using KNIFT.* |
|
||||
|
||||
In many computer vision applications, a crucial building block is to establish
|
||||
reliable correspondences between different views of an object or scene, forming
|
||||
the foundation for approaches like template matching, image retrieval and
|
||||
structure from motion. Correspondences are usually computed by extracting
|
||||
distinctive view-invariant features such as
|
||||
[SIFT](https://en.wikipedia.org/wiki/Scale-invariant_feature_transform) or
|
||||
[ORB](https://opencv-python-tutroals.readthedocs.io/en/latest/py_tutorials/py_feature2d/py_orb/py_orb.html#orb-in-opencv)
|
||||
from images. The ability to reliably establish such correspondences enables
|
||||
applications like image stitching to create panoramas or template matching for
|
||||
object recognition in videos.
|
||||
|
||||
KNIFT is a general purpose local feature descriptor similar to SIFT or ORB.
|
||||
Likewise, KNIFT is also a compact vector representation of local image patches
|
||||
that is invariant to uniform scaling, orientation, and illumination changes.
|
||||
However unlike SIFT or ORB, which were engineered with heuristics, KNIFT is an
|
||||
[embedding](https://developers.google.com/machine-learning/crash-course/embeddings/video-lecture)
|
||||
learned directly from a large number of corresponding local patches extracted
|
||||
from nearby video frames. This data driven approach implicitly encodes complex,
|
||||
real-world spatial transformations and lighting changes in the embedding. As a
|
||||
result, the KNIFT feature descriptor appears to be more robust, not only to
|
||||
[affine distortions](https://en.wikipedia.org/wiki/Affine_transformation), but
|
||||
to some degree of
|
||||
[perspective distortions](https://en.wikipedia.org/wiki/Perspective_distortion_\(photography\))
|
||||
as well.
|
||||
|
||||
For more information, please see
|
||||
[MediaPipe KNIFT: Template-based feature matching](https://developers.googleblog.com/2020/04/mediapipe-knift-template-based-feature-matching.html)
|
||||
in Google Developers Blog.
|
||||
|
||||
 |
|
||||
:-------------------------------------------------------------------------------------: |
|
||||
*Fig 2. Matching US dollar bills using KNIFT.* |
|
||||
|
||||
## Example Apps
|
||||
|
||||
### Matching US Dollar Bills
|
||||
|
||||
In MediaPipe, we've already provided an
|
||||
[index file](https://github.com/google/mediapipe/tree/master/mediapipe/models/knift_index.pb)
|
||||
pre-computed from the 3 template images (of US dollar bills) shown below. If
|
||||
you'd like to use your own template images, see
|
||||
[Matching Your Own Template Images](#matching-your-own-template-images).
|
||||
|
||||
|
||||
|
||||
Please first see general instructions for
|
||||
[Android](../getting_started/android.md) on how to build MediaPipe examples.
|
||||
|
||||
Note: To visualize a graph, copy the graph and paste it into
|
||||
[MediaPipe Visualizer](https://viz.mediapipe.dev/). For more information on how
|
||||
to visualize its associated subgraphs, please see
|
||||
[visualizer documentation](../tools/visualizer.md).
|
||||
|
||||
* Graph:
|
||||
[`mediapipe/graphs/template_matching/template_matching_mobile_cpu.pbtxt`](https://github.com/google/mediapipe/tree/master/mediapipe/graphs/template_matching/template_matching_mobile_cpu.pbtxt)
|
||||
* Android target:
|
||||
[(or download prebuilt ARM64 APK)](https://drive.google.com/open?id=1tSWRfes9rAM4NrzmJBplguNQQvaeBZSa)
|
||||
[`mediapipe/examples/android/src/java/com/google/mediapipe/apps/templatematchingcpu:templatematchingcpu`](https://github.com/google/mediapipe/tree/master/mediapipe/examples/android/src/java/com/google/mediapipe/apps/templatematchingcpu/BUILD)
|
||||
|
||||
Note: MediaPipe uses OpenCV 3 by default. However, because of
|
||||
[issues](https://github.com/opencv/opencv/issues/11488) between NDK 17+ and
|
||||
OpenCV 3 when using
|
||||
[knnMatch](https://docs.opencv.org/3.4/db/d39/classcv_1_1DescriptorMatcher.html#a378f35c9b1a5dfa4022839a45cdf0e89),
|
||||
for this example app please use the following commands to temporarily switch to
|
||||
OpenCV 4, and switch back to OpenCV 3 afterwards.
|
||||
|
||||
```bash
|
||||
# Switch to OpenCV 4
|
||||
sed -i -e 's:3.4.3/opencv-3.4.3:4.0.1/opencv-4.0.1:g' WORKSPACE
|
||||
sed -i -e 's:libopencv_java3:libopencv_java4:g' third_party/opencv_android.BUILD
|
||||
|
||||
# Build and install app
|
||||
bazel build -c opt --config=android_arm64 mediapipe/examples/android/src/java/com/google/mediapipe/apps/templatematchingcpu
|
||||
adb install -r bazel-bin/mediapipe/examples/android/src/java/com/google/mediapipe/apps/templatematchingcpu/templatematchingcpu.apk
|
||||
|
||||
# Switch back to OpenCV 3
|
||||
sed -i -e 's:4.0.1/opencv-4.0.1:3.4.3/opencv-3.4.3:g' WORKSPACE
|
||||
sed -i -e 's:libopencv_java4:libopencv_java3:g' third_party/opencv_android.BUILD
|
||||
```
|
||||
|
||||
Tip: The example uses the TFLite
|
||||
[XNNPACK delegate](https://github.com/tensorflow/tensorflow/tree/master/tensorflow/lite/delegates/xnnpack)
|
||||
by default for faster inference. Users can change the
|
||||
[option in TfLiteInferenceCalculator](https://github.com/google/mediapipe/tree/master/mediapipe/calculators/tflite/tflite_inference_calculator.proto)
|
||||
to run regular TFLite inference.
|
||||
|
||||
### Matching Your Own Template Images
|
||||
|
||||
* Step 1: Put all template images in a single directory.
|
||||
|
||||
* Step 2: To build the index file for all templates in the directory, run
|
||||
|
||||
```bash
|
||||
bazel build -c opt --define MEDIAPIPE_DISABLE_GPU=1 \
|
||||
mediapipe/examples/desktop/template_matching:template_matching_tflite
|
||||
```
|
||||
|
||||
```bash
|
||||
bazel-bin/mediapipe/examples/desktop/template_matching/template_matching_tflite \
|
||||
--calculator_graph_config_file=mediapipe/graphs/template_matching/index_building.pbtxt \
|
||||
--input_side_packets="file_directory=<template image directory>,file_suffix=png,output_index_filename=<output index filename>"
|
||||
```
|
||||
|
||||
The output index file includes the extracted KNIFT features.
|
||||
|
||||
* Step 3: Replace
|
||||
[mediapipe/models/knift_index.pb](https://github.com/google/mediapipe/tree/master/mediapipe/models/knift_index.pb)
|
||||
with the index file you generated, and update
|
||||
[mediapipe/models/knift_labelmap.txt](https://github.com/google/mediapipe/tree/master/mediapipe/models/knift_labelmap.txt)
|
||||
with your own template names.
|
||||
|
||||
* Step 4: Build and run the app using the same instructions in
|
||||
[Matching US Dollar Bills](#matching-us-dollar-bills).
|
||||
|
||||
## Resources
|
||||
|
||||
* Google Developers Blog:
|
||||
[MediaPipe KNIFT: Template-based feature matching](https://developers.googleblog.com/2020/04/mediapipe-knift-template-based-feature-matching.html)
|
||||
* [Models and model cards](./models.md#knift)
|
||||
@@ -1,4 +1,24 @@
|
||||
## Preparing Data Sets with MediaSequence
|
||||
---
|
||||
layout: default
|
||||
title: Dataset Preparation with MediaSequence
|
||||
parent: Solutions
|
||||
nav_order: 15
|
||||
---
|
||||
|
||||
# Dataset Preparation with MediaSequence
|
||||
{: .no_toc }
|
||||
|
||||
<details close markdown="block">
|
||||
<summary>
|
||||
Table of contents
|
||||
</summary>
|
||||
{: .text-delta }
|
||||
1. TOC
|
||||
{:toc}
|
||||
</details>
|
||||
---
|
||||
|
||||
## Overview
|
||||
|
||||
MediaPipe is a useful and general framework for media processing that can
|
||||
assist with research, development, and deployment of ML models. This example
|
||||
@@ -16,7 +36,7 @@ is available about the MediaSequence pipeline, including how to use it to
|
||||
process new data sets, in the documentation of
|
||||
[MediaSequence](https://github.com/google/mediapipe/tree/master/mediapipe/util/sequence).
|
||||
|
||||
### Preparing an example data set
|
||||
## Preparing an example data set
|
||||
|
||||
1. Checkout the mediapipe repository
|
||||
|
||||
@@ -78,33 +98,18 @@ process new data sets, in the documentation of
|
||||
PYTHONPATH="${PYTHONPATH};"+`pwd`
|
||||
```
|
||||
|
||||
and then you can import the data set in Python.
|
||||
and then you can import the data set in Python using
|
||||
[read_demo_dataset.py](https://github.com/google/mediapipe/tree/master/mediapipe/examples/desktop/media_sequence/read_demo_dataset.py)
|
||||
|
||||
```python
|
||||
import tensorflow as tf
|
||||
from mediapipe.examples.desktop.media_sequence.demo_dataset import DemoDataset
|
||||
demo_data_path = '/tmp/demo_data/'
|
||||
with tf.Graph().as_default():
|
||||
d = DemoDataset(demo_data_path)
|
||||
dataset = d.as_dataset('test')
|
||||
# implement additional processing and batching here
|
||||
dataset_output = dataset.make_one_shot_iterator().get_next()
|
||||
images = dataset_output=['images']
|
||||
labels = dataset_output=['labels']
|
||||
## Preparing a practical data set
|
||||
|
||||
with tf.Session() as sess:
|
||||
images_, labels_ = sess.run(images, labels)
|
||||
print('The shape of images_ is %s' % str(images_.shape))
|
||||
print('The shape of labels_ is %s' % str(labels_.shape))
|
||||
```
|
||||
|
||||
### Preparing a practical data set
|
||||
As an example of processing a practical data set, a similar set of commands will
|
||||
prepare the [Charades data set](https://allenai.org/plato/charades/). The
|
||||
Charades data set is a data set of human action recognition collected with and
|
||||
maintained by the Allen Institute for Artificial Intelligence. To follow this
|
||||
code lab, you must abide by the [license](https://allenai.org/plato/charades/license.txt)
|
||||
for the Charades data set provided by the Allen Institute.
|
||||
code lab, you must abide by the
|
||||
[license](https://allenai.org/plato/charades/license.txt) for the Charades data
|
||||
set provided by the Allen Institute.
|
||||
|
||||
The Charades data set is large (~150 GB), and will take considerable time to
|
||||
download and process (4-8 hours).
|
||||
@@ -119,9 +124,10 @@ python -m mediapipe.examples.desktop.media_sequence.charades_dataset \
|
||||
--path_to_graph_directory=mediapipe/graphs/media_sequence/
|
||||
```
|
||||
|
||||
### Preparing your own data set
|
||||
The process for preparing your own data set is described in the [MediaSequence
|
||||
documentation](https://github.com/google/mediapipe/tree/master/mediapipe/util/sequence).
|
||||
## Preparing your own data set
|
||||
|
||||
The process for preparing your own data set is described in the
|
||||
[MediaSequence documentation](https://github.com/google/mediapipe/tree/master/mediapipe/util/sequence).
|
||||
The Python code for Charades can easily be modified to process most annotations,
|
||||
but the MediaPipe processing warrants further discussion. MediaSequence uses
|
||||
MediaPipe graphs to extract features related to the metadata or previously
|
||||
@@ -0,0 +1,115 @@
|
||||
---
|
||||
layout: default
|
||||
title: Models and Model Cards
|
||||
parent: Solutions
|
||||
nav_order: 30
|
||||
---
|
||||
|
||||
# MediaPipe Models and Model Cards
|
||||
{: .no_toc }
|
||||
|
||||
1. TOC
|
||||
{:toc}
|
||||
---
|
||||
|
||||
### [Face Detection](https://google.github.io/mediapipe/solutions/face_detection)
|
||||
|
||||
* Short-range model (best for faces within 2 meters from the camera):
|
||||
[TFLite model](https://storage.googleapis.com/mediapipe-assets/face_detection_short_range.tflite),
|
||||
[TFLite model quantized for EdgeTPU/Coral](https://github.com/google/mediapipe/tree/master/mediapipe/examples/coral/models/face-detector-quantized_edgetpu.tflite),
|
||||
[Model card](https://mediapipe.page.link/blazeface-mc)
|
||||
* Full-range model (dense, best for faces within 5 meters from the camera):
|
||||
[TFLite model](https://storage.googleapis.com/mediapipe-assets/face_detection_full_range.tflite),
|
||||
[Model card](https://mediapipe.page.link/blazeface-back-mc)
|
||||
* Full-range model (sparse, best for faces within 5 meters from the camera):
|
||||
[TFLite model](https://storage.googleapis.com/mediapipe-assets/face_detection_full_range_sparse.tflite),
|
||||
[Model card](https://mediapipe.page.link/blazeface-back-sparse-mc)
|
||||
|
||||
Full-range dense and sparse models have the same quality in terms of
|
||||
[F-score](https://en.wikipedia.org/wiki/F-score) however differ in underlying
|
||||
metrics. The dense model is slightly better in
|
||||
[Recall](https://en.wikipedia.org/wiki/Precision_and_recall) whereas the sparse
|
||||
model outperforms the dense one in
|
||||
[Precision](https://en.wikipedia.org/wiki/Precision_and_recall). Speed-wise
|
||||
sparse model is ~30% faster when executing on CPU via
|
||||
[XNNPACK](https://github.com/google/XNNPACK) whereas on GPU the models
|
||||
demonstrate comparable latencies. Depending on your application, you may prefer
|
||||
one over the other.
|
||||
|
||||
### [Face Mesh](https://google.github.io/mediapipe/solutions/face_mesh)
|
||||
|
||||
* Face landmark model:
|
||||
[TFLite model](https://storage.googleapis.com/mediapipe-assets/face_landmark.tflite),
|
||||
[TF.js model](https://tfhub.dev/mediapipe/facemesh/1)
|
||||
* Face landmark model w/ attention (aka Attention Mesh):
|
||||
[TFLite model](https://storage.googleapis.com/mediapipe-assets/face_landmark_with_attention.tflite)
|
||||
* [Model card](https://mediapipe.page.link/facemesh-mc),
|
||||
[Model card (w/ attention)](https://mediapipe.page.link/attentionmesh-mc)
|
||||
|
||||
### [Iris](https://google.github.io/mediapipe/solutions/iris)
|
||||
|
||||
* Iris landmark model:
|
||||
[TFLite model](https://storage.googleapis.com/mediapipe-assets/iris_landmark.tflite)
|
||||
* [Model card](https://mediapipe.page.link/iris-mc)
|
||||
|
||||
### [Hands](https://google.github.io/mediapipe/solutions/hands)
|
||||
|
||||
* Palm detection model:
|
||||
[TFLite model (lite)](https://storage.googleapis.com/mediapipe-assets/palm_detection_lite.tflite),
|
||||
[TFLite model (full)](https://storage.googleapis.com/mediapipe-assets/palm_detection_full.tflite),
|
||||
[TF.js model](https://tfhub.dev/mediapipe/handdetector/1)
|
||||
* Hand landmark model:
|
||||
[TFLite model (lite)](https://storage.googleapis.com/mediapipe-assets/hand_landmark_lite.tflite),
|
||||
[TFLite model (full)](https://storage.googleapis.com/mediapipe-assets/hand_landmark_full.tflite),
|
||||
[TF.js model](https://tfhub.dev/mediapipe/handskeleton/1)
|
||||
* [Model card](https://mediapipe.page.link/handmc)
|
||||
|
||||
### [Pose](https://google.github.io/mediapipe/solutions/pose)
|
||||
|
||||
* Pose detection model:
|
||||
[TFLite model](https://storage.googleapis.com/mediapipe-assets/pose_detection.tflite)
|
||||
* Pose landmark model:
|
||||
[TFLite model (lite)](https://storage.googleapis.com/mediapipe-assets/pose_landmark_lite.tflite),
|
||||
[TFLite model (full)](https://storage.googleapis.com/mediapipe-assets/pose_landmark_full.tflite),
|
||||
[TFLite model (heavy)](https://storage.googleapis.com/mediapipe-assets/pose_landmark_heavy.tflite)
|
||||
* [Model card](https://mediapipe.page.link/blazepose-mc)
|
||||
|
||||
### [Holistic](https://google.github.io/mediapipe/solutions/holistic)
|
||||
|
||||
* Hand recrop model:
|
||||
[TFLite model](https://storage.googleapis.com/mediapipe-assets/hand_recrop.tflite)
|
||||
|
||||
### [Selfie Segmentation](https://google.github.io/mediapipe/solutions/selfie_segmentation)
|
||||
|
||||
* [TFLite model (general)](https://storage.googleapis.com/mediapipe-assets/selfie_segmentation.tflite)
|
||||
* [TFLite model (landscape)](https://storage.googleapis.com/mediapipe-assets/selfie_segmentation_landscape.tflite)
|
||||
* [Model card](https://mediapipe.page.link/selfiesegmentation-mc)
|
||||
|
||||
### [Hair Segmentation](https://google.github.io/mediapipe/solutions/hair_segmentation)
|
||||
|
||||
* [TFLite model](https://storage.googleapis.com/mediapipe-assets/hair_segmentation.tflite)
|
||||
* [Model card](https://mediapipe.page.link/hairsegmentation-mc)
|
||||
|
||||
### [Object Detection](https://google.github.io/mediapipe/solutions/object_detection)
|
||||
|
||||
* [TFLite model](https://storage.googleapis.com/mediapipe-assets/ssdlite_object_detection.tflite)
|
||||
* [TFLite model quantized for EdgeTPU/Coral](https://github.com/google/mediapipe/tree/master/mediapipe/examples/coral/models/object-detector-quantized_edgetpu.tflite)
|
||||
* [TensorFlow model](https://github.com/google/mediapipe/tree/master/mediapipe/models/object_detection_saved_model)
|
||||
* [Model information](https://github.com/google/mediapipe/tree/master/mediapipe/models/object_detection_saved_model/README.md)
|
||||
|
||||
### [Objectron](https://google.github.io/mediapipe/solutions/objectron)
|
||||
|
||||
* [TFLite model for shoes](https://storage.googleapis.com/mediapipe-assets/object_detection_3d_sneakers.tflite)
|
||||
* [TFLite model for chairs](https://storage.googleapis.com/mediapipe-assets/object_detection_3d_chair.tflite)
|
||||
* [TFLite model for cameras](https://storage.googleapis.com/mediapipe-assets/object_detection_3d_camera.tflite)
|
||||
* [TFLite model for cups](https://storage.googleapis.com/mediapipe-assets/object_detection_3d_cup.tflite)
|
||||
* [Single-stage TFLite model for shoes](https://storage.googleapis.com/mediapipe-assets/object_detection_3d_sneakers_1stage.tflite)
|
||||
* [Single-stage TFLite model for chairs](https://storage.googleapis.com/mediapipe-assets/object_detection_3d_chair_1stage.tflite)
|
||||
* [Model card](https://mediapipe.page.link/objectron-mc)
|
||||
|
||||
### [KNIFT](https://google.github.io/mediapipe/solutions/knift)
|
||||
|
||||
* [TFLite model for up to 200 keypoints](https://storage.googleapis.com/mediapipe-assets/knift_float.tflite)
|
||||
* [TFLite model for up to 400 keypoints](https://storage.googleapis.com/mediapipe-assets/knift_float_400.tflite)
|
||||
* [TFLite model for up to 1000 keypoints](https://storage.googleapis.com/mediapipe-assets/knift_float_1k.tflite)
|
||||
* [Model card](https://mediapipe.page.link/knift-mc)
|
||||
@@ -0,0 +1,153 @@
|
||||
---
|
||||
layout: default
|
||||
title: Object Detection
|
||||
parent: Solutions
|
||||
nav_order: 9
|
||||
---
|
||||
|
||||
# MediaPipe Object Detection
|
||||
{: .no_toc }
|
||||
|
||||
<details close markdown="block">
|
||||
<summary>
|
||||
Table of contents
|
||||
</summary>
|
||||
{: .text-delta }
|
||||
1. TOC
|
||||
{:toc}
|
||||
</details>
|
||||
---
|
||||
|
||||
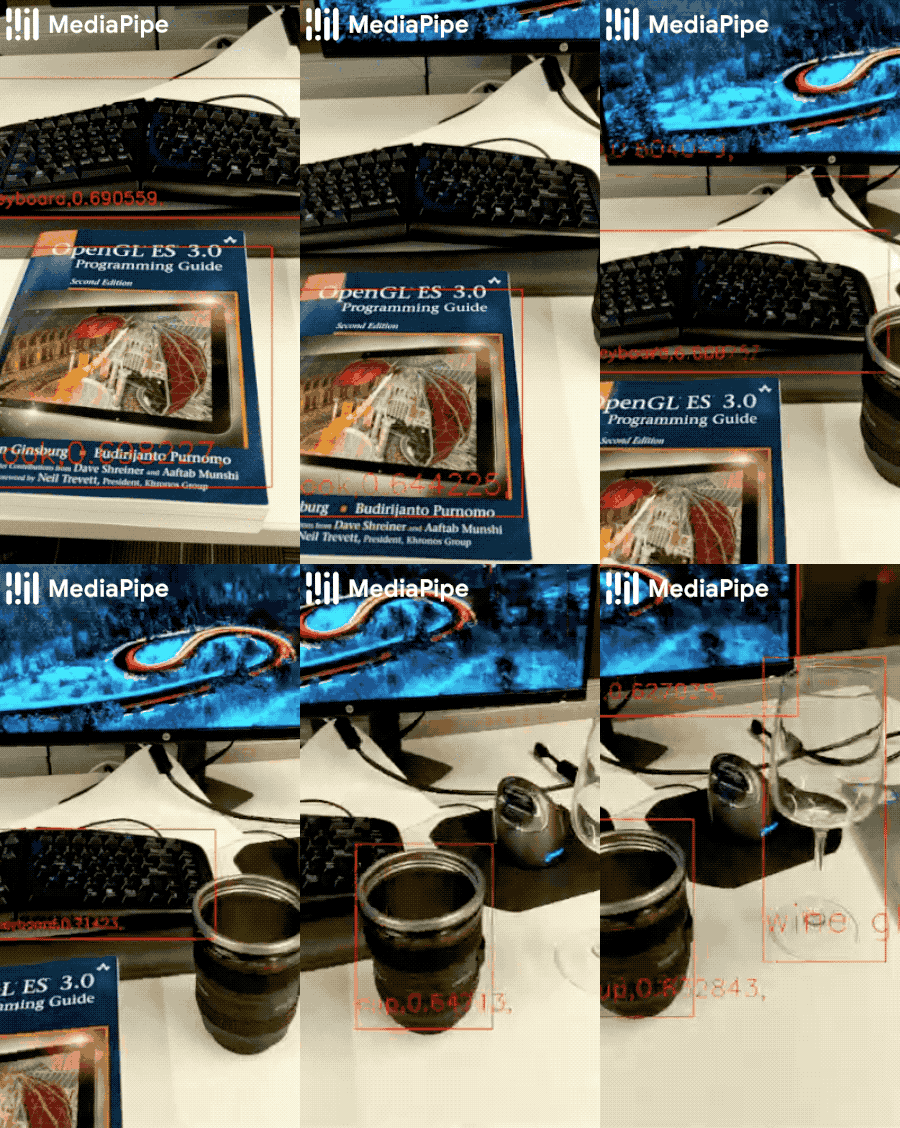
|
||||
|
||||
## Example Apps
|
||||
|
||||
Note: To visualize a graph, copy the graph and paste it into
|
||||
[MediaPipe Visualizer](https://viz.mediapipe.dev/). For more information on how
|
||||
to visualize its associated subgraphs, please see
|
||||
[visualizer documentation](../tools/visualizer.md).
|
||||
|
||||
### Mobile
|
||||
|
||||
Please first see general instructions for
|
||||
[Android](../getting_started/android.md) and [iOS](../getting_started/ios.md) on
|
||||
how to build MediaPipe examples.
|
||||
|
||||
#### GPU Pipeline
|
||||
|
||||
* Graph:
|
||||
[`mediapipe/graphs/object_detection/object_detection_mobile_gpu.pbtxt`](https://github.com/google/mediapipe/tree/master/mediapipe/graphs/object_detection/object_detection_mobile_gpu.pbtxt)
|
||||
* Android target:
|
||||
[(or download prebuilt ARM64 APK)](https://drive.google.com/open?id=1di2ywCA_acf3y5rIcJHngWHAUNsUHAGz)
|
||||
[`mediapipe/examples/android/src/java/com/google/mediapipe/apps/objectdetectiongpu:objectdetectiongpu`](https://github.com/google/mediapipe/tree/master/mediapipe/examples/android/src/java/com/google/mediapipe/apps/objectdetectiongpu/BUILD)
|
||||
* iOS target:
|
||||
[`mediapipe/examples/ios/objectdetectiongpu:ObjectDetectionGpuApp`](https://github.com/google/mediapipe/tree/master/mediapipe/examples/ios/objectdetectiongpu/BUILD)
|
||||
|
||||
#### CPU Pipeline
|
||||
|
||||
This is very similar to the [GPU pipeline](#gpu-pipeline) except that at the
|
||||
beginning and the end of the pipeline it performs GPU-to-CPU and CPU-to-GPU
|
||||
image transfer respectively. As a result, the rest of graph, which shares the
|
||||
same configuration as the GPU pipeline, runs entirely on CPU.
|
||||
|
||||
* Graph:
|
||||
[`mediapipe/graphs/object_detection/object_detection_mobile_cpu.pbtxt`](https://github.com/google/mediapipe/tree/master/mediapipe/graphs/object_detection/object_detection_mobile_cpu.pbtxt))
|
||||
* Android target:
|
||||
[(or download prebuilt ARM64 APK)](https://drive.google.com/open?id=1eRBK6V5Qd1LCRwexitR2OXgrBBXbOfZ5)
|
||||
[`mediapipe/examples/android/src/java/com/google/mediapipe/apps/objectdetectioncpu:objectdetectioncpu`](https://github.com/google/mediapipe/tree/master/mediapipe/examples/android/src/java/com/google/mediapipe/apps/objectdetectioncpu/BUILD)
|
||||
* iOS target:
|
||||
[`mediapipe/examples/ios/objectdetectioncpu:ObjectDetectionCpuApp`](https://github.com/google/mediapipe/tree/master/mediapipe/examples/ios/objectdetectioncpu/BUILD)
|
||||
|
||||
### Desktop
|
||||
|
||||
#### Live Camera Input
|
||||
|
||||
Please first see general instructions for [desktop](../getting_started/cpp.md)
|
||||
on how to build MediaPipe examples.
|
||||
|
||||
* Graph:
|
||||
[`mediapipe/graphs/object_detection/object_detection_desktop_live.pbtxt`](https://github.com/google/mediapipe/tree/master/mediapipe/graphs/object_detection/object_detection_desktop_live.pbtxt)
|
||||
* Target:
|
||||
[`mediapipe/examples/desktop/object_detection:object_detection_cpu`](https://github.com/google/mediapipe/tree/master/mediapipe/examples/desktop/object_detection/BUILD)
|
||||
|
||||
#### Video File Input
|
||||
|
||||
* With a TFLite Model
|
||||
|
||||
This uses the same
|
||||
[TFLite model](https://storage.googleapis.com/mediapipe-assets/ssdlite_object_detection.tflite)
|
||||
(see also
|
||||
[model info](https://github.com/google/mediapipe/tree/master/mediapipe/models/object_detection_saved_model/README.md))
|
||||
as in [Live Camera Input](#live-camera-input) above. The pipeline is
|
||||
implemented in this
|
||||
[graph](https://github.com/google/mediapipe/tree/master/mediapipe/graphs/object_detection/object_detection_desktop_tflite_graph.pbtxt),
|
||||
which differs from the live-camera-input CPU-based pipeline
|
||||
[graph](https://github.com/google/mediapipe/tree/master/mediapipe/graphs/object_detection/object_detection_mobile_cpu.pbtxt)
|
||||
simply by the additional `OpenCvVideoDecoderCalculator` and
|
||||
`OpenCvVideoEncoderCalculator` at the beginning and the end of the graph
|
||||
respectively.
|
||||
|
||||
To build the application, run:
|
||||
|
||||
```bash
|
||||
bazel build -c opt --define MEDIAPIPE_DISABLE_GPU=1 mediapipe/examples/desktop/object_detection:object_detection_tflite
|
||||
```
|
||||
|
||||
To run the application, replace `<input video path>` and `<output video
|
||||
path>` in the command below with your own paths:
|
||||
|
||||
Tip: You can find a test video available in
|
||||
`mediapipe/examples/desktop/object_detection`.
|
||||
|
||||
```
|
||||
GLOG_logtostderr=1 bazel-bin/mediapipe/examples/desktop/object_detection/object_detection_tflite \
|
||||
--calculator_graph_config_file=mediapipe/graphs/object_detection/object_detection_desktop_tflite_graph.pbtxt \
|
||||
--input_side_packets=input_video_path=<input video path>,output_video_path=<output video path>
|
||||
```
|
||||
|
||||
* With a TensorFlow Model
|
||||
|
||||
This uses the
|
||||
[TensorFlow model](https://github.com/google/mediapipe/tree/master/mediapipe/models/object_detection_saved_model)
|
||||
( see also
|
||||
[model info](https://github.com/google/mediapipe/tree/master/mediapipe/models/object_detection_saved_model/README.md)),
|
||||
and the pipeline is implemented in this
|
||||
[graph](https://github.com/google/mediapipe/tree/master/mediapipe/graphs/object_detection/object_detection_mobile_cpu.pbtxt).
|
||||
|
||||
Note: The following runs TensorFlow inference on CPU. If you would like to
|
||||
run inference on GPU (Linux only), please follow
|
||||
[TensorFlow CUDA Support and Setup on Linux Desktop](../getting_started/gpu_support.md#tensorflow-cuda-support-and-setup-on-linux-desktop)
|
||||
instead.
|
||||
|
||||
To build the TensorFlow CPU inference example on desktop, run:
|
||||
|
||||
Note: This command also builds TensorFlow targets from scratch, and it may
|
||||
take a long time (e.g., up to 30 mins) for the first time.
|
||||
|
||||
```bash
|
||||
bazel build -c opt --define MEDIAPIPE_DISABLE_GPU=1 --define no_aws_support=true --linkopt=-s \
|
||||
mediapipe/examples/desktop/object_detection:object_detection_tensorflow
|
||||
```
|
||||
|
||||
To run the application, replace `<input video path>` and `<output video
|
||||
path>` in the command below with your own paths:
|
||||
|
||||
Tip: You can find a test video available in
|
||||
`mediapipe/examples/desktop/object_detection`.
|
||||
|
||||
```bash
|
||||
GLOG_logtostderr=1 bazel-bin/mediapipe/examples/desktop/object_detection/object_detection_tflite \
|
||||
--calculator_graph_config_file=mediapipe/graphs/object_detection/object_detection_desktop_tensorflow_graph.pbtxt \
|
||||
--input_side_packets=input_video_path=<input video path>,output_video_path=<output video path>
|
||||
```
|
||||
|
||||
### Coral
|
||||
|
||||
Please refer to
|
||||
[these instructions](https://github.com/google/mediapipe/tree/master/mediapipe/examples/coral/README.md)
|
||||
to cross-compile and run MediaPipe examples on the
|
||||
[Coral Dev Board](https://coral.ai/products/dev-board).
|
||||
|
||||
## Resources
|
||||
|
||||
* [Models and model cards](./models.md#object_detection)
|
||||
@@ -0,0 +1,662 @@
|
||||
---
|
||||
layout: default
|
||||
title: Objectron (3D Object Detection)
|
||||
parent: Solutions
|
||||
nav_order: 12
|
||||
---
|
||||
|
||||
# MediaPipe Objectron
|
||||
{: .no_toc }
|
||||
|
||||
<details close markdown="block">
|
||||
<summary>
|
||||
Table of contents
|
||||
</summary>
|
||||
{: .text-delta }
|
||||
1. TOC
|
||||
{:toc}
|
||||
</details>
|
||||
---
|
||||
|
||||
## Overview
|
||||
|
||||
MediaPipe Objectron is a mobile real-time 3D object detection solution for
|
||||
everyday objects. It detects objects in 2D images, and estimates their poses
|
||||
through a machine learning (ML) model, trained on the [Objectron dataset](https://github.com/google-research-datasets/Objectron).
|
||||
|
||||
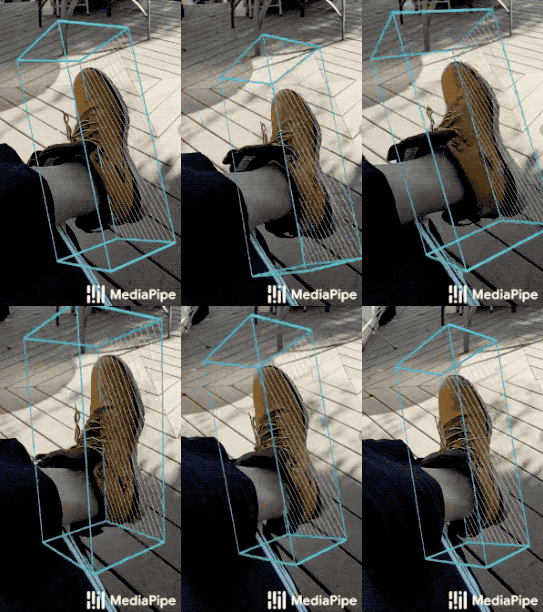 | 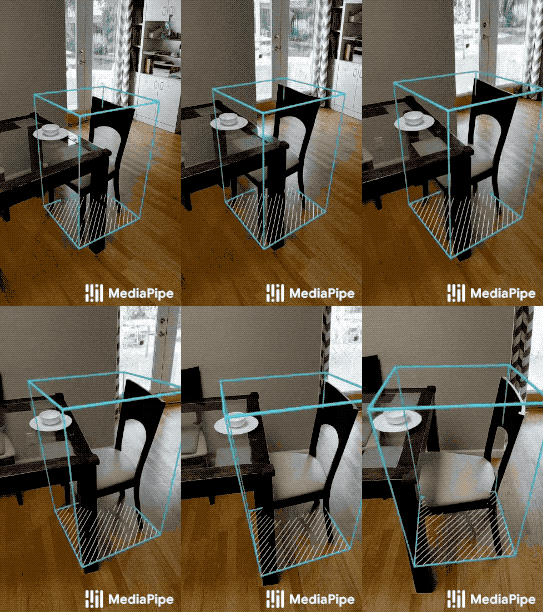 | 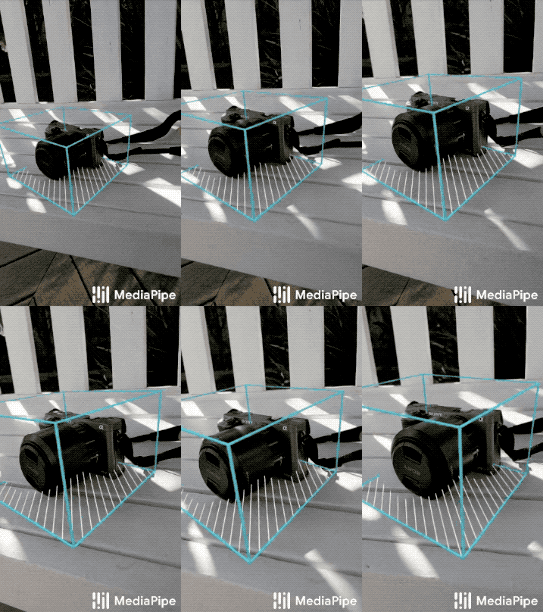 | 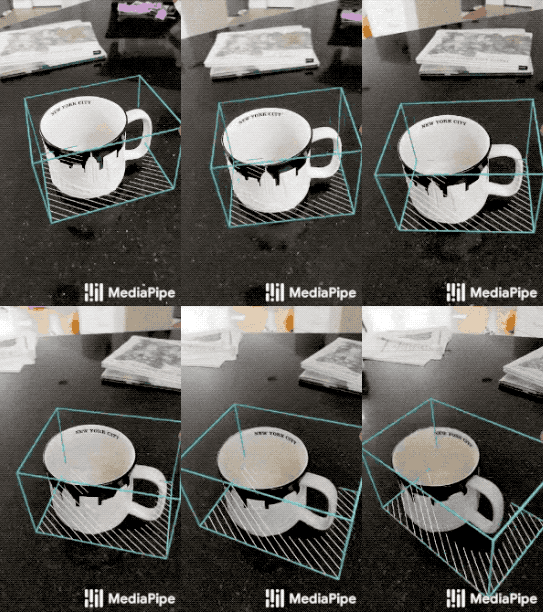
|
||||
:--------------------------------------------------------------------------------: | :----------------------------------------------------------------------------------: | :------------------------------------------------------------------------------------: | :------------------------------------------------------------------------------:
|
||||
*Fig 1a. Shoe Objectron* | *Fig 1b. Chair Objectron* | *Fig 1c. Camera Objectron* | *Fig 1d. Cup Objectron*
|
||||
|
||||
Object detection is an extensively studied computer vision problem, but most of
|
||||
the research has focused on
|
||||
[2D object prediction](https://ai.googleblog.com/2017/06/supercharge-your-computer-vision-models.html).
|
||||
While 2D prediction only provides 2D bounding boxes, by extending prediction to
|
||||
3D, one can capture an object’s size, position and orientation in the world,
|
||||
leading to a variety of applications in robotics, self-driving vehicles, image
|
||||
retrieval, and augmented reality. Although 2D object detection is relatively
|
||||
mature and has been widely used in the industry, 3D object detection from 2D
|
||||
imagery is a challenging problem, due to the lack of data and diversity of
|
||||
appearances and shapes of objects within a category.
|
||||
|
||||
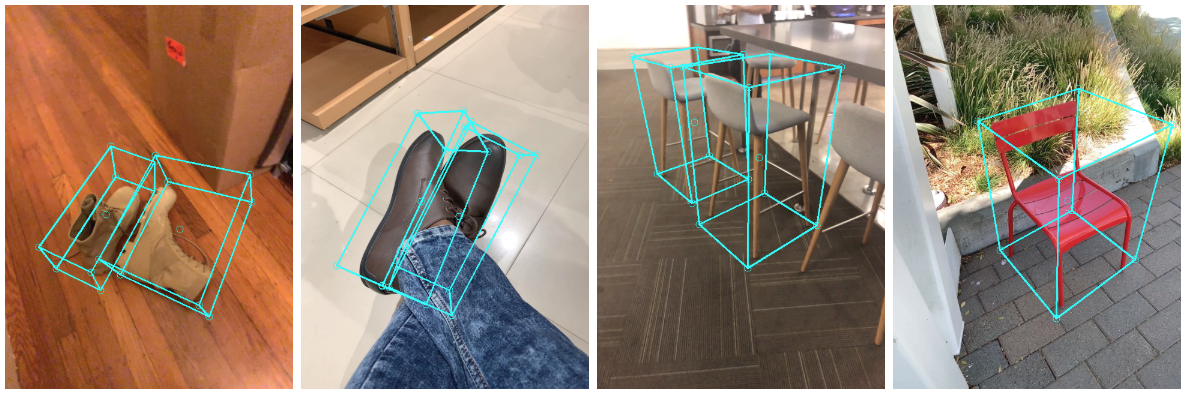 |
|
||||
:-----------------------------------------------------------------------: |
|
||||
*Fig 2. Objectron example results.* |
|
||||
|
||||
## Obtaining Real-World 3D Training Data
|
||||
|
||||
While there are ample amounts of 3D data for street scenes, due to the
|
||||
popularity of research into self-driving cars that rely on 3D capture sensors
|
||||
like LIDAR, datasets with ground truth 3D annotations for more granular everyday
|
||||
objects are extremely limited. To overcome this problem, we developed a novel
|
||||
data pipeline using mobile augmented reality (AR) session data. With the arrival
|
||||
of [ARCore](https://developers.google.com/ar) and
|
||||
[ARKit](https://developer.apple.com/augmented-reality/),
|
||||
[hundreds of millions](https://arinsider.co/2019/05/13/arcore-reaches-400-million-devices/)
|
||||
of smartphones now have AR capabilities and the ability to capture additional
|
||||
information during an AR session, including the camera pose, sparse 3D point
|
||||
clouds, estimated lighting, and planar surfaces.
|
||||
|
||||
In order to label ground truth data, we built a novel annotation tool for use
|
||||
with AR session data, which allows annotators to quickly label 3D bounding boxes
|
||||
for objects. This tool uses a split-screen view to display 2D video frames on
|
||||
which are overlaid 3D bounding boxes on the left, alongside a view showing 3D
|
||||
point clouds, camera positions and detected planes on the right. Annotators draw
|
||||
3D bounding boxes in the 3D view, and verify its location by reviewing the
|
||||
projections in 2D video frames. For static objects, we only need to annotate an
|
||||
object in a single frame and propagate its location to all frames using the
|
||||
ground truth camera pose information from the AR session data, which makes the
|
||||
procedure highly efficient.
|
||||
|
||||
| 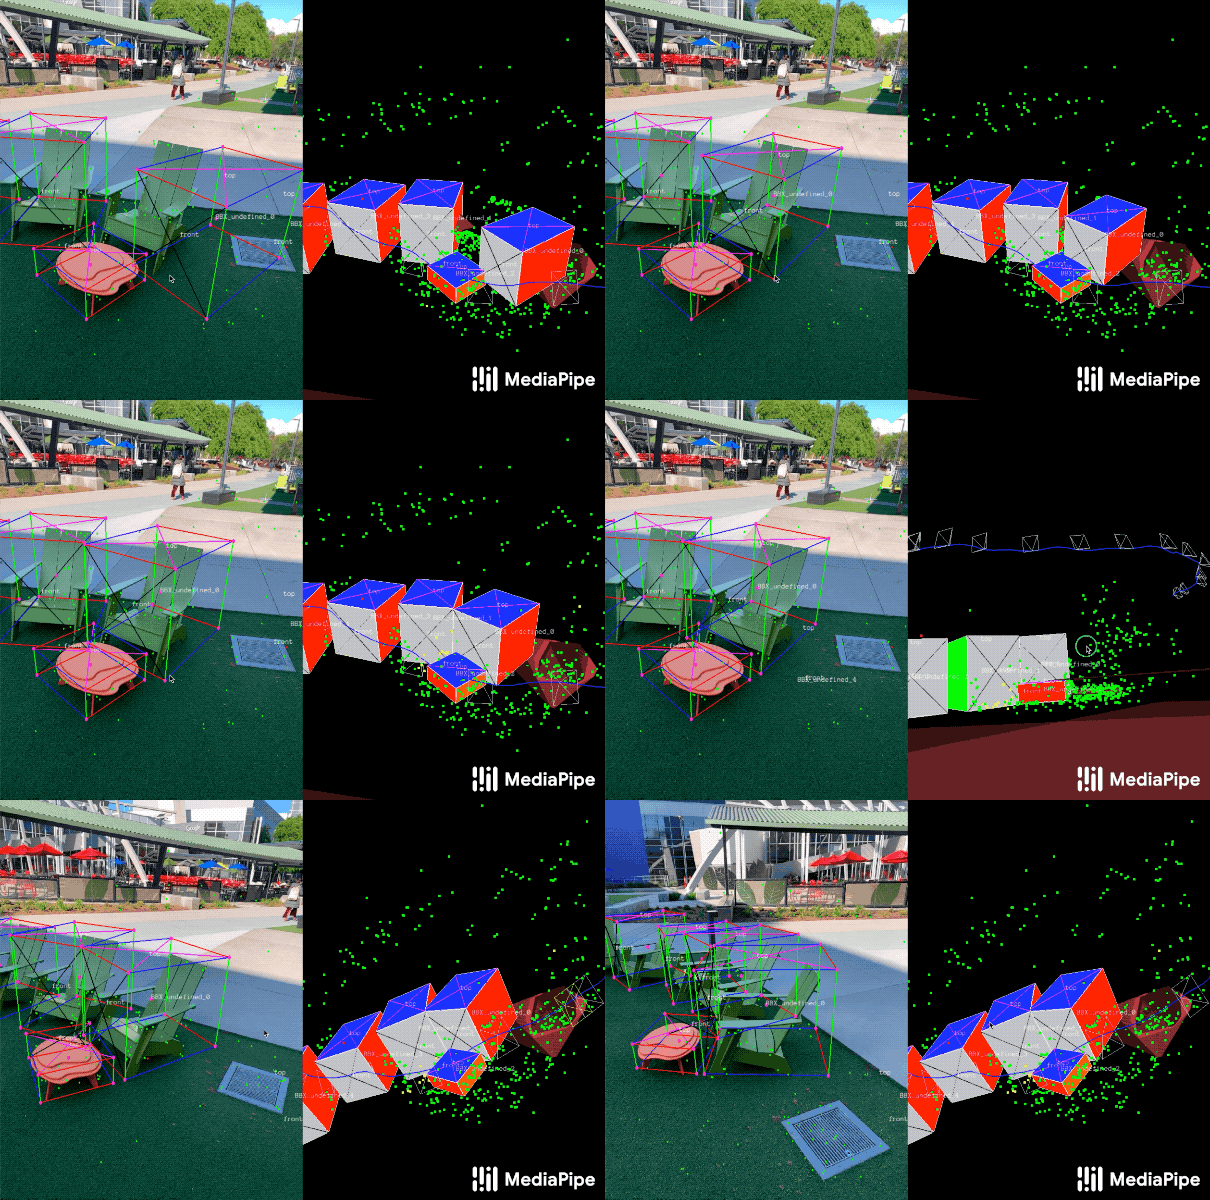 |
|
||||
| :--------------------------------------------------------------------------: |
|
||||
| *Fig 3. Real-world data annotation for 3D object detection. (Right) 3D bounding boxes are annotated in the 3D world with detected surfaces and point clouds. (Left) Projections of annotated 3D bounding boxes are overlaid on top of video frames making it easy to validate the annotation.* |
|
||||
|
||||
## AR Synthetic Data Generation
|
||||
|
||||
A popular approach is to complement real-world data with synthetic data in order
|
||||
to increase the accuracy of prediction. However, attempts to do so often yield
|
||||
poor, unrealistic data or, in the case of photorealistic rendering, require
|
||||
significant effort and compute. Our novel approach, called AR Synthetic Data
|
||||
Generation, places virtual objects into scenes that have AR session data, which
|
||||
allows us to leverage camera poses, detected planar surfaces, and estimated
|
||||
lighting to generate placements that are physically probable and with lighting
|
||||
that matches the scene. This approach results in high-quality synthetic data
|
||||
with rendered objects that respect the scene geometry and fit seamlessly into
|
||||
real backgrounds. By combining real-world data and AR synthetic data, we are
|
||||
able to increase the accuracy by about 10%.
|
||||
|
||||
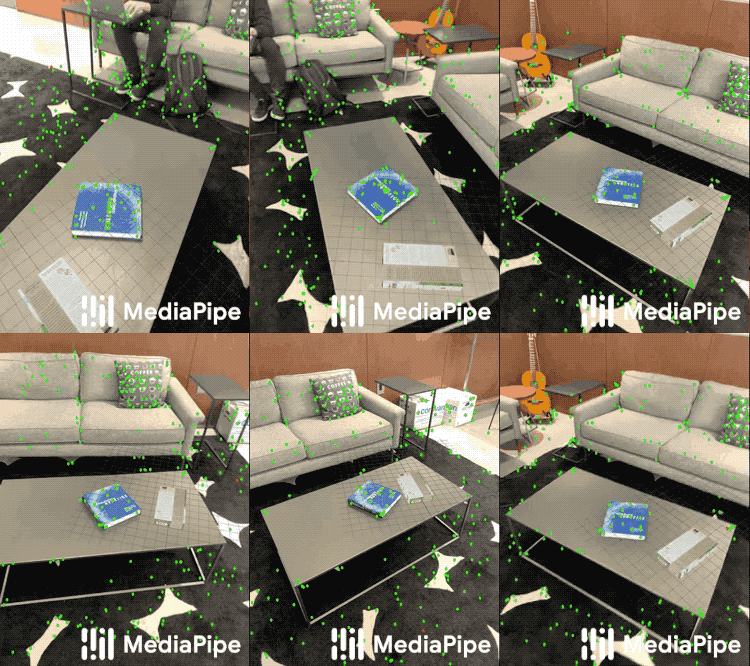 |
|
||||
:-------------------------------------------------------------------------------------------: |
|
||||
*Fig 4. An example of AR synthetic data generation. The virtual white-brown cereal box is rendered into the real scene, next to the real blue book.* |
|
||||
|
||||
## ML Pipelines for 3D Object Detection
|
||||
|
||||
We built two ML pipelines to predict the 3D bounding box of an object from a
|
||||
single RGB image: one is a two-stage pipeline and the other is a single-stage
|
||||
pipeline. The two-stage pipeline is 3x faster than the single-stage pipeline
|
||||
with similar or better accuracy. The single stage pipeline is good at detecting
|
||||
multiple objects, whereas the two stage pipeline is good for a single dominant
|
||||
object.
|
||||
|
||||
### Two-stage Pipeline
|
||||
|
||||
Our two-stage pipeline is illustrated by the diagram in Fig 5. The first stage
|
||||
uses an object detector to find the 2D crop of the object. The second stage
|
||||
takes the image crop and estimates the 3D bounding box. At the same time, it
|
||||
also computes the 2D crop of the object for the next frame, such that the object
|
||||
detector does not need to run every frame.
|
||||
|
||||
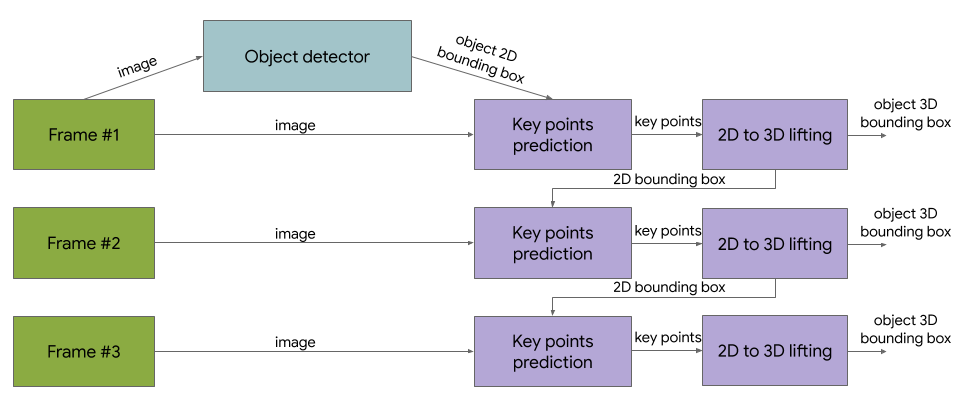 |
|
||||
:----------------------------------------------------------------------------------------: |
|
||||
*Fig 5. Network architecture and post-processing for two-stage 3D object detection.* |
|
||||
|
||||
We can use any 2D object detector for the first stage. In this solution, we use
|
||||
[TensorFlow Object Detection](https://github.com/tensorflow/models/tree/master/research/object_detection) trained
|
||||
with the [Open Images dataset](https://storage.googleapis.com/openimages/web/index.html).
|
||||
The second stage 3D bounding box predictor we released runs 83FPS on Adreno 650
|
||||
mobile GPU.
|
||||
|
||||
### Single-stage Pipeline
|
||||
|
||||
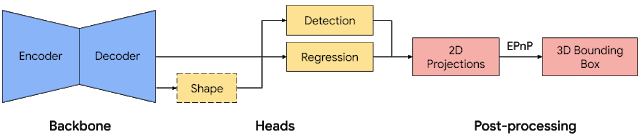 |
|
||||
:---------------------------------------------------------------------------------: |
|
||||
*Fig 6. Network architecture and post-processing for single-stage 3D object detection.* |
|
||||
|
||||
Our [single-stage pipeline](https://arxiv.org/abs/2003.03522) is illustrated by
|
||||
the diagram in Fig 6, the model backbone has an encoder-decoder architecture,
|
||||
built upon
|
||||
[MobileNetv2](https://ai.googleblog.com/2018/04/mobilenetv2-next-generation-of-on.html).
|
||||
We employ a multi-task learning approach, jointly predicting an object's shape
|
||||
with detection and regression. The shape task predicts the object's shape
|
||||
signals depending on what ground truth annotation is available, e.g.
|
||||
segmentation. This is optional if there is no shape annotation in training data.
|
||||
For the detection task, we use the annotated bounding boxes and fit a Gaussian
|
||||
to the box, with center at the box centroid, and standard deviations
|
||||
proportional to the box size. The goal for detection is then to predict this
|
||||
distribution with its peak representing the object’s center location. The
|
||||
regression task estimates the 2D projections of the eight bounding box vertices.
|
||||
To obtain the final 3D coordinates for the bounding box, we leverage a well
|
||||
established pose estimation algorithm
|
||||
([EPnP](https://www.epfl.ch/labs/cvlab/software/multi-view-stereo/epnp/)). It
|
||||
can recover the 3D bounding box of an object, without a priori knowledge of the
|
||||
object dimensions. Given the 3D bounding box, we can easily compute pose and
|
||||
size of the object. The model is light enough to run real-time on mobile devices
|
||||
(at 26 FPS on an Adreno 650 mobile GPU).
|
||||
|
||||
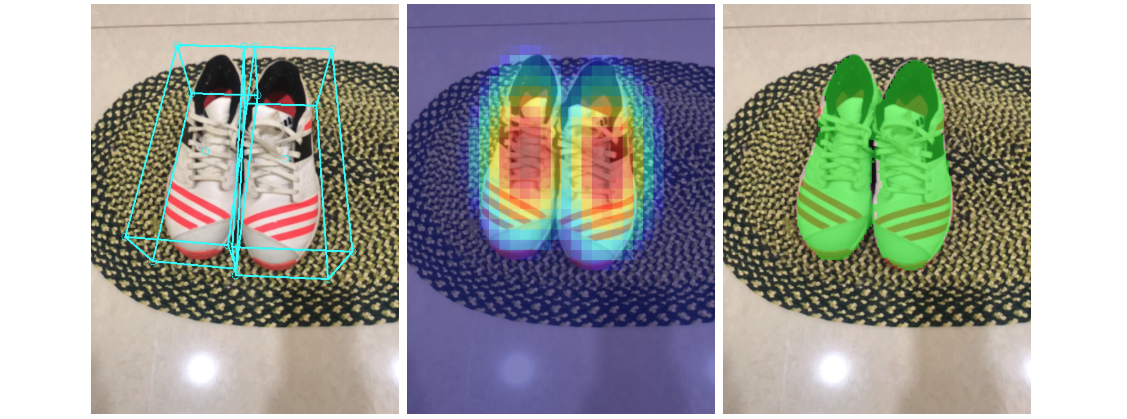 |
|
||||
:-------------------------------------------------------------------------------------: |
|
||||
*Fig 7. Sample results of our network — (Left) original 2D image with estimated bounding boxes, (Middle) object detection by Gaussian distribution, (Right) predicted segmentation mask.* |
|
||||
|
||||
#### Detection and Tracking
|
||||
|
||||
When the model is applied to every frame captured by the mobile device, it can
|
||||
suffer from jitter due to the ambiguity of the 3D bounding box estimated in each
|
||||
frame. To mitigate this, we adopt the same detection+tracking strategy in our
|
||||
[2D object detection and tracking pipeline](./box_tracking.md#object-detection-and-tracking)
|
||||
in [MediaPipe Box Tracking](./box_tracking.md). This mitigates the need to run
|
||||
the network on every frame, allowing the use of heavier and therefore more
|
||||
accurate models, while keeping the pipeline real-time on mobile devices. It also
|
||||
retains object identity across frames and ensures that the prediction is
|
||||
temporally consistent, reducing the jitter.
|
||||
|
||||
The Objectron 3D object detection and tracking pipeline is implemented as a
|
||||
MediaPipe
|
||||
[graph](https://github.com/google/mediapipe/tree/master/mediapipe/graphs/object_detection_3d/object_occlusion_tracking_1stage.pbtxt),
|
||||
which internally uses a
|
||||
[detection subgraph](https://github.com/google/mediapipe/tree/master/mediapipe/modules/objectron/objectron_detection_1stage_gpu.pbtxt)
|
||||
and a
|
||||
[tracking subgraph](https://github.com/google/mediapipe/tree/master/mediapipe/modules/objectron/objectron_tracking_1stage_gpu.pbtxt).
|
||||
The detection subgraph performs ML inference only once every few frames to
|
||||
reduce computation load, and decodes the output tensor to a FrameAnnotation that
|
||||
contains nine keypoints: the 3D bounding box's center and its eight vertices.
|
||||
The tracking subgraph runs every frame, using the box traker in
|
||||
[MediaPipe Box Tracking](./box_tracking.md) to track the 2D box tightly
|
||||
enclosing the projection of the 3D bounding box, and lifts the tracked 2D
|
||||
keypoints to 3D with
|
||||
[EPnP](https://www.epfl.ch/labs/cvlab/software/multi-view-stereo/epnp/). When
|
||||
new detection becomes available from the detection subgraph, the tracking
|
||||
subgraph is also responsible for consolidation between the detection and
|
||||
tracking results, based on the area of overlap.
|
||||
|
||||
## Objectron Dataset
|
||||
|
||||
We also released our [Objectron dataset](http://objectron.dev), with which we
|
||||
trained our 3D object detection models. The technical details of the Objectron
|
||||
dataset, including usage and tutorials, are available on
|
||||
the [dataset website](https://github.com/google-research-datasets/Objectron/).
|
||||
|
||||
## Solution APIs
|
||||
|
||||
### Cross-platform Configuration Options
|
||||
|
||||
Naming style and availability may differ slightly across platforms/languages.
|
||||
|
||||
#### static_image_mode
|
||||
|
||||
If set to `false`, the solution treats the input images as a video stream. It
|
||||
will try to detect objects in the very first images, and upon successful
|
||||
detection further localizes the 3D bounding box landmarks. In subsequent images,
|
||||
once all [max_num_objects](#max_num_objects) objects are detected and the
|
||||
corresponding 3D bounding box landmarks are localized, it simply tracks those
|
||||
landmarks without invoking another detection until it loses track of any of the
|
||||
objects. This reduces latency and is ideal for processing video frames. If set
|
||||
to `true`, object detection runs every input image, ideal for processing a batch
|
||||
of static, possibly unrelated, images. Default to `false`.
|
||||
|
||||
#### max_num_objects
|
||||
|
||||
Maximum number of objects to detect. Default to `5`.
|
||||
|
||||
#### min_detection_confidence
|
||||
|
||||
Minimum confidence value (`[0.0, 1.0]`) from the object-detection model for the
|
||||
detection to be considered successful. Default to `0.5`.
|
||||
|
||||
#### min_tracking_confidence
|
||||
|
||||
Minimum confidence value (`[0.0, 1.0]`) from the landmark-tracking model for the
|
||||
3D bounding box landmarks to be considered tracked successfully, or otherwise
|
||||
object detection will be invoked automatically on the next input image. Setting
|
||||
it to a higher value can increase robustness of the solution, at the expense of
|
||||
a higher latency. Ignored if [static_image_mode](#static_image_mode) is `true`,
|
||||
where object detection simply runs on every image. Default to `0.99`.
|
||||
|
||||
#### model_name
|
||||
|
||||
Name of the model to use for predicting 3D bounding box landmarks. Currently
|
||||
supports `{'Shoe', 'Chair', 'Cup', 'Camera'}`. Default to `Shoe`.
|
||||
|
||||
#### focal_length
|
||||
|
||||
By default, camera focal length defined in [NDC space](#ndc-space), i.e., `(fx,
|
||||
fy)`. Default to `(1.0, 1.0)`. To specify focal length in
|
||||
[pixel space](#pixel-space) instead, i.e., `(fx_pixel, fy_pixel)`, users should
|
||||
provide [`image_size`](#image_size) = `(image_width, image_height)` to enable
|
||||
conversions inside the API. For further details about NDC and pixel space,
|
||||
please see [Coordinate Systems](#coordinate-systems).
|
||||
|
||||
#### principal_point
|
||||
|
||||
By default, camera principal point defined in [NDC space](#ndc-space), i.e.,
|
||||
`(px, py)`. Default to `(0.0, 0.0)`. To specify principal point in
|
||||
[pixel space](#pixel-space), i.e.,`(px_pixel, py_pixel)`, users should provide
|
||||
[`image_size`](#image_size) = `(image_width, image_height)` to enable
|
||||
conversions inside the API. For further details about NDC and pixel space,
|
||||
please see [Coordinate Systems](#coordinate-systems).
|
||||
|
||||
#### image_size
|
||||
|
||||
**Specify only when [`focal_length`](#focal_length) and
|
||||
[`principal_point`](#principal_point) are specified in pixel space.**
|
||||
|
||||
Size of the input image, i.e., `(image_width, image_height)`.
|
||||
|
||||
### Output
|
||||
|
||||
<!-- Naming style may differ slightly across platforms/languages. -->
|
||||
|
||||
#### detected_objects
|
||||
|
||||
A list of detected 3D bounding box. Each 3D bounding box consists of the
|
||||
following:
|
||||
|
||||
* `landmarks_2d` : 2D landmarks of the object's 3D bounding box. The landmark
|
||||
coordinates are normalized to `[0.0, 1.0]` by the image width and height
|
||||
respectively.
|
||||
|
||||
* `landmarks_3d` : 3D landmarks of the object's 3D bounding box. The landmark
|
||||
coordinates are represented in [camera coordinate](#camera-coordinate)
|
||||
frame.
|
||||
|
||||
* `rotation` : rotation matrix from object coordinate frame to camera
|
||||
coordinate frame.
|
||||
|
||||
* `translation` : translation vector from object coordinate frame to camera
|
||||
coordinate frame.
|
||||
|
||||
* `scale` : relative scale of the object along `x`, `y` and `z` directions.
|
||||
|
||||
## Python Solution API
|
||||
|
||||
Please first follow general [instructions](../getting_started/python.md) to
|
||||
install MediaPipe Python package, then learn more in the companion
|
||||
[Python Colab](#resources) and the usage example below.
|
||||
|
||||
Supported configuration options:
|
||||
|
||||
* [static_image_mode](#static_image_mode)
|
||||
* [max_num_objects](#max_num_objects)
|
||||
* [min_detection_confidence](#min_detection_confidence)
|
||||
* [min_tracking_confidence](#min_tracking_confidence)
|
||||
* [model_name](#model_name)
|
||||
* [focal_length](#focal_length)
|
||||
* [principal_point](#principal_point)
|
||||
* [image_size](#image_size)
|
||||
|
||||
```python
|
||||
import cv2
|
||||
import mediapipe as mp
|
||||
mp_drawing = mp.solutions.drawing_utils
|
||||
mp_objectron = mp.solutions.objectron
|
||||
|
||||
# For static images:
|
||||
IMAGE_FILES = []
|
||||
with mp_objectron.Objectron(static_image_mode=True,
|
||||
max_num_objects=5,
|
||||
min_detection_confidence=0.5,
|
||||
model_name='Shoe') as objectron:
|
||||
for idx, file in enumerate(IMAGE_FILES):
|
||||
image = cv2.imread(file)
|
||||
# Convert the BGR image to RGB and process it with MediaPipe Objectron.
|
||||
results = objectron.process(cv2.cvtColor(image, cv2.COLOR_BGR2RGB))
|
||||
|
||||
# Draw box landmarks.
|
||||
if not results.detected_objects:
|
||||
print(f'No box landmarks detected on {file}')
|
||||
continue
|
||||
print(f'Box landmarks of {file}:')
|
||||
annotated_image = image.copy()
|
||||
for detected_object in results.detected_objects:
|
||||
mp_drawing.draw_landmarks(
|
||||
annotated_image, detected_object.landmarks_2d, mp_objectron.BOX_CONNECTIONS)
|
||||
mp_drawing.draw_axis(annotated_image, detected_object.rotation,
|
||||
detected_object.translation)
|
||||
cv2.imwrite('/tmp/annotated_image' + str(idx) + '.png', annotated_image)
|
||||
|
||||
# For webcam input:
|
||||
cap = cv2.VideoCapture(0)
|
||||
with mp_objectron.Objectron(static_image_mode=False,
|
||||
max_num_objects=5,
|
||||
min_detection_confidence=0.5,
|
||||
min_tracking_confidence=0.99,
|
||||
model_name='Shoe') as objectron:
|
||||
while cap.isOpened():
|
||||
success, image = cap.read()
|
||||
if not success:
|
||||
print("Ignoring empty camera frame.")
|
||||
# If loading a video, use 'break' instead of 'continue'.
|
||||
continue
|
||||
|
||||
# To improve performance, optionally mark the image as not writeable to
|
||||
# pass by reference.
|
||||
image.flags.writeable = False
|
||||
image = cv2.cvtColor(image, cv2.COLOR_BGR2RGB)
|
||||
results = objectron.process(image)
|
||||
|
||||
# Draw the box landmarks on the image.
|
||||
image.flags.writeable = True
|
||||
image = cv2.cvtColor(image, cv2.COLOR_RGB2BGR)
|
||||
if results.detected_objects:
|
||||
for detected_object in results.detected_objects:
|
||||
mp_drawing.draw_landmarks(
|
||||
image, detected_object.landmarks_2d, mp_objectron.BOX_CONNECTIONS)
|
||||
mp_drawing.draw_axis(image, detected_object.rotation,
|
||||
detected_object.translation)
|
||||
# Flip the image horizontally for a selfie-view display.
|
||||
cv2.imshow('MediaPipe Objectron', cv2.flip(image, 1))
|
||||
if cv2.waitKey(5) & 0xFF == 27:
|
||||
break
|
||||
cap.release()
|
||||
```
|
||||
|
||||
## JavaScript Solution API
|
||||
|
||||
Please first see general [introduction](../getting_started/javascript.md) on
|
||||
MediaPipe in JavaScript, then learn more in the companion [web demo](#resources)
|
||||
and the following usage example.
|
||||
|
||||
Supported configuration options:
|
||||
|
||||
* [staticImageMode](#static_image_mode)
|
||||
* [maxNumObjects](#max_num_objects)
|
||||
* [minDetectionConfidence](#min_detection_confidence)
|
||||
* [minTrackingConfidence](#min_tracking_confidence)
|
||||
* [modelName](#model_name)
|
||||
* [focalLength](#focal_length)
|
||||
* [principalPoint](#principal_point)
|
||||
* [imageSize](#image_size)
|
||||
|
||||
```html
|
||||
<!DOCTYPE html>
|
||||
<html>
|
||||
<head>
|
||||
<meta charset="utf-8">
|
||||
<script src="https://cdn.jsdelivr.net/npm/@mediapipe/camera_utils/camera_utils.js" crossorigin="anonymous"></script>
|
||||
<script src="https://cdn.jsdelivr.net/npm/@mediapipe/control_utils/control_utils.js" crossorigin="anonymous"></script>
|
||||
<script src="https://cdn.jsdelivr.net/npm/@mediapipe/control_utils_3d/control_utils_3d.js" crossorigin="anonymous"></script>
|
||||
<script src="https://cdn.jsdelivr.net/npm/@mediapipe/drawing_utils/drawing_utils.js" crossorigin="anonymous"></script>
|
||||
<script src="https://cdn.jsdelivr.net/npm/@mediapipe/objectron/objectron.js" crossorigin="anonymous"></script>
|
||||
</head>
|
||||
|
||||
<body>
|
||||
<div class="container">
|
||||
<video class="input_video"></video>
|
||||
<canvas class="output_canvas" width="1280px" height="720px"></canvas>
|
||||
</div>
|
||||
</body>
|
||||
</html>
|
||||
```
|
||||
|
||||
```javascript
|
||||
<script type="module">
|
||||
const videoElement = document.getElementsByClassName('input_video')[0];
|
||||
const canvasElement = document.getElementsByClassName('output_canvas')[0];
|
||||
const canvasCtx = canvasElement.getContext('2d');
|
||||
|
||||
function onResults(results) {
|
||||
canvasCtx.save();
|
||||
canvasCtx.drawImage(
|
||||
results.image, 0, 0, canvasElement.width, canvasElement.height);
|
||||
if (!!results.objectDetections) {
|
||||
for (const detectedObject of results.objectDetections) {
|
||||
// Reformat keypoint information as landmarks, for easy drawing.
|
||||
const landmarks: mpObjectron.Point2D[] =
|
||||
detectedObject.keypoints.map(x => x.point2d);
|
||||
// Draw bounding box.
|
||||
drawingUtils.drawConnectors(canvasCtx, landmarks,
|
||||
mpObjectron.BOX_CONNECTIONS, {color: '#FF0000'});
|
||||
// Draw centroid.
|
||||
drawingUtils.drawLandmarks(canvasCtx, [landmarks[0]], {color: '#FFFFFF'});
|
||||
}
|
||||
}
|
||||
canvasCtx.restore();
|
||||
}
|
||||
|
||||
const objectron = new Objectron({locateFile: (file) => {
|
||||
return `https://cdn.jsdelivr.net/npm/@mediapipe/objectron/${file}`;
|
||||
}});
|
||||
objectron.setOptions({
|
||||
modelName: 'Chair',
|
||||
maxNumObjects: 3,
|
||||
});
|
||||
objectron.onResults(onResults);
|
||||
|
||||
const camera = new Camera(videoElement, {
|
||||
onFrame: async () => {
|
||||
await objectron.send({image: videoElement});
|
||||
},
|
||||
width: 1280,
|
||||
height: 720
|
||||
});
|
||||
camera.start();
|
||||
</script>
|
||||
```
|
||||
|
||||
## Example Apps
|
||||
|
||||
Please first see general instructions for
|
||||
[Android](../getting_started/android.md), [iOS](../getting_started/ios.md), and
|
||||
[desktop](../getting_started/cpp.md) on how to build MediaPipe examples.
|
||||
|
||||
Note: To visualize a graph, copy the graph and paste it into
|
||||
[MediaPipe Visualizer](https://viz.mediapipe.dev/). For more information on how
|
||||
to visualize its associated subgraphs, please see
|
||||
[visualizer documentation](../tools/visualizer.md).
|
||||
|
||||
### Mobile
|
||||
|
||||
#### Two-stage Objectron
|
||||
|
||||
* Graph:
|
||||
[`mediapipe/graphs/object_detection_3d/object_occlusion_tracking.pbtxt`](https://github.com/google/mediapipe/tree/master/mediapipe/graphs/object_detection_3d/object_occlusion_tracking.pbtxt)
|
||||
|
||||
* Android target:
|
||||
[`mediapipe/examples/android/src/java/com/google/mediapipe/apps/objectdetection3d:objectdetection3d`](https://github.com/google/mediapipe/tree/master/mediapipe/examples/android/src/java/com/google/mediapipe/apps/objectdetection3d/BUILD).
|
||||
|
||||
Build for **shoes** (default) with:
|
||||
[(or download prebuilt ARM64 APK)](https://drive.google.com/file/d/1ANW9WDOCb8QO1r8gDC03A4UgrPkICdPP/view?usp=sharing)
|
||||
|
||||
```bash
|
||||
bazel build -c opt --config android_arm64 mediapipe/examples/android/src/java/com/google/mediapipe/apps/objectdetection3d:objectdetection3d
|
||||
```
|
||||
|
||||
Build for **chairs** with:
|
||||
[(or download prebuilt ARM64 APK)](https://drive.google.com/file/d/1lcUv1TBnv_SxnKSQwdOqbdLa9mkaTJHy/view?usp=sharing)
|
||||
|
||||
```bash
|
||||
bazel build -c opt --config android_arm64 --define chair=true mediapipe/examples/android/src/java/com/google/mediapipe/apps/objectdetection3d:objectdetection3d
|
||||
```
|
||||
|
||||
Build for **cups** with:
|
||||
[(or download prebuilt ARM64 APK)](https://drive.google.com/file/d/1bf77KDkowwrduleiC9B1M1XnEhjnOQbX/view?usp=sharing)
|
||||
|
||||
```bash
|
||||
bazel build -c opt --config android_arm64 --define cup=true mediapipe/examples/android/src/java/com/google/mediapipe/apps/objectdetection3d:objectdetection3d
|
||||
```
|
||||
|
||||
Build for **cameras** with:
|
||||
[(or download prebuilt ARM64 APK)](https://drive.google.com/file/d/1GM7lPO-s5URVxIzQur1bLsionEJs3yIl/view?usp=sharing)
|
||||
|
||||
```bash
|
||||
bazel build -c opt --config android_arm64 --define camera=true mediapipe/examples/android/src/java/com/google/mediapipe/apps/objectdetection3d:objectdetection3d
|
||||
```
|
||||
|
||||
* iOS target: Not available
|
||||
|
||||
#### Single-stage Objectron
|
||||
|
||||
* Graph:
|
||||
[`mediapipe/graphs/object_detection_3d/object_occlusion_tracking_1stage.pbtxt`](https://github.com/google/mediapipe/tree/master/mediapipe/graphs/object_detection_3d/object_occlusion_tracking.pbtxt)
|
||||
|
||||
* Android target:
|
||||
[`mediapipe/examples/android/src/java/com/google/mediapipe/apps/objectdetection3d:objectdetection3d`](https://github.com/google/mediapipe/tree/master/mediapipe/examples/android/src/java/com/google/mediapipe/apps/objectdetection3d/BUILD).
|
||||
|
||||
Build with **single-stage** model for **shoes** with:
|
||||
[(or download prebuilt ARM64 APK)](https://drive.google.com/file/d/1MvaEg4dkvKN8jAU1Z2GtudyXi1rQHYsE/view?usp=sharing)
|
||||
|
||||
```bash
|
||||
bazel build -c opt --config android_arm64 --define shoe_1stage=true mediapipe/examples/android/src/java/com/google/mediapipe/apps/objectdetection3d:objectdetection3d
|
||||
```
|
||||
|
||||
Build with **single-stage** model for **chairs** with:
|
||||
[(or download prebuilt ARM64 APK)](https://drive.google.com/file/d/1GJL4z3jr-wD1jMHGd4NBfOG-Yoq5t167/view?usp=sharing)
|
||||
|
||||
```bash
|
||||
bazel build -c opt --config android_arm64 --define chair_1stage=true mediapipe/examples/android/src/java/com/google/mediapipe/apps/objectdetection3d:objectdetection3d
|
||||
```
|
||||
|
||||
* iOS target: Not available
|
||||
|
||||
#### Assets
|
||||
|
||||
Example app bounding boxes are rendered with [GlAnimationOverlayCalculator](https://github.com/google/mediapipe/tree/master/mediapipe/graphs/object_detection_3d/calculators/gl_animation_overlay_calculator.cc) using a parsing of the sequenced .obj file
|
||||
format into a custom .uuu format. This can be done for user assets as follows:
|
||||
> First run
|
||||
>
|
||||
> ```shell
|
||||
> ./mediapipe/graphs/object_detection_3d/obj_parser/obj_cleanup.sh [INPUT_DIR] [INTERMEDIATE_OUTPUT_DIR]
|
||||
> ```
|
||||
> and then run
|
||||
>
|
||||
> ```bash
|
||||
> bazel run -c opt mediapipe/graphs/object_detection_3d/obj_parser:ObjParser -- input_dir=[INTERMEDIATE_OUTPUT_DIR] output_dir=[OUTPUT_DIR]
|
||||
> ```
|
||||
> INPUT_DIR should be the folder with initial asset .obj files to be processed,
|
||||
> and OUTPUT_DIR is the folder where the processed asset .uuu file will be placed.
|
||||
>
|
||||
> Note: ObjParser combines all .obj files found in the given directory into a
|
||||
> single .uuu animation file, using the order given by sorting the filenames alphanumerically. Also the ObjParser directory inputs must be given as
|
||||
> absolute paths, not relative paths. See parser utility library at [`mediapipe/graphs/object_detection_3d/obj_parser/`](https://github.com/google/mediapipe/tree/master/mediapipe/graphs/object_detection_3d/obj_parser/) for more details.
|
||||
|
||||
|
||||
### Desktop
|
||||
|
||||
To build the application, run:
|
||||
|
||||
```bash
|
||||
bazel build -c opt --define MEDIAPIPE_DISABLE_GPU=1 mediapipe/examples/desktop/object_detection_3d:objectron_cpu
|
||||
```
|
||||
|
||||
To run the application, replace `<input video path>` and `<output video path>`
|
||||
in the command below with your own paths, and `<landmark model path>` and
|
||||
`<allowed labels>` with the following:
|
||||
|
||||
Category | `<landmark model path>` | `<allowed labels>`
|
||||
:------- | :-------------------------------------------------------------------------- | :-----------------
|
||||
Shoe | mediapipe/modules/objectron/object_detection_3d_sneakers.tflite | Footwear
|
||||
Chair | mediapipe/modules/objectron/object_detection_3d_chair.tflite | Chair
|
||||
Cup | mediapipe/modules/objectron/object_detection_3d_cup.tflite | Mug
|
||||
Camera | mediapipe/modules/objectron/object_detection_3d_camera.tflite | Camera
|
||||
|
||||
```
|
||||
GLOG_logtostderr=1 bazel-bin/mediapipe/examples/desktop/object_detection_3d/objectron_cpu \
|
||||
--calculator_graph_config_file=mediapipe/graphs/object_detection_3d/objectron_desktop_cpu.pbtxt \
|
||||
--input_side_packets=input_video_path=<input video path>,output_video_path=<output video path>,box_landmark_model_path=<landmark model path>,allowed_labels=<allowed labels>
|
||||
```
|
||||
|
||||
## Coordinate Systems
|
||||
|
||||
### Object Coordinate
|
||||
|
||||
Each object has its object coordinate frame. We use the below object coordinate
|
||||
definition, with `+x` pointing right, `+y` pointing up and `+z` pointing front,
|
||||
origin is at the center of the 3D bounding box.
|
||||
|
||||

|
||||
|
||||
### Camera Coordinate
|
||||
|
||||
A 3D object is parameterized by its `scale` and `rotation`, `translation` with
|
||||
regard to the camera coordinate frame. In this API we use the below camera
|
||||
coordinate definition, with `+x` pointing right, `+y` pointing up and `-z`
|
||||
pointing to the scene.
|
||||
|
||||

|
||||
|
||||
To work with box landmarks, one can first derive landmark coordinates in object
|
||||
frame by scaling a origin centered unit box with `scale`, then transform to
|
||||
camera frame by applying `rotation` and `translation`:
|
||||
|
||||
```
|
||||
landmarks_3d = rotation * scale * unit_box + translation
|
||||
```
|
||||
|
||||
### NDC Space
|
||||
|
||||
In this API we use
|
||||
[NDC(normalized device coordinates)](http://www.songho.ca/opengl/gl_projectionmatrix.html)
|
||||
as an intermediate space when projecting points from 3D to 2D. In NDC space,
|
||||
`x`, `y` are confined to `[-1, 1]`.
|
||||
|
||||

|
||||
|
||||
By default the camera parameters `(fx, fy)` and `(px, py)` are defined in NDC
|
||||
space. Given `(X, Y, Z)` of 3D points in camera coordinate, one can project 3D
|
||||
points to NDC space as follows:
|
||||
|
||||
```
|
||||
x_ndc = -fx * X / Z + px
|
||||
y_ndc = -fy * Y / Z + py
|
||||
z_ndc = 1 / Z
|
||||
```
|
||||
|
||||
### Pixel Space
|
||||
|
||||
In this API we set upper-left coner of an image as the origin of pixel
|
||||
coordinate. One can convert from NDC to pixel space as follows:
|
||||
|
||||
```
|
||||
x_pixel = (1 + x_ndc) / 2.0 * image_width
|
||||
y_pixel = (1 - y_ndc) / 2.0 * image_height
|
||||
```
|
||||
|
||||
Alternatively one can directly project from camera coordinate to pixel
|
||||
coordinate with camera parameters `(fx_pixel, fy_pixel)` and `(px_pixel,
|
||||
py_pixel)` defined in pixel space as follows:
|
||||
|
||||
```
|
||||
x_pixel = -fx_pixel * X / Z + px_pixel
|
||||
y_pixel = fy_pixel * Y / Z + py_pixel
|
||||
```
|
||||
|
||||
Conversion of camera parameters from pixel space to NDC space:
|
||||
|
||||
```
|
||||
fx = fx_pixel * 2.0 / image_width
|
||||
fy = fy_pixel * 2.0 / image_height
|
||||
```
|
||||
|
||||
```
|
||||
px = -px_pixel * 2.0 / image_width + 1.0
|
||||
py = -py_pixel * 2.0 / image_height + 1.0
|
||||
```
|
||||
|
||||
## Resources
|
||||
|
||||
* Google AI Blog:
|
||||
[Announcing the Objectron Dataset](https://ai.googleblog.com/2020/11/announcing-objectron-dataset.html)
|
||||
* Google AI Blog:
|
||||
[Real-Time 3D Object Detection on Mobile Devices with MediaPipe](https://ai.googleblog.com/2020/03/real-time-3d-object-detection-on-mobile.html)
|
||||
* Paper: [Objectron: A Large Scale Dataset of Object-Centric Videos in the
|
||||
Wild with Pose Annotations](https://arxiv.org/abs/2012.09988), to appear in
|
||||
CVPR 2021
|
||||
* Paper: [MobilePose: Real-Time Pose Estimation for Unseen Objects with Weak
|
||||
Shape Supervision](https://arxiv.org/abs/2003.03522)
|
||||
* Paper:
|
||||
[Instant 3D Object Tracking with Applications in Augmented Reality](https://drive.google.com/open?id=1O_zHmlgXIzAdKljp20U_JUkEHOGG52R8)
|
||||
([presentation](https://www.youtube.com/watch?v=9ndF1AIo7h0)), Fourth
|
||||
Workshop on Computer Vision for AR/VR, CVPR 2020
|
||||
* [Models and model cards](./models.md#objectron)
|
||||
* [Web demo](https://code.mediapipe.dev/codepen/objectron)
|
||||
* [Python Colab](https://mediapipe.page.link/objectron_py_colab)
|
||||
@@ -0,0 +1,494 @@
|
||||
---
|
||||
layout: default
|
||||
title: Pose
|
||||
parent: Solutions
|
||||
has_children: true
|
||||
has_toc: false
|
||||
nav_order: 5
|
||||
---
|
||||
|
||||
# MediaPipe Pose
|
||||
{: .no_toc }
|
||||
|
||||
<details close markdown="block">
|
||||
<summary>
|
||||
Table of contents
|
||||
</summary>
|
||||
{: .text-delta }
|
||||
1. TOC
|
||||
{:toc}
|
||||
</details>
|
||||
---
|
||||
|
||||
## Overview
|
||||
|
||||
Human pose estimation from video plays a critical role in various applications
|
||||
such as [quantifying physical exercises](./pose_classification.md), sign
|
||||
language recognition, and full-body gesture control. For example, it can form
|
||||
the basis for yoga, dance, and fitness applications. It can also enable the
|
||||
overlay of digital content and information on top of the physical world in
|
||||
augmented reality.
|
||||
|
||||
MediaPipe Pose is a ML solution for high-fidelity body pose tracking, inferring
|
||||
33 3D landmarks and background segmentation mask on the whole body from RGB
|
||||
video frames utilizing our
|
||||
[BlazePose](https://ai.googleblog.com/2020/08/on-device-real-time-body-pose-tracking.html)
|
||||
research that also powers the
|
||||
[ML Kit Pose Detection API](https://developers.google.com/ml-kit/vision/pose-detection).
|
||||
Current state-of-the-art approaches rely primarily on powerful desktop
|
||||
environments for inference, whereas our method achieves real-time performance on
|
||||
most modern [mobile phones](#mobile), [desktops/laptops](#desktop), in
|
||||
[python](#python-solution-api) and even on the [web](#javascript-solution-api).
|
||||
|
||||
 |
|
||||
:----------------------------------------------------------------------: |
|
||||
*Fig 1. Example of MediaPipe Pose for pose tracking.* |
|
||||
|
||||
## ML Pipeline
|
||||
|
||||
The solution utilizes a two-step detector-tracker ML pipeline, proven to be
|
||||
effective in our [MediaPipe Hands](./hands.md) and
|
||||
[MediaPipe Face Mesh](./face_mesh.md) solutions. Using a detector, the pipeline
|
||||
first locates the person/pose region-of-interest (ROI) within the frame. The
|
||||
tracker subsequently predicts the pose landmarks and segmentation mask within
|
||||
the ROI using the ROI-cropped frame as input. Note that for video use cases the
|
||||
detector is invoked only as needed, i.e., for the very first frame and when the
|
||||
tracker could no longer identify body pose presence in the previous frame. For
|
||||
other frames the pipeline simply derives the ROI from the previous frame’s pose
|
||||
landmarks.
|
||||
|
||||
The pipeline is implemented as a MediaPipe
|
||||
[graph](https://github.com/google/mediapipe/tree/master/mediapipe/graphs/pose_tracking/pose_tracking_gpu.pbtxt)
|
||||
that uses a
|
||||
[pose landmark subgraph](https://github.com/google/mediapipe/tree/master/mediapipe/modules/pose_landmark/pose_landmark_gpu.pbtxt)
|
||||
from the
|
||||
[pose landmark module](https://github.com/google/mediapipe/tree/master/mediapipe/modules/pose_landmark)
|
||||
and renders using a dedicated
|
||||
[pose renderer subgraph](https://github.com/google/mediapipe/tree/master/mediapipe/graphs/pose_tracking/subgraphs/pose_renderer_gpu.pbtxt).
|
||||
The
|
||||
[pose landmark subgraph](https://github.com/google/mediapipe/tree/master/mediapipe/modules/pose_landmark/pose_landmark_gpu.pbtxt)
|
||||
internally uses a
|
||||
[pose detection subgraph](https://github.com/google/mediapipe/tree/master/mediapipe/modules/pose_detection/pose_detection_gpu.pbtxt)
|
||||
from the
|
||||
[pose detection module](https://github.com/google/mediapipe/tree/master/mediapipe/modules/pose_detection).
|
||||
|
||||
Note: To visualize a graph, copy the graph and paste it into
|
||||
[MediaPipe Visualizer](https://viz.mediapipe.dev/). For more information on how
|
||||
to visualize its associated subgraphs, please see
|
||||
[visualizer documentation](../tools/visualizer.md).
|
||||
|
||||
## Pose Estimation Quality
|
||||
|
||||
To evaluate the quality of our [models](./models.md#pose) against other
|
||||
well-performing publicly available solutions, we use three different validation
|
||||
datasets, representing different verticals: Yoga, Dance and HIIT. Each image
|
||||
contains only a single person located 2-4 meters from the camera. To be
|
||||
consistent with other solutions, we perform evaluation only for 17 keypoints
|
||||
from [COCO topology](https://cocodataset.org/#keypoints-2020).
|
||||
|
||||
Method | Yoga <br/> [`mAP`] | Yoga <br/> [`[email protected]`] | Dance <br/> [`mAP`] | Dance <br/> [`[email protected]`] | HIIT <br/> [`mAP`] | HIIT <br/> [`[email protected]`]
|
||||
----------------------------------------------------------------------------------------------------- | -----------------: | ---------------------: | ------------------: | ----------------------: | -----------------: | ---------------------:
|
||||
BlazePose GHUM Heavy | 68.1 | **96.4** | 73.0 | **97.2** | 74.0 | **97.5**
|
||||
BlazePose GHUM Full | 62.6 | **95.5** | 67.4 | **96.3** | 68.0 | **95.7**
|
||||
BlazePose GHUM Lite | 45.0 | **90.2** | 53.6 | **92.5** | 53.8 | **93.5**
|
||||
[AlphaPose ResNet50](https://github.com/MVIG-SJTU/AlphaPose) | 63.4 | **96.0** | 57.8 | **95.5** | 63.4 | **96.0**
|
||||
[Apple Vision](https://developer.apple.com/documentation/vision/detecting_human_body_poses_in_images) | 32.8 | **82.7** | 36.4 | **91.4** | 44.5 | **88.6**
|
||||
|
||||
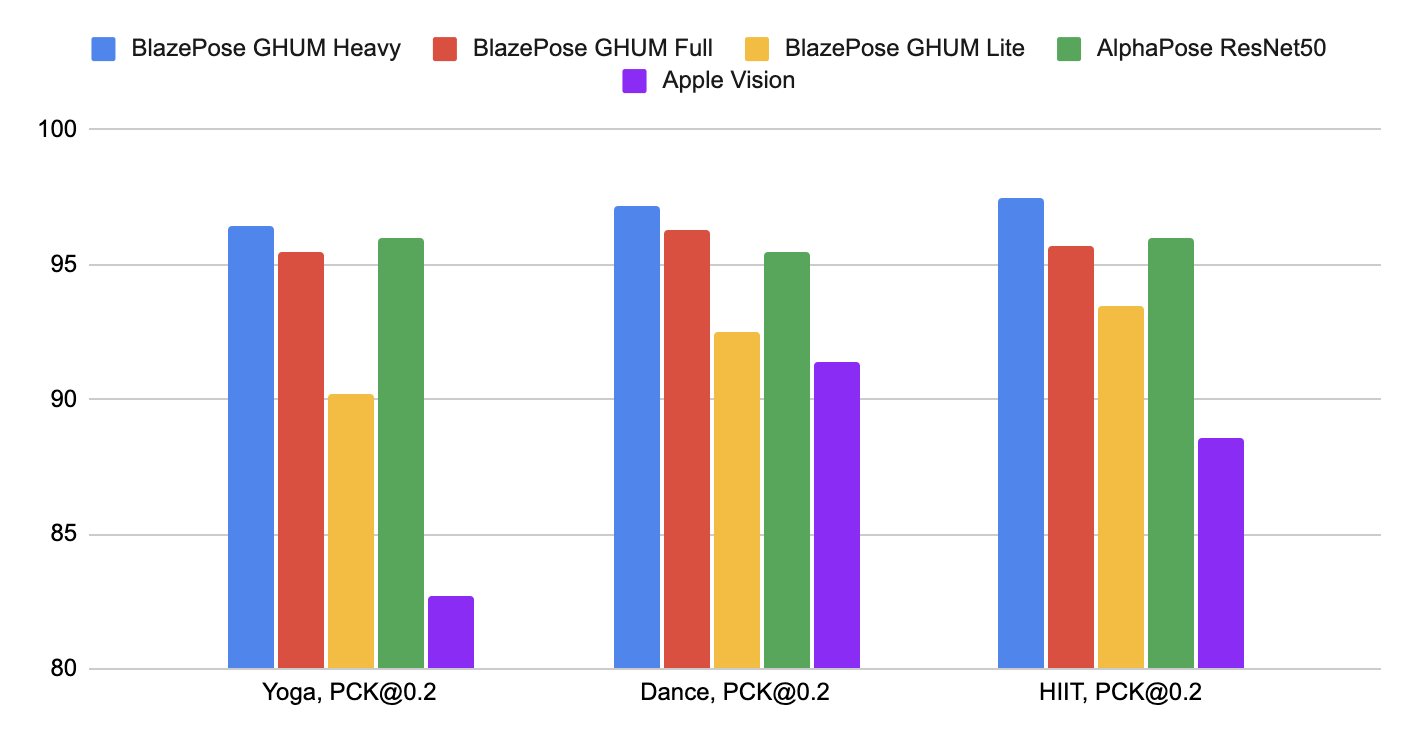 |
|
||||
:--------------------------------------------------------------------------: |
|
||||
*Fig 2. Quality evaluation in [`[email protected]`].* |
|
||||
|
||||
We designed our models specifically for live perception use cases, so all of
|
||||
them work in real-time on the majority of modern devices.
|
||||
|
||||
Method | Latency <br/> Pixel 3 [TFLite GPU](https://www.tensorflow.org/lite/performance/gpu_advanced) | Latency <br/> MacBook Pro (15-inch 2017)
|
||||
-------------------- | -------------------------------------------------------------------------------------------: | ---------------------------------------:
|
||||
BlazePose GHUM Heavy | 53 ms | 38 ms
|
||||
BlazePose GHUM Full | 25 ms | 27 ms
|
||||
BlazePose GHUM Lite | 20 ms | 25 ms
|
||||
|
||||
## Models
|
||||
|
||||
### Person/pose Detection Model (BlazePose Detector)
|
||||
|
||||
The detector is inspired by our own lightweight
|
||||
[BlazeFace](https://arxiv.org/abs/1907.05047) model, used in
|
||||
[MediaPipe Face Detection](./face_detection.md), as a proxy for a person
|
||||
detector. It explicitly predicts two additional virtual keypoints that firmly
|
||||
describe the human body center, rotation and scale as a circle. Inspired by
|
||||
[Leonardo’s Vitruvian man](https://en.wikipedia.org/wiki/Vitruvian_Man), we
|
||||
predict the midpoint of a person's hips, the radius of a circle circumscribing
|
||||
the whole person, and the incline angle of the line connecting the shoulder and
|
||||
hip midpoints.
|
||||
|
||||
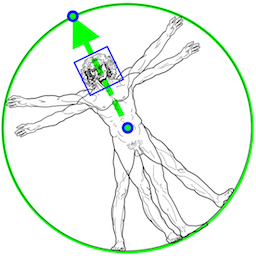 |
|
||||
:----------------------------------------------------------------------------------------------------: |
|
||||
*Fig 3. Vitruvian man aligned via two virtual keypoints predicted by BlazePose detector in addition to the face bounding box.* |
|
||||
|
||||
### Pose Landmark Model (BlazePose [GHUM](https://github.com/google-research/google-research/tree/master/ghum) 3D)
|
||||
|
||||
The landmark model in MediaPipe Pose predicts the location of 33 pose landmarks
|
||||
(see figure below).
|
||||
|
||||
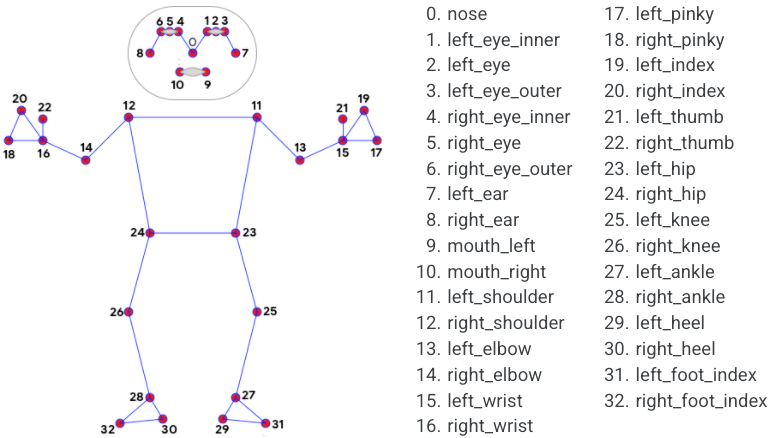 |
|
||||
:----------------------------------------------------------------------------------------------: |
|
||||
*Fig 4. 33 pose landmarks.* |
|
||||
|
||||
Optionally, MediaPipe Pose can predicts a full-body
|
||||
[segmentation mask](#segmentation_mask) represented as a two-class segmentation
|
||||
(human or background).
|
||||
|
||||
Please find more detail in the
|
||||
[BlazePose Google AI Blog](https://ai.googleblog.com/2020/08/on-device-real-time-body-pose-tracking.html),
|
||||
this [paper](https://arxiv.org/abs/2006.10204),
|
||||
[the model card](./models.md#pose) and the [Output](#output) section below.
|
||||
|
||||
## Solution APIs
|
||||
|
||||
### Cross-platform Configuration Options
|
||||
|
||||
Naming style and availability may differ slightly across platforms/languages.
|
||||
|
||||
#### static_image_mode
|
||||
|
||||
If set to `false`, the solution treats the input images as a video stream. It
|
||||
will try to detect the most prominent person in the very first images, and upon
|
||||
a successful detection further localizes the pose landmarks. In subsequent
|
||||
images, it then simply tracks those landmarks without invoking another detection
|
||||
until it loses track, on reducing computation and latency. If set to `true`,
|
||||
person detection runs every input image, ideal for processing a batch of static,
|
||||
possibly unrelated, images. Default to `false`.
|
||||
|
||||
#### model_complexity
|
||||
|
||||
Complexity of the pose landmark model: `0`, `1` or `2`. Landmark accuracy as
|
||||
well as inference latency generally go up with the model complexity. Default to
|
||||
`1`.
|
||||
|
||||
#### smooth_landmarks
|
||||
|
||||
If set to `true`, the solution filters pose landmarks across different input
|
||||
images to reduce jitter, but ignored if [static_image_mode](#static_image_mode)
|
||||
is also set to `true`. Default to `true`.
|
||||
|
||||
#### enable_segmentation
|
||||
|
||||
If set to `true`, in addition to the pose landmarks the solution also generates
|
||||
the segmentation mask. Default to `false`.
|
||||
|
||||
#### smooth_segmentation
|
||||
|
||||
If set to `true`, the solution filters segmentation masks across different input
|
||||
images to reduce jitter. Ignored if [enable_segmentation](#enable_segmentation)
|
||||
is `false` or [static_image_mode](#static_image_mode) is `true`. Default to
|
||||
`true`.
|
||||
|
||||
#### min_detection_confidence
|
||||
|
||||
Minimum confidence value (`[0.0, 1.0]`) from the person-detection model for the
|
||||
detection to be considered successful. Default to `0.5`.
|
||||
|
||||
#### min_tracking_confidence
|
||||
|
||||
Minimum confidence value (`[0.0, 1.0]`) from the landmark-tracking model for the
|
||||
pose landmarks to be considered tracked successfully, or otherwise person
|
||||
detection will be invoked automatically on the next input image. Setting it to a
|
||||
higher value can increase robustness of the solution, at the expense of a higher
|
||||
latency. Ignored if [static_image_mode](#static_image_mode) is `true`, where
|
||||
person detection simply runs on every image. Default to `0.5`.
|
||||
|
||||
### Output
|
||||
|
||||
Naming style may differ slightly across platforms/languages.
|
||||
|
||||
#### pose_landmarks
|
||||
|
||||
A list of pose landmarks. Each landmark consists of the following:
|
||||
|
||||
* `x` and `y`: Landmark coordinates normalized to `[0.0, 1.0]` by the image
|
||||
width and height respectively.
|
||||
* `z`: Represents the landmark depth with the depth at the midpoint of hips
|
||||
being the origin, and the smaller the value the closer the landmark is to
|
||||
the camera. The magnitude of `z` uses roughly the same scale as `x`.
|
||||
* `visibility`: A value in `[0.0, 1.0]` indicating the likelihood of the
|
||||
landmark being visible (present and not occluded) in the image.
|
||||
|
||||
#### pose_world_landmarks
|
||||
|
||||
*Fig 5. Example of MediaPipe Pose real-world 3D coordinates.* |
|
||||
:-----------------------------------------------------------: |
|
||||
<video autoplay muted loop preload style="height: auto; width: 480px"><source src="../images/mobile/pose_world_landmarks.mp4" type="video/mp4"></video> |
|
||||
|
||||
Another list of pose landmarks in world coordinates. Each landmark consists of
|
||||
the following:
|
||||
|
||||
* `x`, `y` and `z`: Real-world 3D coordinates in meters with the origin at the
|
||||
center between hips.
|
||||
* `visibility`: Identical to that defined in the corresponding
|
||||
[pose_landmarks](#pose_landmarks).
|
||||
|
||||
#### segmentation_mask
|
||||
|
||||
The output segmentation mask, predicted only when
|
||||
[enable_segmentation](#enable_segmentation) is set to `true`. The mask has the
|
||||
same width and height as the input image, and contains values in `[0.0, 1.0]`
|
||||
where `1.0` and `0.0` indicate high certainty of a "human" and "background"
|
||||
pixel respectively. Please refer to the platform-specific usage examples below
|
||||
for usage details.
|
||||
|
||||
*Fig 6. Example of MediaPipe Pose segmentation mask.* |
|
||||
:---------------------------------------------------: |
|
||||
<video autoplay muted loop preload style="height: auto; width: 480px"><source src="../images/mobile/pose_segmentation.mp4" type="video/mp4"></video> |
|
||||
|
||||
### Python Solution API
|
||||
|
||||
Please first follow general [instructions](../getting_started/python.md) to
|
||||
install MediaPipe Python package, then learn more in the companion
|
||||
[Python Colab](#resources) and the usage example below.
|
||||
|
||||
Supported configuration options:
|
||||
|
||||
* [static_image_mode](#static_image_mode)
|
||||
* [model_complexity](#model_complexity)
|
||||
* [smooth_landmarks](#smooth_landmarks)
|
||||
* [enable_segmentation](#enable_segmentation)
|
||||
* [smooth_segmentation](#smooth_segmentation)
|
||||
* [min_detection_confidence](#min_detection_confidence)
|
||||
* [min_tracking_confidence](#min_tracking_confidence)
|
||||
|
||||
```python
|
||||
import cv2
|
||||
import mediapipe as mp
|
||||
mp_drawing = mp.solutions.drawing_utils
|
||||
mp_drawing_styles = mp.solutions.drawing_styles
|
||||
mp_pose = mp.solutions.pose
|
||||
|
||||
# For static images:
|
||||
IMAGE_FILES = []
|
||||
BG_COLOR = (192, 192, 192) # gray
|
||||
with mp_pose.Pose(
|
||||
static_image_mode=True,
|
||||
model_complexity=2,
|
||||
enable_segmentation=True,
|
||||
min_detection_confidence=0.5) as pose:
|
||||
for idx, file in enumerate(IMAGE_FILES):
|
||||
image = cv2.imread(file)
|
||||
image_height, image_width, _ = image.shape
|
||||
# Convert the BGR image to RGB before processing.
|
||||
results = pose.process(cv2.cvtColor(image, cv2.COLOR_BGR2RGB))
|
||||
|
||||
if not results.pose_landmarks:
|
||||
continue
|
||||
print(
|
||||
f'Nose coordinates: ('
|
||||
f'{results.pose_landmarks.landmark[mp_pose.PoseLandmark.NOSE].x * image_width}, '
|
||||
f'{results.pose_landmarks.landmark[mp_pose.PoseLandmark.NOSE].y * image_height})'
|
||||
)
|
||||
|
||||
annotated_image = image.copy()
|
||||
# Draw segmentation on the image.
|
||||
# To improve segmentation around boundaries, consider applying a joint
|
||||
# bilateral filter to "results.segmentation_mask" with "image".
|
||||
condition = np.stack((results.segmentation_mask,) * 3, axis=-1) > 0.1
|
||||
bg_image = np.zeros(image.shape, dtype=np.uint8)
|
||||
bg_image[:] = BG_COLOR
|
||||
annotated_image = np.where(condition, annotated_image, bg_image)
|
||||
# Draw pose landmarks on the image.
|
||||
mp_drawing.draw_landmarks(
|
||||
annotated_image,
|
||||
results.pose_landmarks,
|
||||
mp_pose.POSE_CONNECTIONS,
|
||||
landmark_drawing_spec=mp_drawing_styles.get_default_pose_landmarks_style())
|
||||
cv2.imwrite('/tmp/annotated_image' + str(idx) + '.png', annotated_image)
|
||||
# Plot pose world landmarks.
|
||||
mp_drawing.plot_landmarks(
|
||||
results.pose_world_landmarks, mp_pose.POSE_CONNECTIONS)
|
||||
|
||||
# For webcam input:
|
||||
cap = cv2.VideoCapture(0)
|
||||
with mp_pose.Pose(
|
||||
min_detection_confidence=0.5,
|
||||
min_tracking_confidence=0.5) as pose:
|
||||
while cap.isOpened():
|
||||
success, image = cap.read()
|
||||
if not success:
|
||||
print("Ignoring empty camera frame.")
|
||||
# If loading a video, use 'break' instead of 'continue'.
|
||||
continue
|
||||
|
||||
# To improve performance, optionally mark the image as not writeable to
|
||||
# pass by reference.
|
||||
image.flags.writeable = False
|
||||
image = cv2.cvtColor(image, cv2.COLOR_BGR2RGB)
|
||||
results = pose.process(image)
|
||||
|
||||
# Draw the pose annotation on the image.
|
||||
image.flags.writeable = True
|
||||
image = cv2.cvtColor(image, cv2.COLOR_RGB2BGR)
|
||||
mp_drawing.draw_landmarks(
|
||||
image,
|
||||
results.pose_landmarks,
|
||||
mp_pose.POSE_CONNECTIONS,
|
||||
landmark_drawing_spec=mp_drawing_styles.get_default_pose_landmarks_style())
|
||||
# Flip the image horizontally for a selfie-view display.
|
||||
cv2.imshow('MediaPipe Pose', cv2.flip(image, 1))
|
||||
if cv2.waitKey(5) & 0xFF == 27:
|
||||
break
|
||||
cap.release()
|
||||
```
|
||||
|
||||
### JavaScript Solution API
|
||||
|
||||
Please first see general [introduction](../getting_started/javascript.md) on
|
||||
MediaPipe in JavaScript, then learn more in the companion [web demo](#resources)
|
||||
and the following usage example.
|
||||
|
||||
Supported configuration options:
|
||||
|
||||
* [modelComplexity](#model_complexity)
|
||||
* [smoothLandmarks](#smooth_landmarks)
|
||||
* [enableSegmentation](#enable_segmentation)
|
||||
* [smoothSegmentation](#smooth_segmentation)
|
||||
* [minDetectionConfidence](#min_detection_confidence)
|
||||
* [minTrackingConfidence](#min_tracking_confidence)
|
||||
|
||||
```html
|
||||
<!DOCTYPE html>
|
||||
<html>
|
||||
<head>
|
||||
<meta charset="utf-8">
|
||||
<script src="https://cdn.jsdelivr.net/npm/@mediapipe/camera_utils/camera_utils.js" crossorigin="anonymous"></script>
|
||||
<script src="https://cdn.jsdelivr.net/npm/@mediapipe/control_utils/control_utils.js" crossorigin="anonymous"></script>
|
||||
<script src="https://cdn.jsdelivr.net/npm/@mediapipe/control_utils_3d/control_utils_3d.js" crossorigin="anonymous"></script>
|
||||
<script src="https://cdn.jsdelivr.net/npm/@mediapipe/drawing_utils/drawing_utils.js" crossorigin="anonymous"></script>
|
||||
<script src="https://cdn.jsdelivr.net/npm/@mediapipe/pose/pose.js" crossorigin="anonymous"></script>
|
||||
</head>
|
||||
|
||||
<body>
|
||||
<div class="container">
|
||||
<video class="input_video"></video>
|
||||
<canvas class="output_canvas" width="1280px" height="720px"></canvas>
|
||||
<div class="landmark-grid-container"></div>
|
||||
</div>
|
||||
</body>
|
||||
</html>
|
||||
```
|
||||
|
||||
```javascript
|
||||
<script type="module">
|
||||
const videoElement = document.getElementsByClassName('input_video')[0];
|
||||
const canvasElement = document.getElementsByClassName('output_canvas')[0];
|
||||
const canvasCtx = canvasElement.getContext('2d');
|
||||
const landmarkContainer = document.getElementsByClassName('landmark-grid-container')[0];
|
||||
const grid = new LandmarkGrid(landmarkContainer);
|
||||
|
||||
function onResults(results) {
|
||||
if (!results.poseLandmarks) {
|
||||
grid.updateLandmarks([]);
|
||||
return;
|
||||
}
|
||||
|
||||
canvasCtx.save();
|
||||
canvasCtx.clearRect(0, 0, canvasElement.width, canvasElement.height);
|
||||
canvasCtx.drawImage(results.segmentationMask, 0, 0,
|
||||
canvasElement.width, canvasElement.height);
|
||||
|
||||
// Only overwrite existing pixels.
|
||||
canvasCtx.globalCompositeOperation = 'source-in';
|
||||
canvasCtx.fillStyle = '#00FF00';
|
||||
canvasCtx.fillRect(0, 0, canvasElement.width, canvasElement.height);
|
||||
|
||||
// Only overwrite missing pixels.
|
||||
canvasCtx.globalCompositeOperation = 'destination-atop';
|
||||
canvasCtx.drawImage(
|
||||
results.image, 0, 0, canvasElement.width, canvasElement.height);
|
||||
|
||||
canvasCtx.globalCompositeOperation = 'source-over';
|
||||
drawConnectors(canvasCtx, results.poseLandmarks, POSE_CONNECTIONS,
|
||||
{color: '#00FF00', lineWidth: 4});
|
||||
drawLandmarks(canvasCtx, results.poseLandmarks,
|
||||
{color: '#FF0000', lineWidth: 2});
|
||||
canvasCtx.restore();
|
||||
|
||||
grid.updateLandmarks(results.poseWorldLandmarks);
|
||||
}
|
||||
|
||||
const pose = new Pose({locateFile: (file) => {
|
||||
return `https://cdn.jsdelivr.net/npm/@mediapipe/pose/${file}`;
|
||||
}});
|
||||
pose.setOptions({
|
||||
modelComplexity: 1,
|
||||
smoothLandmarks: true,
|
||||
enableSegmentation: true,
|
||||
smoothSegmentation: true,
|
||||
minDetectionConfidence: 0.5,
|
||||
minTrackingConfidence: 0.5
|
||||
});
|
||||
pose.onResults(onResults);
|
||||
|
||||
const camera = new Camera(videoElement, {
|
||||
onFrame: async () => {
|
||||
await pose.send({image: videoElement});
|
||||
},
|
||||
width: 1280,
|
||||
height: 720
|
||||
});
|
||||
camera.start();
|
||||
</script>
|
||||
```
|
||||
|
||||
## Example Apps
|
||||
|
||||
Please first see general instructions for
|
||||
[Android](../getting_started/android.md), [iOS](../getting_started/ios.md), and
|
||||
[desktop](../getting_started/cpp.md) on how to build MediaPipe examples.
|
||||
|
||||
Note: To visualize a graph, copy the graph and paste it into
|
||||
[MediaPipe Visualizer](https://viz.mediapipe.dev/). For more information on how
|
||||
to visualize its associated subgraphs, please see
|
||||
[visualizer documentation](../tools/visualizer.md).
|
||||
|
||||
### Mobile
|
||||
|
||||
#### Main Example
|
||||
|
||||
* Graph:
|
||||
[`mediapipe/graphs/pose_tracking/pose_tracking_gpu.pbtxt`](https://github.com/google/mediapipe/tree/master/mediapipe/graphs/pose_tracking/pose_tracking_gpu.pbtxt)
|
||||
* Android target:
|
||||
[(or download prebuilt ARM64 APK)](https://drive.google.com/file/d/17GFIrqEJS6W8UHKXlYevTtSCLxN9pWlY/view?usp=sharing)
|
||||
[`mediapipe/examples/android/src/java/com/google/mediapipe/apps/posetrackinggpu:posetrackinggpu`](https://github.com/google/mediapipe/tree/master/mediapipe/examples/android/src/java/com/google/mediapipe/apps/posetrackinggpu/BUILD)
|
||||
* iOS target:
|
||||
[`mediapipe/examples/ios/posetrackinggpu:PoseTrackingGpuApp`](http:/mediapipe/examples/ios/posetrackinggpu/BUILD)
|
||||
|
||||
### Desktop
|
||||
|
||||
Please first see general instructions for [desktop](../getting_started/cpp.md)
|
||||
on how to build MediaPipe examples.
|
||||
|
||||
#### Main Example
|
||||
|
||||
* Running on CPU
|
||||
* Graph:
|
||||
[`mediapipe/graphs/pose_tracking/pose_tracking_cpu.pbtxt`](https://github.com/google/mediapipe/tree/master/mediapipe/graphs/pose_tracking/pose_tracking_cpu.pbtxt)
|
||||
* Target:
|
||||
[`mediapipe/examples/desktop/pose_tracking:pose_tracking_cpu`](https://github.com/google/mediapipe/tree/master/mediapipe/examples/desktop/pose_tracking/BUILD)
|
||||
* Running on GPU
|
||||
* Graph:
|
||||
[`mediapipe/graphs/pose_tracking/pose_tracking_gpu.pbtxt`](https://github.com/google/mediapipe/tree/master/mediapipe/graphs/pose_tracking/pose_tracking_gpu.pbtxt)
|
||||
* Target:
|
||||
[`mediapipe/examples/desktop/pose_tracking:pose_tracking_gpu`](https://github.com/google/mediapipe/tree/master/mediapipe/examples/desktop/pose_tracking/BUILD)
|
||||
|
||||
## Resources
|
||||
|
||||
* Google AI Blog:
|
||||
[BlazePose - On-device Real-time Body Pose Tracking](https://ai.googleblog.com/2020/08/on-device-real-time-body-pose-tracking.html)
|
||||
* Paper:
|
||||
[BlazePose: On-device Real-time Body Pose Tracking](https://arxiv.org/abs/2006.10204)
|
||||
([presentation](https://youtu.be/YPpUOTRn5tA))
|
||||
* [Models and model cards](./models.md#pose)
|
||||
* [GHUM & GHUML: Generative 3D Human Shape and Articulated Pose Models](https://github.com/google-research/google-research/tree/master/ghum)
|
||||
* [Web demo](https://code.mediapipe.dev/codepen/pose)
|
||||
* [Python Colab](https://mediapipe.page.link/pose_py_colab)
|
||||
|
||||
[`mAP`]: https://cocodataset.org/#keypoints-eval
|
||||
[`[email protected]`]: https://github.com/cbsudux/Human-Pose-Estimation-101
|
||||
@@ -0,0 +1,145 @@
|
||||
---
|
||||
layout: default
|
||||
title: Pose Classification
|
||||
parent: Pose
|
||||
grand_parent: Solutions
|
||||
nav_order: 1
|
||||
---
|
||||
|
||||
# Pose Classification
|
||||
{: .no_toc }
|
||||
|
||||
<details close markdown="block">
|
||||
<summary>
|
||||
Table of contents
|
||||
</summary>
|
||||
{: .text-delta }
|
||||
1. TOC
|
||||
{:toc}
|
||||
</details>
|
||||
---
|
||||
|
||||
## Overview
|
||||
|
||||
One of the applications
|
||||
[BlazePose](https://ai.googleblog.com/2020/08/on-device-real-time-body-pose-tracking.html)
|
||||
can enable is fitness. More specifically - pose classification and repetition
|
||||
counting. In this section we'll provide basic guidance on building a custom pose
|
||||
classifier with the help of [Colabs](#colabs) and wrap it in a simple fitness
|
||||
demo within
|
||||
[ML Kit quickstart app](https://developers.google.com/ml-kit/vision/pose-detection/classifying-poses#4_integrate_with_the_ml_kit_quickstart_app).
|
||||
Push-ups and squats are used for demonstration purposes as the most common
|
||||
exercises.
|
||||
|
||||
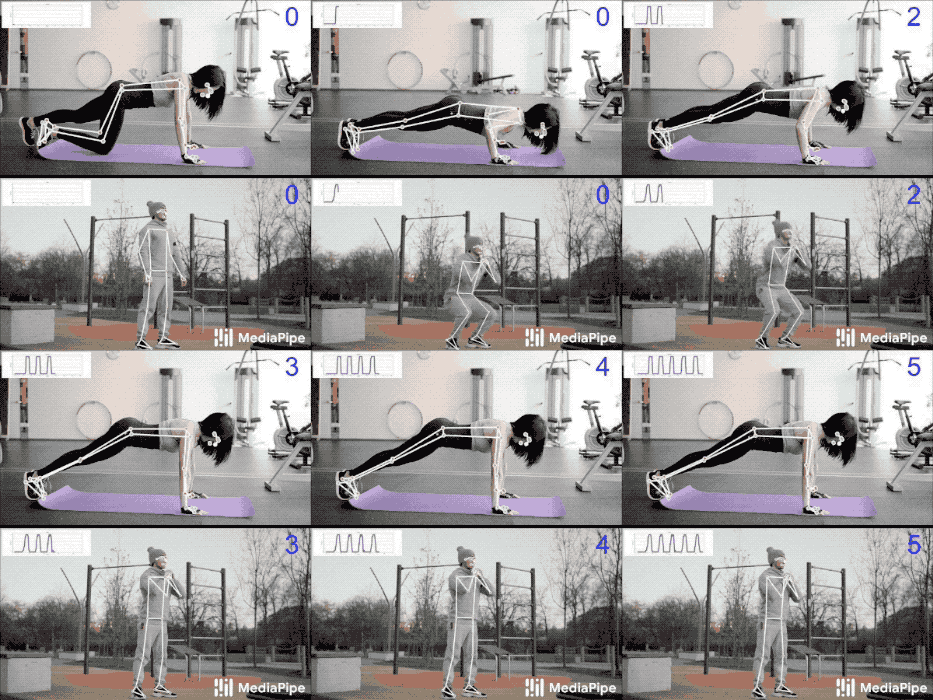 |
|
||||
:--------------------------------------------------------------------------------------------------------: |
|
||||
*Fig 1. Pose classification and repetition counting with MediaPipe Pose.* |
|
||||
|
||||
We picked the
|
||||
[k-nearest neighbors algorithm](https://en.wikipedia.org/wiki/K-nearest_neighbors_algorithm)
|
||||
(k-NN) as the classifier. It's simple and easy to start with. The algorithm
|
||||
determines the object's class based on the closest samples in the training set.
|
||||
|
||||
**To build it, one needs to:**
|
||||
|
||||
1. Collect image samples of the target exercises and run pose prediction on
|
||||
them,
|
||||
2. Convert obtained pose landmarks to a representation suitable for the k-NN
|
||||
classifier and form a training set using these [Colabs](#colabs),
|
||||
3. Perform the classification itself followed by repetition counting (e.g., in
|
||||
the
|
||||
[ML Kit quickstart app](https://developers.google.com/ml-kit/vision/pose-detection/classifying-poses#4_integrate_with_the_ml_kit_quickstart_app)).
|
||||
|
||||
## Training Set
|
||||
|
||||
To build a good classifier appropriate samples should be collected for the
|
||||
training set: about a few hundred samples for each terminal state of each
|
||||
exercise (e.g., "up" and "down" positions for push-ups). It's important that
|
||||
collected samples cover different camera angles, environment conditions, body
|
||||
shapes, and exercise variations.
|
||||
|
||||
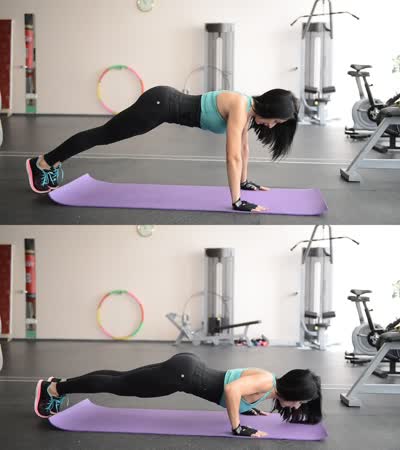 |
|
||||
:--------------------------------------------------------------------------------------------------------------------------: |
|
||||
*Fig 2. Two terminal states of push-ups.* |
|
||||
|
||||
To transform samples into a k-NN classifier training set, both
|
||||
[`Pose Classification Colab (Basic)`] and
|
||||
[`Pose Classification Colab (Extended)`] could be used. They use the
|
||||
[Python Solution API](./pose.md#python-solution-api) to run the BlazePose models
|
||||
on given images and dump predicted pose landmarks to a CSV file. Additionally,
|
||||
the [`Pose Classification Colab (Extended)`] provides useful tools to find
|
||||
outliers (e.g., wrongly predicted poses) and underrepresented classes (e.g., not
|
||||
covering all camera angles) by classifying each sample against the entire
|
||||
training set. After that, you'll be able to test the classifier on an arbitrary
|
||||
video right in the Colab.
|
||||
|
||||
## Classification
|
||||
|
||||
Code of the classifier is available both in the
|
||||
[`Pose Classification Colab (Extended)`] and in the
|
||||
[ML Kit quickstart app](https://developers.google.com/ml-kit/vision/pose-detection/classifying-poses#4_integrate_with_the_ml_kit_quickstart_app).
|
||||
Please refer to them for details of the approach described below.
|
||||
|
||||
The k-NN algorithm used for pose classification requires a feature vector
|
||||
representation of each sample and a metric to compute the distance between two
|
||||
such vectors to find the nearest pose samples to a target one.
|
||||
|
||||
To convert pose landmarks to a feature vector, we use pairwise distances between
|
||||
predefined lists of pose joints, such as distances between wrist and shoulder,
|
||||
ankle and hip, and two wrists. Since the algorithm relies on distances, all
|
||||
poses are normalized to have the same torso size and vertical torso orientation
|
||||
before the conversion.
|
||||
|
||||
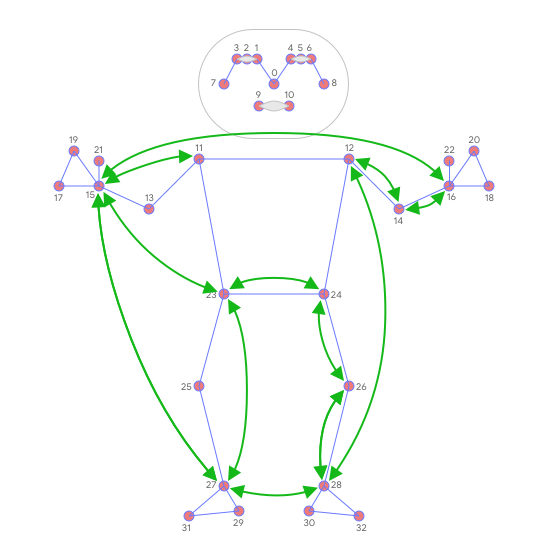 |
|
||||
:--------------------------------------------------------------------------------------------------------: |
|
||||
*Fig 3. Main pairwise distances used for the pose feature vector.* |
|
||||
|
||||
To get a better classification result, k-NN search is invoked twice with
|
||||
different distance metrics:
|
||||
|
||||
* First, to filter out samples that are almost the same as the target one but
|
||||
have only a few different values in the feature vector (which means
|
||||
differently bent joints and thus other pose class), minimum per-coordinate
|
||||
distance is used as distance metric,
|
||||
* Then average per-coordinate distance is used to find the nearest pose
|
||||
cluster among those from the first search.
|
||||
|
||||
Finally, we apply
|
||||
[exponential moving average](https://en.wikipedia.org/wiki/Moving_average#Exponential_moving_average)
|
||||
(EMA) smoothing to level any noise from pose prediction or classification. To do
|
||||
that, we search not only for the nearest pose cluster, but we calculate a
|
||||
probability for each of them and use it for smoothing over time.
|
||||
|
||||
## Repetition Counting
|
||||
|
||||
To count the repetitions, the algorithm monitors the probability of a target
|
||||
pose class. Let's take push-ups with its "up" and "down" terminal states:
|
||||
|
||||
* When the probability of the "down" pose class passes a certain threshold for
|
||||
the first time, the algorithm marks that the "down" pose class is entered.
|
||||
* Once the probability drops below the threshold, the algorithm marks that the
|
||||
"down" pose class has been exited and increases the counter.
|
||||
|
||||
To avoid cases when the probability fluctuates around the threshold (e.g., when
|
||||
the user pauses between "up" and "down" states) causing phantom counts, the
|
||||
threshold used to detect when the state is exited is actually slightly lower
|
||||
than the one used to detect when the state is entered. It creates an interval
|
||||
where the pose class and the counter can't be changed.
|
||||
|
||||
## Future Work
|
||||
|
||||
We are actively working on improving
|
||||
[BlazePose GHUM 3D](./pose.md#pose-landmark-model-blazepose-ghum-3d)'s Z
|
||||
prediction. It will allow us to use joint angles in the feature vectors, which
|
||||
are more natural and easier to configure (although distances can still be useful
|
||||
to detect touches between body parts) and to perform rotation normalization of
|
||||
poses and reduce the number of camera angles required for accurate k-NN
|
||||
classification.
|
||||
|
||||
## Colabs
|
||||
|
||||
* [`Pose Classification Colab (Basic)`]
|
||||
* [`Pose Classification Colab (Extended)`]
|
||||
|
||||
[`Pose Classification Colab (Basic)`]: https://mediapipe.page.link/pose_classification_basic
|
||||
[`Pose Classification Colab (Extended)`]: https://mediapipe.page.link/pose_classification_extended
|
||||
@@ -0,0 +1,290 @@
|
||||
---
|
||||
layout: default
|
||||
title: Selfie Segmentation
|
||||
parent: Solutions
|
||||
nav_order: 7
|
||||
---
|
||||
|
||||
# MediaPipe Selfie Segmentation
|
||||
{: .no_toc }
|
||||
|
||||
<details close markdown="block">
|
||||
<summary>
|
||||
Table of contents
|
||||
</summary>
|
||||
{: .text-delta }
|
||||
1. TOC
|
||||
{:toc}
|
||||
</details>
|
||||
---
|
||||
|
||||
## Overview
|
||||
|
||||
*Fig 1. Example of MediaPipe Selfie Segmentation.* |
|
||||
:------------------------------------------------: |
|
||||
<video autoplay muted loop preload style="height: auto; width: 480px"><source src="../images/selfie_segmentation_web.mp4" type="video/mp4"></video> |
|
||||
|
||||
MediaPipe Selfie Segmentation segments the prominent humans in the scene. It can
|
||||
run in real-time on both smartphones and laptops. The intended use cases include
|
||||
selfie effects and video conferencing, where the person is close (< 2m) to the
|
||||
camera.
|
||||
|
||||
## Models
|
||||
|
||||
In this solution, we provide two models: general and landscape. Both models are
|
||||
based on
|
||||
[MobileNetV3](https://ai.googleblog.com/2019/11/introducing-next-generation-on-device.html),
|
||||
with modifications to make them more efficient. The general model operates on a
|
||||
256x256x3 (HWC) tensor, and outputs a 256x256x1 tensor representing the
|
||||
segmentation mask. The landscape model is similar to the general model, but
|
||||
operates on a 144x256x3 (HWC) tensor. It has fewer FLOPs than the general model,
|
||||
and therefore, runs faster. Note that MediaPipe Selfie Segmentation
|
||||
automatically resizes the input image to the desired tensor dimension before
|
||||
feeding it into the ML models.
|
||||
|
||||
The general model is also powering
|
||||
[ML Kit](https://developers.google.com/ml-kit/vision/selfie-segmentation), and a
|
||||
variant of the landscape model is powering
|
||||
[Google Meet](https://ai.googleblog.com/2020/10/background-features-in-google-meet.html).
|
||||
Please find more detail about the models in the
|
||||
[model card](./models.md#selfie-segmentation).
|
||||
|
||||
## ML Pipeline
|
||||
|
||||
The pipeline is implemented as a MediaPipe
|
||||
[graph](https://github.com/google/mediapipe/tree/master/mediapipe/graphs/selfie_segmentation/selfie_segmentation_gpu.pbtxt)
|
||||
that uses a
|
||||
[selfie segmentation subgraph](https://github.com/google/mediapipe/tree/master/mediapipe/modules/selfie_segmentation/selfie_segmentation_gpu.pbtxt)
|
||||
from the
|
||||
[selfie segmentation module](https://github.com/google/mediapipe/tree/master/mediapipe/modules/selfie_segmentation).
|
||||
|
||||
Note: To visualize a graph, copy the graph and paste it into
|
||||
[MediaPipe Visualizer](https://viz.mediapipe.dev/). For more information on how
|
||||
to visualize its associated subgraphs, please see
|
||||
[visualizer documentation](../tools/visualizer.md).
|
||||
|
||||
## Solution APIs
|
||||
|
||||
### Cross-platform Configuration Options
|
||||
|
||||
Naming style and availability may differ slightly across platforms/languages.
|
||||
|
||||
#### model_selection
|
||||
|
||||
An integer index `0` or `1`. Use `0` to select the general model, and `1` to
|
||||
select the landscape model (see details in [Models](#models)). Default to `0` if
|
||||
not specified.
|
||||
|
||||
### Output
|
||||
|
||||
Naming style may differ slightly across platforms/languages.
|
||||
|
||||
#### segmentation_mask
|
||||
|
||||
The output segmentation mask, which has the same dimension as the input image.
|
||||
|
||||
### Python Solution API
|
||||
|
||||
Please first follow general [instructions](../getting_started/python.md) to
|
||||
install MediaPipe Python package, then learn more in the companion
|
||||
[Python Colab](#resources) and the usage example below.
|
||||
|
||||
Supported configuration options:
|
||||
|
||||
* [model_selection](#model_selection)
|
||||
|
||||
```python
|
||||
import cv2
|
||||
import mediapipe as mp
|
||||
import numpy as np
|
||||
mp_drawing = mp.solutions.drawing_utils
|
||||
mp_selfie_segmentation = mp.solutions.selfie_segmentation
|
||||
|
||||
# For static images:
|
||||
IMAGE_FILES = []
|
||||
BG_COLOR = (192, 192, 192) # gray
|
||||
MASK_COLOR = (255, 255, 255) # white
|
||||
with mp_selfie_segmentation.SelfieSegmentation(
|
||||
model_selection=0) as selfie_segmentation:
|
||||
for idx, file in enumerate(IMAGE_FILES):
|
||||
image = cv2.imread(file)
|
||||
image_height, image_width, _ = image.shape
|
||||
# Convert the BGR image to RGB before processing.
|
||||
results = selfie_segmentation.process(cv2.cvtColor(image, cv2.COLOR_BGR2RGB))
|
||||
|
||||
# Draw selfie segmentation on the background image.
|
||||
# To improve segmentation around boundaries, consider applying a joint
|
||||
# bilateral filter to "results.segmentation_mask" with "image".
|
||||
condition = np.stack((results.segmentation_mask,) * 3, axis=-1) > 0.1
|
||||
# Generate solid color images for showing the output selfie segmentation mask.
|
||||
fg_image = np.zeros(image.shape, dtype=np.uint8)
|
||||
fg_image[:] = MASK_COLOR
|
||||
bg_image = np.zeros(image.shape, dtype=np.uint8)
|
||||
bg_image[:] = BG_COLOR
|
||||
output_image = np.where(condition, fg_image, bg_image)
|
||||
cv2.imwrite('/tmp/selfie_segmentation_output' + str(idx) + '.png', output_image)
|
||||
|
||||
# For webcam input:
|
||||
BG_COLOR = (192, 192, 192) # gray
|
||||
cap = cv2.VideoCapture(0)
|
||||
with mp_selfie_segmentation.SelfieSegmentation(
|
||||
model_selection=1) as selfie_segmentation:
|
||||
bg_image = None
|
||||
while cap.isOpened():
|
||||
success, image = cap.read()
|
||||
if not success:
|
||||
print("Ignoring empty camera frame.")
|
||||
# If loading a video, use 'break' instead of 'continue'.
|
||||
continue
|
||||
|
||||
# Flip the image horizontally for a later selfie-view display, and convert
|
||||
# the BGR image to RGB.
|
||||
image = cv2.cvtColor(cv2.flip(image, 1), cv2.COLOR_BGR2RGB)
|
||||
# To improve performance, optionally mark the image as not writeable to
|
||||
# pass by reference.
|
||||
image.flags.writeable = False
|
||||
results = selfie_segmentation.process(image)
|
||||
|
||||
image.flags.writeable = True
|
||||
image = cv2.cvtColor(image, cv2.COLOR_RGB2BGR)
|
||||
|
||||
# Draw selfie segmentation on the background image.
|
||||
# To improve segmentation around boundaries, consider applying a joint
|
||||
# bilateral filter to "results.segmentation_mask" with "image".
|
||||
condition = np.stack(
|
||||
(results.segmentation_mask,) * 3, axis=-1) > 0.1
|
||||
# The background can be customized.
|
||||
# a) Load an image (with the same width and height of the input image) to
|
||||
# be the background, e.g., bg_image = cv2.imread('/path/to/image/file')
|
||||
# b) Blur the input image by applying image filtering, e.g.,
|
||||
# bg_image = cv2.GaussianBlur(image,(55,55),0)
|
||||
if bg_image is None:
|
||||
bg_image = np.zeros(image.shape, dtype=np.uint8)
|
||||
bg_image[:] = BG_COLOR
|
||||
output_image = np.where(condition, image, bg_image)
|
||||
|
||||
cv2.imshow('MediaPipe Selfie Segmentation', output_image)
|
||||
if cv2.waitKey(5) & 0xFF == 27:
|
||||
break
|
||||
cap.release()
|
||||
```
|
||||
|
||||
### JavaScript Solution API
|
||||
|
||||
Please first see general [introduction](../getting_started/javascript.md) on
|
||||
MediaPipe in JavaScript, then learn more in the companion [web demo](#resources)
|
||||
and the following usage example.
|
||||
|
||||
Supported configuration options:
|
||||
|
||||
* [modelSelection](#model_selection)
|
||||
|
||||
```html
|
||||
<!DOCTYPE html>
|
||||
<html>
|
||||
<head>
|
||||
<meta charset="utf-8">
|
||||
<script src="https://cdn.jsdelivr.net/npm/@mediapipe/camera_utils/camera_utils.js" crossorigin="anonymous"></script>
|
||||
<script src="https://cdn.jsdelivr.net/npm/@mediapipe/control_utils/control_utils.js" crossorigin="anonymous"></script>
|
||||
<script src="https://cdn.jsdelivr.net/npm/@mediapipe/drawing_utils/drawing_utils.js" crossorigin="anonymous"></script>
|
||||
<script src="https://cdn.jsdelivr.net/npm/@mediapipe/selfie_segmentation/selfie_segmentation.js" crossorigin="anonymous"></script>
|
||||
</head>
|
||||
|
||||
<body>
|
||||
<div class="container">
|
||||
<video class="input_video"></video>
|
||||
<canvas class="output_canvas" width="1280px" height="720px"></canvas>
|
||||
</div>
|
||||
</body>
|
||||
</html>
|
||||
```
|
||||
|
||||
```javascript
|
||||
<script type="module">
|
||||
const videoElement = document.getElementsByClassName('input_video')[0];
|
||||
const canvasElement = document.getElementsByClassName('output_canvas')[0];
|
||||
const canvasCtx = canvasElement.getContext('2d');
|
||||
|
||||
function onResults(results) {
|
||||
canvasCtx.save();
|
||||
canvasCtx.clearRect(0, 0, canvasElement.width, canvasElement.height);
|
||||
canvasCtx.drawImage(results.segmentationMask, 0, 0,
|
||||
canvasElement.width, canvasElement.height);
|
||||
|
||||
// Only overwrite existing pixels.
|
||||
canvasCtx.globalCompositeOperation = 'source-in';
|
||||
canvasCtx.fillStyle = '#00FF00';
|
||||
canvasCtx.fillRect(0, 0, canvasElement.width, canvasElement.height);
|
||||
|
||||
// Only overwrite missing pixels.
|
||||
canvasCtx.globalCompositeOperation = 'destination-atop';
|
||||
canvasCtx.drawImage(
|
||||
results.image, 0, 0, canvasElement.width, canvasElement.height);
|
||||
|
||||
canvasCtx.restore();
|
||||
}
|
||||
|
||||
const selfieSegmentation = new SelfieSegmentation({locateFile: (file) => {
|
||||
return `https://cdn.jsdelivr.net/npm/@mediapipe/selfie_segmentation/${file}`;
|
||||
}});
|
||||
selfieSegmentation.setOptions({
|
||||
modelSelection: 1,
|
||||
});
|
||||
selfieSegmentation.onResults(onResults);
|
||||
|
||||
const camera = new Camera(videoElement, {
|
||||
onFrame: async () => {
|
||||
await selfieSegmentation.send({image: videoElement});
|
||||
},
|
||||
width: 1280,
|
||||
height: 720
|
||||
});
|
||||
camera.start();
|
||||
</script>
|
||||
```
|
||||
|
||||
## Example Apps
|
||||
|
||||
Please first see general instructions for
|
||||
[Android](../getting_started/android.md), [iOS](../getting_started/ios.md), and
|
||||
[desktop](../getting_started/cpp.md) on how to build MediaPipe examples.
|
||||
|
||||
Note: To visualize a graph, copy the graph and paste it into
|
||||
[MediaPipe Visualizer](https://viz.mediapipe.dev/). For more information on how
|
||||
to visualize its associated subgraphs, please see
|
||||
[visualizer documentation](../tools/visualizer.md).
|
||||
|
||||
### Mobile
|
||||
|
||||
* Graph:
|
||||
[`mediapipe/graphs/selfie_segmentation/selfie_segmentation_gpu.pbtxt`](https://github.com/google/mediapipe/tree/master/mediapipe/graphs/selfie_segmentation/selfie_segmentation_gpu.pbtxt)
|
||||
* Android target:
|
||||
[(or download prebuilt ARM64 APK)](https://drive.google.com/file/d/1DoeyGzMmWUsjfVgZfGGecrn7GKzYcEAo/view?usp=sharing)
|
||||
[`mediapipe/examples/android/src/java/com/google/mediapipe/apps/selfiesegmentationgpu:selfiesegmentationgpu`](https://github.com/google/mediapipe/tree/master/mediapipe/examples/android/src/java/com/google/mediapipe/apps/selfiesegmentationgpu/BUILD)
|
||||
* iOS target:
|
||||
[`mediapipe/examples/ios/selfiesegmentationgpu:SelfieSegmentationGpuApp`](https://github.com/google/mediapipe/tree/master/mediapipe/examples/ios/selfiesegmentationgpu/BUILD)
|
||||
|
||||
### Desktop
|
||||
|
||||
Please first see general instructions for [desktop](../getting_started/cpp.md)
|
||||
on how to build MediaPipe examples.
|
||||
|
||||
* Running on CPU
|
||||
* Graph:
|
||||
[`mediapipe/graphs/selfie_segmentation/selfie_segmentation_cpu.pbtxt`](https://github.com/google/mediapipe/tree/master/mediapipe/graphs/selfie_segmentation/selfie_segmentation_cpu.pbtxt)
|
||||
* Target:
|
||||
[`mediapipe/examples/desktop/selfie_segmentation:selfie_segmentation_cpu`](https://github.com/google/mediapipe/tree/master/mediapipe/examples/desktop/selfie_segmentation/BUILD)
|
||||
* Running on GPU
|
||||
* Graph:
|
||||
[`mediapipe/graphs/selfie_segmentation/selfie_segmentation_gpu.pbtxt`](https://github.com/google/mediapipe/tree/master/mediapipe/graphs/selfie_segmentation/selfie_segmentation_gpu.pbtxt)
|
||||
* Target:
|
||||
[`mediapipe/examples/desktop/selfie_segmentation:selfie_segmentation_gpu`](https://github.com/google/mediapipe/tree/master/mediapipe/examples/desktop/selfie_segmentation/BUILD)
|
||||
|
||||
## Resources
|
||||
|
||||
* Google AI Blog:
|
||||
[Background Features in Google Meet, Powered by Web ML](https://ai.googleblog.com/2020/10/background-features-in-google-meet.html)
|
||||
* [ML Kit Selfie Segmentation API](https://developers.google.com/ml-kit/vision/selfie-segmentation)
|
||||
* [Models and model cards](./models.md#selfie-segmentation)
|
||||
* [Web demo](https://code.mediapipe.dev/codepen/selfie_segmentation)
|
||||
* [Python Colab](https://mediapipe.page.link/selfie_segmentation_py_colab)
|
||||
@@ -0,0 +1,43 @@
|
||||
---
|
||||
layout: default
|
||||
title: Solutions
|
||||
nav_order: 3
|
||||
has_children: true
|
||||
has_toc: false
|
||||
---
|
||||
|
||||
# Solutions
|
||||
{: .no_toc }
|
||||
|
||||
1. TOC
|
||||
{:toc}
|
||||
---
|
||||
|
||||
MediaPipe offers open source cross-platform, customizable ML solutions for live
|
||||
and streaming media.
|
||||
|
||||
<!-- []() in the first cell is needed to preserve table formatting in GitHub Pages. -->
|
||||
<!-- Whenever this table is updated, paste a copy to ../external_index.md. -->
|
||||
|
||||
[]() | [Android](https://google.github.io/mediapipe/getting_started/android) | [iOS](https://google.github.io/mediapipe/getting_started/ios) | [C++](https://google.github.io/mediapipe/getting_started/cpp) | [Python](https://google.github.io/mediapipe/getting_started/python) | [JS](https://google.github.io/mediapipe/getting_started/javascript) | [Coral](https://github.com/google/mediapipe/tree/master/mediapipe/examples/coral/README.md)
|
||||
:---------------------------------------------------------------------------------------- | :-------------------------------------------------------------: | :-----------------------------------------------------: | :-----------------------------------------------------: | :-----------------------------------------------------------: | :-----------------------------------------------------------: | :--------------------------------------------------------------------:
|
||||
[Face Detection](https://google.github.io/mediapipe/solutions/face_detection) | ✅ | ✅ | ✅ | ✅ | ✅ | ✅
|
||||
[Face Mesh](https://google.github.io/mediapipe/solutions/face_mesh) | ✅ | ✅ | ✅ | ✅ | ✅ |
|
||||
[Iris](https://google.github.io/mediapipe/solutions/iris) | ✅ | ✅ | ✅ | | |
|
||||
[Hands](https://google.github.io/mediapipe/solutions/hands) | ✅ | ✅ | ✅ | ✅ | ✅ |
|
||||
[Pose](https://google.github.io/mediapipe/solutions/pose) | ✅ | ✅ | ✅ | ✅ | ✅ |
|
||||
[Holistic](https://google.github.io/mediapipe/solutions/holistic) | ✅ | ✅ | ✅ | ✅ | ✅ |
|
||||
[Selfie Segmentation](https://google.github.io/mediapipe/solutions/selfie_segmentation) | ✅ | ✅ | ✅ | ✅ | ✅ |
|
||||
[Hair Segmentation](https://google.github.io/mediapipe/solutions/hair_segmentation) | ✅ | | ✅ | | |
|
||||
[Object Detection](https://google.github.io/mediapipe/solutions/object_detection) | ✅ | ✅ | ✅ | | | ✅
|
||||
[Box Tracking](https://google.github.io/mediapipe/solutions/box_tracking) | ✅ | ✅ | ✅ | | |
|
||||
[Instant Motion Tracking](https://google.github.io/mediapipe/solutions/instant_motion_tracking) | ✅ | | | | |
|
||||
[Objectron](https://google.github.io/mediapipe/solutions/objectron) | ✅ | | ✅ | ✅ | ✅ |
|
||||
[KNIFT](https://google.github.io/mediapipe/solutions/knift) | ✅ | | | | |
|
||||
[AutoFlip](https://google.github.io/mediapipe/solutions/autoflip) | | | ✅ | | |
|
||||
[MediaSequence](https://google.github.io/mediapipe/solutions/media_sequence) | | | ✅ | | |
|
||||
[YouTube 8M](https://google.github.io/mediapipe/solutions/youtube_8m) | | | ✅ | | |
|
||||
|
||||
See also
|
||||
[MediaPipe Models and Model Cards](https://google.github.io/mediapipe/solutions/models)
|
||||
for ML models released in MediaPipe.
|
||||
@@ -1,4 +1,22 @@
|
||||
# Feature Extraction and Model Inference for YouTube-8M Challenge
|
||||
---
|
||||
layout: default
|
||||
title: YouTube-8M Feature Extraction and Model Inference
|
||||
parent: Solutions
|
||||
nav_order: 16
|
||||
---
|
||||
|
||||
# YouTube-8M Feature Extraction and Model Inference
|
||||
{: .no_toc }
|
||||
|
||||
<details close markdown="block">
|
||||
<summary>
|
||||
Table of contents
|
||||
</summary>
|
||||
{: .text-delta }
|
||||
1. TOC
|
||||
{:toc}
|
||||
</details>
|
||||
---
|
||||
|
||||
MediaPipe is a useful and general framework for media processing that can assist
|
||||
with research, development, and deployment of ML models. This example focuses on
|
||||
@@ -120,7 +138,7 @@ the inference for both local videos and the dataset
|
||||
to local.
|
||||
|
||||
```bash
|
||||
curl -o /tmp/mediapipe/yt8m_baseline_saved_model.tar.gz data.yt8m.org/models/baseline/saved_model.tar.gz
|
||||
curl -o /tmp/mediapipe/yt8m_baseline_saved_model.tar.gz http://data.yt8m.org/models/baseline/saved_model.tar.gz
|
||||
|
||||
tar -xvf /tmp/mediapipe/yt8m_baseline_saved_model.tar.gz -C /tmp/mediapipe
|
||||
```
|
||||
@@ -156,7 +174,7 @@ the inference for both local videos and the dataset
|
||||
to local.
|
||||
|
||||
```bash
|
||||
curl -o /tmp/mediapipe/yt8m_baseline_saved_model.tar.gz data.yt8m.org/models/baseline/saved_model.tar.gz
|
||||
curl -o /tmp/mediapipe/yt8m_baseline_saved_model.tar.gz http://data.yt8m.org/models/baseline/saved_model.tar.gz
|
||||
|
||||
tar -xvf /tmp/mediapipe/yt8m_baseline_saved_model.tar.gz -C /tmp/mediapipe
|
||||
```
|
||||
@@ -0,0 +1,18 @@
|
||||
---
|
||||
layout: default
|
||||
title: Performance Benchmarking
|
||||
parent: Tools
|
||||
nav_order: 3
|
||||
---
|
||||
|
||||
# Performance Benchmarking
|
||||
{: .no_toc }
|
||||
|
||||
1. TOC
|
||||
{:toc}
|
||||
---
|
||||
|
||||
*Coming soon.*
|
||||
|
||||
Future mediapipe releases will include tools for visualizing and analysing the
|
||||
latency histograms and timed events captured for performance benchmarking.
|
||||
@@ -0,0 +1,13 @@
|
||||
---
|
||||
layout: default
|
||||
title: Tools
|
||||
nav_order: 4
|
||||
has_children: true
|
||||
---
|
||||
|
||||
# Tools
|
||||
{: .no_toc }
|
||||
|
||||
1. TOC
|
||||
{:toc}
|
||||
---
|
||||
@@ -0,0 +1,322 @@
|
||||
---
|
||||
layout: default
|
||||
title: Tracing and Profiling
|
||||
parent: Tools
|
||||
nav_order: 2
|
||||
---
|
||||
|
||||
# Tracing and Profiling
|
||||
{: .no_toc }
|
||||
|
||||
1. TOC
|
||||
{:toc}
|
||||
---
|
||||
|
||||
The MediaPipe framework includes a built-in tracer and profiler. The tracer
|
||||
records various timing events related to packet processing, including the start
|
||||
and end time of each Calculator::Process call. The tracer writes trace log files
|
||||
in binary protobuf format. The profiler further accumulates for each running
|
||||
calculator a histogram of latencies for Process calls. Tracing and profiling is
|
||||
available on Linux, Android, or iOS.
|
||||
|
||||
## Enabling tracing and profiling
|
||||
|
||||
To enable tracing and profiling of a mediapipe graph:
|
||||
|
||||
1. The profiling library must be linked to the framework.
|
||||
2. Tracing and profiling must be enabled in the graph configuration.
|
||||
|
||||
The profiling library is linked to the framework by default for Desktop.
|
||||
If needed, it can be omitted from the framework using the bazel command line
|
||||
option: `--define MEDIAPIPE_PROFILING=0`. For other platforms, you can use the
|
||||
bazel command line option `--define MEDIAPIPE_PROFILING=1` to link it.
|
||||
|
||||
To enable tracing and profiling, the `CalculatorGraphConfig` (in
|
||||
[calculator.proto](https://github.com/google/mediapipe/tree/master/mediapipe/framework/calculator.proto))
|
||||
representing the graph must have a `profiler_config` message at its root. Here
|
||||
is a simple setup that turns on tracing and keeps 100 seconds of timing events:
|
||||
|
||||
```
|
||||
profiler_config {
|
||||
trace_enabled: true
|
||||
enable_profiler: true
|
||||
trace_log_interval_count: 200
|
||||
trace_log_path: "/sdcard/Download/"
|
||||
}
|
||||
```
|
||||
|
||||
* `enable_profiler` is required to emit any logging at all.
|
||||
|
||||
* `trace_enabled` gives us packet level information needed for offline
|
||||
profiling.
|
||||
|
||||
* `trace_log_count` is a convenience that allows us to, by default, to chop up
|
||||
our log into five separate files which are filled up in a round robin
|
||||
fashion (after the fifth file is recorded, the first file is used again).
|
||||
The trace log files are named `trace_0.log` through `trace_k.log`.
|
||||
|
||||
See [Profiler configuration](#profiler_configuration) for other settings
|
||||
available in the profiler config. Note that most of the other settings are
|
||||
considered advanced, and in general should not be needed.
|
||||
|
||||
## Collecting the Logs
|
||||
|
||||
MediaPipe will emit data into a pre-specified directory:
|
||||
|
||||
* On the desktop, this will be the `/tmp` directory.
|
||||
|
||||
* On Android, this will be the external storage directory (e.g., `/storage/emulated/0/`).
|
||||
|
||||
* On iOS, this can be reached through XCode. Select "Window/Devices and
|
||||
Simulators" and select the "Devices" tab.
|
||||
|
||||
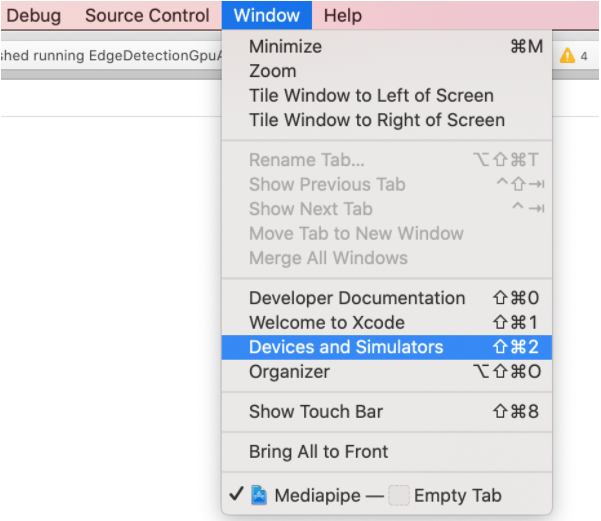
|
||||
|
||||
You can open the Download Container. Logs will be located in `application
|
||||
container/.xcappdata/AppData/Documents/`
|
||||
If XCode shows empty content for the downloaded container file, you can
|
||||
right click and select 'Show Package Contents' in Finder. Logs
|
||||
will be located in 'AppData/Documents/'
|
||||
|
||||
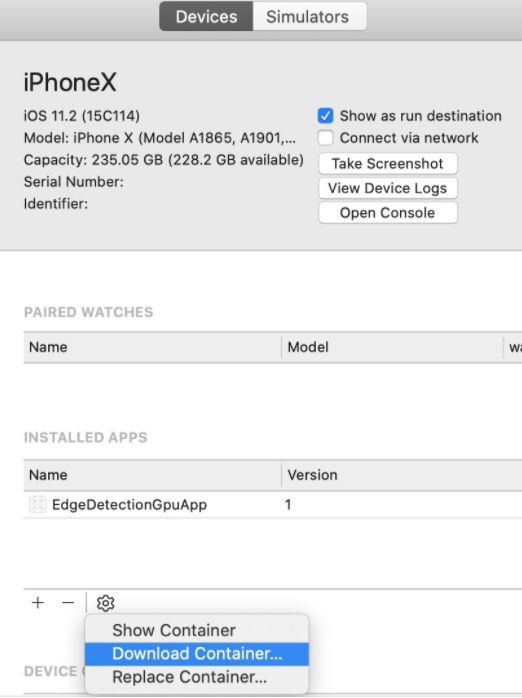
|
||||
|
||||
Log files are written to `\<trace_log_path index\>.binarypb` where, by default,
|
||||
`\<trace_log_path\>` is equal to `mediapipe_trace_` (the entire path and file
|
||||
prefix can be overwritten by setting `trace_log_path` within the
|
||||
`profiler_config` message). The index will, by default, alternate between 0 and
|
||||
1, unless you've overridden the trace_log_count as we did, above.
|
||||
|
||||
By default, each file records five seconds of events. (Advanced: Specifically,
|
||||
we record ten intervals of half a second each. This can be overridden by adding
|
||||
`trace_log_interval_usec` and `trace_log_interval_count` to `profiler_config`).
|
||||
|
||||
### Tracing on Linux
|
||||
|
||||
1. Follow the instructions stated above in `Enable tracing`
|
||||
|
||||
2. Build and run your MediaPipe graph. The running graph writes trace events as
|
||||
stated above in `Collect the logs`
|
||||
|
||||
### Tracing on Android
|
||||
|
||||
* Ensure that the Android app has write permissions to external storage.
|
||||
|
||||
* Include the line below in your `AndroidManifest.xml` file.
|
||||
|
||||
```xml
|
||||
<uses-permission android:name="android.permission.MANAGE_EXTERNAL_STORAGE" />
|
||||
```
|
||||
|
||||
* Grant the permission either upon first app launch, or by going into
|
||||
`Settings -> Apps & notifications -> $YOUR_APP -> Permissions` and
|
||||
enable `Storage`.
|
||||
|
||||
* Add the following protobuf message into the existing calculator-graph-config
|
||||
protobuf, such as the existing `.pbtxt` file. Follow the instructions stated
|
||||
above in `Enable tracing`
|
||||
|
||||
* Connect your Android device and run `adb devices`.
|
||||
|
||||
```bash
|
||||
adb devices
|
||||
# should print:
|
||||
# List of devices attached
|
||||
# 805KPWQ1876505 device
|
||||
```
|
||||
|
||||
* Use `bazel build` to compile the Android app and use `adb install` to get it
|
||||
installed on your Android device.
|
||||
|
||||
* Open the installed Android app. The running MediaPipe graph appends trace
|
||||
events to a trace log files at:
|
||||
|
||||
```bash
|
||||
/storage/emulated/0/Download/mediapipe_trace_0.binarypb
|
||||
/storage/emulated/0/Download/mediapipe_trace_1.binarypb
|
||||
```
|
||||
|
||||
After every 5 sec, writing shifts to a successive trace log file, such that
|
||||
the most recent 5 sec of events are preserved. You can check whether the
|
||||
trace files have been written to the device using adb shell.
|
||||
|
||||
```bash
|
||||
adb shell "ls -la /storage/emulated/0/Download"
|
||||
```
|
||||
|
||||
On android, MediaPipe selects the external storage (e.g., `/storage/emulated/0/`) for
|
||||
trace logs. This directory can be overridden using the setting
|
||||
`trace_log_path`, like:
|
||||
|
||||
```bash
|
||||
profiler_config {
|
||||
trace_enabled: true
|
||||
enable_profiler: true
|
||||
trace_log_path: "/sdcard/Download/profiles/"
|
||||
}
|
||||
```
|
||||
|
||||
Note: The forward slash at the end of the `trace_log_path` is necessary for
|
||||
indicating that `profiles` is a directory (that *should* exist).
|
||||
|
||||
* Download the trace files from the device.
|
||||
|
||||
```bash
|
||||
# from your terminal
|
||||
adb pull /storage/emulated/0/Download/mediapipe_trace_0.binarypb
|
||||
# if successful you should see something like
|
||||
# /sdcard/mediapipe_trace_0.binarypb: 1 file pulled. 0.1 MB/s (6766 bytes in 0.045s)
|
||||
```
|
||||
|
||||
## Analyzing the Logs
|
||||
|
||||
Trace logs can be analyzed from within the visualizer.
|
||||
|
||||
1. Navigate to
|
||||
[viz.mediapipe.dev](https://viz.mediapipe.dev)
|
||||
|
||||
2. Click on the "Upload" button in the upper right.
|
||||
|
||||
|
||||
|
||||
3. Click on "Upload trace file".
|
||||
|
||||
|
||||
|
||||
A sample trace file has been generated for you:
|
||||
[sample_trace_binary.pb](../data/visualizer/sample_trace.binarypb)
|
||||
|
||||
4. A file selection popup will appear. Select the `.binarypb` that holds your
|
||||
trace information.
|
||||
|
||||
5. A chart view will appear. All of your calculators will appear along the left
|
||||
with profiling information listed along the top.
|
||||
|
||||
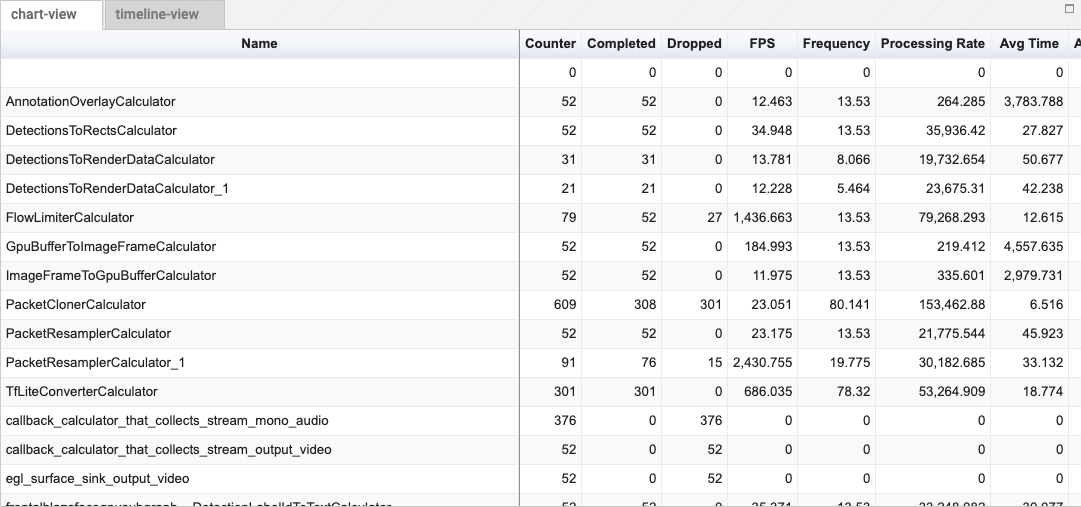
|
||||
|
||||
Click on a header to alternately sort that column in ascending or descending
|
||||
order. You can also scroll horizontally and vertically within the control to
|
||||
see more columns and more calculators.
|
||||
|
||||
### Explanation of columns:
|
||||
|
||||
name
|
||||
: The name of the calculator.
|
||||
|
||||
fps
|
||||
: The number of frames that this calculator can generate each second, on
|
||||
average. `1 / (input_latency_mean + time_mean`) (Units are 1 / second).
|
||||
|
||||
frequency
|
||||
: The rate that this calculator was asked to process packets per second.
|
||||
(Computed by `# of calls total / (last_call_time - first_call_time))`.
|
||||
(Units are `1 / second`)
|
||||
|
||||
counter
|
||||
: Number of times process() was called on the calculator. It is the `sum of
|
||||
dropped + completed`.
|
||||
|
||||
dropped
|
||||
: Number of times the calculator was called but did not produce an output.
|
||||
|
||||
completed
|
||||
: Number of times that this calculator was asked to process inputs after which
|
||||
it generated outputs.
|
||||
|
||||
processing_rate
|
||||
: `1E+6 / time_mean`. The number of times per second this calculator could run
|
||||
process, on average. (Units are `1 / second`).
|
||||
|
||||
thread_count
|
||||
: The number of threads that made use of each calculator.
|
||||
|
||||
time_mean
|
||||
: Average time spent within a calculator (in microseconds).
|
||||
|
||||
time_stddev
|
||||
: Standard deviation of time_mean (in microseconds).
|
||||
|
||||
time_total
|
||||
: Total time spent within a calculator (in microseconds).
|
||||
|
||||
time_percent
|
||||
: Percent of total time spent within a calculator.
|
||||
|
||||
input_latency_mean
|
||||
: Average latency between earliest input packet used by a iteration of the
|
||||
calculator and when the calculator actually begins processing (in
|
||||
microseconds).
|
||||
|
||||
input_latency_stddev
|
||||
: Standard deviation of input_latency_mean (in microseconds).
|
||||
|
||||
input_latency_total
|
||||
: Total accumulated input_latency (in microseconds).
|
||||
|
||||
## Profiler configuration
|
||||
|
||||
Many of the following settings are advanced and not recommended for general
|
||||
usage. Consult [Enabling tracing and profiling](#enabling-tracing-and-profiling)
|
||||
for a friendlier introduction.
|
||||
|
||||
histogram_interval_size_usec
|
||||
: Specifies the size of the runtimes histogram intervals (in microseconds) to
|
||||
generate the histogram of the `Process()` time. The last interval extends to
|
||||
+inf. If not specified, the interval is 1000000 usec = 1 sec.
|
||||
|
||||
num_histogram_intervals
|
||||
: Specifies the number of intervals to generate the histogram of the
|
||||
`Process()` runtime. If not specified, one interval is used.
|
||||
|
||||
enable_profiler
|
||||
: If true, the profiler starts profiling when graph is initialized.
|
||||
|
||||
enable_stream_latency
|
||||
: If true, the profiler also profiles the stream latency and input-output
|
||||
latency. No-op if enable_profiler is false.
|
||||
|
||||
use_packet_timestamp_for_added_packet
|
||||
: If true, the profiler uses packet timestamp (as production time and source
|
||||
production time) for packets added by calling
|
||||
`CalculatorGraph::AddPacketToInputStream()`. If false, uses the profiler's
|
||||
clock.
|
||||
|
||||
trace_log_capacity
|
||||
: The maximum number of trace events buffered in memory. The default value
|
||||
buffers up to 20000 events.
|
||||
|
||||
trace_event_types_disabled
|
||||
: Trace event types that are not logged.
|
||||
|
||||
trace_log_path
|
||||
: The output directory and base-name prefix for trace log files. Log files are
|
||||
written to: `StrCat(trace_log_path, index, ".binarypb")`
|
||||
|
||||
trace_log_count
|
||||
: The number of trace log files retained. The trace log files are named
|
||||
"`trace_0.log`" through "`trace_k.log`". The default value specifies 2
|
||||
output files retained.
|
||||
|
||||
trace_log_interval_usec
|
||||
: The interval in microseconds between trace log output. The default value
|
||||
specifies trace log output once every 0.5 sec.
|
||||
|
||||
trace_log_margin_usec
|
||||
: The interval in microseconds between TimeNow and the highest times included
|
||||
in trace log output. This margin allows time for events to be appended to
|
||||
the TraceBuffer.
|
||||
|
||||
trace_log_instant_events
|
||||
: False specifies an event for each calculator invocation. True specifies a
|
||||
separate event for each start and finish time.
|
||||
|
||||
trace_log_interval_count
|
||||
: The number of trace log intervals per file. The total log duration is:
|
||||
`trace_log_interval_usec * trace_log_count * trace_log_interval_count`. The
|
||||
default value specifies 10 intervals per file.
|
||||
|
||||
trace_log_disabled
|
||||
: An option to turn ON/OFF writing trace files to disk. Saving trace files to
|
||||
disk is enabled by default.
|
||||
|
||||
trace_enabled
|
||||
: If true, tracer timing events are recorded and reported.
|
||||
@@ -1,8 +1,16 @@
|
||||
## Visualizing MediaPipe Graphs
|
||||
---
|
||||
layout: default
|
||||
title: Visualizer
|
||||
parent: Tools
|
||||
nav_order: 1
|
||||
---
|
||||
|
||||
- [Working within the Editor](#working-within-the-editor)
|
||||
- [Understanding the Graph](#understanding-the-graph)
|
||||
- [Visualizing Subgraphs](#visualizing-subgraphs)
|
||||
# Visualizer
|
||||
{: .no_toc }
|
||||
|
||||
1. TOC
|
||||
{:toc}
|
||||
---
|
||||
|
||||
To help users understand the structure of their calculator graphs and to
|
||||
understand the overall behavior of their machine learning inference pipelines,
|
||||
@@ -13,31 +21,31 @@ that is available online.
|
||||
through a graph configuration that is pasted into the graph editor or
|
||||
uploaded. The user can visualize and troubleshoot a graph they have created.
|
||||
|
||||

|
||||
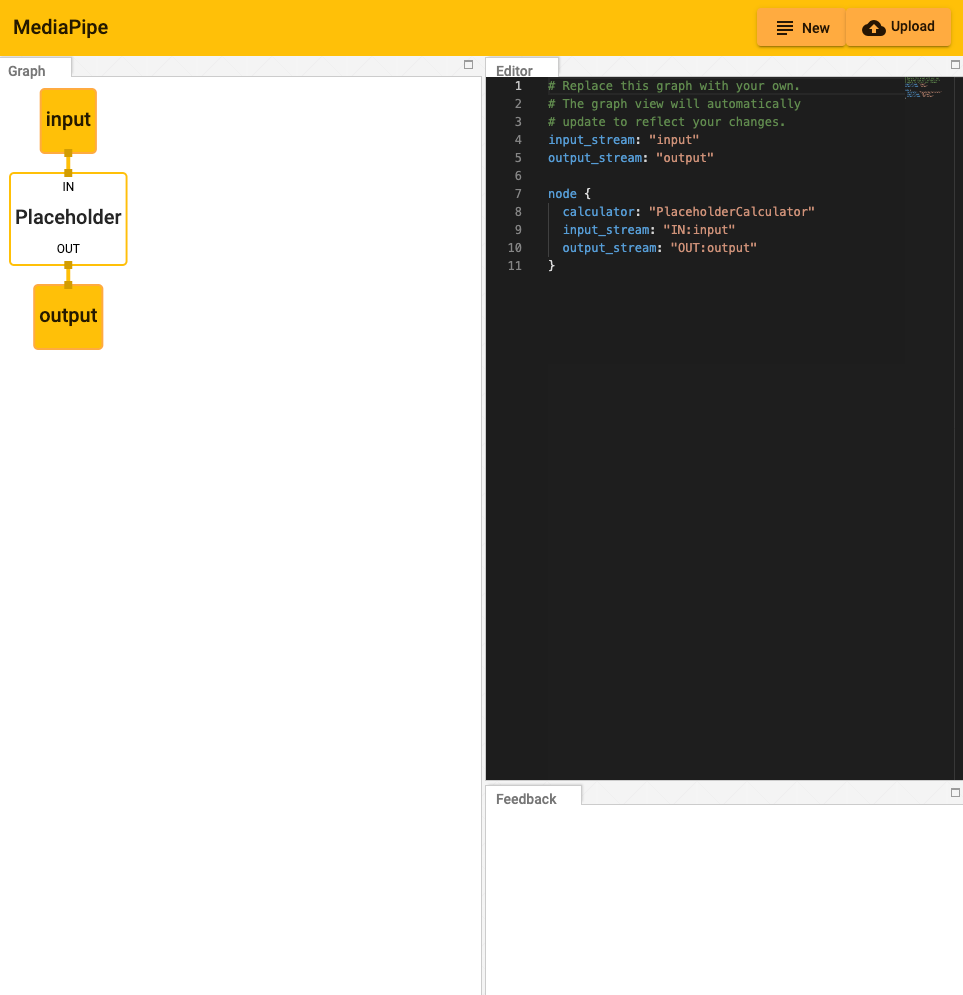
|
||||
|
||||
### Working within the Editor
|
||||
## Working within the Editor
|
||||
|
||||
Getting Started:
|
||||
|
||||
The graph can be modified by adding and editing code in the Editor view.
|
||||
|
||||

|
||||
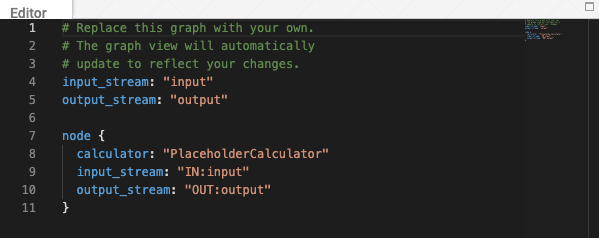
|
||||
|
||||
* Pressing the "New" button in the upper right corner will clear any existing
|
||||
code in the Editor window.
|
||||
|
||||

|
||||

|
||||
|
||||
* Pressing the "Upload" button will prompt the user to select a local PBTXT
|
||||
file, which will everwrite the current code within the editor.
|
||||
file, which will overwrite the current code within the editor.
|
||||
|
||||
* Alternatively, code can be pasted directly into the editor window.
|
||||
|
||||
* Errors and informational messages will appear in the Feedback window.
|
||||
|
||||

|
||||
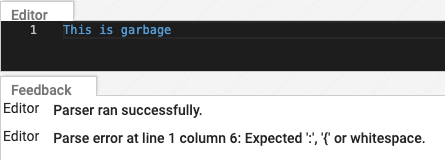
|
||||
|
||||
### Understanding the Graph
|
||||
## Understanding the Graph
|
||||
|
||||
The visualizer graph shows the connections between calculator nodes.
|
||||
|
||||
@@ -45,26 +53,26 @@ The visualizer graph shows the connections between calculator nodes.
|
||||
enter the top of any calculator receiving the stream. (Notice the use of the
|
||||
key, "input_stream" and "output_stream").
|
||||
|
||||

|
||||
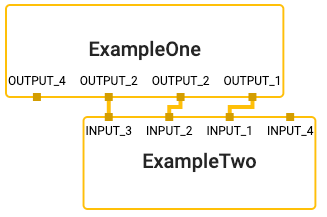
|
||||
|
||||

|
||||
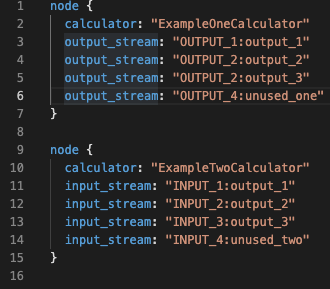
|
||||
|
||||
* Sidepackets work the same, except that they exit a node on the right and
|
||||
enter on the left. (Notice the use of the key, "input_side_packet" and
|
||||
"output_side_packet").
|
||||
|
||||

|
||||
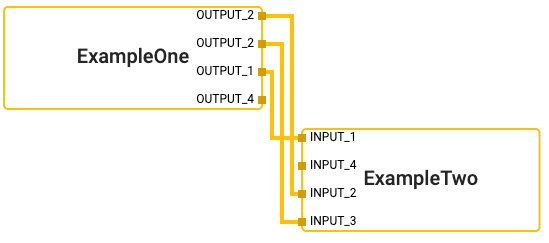
|
||||
|
||||

|
||||
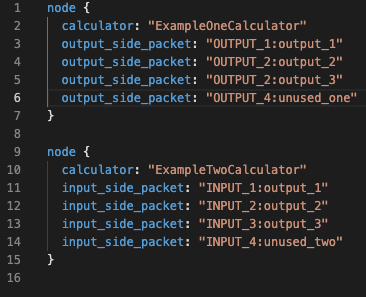
|
||||
|
||||
* There are special nodes that represent inputs and outputs to the graph and
|
||||
can supply either side packets or streams.
|
||||
|
||||

|
||||
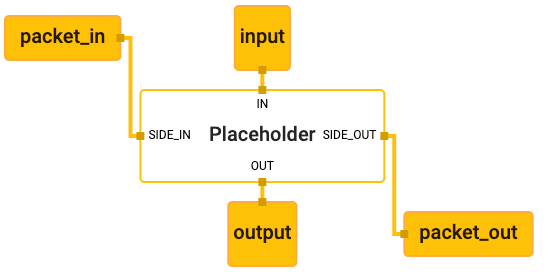
|
||||
|
||||

|
||||
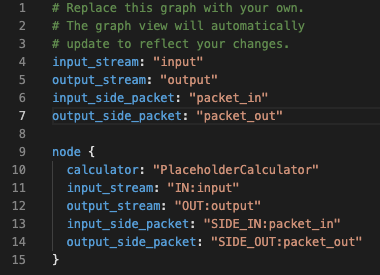
|
||||
|
||||
### Visualizing Subgraphs
|
||||
## Visualizing Subgraphs
|
||||
|
||||
The MediaPipe visualizer can display multiple graphs in separate tabs. If a
|
||||
graph has a `type` field in the top level of the graph's text proto definition,
|
||||
@@ -73,26 +81,26 @@ is considered a subgraph by the visualizer and colored appropriately where it is
|
||||
used. Clicking on a subgraph will navigate to the corresponding tab which holds
|
||||
the subgraph's definition.
|
||||
|
||||
For instance, there are two graphs involved in the
|
||||
[hand detection example](./hand_detection_mobile_gpu.md): the main graph
|
||||
([source pbtxt file](https://github.com/google/mediapipe/tree/master/mediapipe/graphs/hand_tracking/hand_detection_mobile.pbtxt))
|
||||
For instance, there are two graphs involved in
|
||||
[MediaPipe Hands](../solutions/hands.md): the main graph
|
||||
([source pbtxt file](https://github.com/google/mediapipe/blob/master/mediapipe/graphs/hand_tracking/hand_detection_mobile.pbtxt))
|
||||
and its associated subgraph
|
||||
([source pbtxt file](https://github.com/google/mediapipe/tree/master/mediapipe/graphs/hand_tracking/subgraphs/hand_detection_gpu.pbtxt)).
|
||||
([source pbtxt file](https://github.com/google/mediapipe/blob/master/mediapipe/graphs/hand_tracking/subgraphs/hand_detection_gpu.pbtxt)).
|
||||
To visualize them:
|
||||
|
||||
* In the MediaPipe visualizer, click on the upload graph button and select the
|
||||
2 pbtxt files to visualize (main graph and its associated subgraph).
|
||||
|
||||

|
||||

|
||||
|
||||

|
||||
|
||||
|
||||
* There will be 2 additional tabs. The main graph tab is
|
||||
`hand_detection_mobile.pbtxt`.
|
||||
|
||||

|
||||
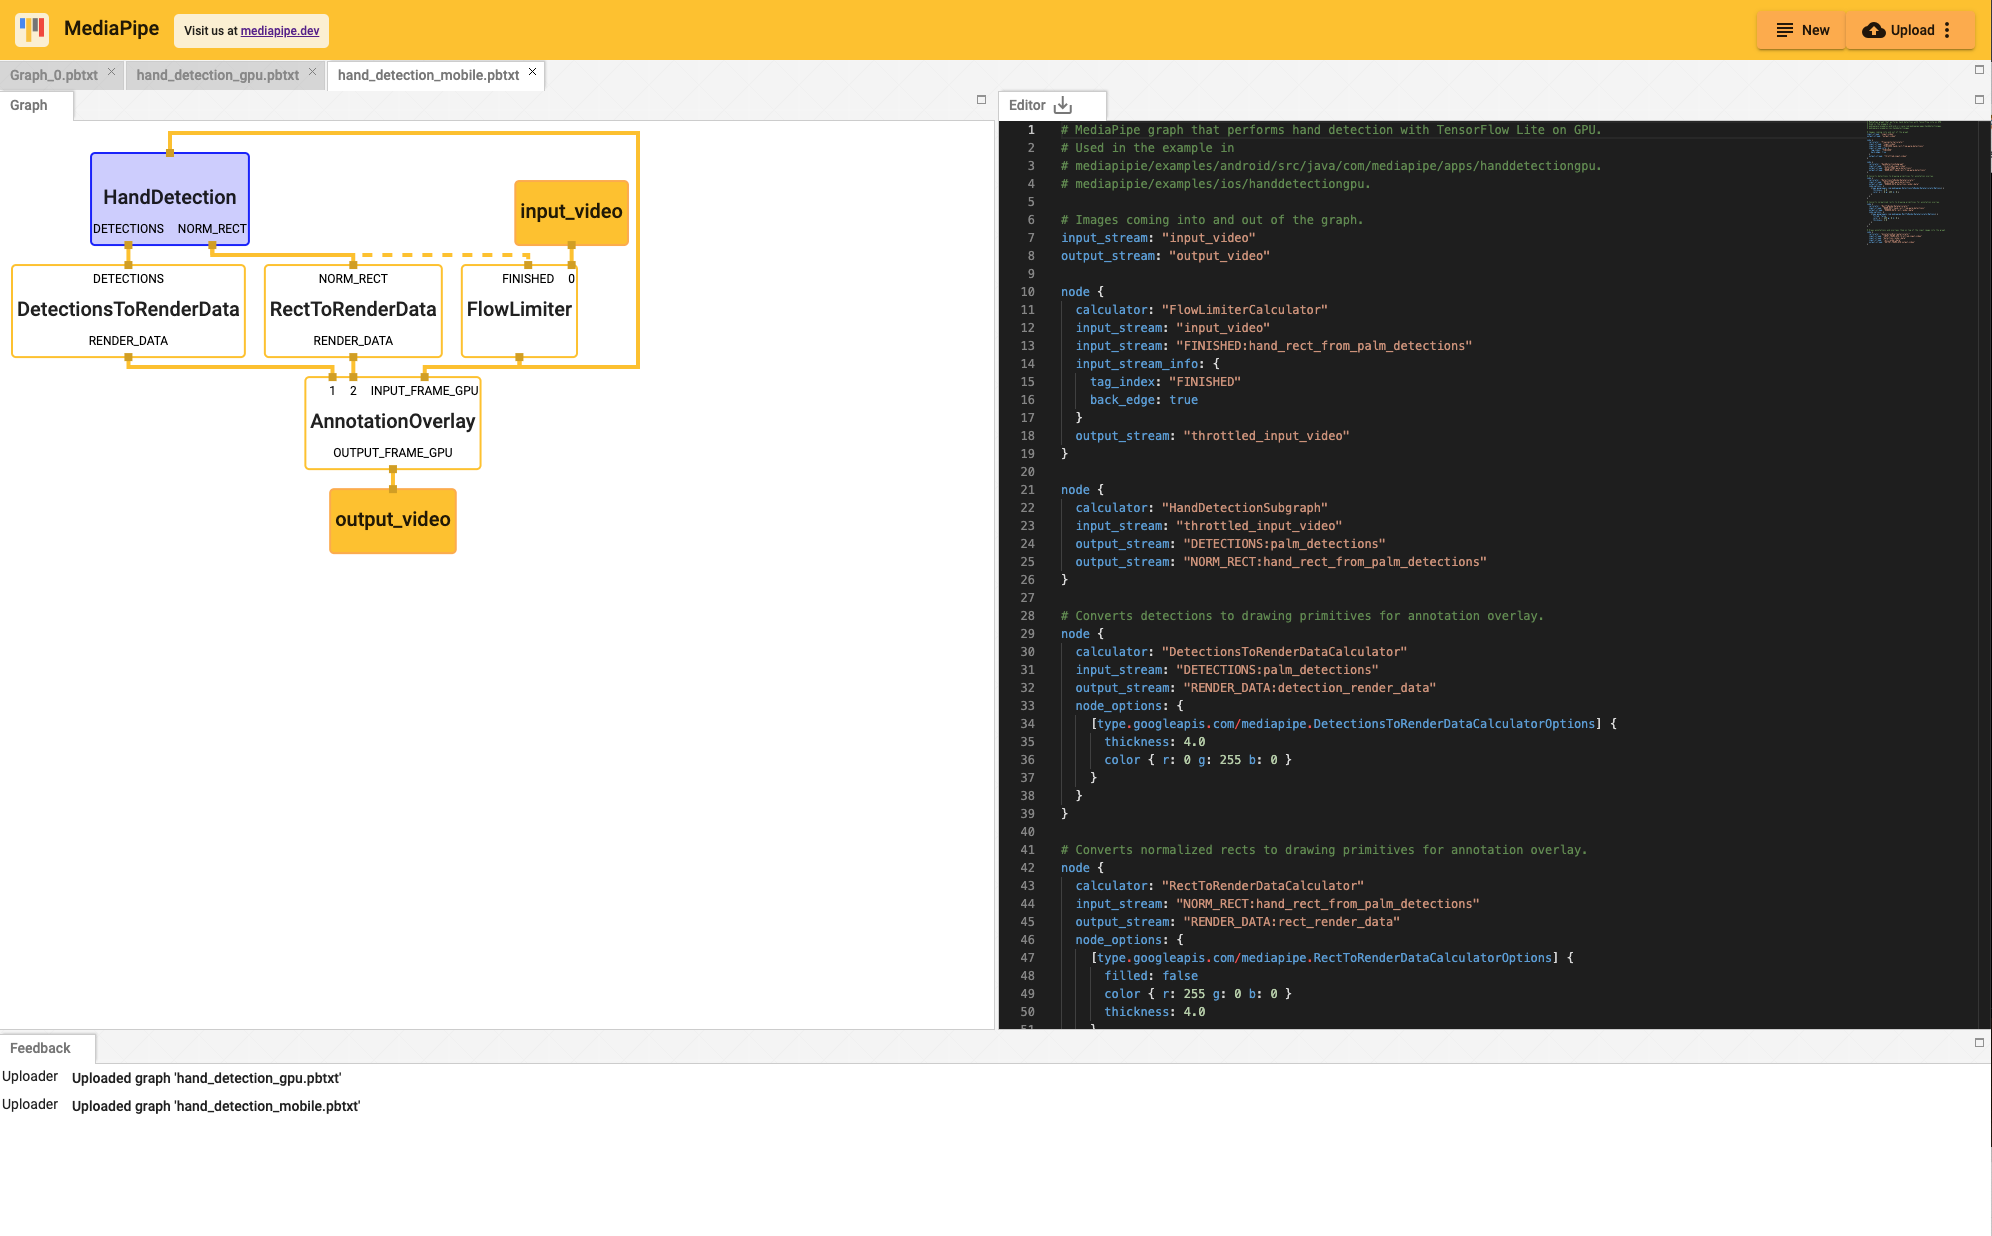
|
||||
|
||||
* Clicking on the `HandDetection` node in purple redirects the view to the
|
||||
`hand_detection_gpu.pbtxt` tab.
|
||||
|
||||

|
||||
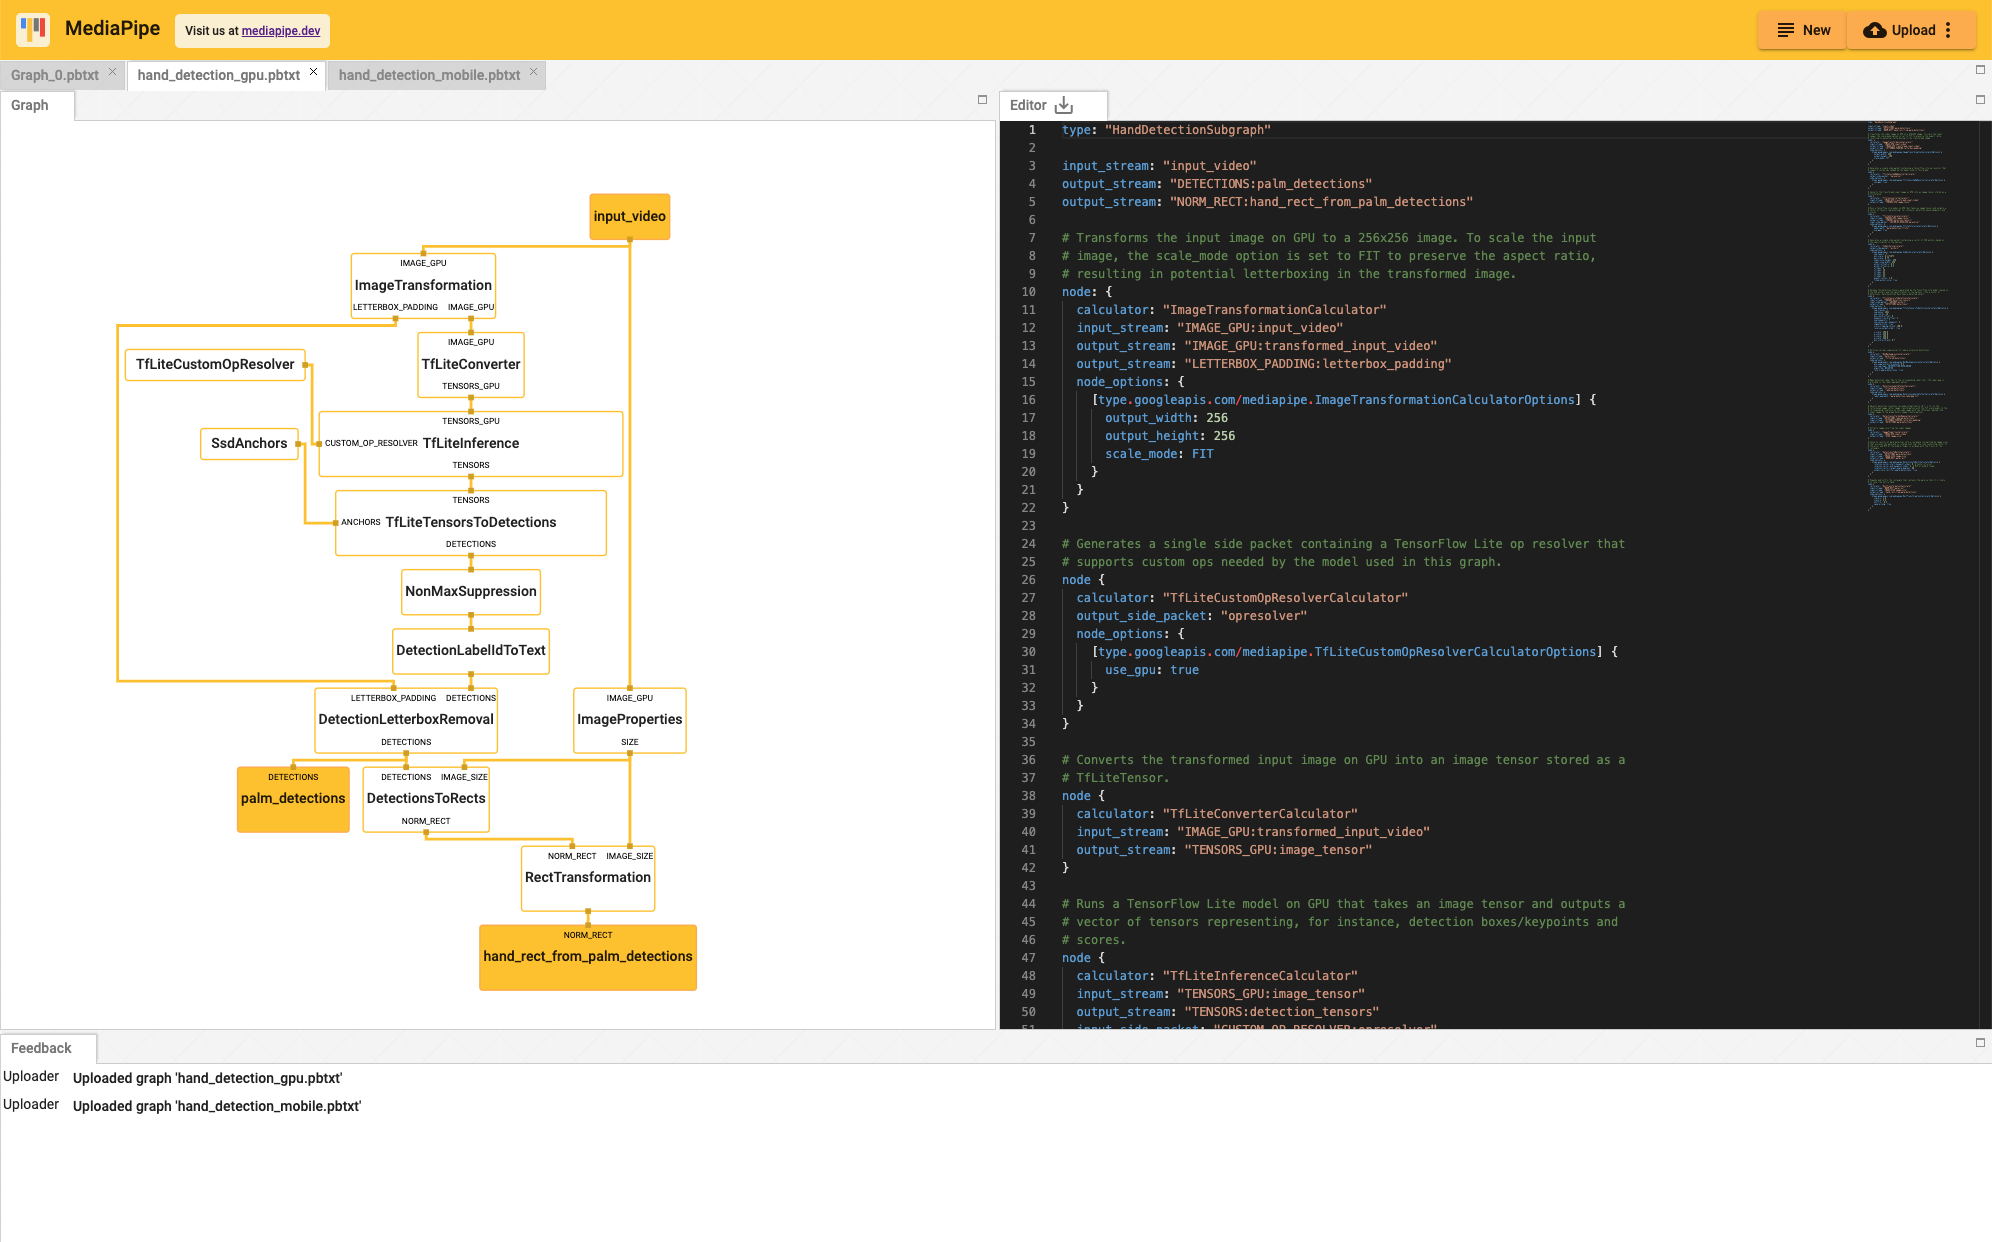
|
||||
@@ -14,6 +14,9 @@
|
||||
|
||||
licenses(["notice"]) # Apache 2.0
|
||||
|
||||
# Note: yes, these need to use "//external:android/crosstool", not
|
||||
# @androidndk//:default_crosstool.
|
||||
|
||||
config_setting(
|
||||
name = "android",
|
||||
values = {"crosstool_top": "//external:android/crosstool"},
|
||||
@@ -72,6 +75,7 @@ alias(
|
||||
actual = select({
|
||||
":macos_i386": ":macos_i386",
|
||||
":macos_x86_64": ":macos_x86_64",
|
||||
":macos_arm64": ":macos_arm64",
|
||||
"//conditions:default": ":macos_i386", # Arbitrarily chosen from above.
|
||||
}),
|
||||
visibility = ["//visibility:public"],
|
||||
@@ -116,6 +120,15 @@ config_setting(
|
||||
visibility = ["//visibility:public"],
|
||||
)
|
||||
|
||||
config_setting(
|
||||
name = "macos_arm64",
|
||||
values = {
|
||||
"apple_platform_type": "macos",
|
||||
"cpu": "darwin_arm64",
|
||||
},
|
||||
visibility = ["//visibility:public"],
|
||||
)
|
||||
|
||||
[
|
||||
config_setting(
|
||||
name = arch,
|
||||
@@ -131,6 +144,11 @@ config_setting(
|
||||
]
|
||||
]
|
||||
|
||||
config_setting(
|
||||
name = "windows",
|
||||
values = {"cpu": "x64_windows"},
|
||||
)
|
||||
|
||||
exports_files(
|
||||
["provisioning_profile.mobileprovision"],
|
||||
visibility = ["//visibility:public"],
|
||||
|
||||
@@ -2,26 +2,41 @@
|
||||
"additionalFilePaths" : [
|
||||
"/BUILD",
|
||||
"mediapipe/BUILD",
|
||||
"mediapipe/objc/BUILD",
|
||||
"mediapipe/examples/ios/BUILD",
|
||||
"mediapipe/examples/ios/edgedetectiongpu/BUILD",
|
||||
"mediapipe/examples/ios/common/BUILD",
|
||||
"mediapipe/examples/ios/facedetectioncpu/BUILD",
|
||||
"mediapipe/examples/ios/facedetectiongpu/BUILD",
|
||||
"mediapipe/examples/ios/faceeffect/BUILD",
|
||||
"mediapipe/examples/ios/facemeshgpu/BUILD",
|
||||
"mediapipe/examples/ios/handdetectiongpu/BUILD",
|
||||
"mediapipe/examples/ios/handtrackinggpu/BUILD",
|
||||
"mediapipe/examples/ios/multihandtrackinggpu/BUILD",
|
||||
"mediapipe/examples/ios/helloworld/BUILD",
|
||||
"mediapipe/examples/ios/holistictrackinggpu/BUILD",
|
||||
"mediapipe/examples/ios/iristrackinggpu/BUILD",
|
||||
"mediapipe/examples/ios/objectdetectioncpu/BUILD",
|
||||
"mediapipe/examples/ios/objectdetectiongpu/BUILD"
|
||||
"mediapipe/examples/ios/objectdetectiongpu/BUILD",
|
||||
"mediapipe/examples/ios/objectdetectiontrackinggpu/BUILD",
|
||||
"mediapipe/examples/ios/posetrackinggpu/BUILD",
|
||||
"mediapipe/examples/ios/selfiesegmentationgpu/BUILD",
|
||||
"mediapipe/framework/BUILD",
|
||||
"mediapipe/gpu/BUILD",
|
||||
"mediapipe/objc/BUILD",
|
||||
"mediapipe/objc/testing/app/BUILD"
|
||||
],
|
||||
"buildTargets" : [
|
||||
"//mediapipe/examples/ios/edgedetectiongpu:EdgeDetectionGpuApp",
|
||||
"//mediapipe/examples/ios/facedetectioncpu:FaceDetectionCpuApp",
|
||||
"//mediapipe/examples/ios/facedetectiongpu:FaceDetectionGpuApp",
|
||||
"//mediapipe/examples/ios/faceeffect:FaceEffectApp",
|
||||
"//mediapipe/examples/ios/facemeshgpu:FaceMeshGpuApp",
|
||||
"//mediapipe/examples/ios/handdetectiongpu:HandDetectionGpuApp",
|
||||
"//mediapipe/examples/ios/handtrackinggpu:HandTrackingGpuApp",
|
||||
"//mediapipe/examples/ios/multihandtrackinggpu:MultiHandTrackingGpuApp",
|
||||
"//mediapipe/examples/ios/helloworld:HelloWorldApp",
|
||||
"//mediapipe/examples/ios/holistictrackinggpu:HolisticTrackingGpuApp",
|
||||
"//mediapipe/examples/ios/iristrackinggpu:IrisTrackingGpuApp",
|
||||
"//mediapipe/examples/ios/objectdetectioncpu:ObjectDetectionCpuApp",
|
||||
"//mediapipe/examples/ios/objectdetectiongpu:ObjectDetectionGpuApp",
|
||||
"//mediapipe/examples/ios/objectdetectiontrackinggpu:ObjectDetectionTrackingGpuApp",
|
||||
"//mediapipe/examples/ios/posetrackinggpu:PoseTrackingGpuApp",
|
||||
"//mediapipe/examples/ios/selfiesegmentationgpu:SelfieSegmentationGpuApp",
|
||||
"//mediapipe/objc:mediapipe_framework_ios"
|
||||
],
|
||||
"optionSet" : {
|
||||
@@ -76,22 +91,21 @@
|
||||
"mediapipe/calculators/util",
|
||||
"mediapipe/examples",
|
||||
"mediapipe/examples/ios",
|
||||
"mediapipe/examples/ios/edgedetectiongpu",
|
||||
"mediapipe/examples/ios/edgedetectiongpu/Base.lproj",
|
||||
"mediapipe/examples/ios/common",
|
||||
"mediapipe/examples/ios/common/Base.lproj",
|
||||
"mediapipe/examples/ios/facedetectioncpu",
|
||||
"mediapipe/examples/ios/facedetectioncpu/Base.lproj",
|
||||
"mediapipe/examples/ios/facedetectiongpu",
|
||||
"mediapipe/examples/ios/facedetectiongpu/Base.lproj",
|
||||
"mediapipe/examples/ios/faceeffect",
|
||||
"mediapipe/examples/ios/faceeffect/Base.lproj",
|
||||
"mediapipe/examples/ios/handdetectiongpu",
|
||||
"mediapipe/examples/ios/handdetectiongpu/Base.lproj",
|
||||
"mediapipe/examples/ios/handtrackinggpu",
|
||||
"mediapipe/examples/ios/handtrackinggpu/Base.lproj",
|
||||
"mediapipe/examples/ios/multihandtrackinggpu",
|
||||
"mediapipe/examples/ios/multihandtrackinggpu/Base.lproj",
|
||||
"mediapipe/examples/ios/helloworld",
|
||||
"mediapipe/examples/ios/holistictrackinggpu",
|
||||
"mediapipe/examples/ios/iristrackinggpu",
|
||||
"mediapipe/examples/ios/objectdetectioncpu",
|
||||
"mediapipe/examples/ios/objectdetectioncpu/Base.lproj",
|
||||
"mediapipe/examples/ios/objectdetectiongpu",
|
||||
"mediapipe/examples/ios/objectdetectiongpu/Base.lproj",
|
||||
"mediapipe/examples/ios/posetrackinggpu",
|
||||
"mediapipe/examples/ios/selfiesegmentationgpu",
|
||||
"mediapipe/framework",
|
||||
"mediapipe/framework/deps",
|
||||
"mediapipe/framework/formats",
|
||||
@@ -105,9 +119,13 @@
|
||||
"mediapipe/graphs",
|
||||
"mediapipe/graphs/edge_detection",
|
||||
"mediapipe/graphs/face_detection",
|
||||
"mediapipe/graphs/face_geometry",
|
||||
"mediapipe/graphs/hand_tracking",
|
||||
"mediapipe/graphs/object_detection",
|
||||
"mediapipe/graphs/pose_tracking",
|
||||
"mediapipe/graphs/selfie_segmentation",
|
||||
"mediapipe/models",
|
||||
"mediapipe/modules",
|
||||
"mediapipe/objc",
|
||||
"mediapipe/util",
|
||||
"mediapipe/util/android",
|
||||
|
||||
@@ -9,16 +9,21 @@
|
||||
"packages" : [
|
||||
"",
|
||||
"mediapipe",
|
||||
"mediapipe/objc",
|
||||
"mediapipe/examples/ios",
|
||||
"mediapipe/examples/ios/edgedetectiongpu",
|
||||
"mediapipe/examples/ios/facedetectioncpu",
|
||||
"mediapipe/examples/ios/facedetectiongpu",
|
||||
"mediapipe/examples/ios/faceeffect",
|
||||
"mediapipe/examples/ios/facemeshgpu",
|
||||
"mediapipe/examples/ios/handdetectiongpu",
|
||||
"mediapipe/examples/ios/handtrackinggpu",
|
||||
"mediapipe/examples/ios/multihandtrackinggpu",
|
||||
"mediapipe/examples/ios/holistictrackinggpu",
|
||||
"mediapipe/examples/ios/iristrackinggpu",
|
||||
"mediapipe/examples/ios/objectdetectioncpu",
|
||||
"mediapipe/examples/ios/objectdetectiongpu"
|
||||
"mediapipe/examples/ios/objectdetectiongpu",
|
||||
"mediapipe/examples/ios/objectdetectiontrackinggpu",
|
||||
"mediapipe/examples/ios/posetrackinggpu",
|
||||
"mediapipe/examples/ios/selfiesegmentationgpu",
|
||||
"mediapipe/objc"
|
||||
],
|
||||
"projectName" : "Mediapipe",
|
||||
"workspaceRoot" : "../.."
|
||||
|
||||
@@ -1,4 +1,4 @@
|
||||
"""Copyright 2019 The MediaPipe Authors.
|
||||
"""Copyright 2019 - 2020 The MediaPipe Authors.
|
||||
|
||||
Licensed under the Apache License, Version 2.0 (the "License");
|
||||
you may not use this file except in compliance with the License.
|
||||
|
||||
@@ -1,4 +1,4 @@
|
||||
# Copyright 2019 The MediaPipe Authors.
|
||||
# Copyright 2019, 2021 The MediaPipe Authors.
|
||||
#
|
||||
# Licensed under the Apache License, Version 2.0 (the "License");
|
||||
# you may not use this file except in compliance with the License.
|
||||
@@ -12,7 +12,7 @@
|
||||
# See the License for the specific language governing permissions and
|
||||
# limitations under the License.
|
||||
|
||||
licenses(["notice"]) # Apache 2.0
|
||||
licenses(["notice"])
|
||||
|
||||
package(default_visibility = ["//visibility:private"])
|
||||
|
||||
@@ -128,7 +128,7 @@ cc_library(
|
||||
"//mediapipe/framework/port:ret_check",
|
||||
"//mediapipe/util:time_series_util",
|
||||
"@com_google_absl//absl/strings",
|
||||
"@eigen_archive//:eigen",
|
||||
"@eigen_archive//:eigen3",
|
||||
],
|
||||
alwayslink = 1,
|
||||
)
|
||||
@@ -147,7 +147,7 @@ cc_library(
|
||||
"//mediapipe/util:time_series_util",
|
||||
"@com_google_absl//absl/strings",
|
||||
"@com_google_audio_tools//audio/dsp/mfcc",
|
||||
"@eigen_archive//:eigen",
|
||||
"@eigen_archive//:eigen3",
|
||||
],
|
||||
alwayslink = 1,
|
||||
)
|
||||
@@ -167,8 +167,8 @@ cc_library(
|
||||
"//mediapipe/util:time_series_util",
|
||||
"@com_google_absl//absl/strings",
|
||||
"@com_google_audio_tools//audio/dsp:resampler",
|
||||
"@com_google_audio_tools//audio/dsp:resampler_rational_factor",
|
||||
"@eigen_archive//:eigen",
|
||||
"@com_google_audio_tools//audio/dsp:resampler_q",
|
||||
"@eigen_archive//:eigen3",
|
||||
],
|
||||
alwayslink = 1,
|
||||
)
|
||||
@@ -208,7 +208,7 @@ cc_library(
|
||||
"@com_google_absl//absl/strings",
|
||||
"@com_google_audio_tools//audio/dsp:window_functions",
|
||||
"@com_google_audio_tools//audio/dsp/spectrogram",
|
||||
"@eigen_archive//:eigen",
|
||||
"@eigen_archive//:eigen3",
|
||||
],
|
||||
alwayslink = 1,
|
||||
)
|
||||
@@ -228,7 +228,7 @@ cc_library(
|
||||
"//mediapipe/framework/port:status",
|
||||
"//mediapipe/util:time_series_util",
|
||||
"@com_google_audio_tools//audio/dsp:window_functions",
|
||||
"@eigen_archive//:eigen",
|
||||
"@eigen_archive//:eigen3",
|
||||
],
|
||||
alwayslink = 1,
|
||||
)
|
||||
@@ -244,6 +244,8 @@ cc_test(
|
||||
"//mediapipe/framework/formats:time_series_header_cc_proto",
|
||||
"//mediapipe/framework/port:gtest_main",
|
||||
"//mediapipe/framework/port:parse_text_proto",
|
||||
"//mediapipe/framework/tool:test_util",
|
||||
"@com_google_absl//absl/flags:flag",
|
||||
],
|
||||
)
|
||||
|
||||
@@ -260,7 +262,7 @@ cc_test(
|
||||
"//mediapipe/framework/port:integral_types",
|
||||
"//mediapipe/framework/port:parse_text_proto",
|
||||
"//mediapipe/util:time_series_test_util",
|
||||
"@eigen_archive//:eigen",
|
||||
"@eigen_archive//:eigen3",
|
||||
],
|
||||
)
|
||||
|
||||
@@ -275,7 +277,7 @@ cc_test(
|
||||
"//mediapipe/framework/port:gtest_main",
|
||||
"//mediapipe/framework/port:status",
|
||||
"//mediapipe/util:time_series_test_util",
|
||||
"@eigen_archive//:eigen",
|
||||
"@eigen_archive//:eigen3",
|
||||
],
|
||||
)
|
||||
|
||||
@@ -295,7 +297,7 @@ cc_test(
|
||||
"//mediapipe/framework/port:status",
|
||||
"//mediapipe/util:time_series_test_util",
|
||||
"@com_google_audio_tools//audio/dsp:number_util",
|
||||
"@eigen_archive//:eigen",
|
||||
"@eigen_archive//:eigen3",
|
||||
],
|
||||
)
|
||||
|
||||
@@ -313,7 +315,7 @@ cc_test(
|
||||
"//mediapipe/framework/port:integral_types",
|
||||
"//mediapipe/framework/port:status",
|
||||
"//mediapipe/util:time_series_test_util",
|
||||
"@eigen_archive//:eigen",
|
||||
"@eigen_archive//:eigen3",
|
||||
],
|
||||
)
|
||||
|
||||
@@ -332,7 +334,7 @@ cc_test(
|
||||
"//mediapipe/framework/port:status",
|
||||
"//mediapipe/util:time_series_test_util",
|
||||
"@com_google_audio_tools//audio/dsp:window_functions",
|
||||
"@eigen_archive//:eigen",
|
||||
"@eigen_archive//:eigen3",
|
||||
],
|
||||
)
|
||||
|
||||
@@ -351,6 +353,6 @@ cc_test(
|
||||
"//mediapipe/framework/tool:validate_type",
|
||||
"//mediapipe/util:time_series_test_util",
|
||||
"@com_google_audio_tools//audio/dsp:signal_vector_util",
|
||||
"@eigen_archive//:eigen",
|
||||
"@eigen_archive//:eigen3",
|
||||
],
|
||||
)
|
||||
|
||||
@@ -48,18 +48,17 @@ namespace mediapipe {
|
||||
// TODO: support decoding multiple streams.
|
||||
class AudioDecoderCalculator : public CalculatorBase {
|
||||
public:
|
||||
static ::mediapipe::Status GetContract(CalculatorContract* cc);
|
||||
static absl::Status GetContract(CalculatorContract* cc);
|
||||
|
||||
::mediapipe::Status Open(CalculatorContext* cc) override;
|
||||
::mediapipe::Status Process(CalculatorContext* cc) override;
|
||||
::mediapipe::Status Close(CalculatorContext* cc) override;
|
||||
absl::Status Open(CalculatorContext* cc) override;
|
||||
absl::Status Process(CalculatorContext* cc) override;
|
||||
absl::Status Close(CalculatorContext* cc) override;
|
||||
|
||||
private:
|
||||
std::unique_ptr<AudioDecoder> decoder_;
|
||||
};
|
||||
|
||||
::mediapipe::Status AudioDecoderCalculator::GetContract(
|
||||
CalculatorContract* cc) {
|
||||
absl::Status AudioDecoderCalculator::GetContract(CalculatorContract* cc) {
|
||||
cc->InputSidePackets().Tag("INPUT_FILE_PATH").Set<std::string>();
|
||||
if (cc->InputSidePackets().HasTag("OPTIONS")) {
|
||||
cc->InputSidePackets().Tag("OPTIONS").Set<mediapipe::AudioDecoderOptions>();
|
||||
@@ -68,10 +67,10 @@ class AudioDecoderCalculator : public CalculatorBase {
|
||||
if (cc->Outputs().HasTag("AUDIO_HEADER")) {
|
||||
cc->Outputs().Tag("AUDIO_HEADER").SetNone();
|
||||
}
|
||||
return ::mediapipe::OkStatus();
|
||||
return absl::OkStatus();
|
||||
}
|
||||
|
||||
::mediapipe::Status AudioDecoderCalculator::Open(CalculatorContext* cc) {
|
||||
absl::Status AudioDecoderCalculator::Open(CalculatorContext* cc) {
|
||||
const std::string& input_file_path =
|
||||
cc->InputSidePackets().Tag("INPUT_FILE_PATH").Get<std::string>();
|
||||
const auto& decoder_options =
|
||||
@@ -88,10 +87,10 @@ class AudioDecoderCalculator : public CalculatorBase {
|
||||
cc->Outputs().Tag("AUDIO_HEADER").SetHeader(Adopt(header.release()));
|
||||
}
|
||||
cc->Outputs().Tag("AUDIO_HEADER").Close();
|
||||
return ::mediapipe::OkStatus();
|
||||
return absl::OkStatus();
|
||||
}
|
||||
|
||||
::mediapipe::Status AudioDecoderCalculator::Process(CalculatorContext* cc) {
|
||||
absl::Status AudioDecoderCalculator::Process(CalculatorContext* cc) {
|
||||
Packet data;
|
||||
int options_index = -1;
|
||||
auto status = decoder_->GetData(&options_index, &data);
|
||||
@@ -101,7 +100,7 @@ class AudioDecoderCalculator : public CalculatorBase {
|
||||
return status;
|
||||
}
|
||||
|
||||
::mediapipe::Status AudioDecoderCalculator::Close(CalculatorContext* cc) {
|
||||
absl::Status AudioDecoderCalculator::Close(CalculatorContext* cc) {
|
||||
return decoder_->Close();
|
||||
}
|
||||
|
||||
|
||||
@@ -12,6 +12,7 @@
|
||||
// See the License for the specific language governing permissions and
|
||||
// limitations under the License.
|
||||
|
||||
#include "absl/flags/flag.h"
|
||||
#include "mediapipe/framework/calculator_runner.h"
|
||||
#include "mediapipe/framework/deps/file_path.h"
|
||||
#include "mediapipe/framework/formats/time_series_header.pb.h"
|
||||
@@ -19,12 +20,16 @@
|
||||
#include "mediapipe/framework/port/gtest.h"
|
||||
#include "mediapipe/framework/port/parse_text_proto.h"
|
||||
#include "mediapipe/framework/port/status_matchers.h"
|
||||
#include "mediapipe/framework/tool/test_util.h"
|
||||
|
||||
namespace mediapipe {
|
||||
namespace {
|
||||
|
||||
constexpr char kTestPackageRoot[] = "mediapipe/calculators/audio";
|
||||
|
||||
TEST(AudioDecoderCalculatorTest, TestWAV) {
|
||||
CalculatorGraphConfig::Node node_config =
|
||||
ParseTextProtoOrDie<CalculatorGraphConfig::Node>(R"(
|
||||
ParseTextProtoOrDie<CalculatorGraphConfig::Node>(R"pb(
|
||||
calculator: "AudioDecoderCalculator"
|
||||
input_side_packet: "INPUT_FILE_PATH:input_file_path"
|
||||
output_stream: "AUDIO:audio"
|
||||
@@ -33,12 +38,11 @@ TEST(AudioDecoderCalculatorTest, TestWAV) {
|
||||
[type.googleapis.com/mediapipe.AudioDecoderOptions]: {
|
||||
audio_stream { stream_index: 0 }
|
||||
}
|
||||
})");
|
||||
})pb");
|
||||
CalculatorRunner runner(node_config);
|
||||
runner.MutableSidePackets()->Tag("INPUT_FILE_PATH") = MakePacket<std::string>(
|
||||
file::JoinPath("./",
|
||||
"/mediapipe/calculators/audio/"
|
||||
"testdata/sine_wave_1k_44100_mono_2_sec_wav.audio"));
|
||||
file::JoinPath(GetTestDataDir(kTestPackageRoot),
|
||||
"sine_wave_1k_44100_mono_2_sec_wav.audio"));
|
||||
MP_ASSERT_OK(runner.Run());
|
||||
MP_EXPECT_OK(runner.Outputs()
|
||||
.Tag("AUDIO_HEADER")
|
||||
@@ -55,7 +59,7 @@ TEST(AudioDecoderCalculatorTest, TestWAV) {
|
||||
|
||||
TEST(AudioDecoderCalculatorTest, Test48KWAV) {
|
||||
CalculatorGraphConfig::Node node_config =
|
||||
ParseTextProtoOrDie<CalculatorGraphConfig::Node>(R"(
|
||||
ParseTextProtoOrDie<CalculatorGraphConfig::Node>(R"pb(
|
||||
calculator: "AudioDecoderCalculator"
|
||||
input_side_packet: "INPUT_FILE_PATH:input_file_path"
|
||||
output_stream: "AUDIO:audio"
|
||||
@@ -64,12 +68,11 @@ TEST(AudioDecoderCalculatorTest, Test48KWAV) {
|
||||
[type.googleapis.com/mediapipe.AudioDecoderOptions]: {
|
||||
audio_stream { stream_index: 0 }
|
||||
}
|
||||
})");
|
||||
})pb");
|
||||
CalculatorRunner runner(node_config);
|
||||
runner.MutableSidePackets()->Tag("INPUT_FILE_PATH") = MakePacket<std::string>(
|
||||
file::JoinPath("./",
|
||||
"/mediapipe/calculators/audio/"
|
||||
"testdata/sine_wave_1k_48000_stereo_2_sec_wav.audio"));
|
||||
file::JoinPath(GetTestDataDir(kTestPackageRoot),
|
||||
"sine_wave_1k_48000_stereo_2_sec_wav.audio"));
|
||||
MP_ASSERT_OK(runner.Run());
|
||||
MP_EXPECT_OK(runner.Outputs()
|
||||
.Tag("AUDIO_HEADER")
|
||||
@@ -86,7 +89,7 @@ TEST(AudioDecoderCalculatorTest, Test48KWAV) {
|
||||
|
||||
TEST(AudioDecoderCalculatorTest, TestMP3) {
|
||||
CalculatorGraphConfig::Node node_config =
|
||||
ParseTextProtoOrDie<CalculatorGraphConfig::Node>(R"(
|
||||
ParseTextProtoOrDie<CalculatorGraphConfig::Node>(R"pb(
|
||||
calculator: "AudioDecoderCalculator"
|
||||
input_side_packet: "INPUT_FILE_PATH:input_file_path"
|
||||
output_stream: "AUDIO:audio"
|
||||
@@ -95,12 +98,11 @@ TEST(AudioDecoderCalculatorTest, TestMP3) {
|
||||
[type.googleapis.com/mediapipe.AudioDecoderOptions]: {
|
||||
audio_stream { stream_index: 0 }
|
||||
}
|
||||
})");
|
||||
})pb");
|
||||
CalculatorRunner runner(node_config);
|
||||
runner.MutableSidePackets()->Tag("INPUT_FILE_PATH") = MakePacket<std::string>(
|
||||
file::JoinPath("./",
|
||||
"/mediapipe/calculators/audio/"
|
||||
"testdata/sine_wave_1k_44100_stereo_2_sec_mp3.audio"));
|
||||
file::JoinPath(GetTestDataDir(kTestPackageRoot),
|
||||
"sine_wave_1k_44100_stereo_2_sec_mp3.audio"));
|
||||
MP_ASSERT_OK(runner.Run());
|
||||
MP_EXPECT_OK(runner.Outputs()
|
||||
.Tag("AUDIO_HEADER")
|
||||
@@ -117,7 +119,7 @@ TEST(AudioDecoderCalculatorTest, TestMP3) {
|
||||
|
||||
TEST(AudioDecoderCalculatorTest, TestAAC) {
|
||||
CalculatorGraphConfig::Node node_config =
|
||||
ParseTextProtoOrDie<CalculatorGraphConfig::Node>(R"(
|
||||
ParseTextProtoOrDie<CalculatorGraphConfig::Node>(R"pb(
|
||||
calculator: "AudioDecoderCalculator"
|
||||
input_side_packet: "INPUT_FILE_PATH:input_file_path"
|
||||
output_stream: "AUDIO:audio"
|
||||
@@ -126,12 +128,11 @@ TEST(AudioDecoderCalculatorTest, TestAAC) {
|
||||
[type.googleapis.com/mediapipe.AudioDecoderOptions]: {
|
||||
audio_stream { stream_index: 0 }
|
||||
}
|
||||
})");
|
||||
})pb");
|
||||
CalculatorRunner runner(node_config);
|
||||
runner.MutableSidePackets()->Tag("INPUT_FILE_PATH") = MakePacket<std::string>(
|
||||
file::JoinPath("./",
|
||||
"/mediapipe/calculators/audio/"
|
||||
"testdata/sine_wave_1k_44100_stereo_2_sec_aac.audio"));
|
||||
file::JoinPath(GetTestDataDir(kTestPackageRoot),
|
||||
"sine_wave_1k_44100_stereo_2_sec_aac.audio"));
|
||||
MP_ASSERT_OK(runner.Run());
|
||||
MP_EXPECT_OK(runner.Outputs()
|
||||
.Tag("AUDIO_HEADER")
|
||||
@@ -146,4 +147,5 @@ TEST(AudioDecoderCalculatorTest, TestAAC) {
|
||||
std::ceil(44100.0 * 2 / 1024));
|
||||
}
|
||||
|
||||
} // namespace
|
||||
} // namespace mediapipe
|
||||
|
||||
@@ -38,7 +38,7 @@ static bool SafeMultiply(int x, int y, int* result) {
|
||||
}
|
||||
} // namespace
|
||||
|
||||
::mediapipe::Status BasicTimeSeriesCalculatorBase::GetContract(
|
||||
absl::Status BasicTimeSeriesCalculatorBase::GetContract(
|
||||
CalculatorContract* cc) {
|
||||
cc->Inputs().Index(0).Set<Matrix>(
|
||||
// Input stream with TimeSeriesHeader.
|
||||
@@ -46,10 +46,10 @@ static bool SafeMultiply(int x, int y, int* result) {
|
||||
cc->Outputs().Index(0).Set<Matrix>(
|
||||
// Output stream with TimeSeriesHeader.
|
||||
);
|
||||
return ::mediapipe::OkStatus();
|
||||
return absl::OkStatus();
|
||||
}
|
||||
|
||||
::mediapipe::Status BasicTimeSeriesCalculatorBase::Open(CalculatorContext* cc) {
|
||||
absl::Status BasicTimeSeriesCalculatorBase::Open(CalculatorContext* cc) {
|
||||
TimeSeriesHeader input_header;
|
||||
MP_RETURN_IF_ERROR(time_series_util::FillTimeSeriesHeaderIfValid(
|
||||
cc->Inputs().Index(0).Header(), &input_header));
|
||||
@@ -57,11 +57,13 @@ static bool SafeMultiply(int x, int y, int* result) {
|
||||
auto output_header = new TimeSeriesHeader(input_header);
|
||||
MP_RETURN_IF_ERROR(MutateHeader(output_header));
|
||||
cc->Outputs().Index(0).SetHeader(Adopt(output_header));
|
||||
return ::mediapipe::OkStatus();
|
||||
|
||||
cc->SetOffset(0);
|
||||
|
||||
return absl::OkStatus();
|
||||
}
|
||||
|
||||
::mediapipe::Status BasicTimeSeriesCalculatorBase::Process(
|
||||
CalculatorContext* cc) {
|
||||
absl::Status BasicTimeSeriesCalculatorBase::Process(CalculatorContext* cc) {
|
||||
const Matrix& input = cc->Inputs().Index(0).Get<Matrix>();
|
||||
MP_RETURN_IF_ERROR(time_series_util::IsMatrixShapeConsistentWithHeader(
|
||||
input, cc->Inputs().Index(0).Header().Get<TimeSeriesHeader>()));
|
||||
@@ -71,12 +73,12 @@ static bool SafeMultiply(int x, int y, int* result) {
|
||||
*output, cc->Outputs().Index(0).Header().Get<TimeSeriesHeader>()));
|
||||
|
||||
cc->Outputs().Index(0).Add(output.release(), cc->InputTimestamp());
|
||||
return ::mediapipe::OkStatus();
|
||||
return absl::OkStatus();
|
||||
}
|
||||
|
||||
::mediapipe::Status BasicTimeSeriesCalculatorBase::MutateHeader(
|
||||
absl::Status BasicTimeSeriesCalculatorBase::MutateHeader(
|
||||
TimeSeriesHeader* output_header) {
|
||||
return ::mediapipe::OkStatus();
|
||||
return absl::OkStatus();
|
||||
}
|
||||
|
||||
// Calculator to sum an input time series across channels. This is
|
||||
@@ -86,9 +88,9 @@ static bool SafeMultiply(int x, int y, int* result) {
|
||||
class SumTimeSeriesAcrossChannelsCalculator
|
||||
: public BasicTimeSeriesCalculatorBase {
|
||||
protected:
|
||||
::mediapipe::Status MutateHeader(TimeSeriesHeader* output_header) final {
|
||||
absl::Status MutateHeader(TimeSeriesHeader* output_header) final {
|
||||
output_header->set_num_channels(1);
|
||||
return ::mediapipe::OkStatus();
|
||||
return absl::OkStatus();
|
||||
}
|
||||
|
||||
Matrix ProcessMatrix(const Matrix& input_matrix) final {
|
||||
@@ -104,9 +106,9 @@ REGISTER_CALCULATOR(SumTimeSeriesAcrossChannelsCalculator);
|
||||
class AverageTimeSeriesAcrossChannelsCalculator
|
||||
: public BasicTimeSeriesCalculatorBase {
|
||||
protected:
|
||||
::mediapipe::Status MutateHeader(TimeSeriesHeader* output_header) final {
|
||||
absl::Status MutateHeader(TimeSeriesHeader* output_header) final {
|
||||
output_header->set_num_channels(1);
|
||||
return ::mediapipe::OkStatus();
|
||||
return absl::OkStatus();
|
||||
}
|
||||
|
||||
Matrix ProcessMatrix(const Matrix& input_matrix) final {
|
||||
@@ -122,7 +124,7 @@ REGISTER_CALCULATOR(AverageTimeSeriesAcrossChannelsCalculator);
|
||||
// Options proto: None.
|
||||
class SummarySaiToPitchogramCalculator : public BasicTimeSeriesCalculatorBase {
|
||||
protected:
|
||||
::mediapipe::Status MutateHeader(TimeSeriesHeader* output_header) final {
|
||||
absl::Status MutateHeader(TimeSeriesHeader* output_header) final {
|
||||
if (output_header->num_channels() != 1) {
|
||||
return tool::StatusInvalid(
|
||||
absl::StrCat("Expected single-channel input, got ",
|
||||
@@ -131,7 +133,7 @@ class SummarySaiToPitchogramCalculator : public BasicTimeSeriesCalculatorBase {
|
||||
output_header->set_num_channels(output_header->num_samples());
|
||||
output_header->set_num_samples(1);
|
||||
output_header->set_sample_rate(output_header->packet_rate());
|
||||
return ::mediapipe::OkStatus();
|
||||
return absl::OkStatus();
|
||||
}
|
||||
|
||||
Matrix ProcessMatrix(const Matrix& input_matrix) final {
|
||||
@@ -160,7 +162,7 @@ REGISTER_CALCULATOR(ReverseChannelOrderCalculator);
|
||||
// Options proto: None.
|
||||
class FlattenPacketCalculator : public BasicTimeSeriesCalculatorBase {
|
||||
protected:
|
||||
::mediapipe::Status MutateHeader(TimeSeriesHeader* output_header) final {
|
||||
absl::Status MutateHeader(TimeSeriesHeader* output_header) final {
|
||||
const int num_input_channels = output_header->num_channels();
|
||||
const int num_input_samples = output_header->num_samples();
|
||||
RET_CHECK(num_input_channels >= 0)
|
||||
@@ -174,7 +176,7 @@ class FlattenPacketCalculator : public BasicTimeSeriesCalculatorBase {
|
||||
output_header->set_num_channels(output_num_channels);
|
||||
output_header->set_num_samples(1);
|
||||
output_header->set_sample_rate(output_header->packet_rate());
|
||||
return ::mediapipe::OkStatus();
|
||||
return absl::OkStatus();
|
||||
}
|
||||
|
||||
Matrix ProcessMatrix(const Matrix& input_matrix) final {
|
||||
@@ -253,10 +255,10 @@ REGISTER_CALCULATOR(DivideByMeanAcrossChannelsCalculator);
|
||||
// Options proto: None.
|
||||
class MeanCalculator : public BasicTimeSeriesCalculatorBase {
|
||||
protected:
|
||||
::mediapipe::Status MutateHeader(TimeSeriesHeader* output_header) final {
|
||||
absl::Status MutateHeader(TimeSeriesHeader* output_header) final {
|
||||
output_header->set_num_samples(1);
|
||||
output_header->set_sample_rate(output_header->packet_rate());
|
||||
return ::mediapipe::OkStatus();
|
||||
return absl::OkStatus();
|
||||
}
|
||||
|
||||
Matrix ProcessMatrix(const Matrix& input_matrix) final {
|
||||
@@ -272,10 +274,10 @@ REGISTER_CALCULATOR(MeanCalculator);
|
||||
// Options proto: None.
|
||||
class StandardDeviationCalculator : public BasicTimeSeriesCalculatorBase {
|
||||
protected:
|
||||
::mediapipe::Status MutateHeader(TimeSeriesHeader* output_header) final {
|
||||
absl::Status MutateHeader(TimeSeriesHeader* output_header) final {
|
||||
output_header->set_num_samples(1);
|
||||
output_header->set_sample_rate(output_header->packet_rate());
|
||||
return ::mediapipe::OkStatus();
|
||||
return absl::OkStatus();
|
||||
}
|
||||
|
||||
Matrix ProcessMatrix(const Matrix& input_matrix) final {
|
||||
@@ -293,9 +295,9 @@ REGISTER_CALCULATOR(StandardDeviationCalculator);
|
||||
// Options proto: None.
|
||||
class CovarianceCalculator : public BasicTimeSeriesCalculatorBase {
|
||||
protected:
|
||||
::mediapipe::Status MutateHeader(TimeSeriesHeader* output_header) final {
|
||||
absl::Status MutateHeader(TimeSeriesHeader* output_header) final {
|
||||
output_header->set_num_samples(output_header->num_channels());
|
||||
return ::mediapipe::OkStatus();
|
||||
return absl::OkStatus();
|
||||
}
|
||||
|
||||
Matrix ProcessMatrix(const Matrix& input_matrix) final {
|
||||
@@ -313,9 +315,9 @@ REGISTER_CALCULATOR(CovarianceCalculator);
|
||||
// Options proto: None.
|
||||
class L2NormCalculator : public BasicTimeSeriesCalculatorBase {
|
||||
protected:
|
||||
::mediapipe::Status MutateHeader(TimeSeriesHeader* output_header) final {
|
||||
absl::Status MutateHeader(TimeSeriesHeader* output_header) final {
|
||||
output_header->set_num_channels(1);
|
||||
return ::mediapipe::OkStatus();
|
||||
return absl::OkStatus();
|
||||
}
|
||||
|
||||
Matrix ProcessMatrix(const Matrix& input_matrix) final {
|
||||
@@ -385,12 +387,12 @@ REGISTER_CALCULATOR(ElementwiseSquareCalculator);
|
||||
// Options proto: None.
|
||||
class FirstHalfSlicerCalculator : public BasicTimeSeriesCalculatorBase {
|
||||
protected:
|
||||
::mediapipe::Status MutateHeader(TimeSeriesHeader* output_header) final {
|
||||
absl::Status MutateHeader(TimeSeriesHeader* output_header) final {
|
||||
const int num_input_samples = output_header->num_samples();
|
||||
RET_CHECK(num_input_samples >= 0)
|
||||
<< "FirstHalfSlicerCalculator: num_input_samples < 0";
|
||||
output_header->set_num_samples(num_input_samples / 2);
|
||||
return ::mediapipe::OkStatus();
|
||||
return absl::OkStatus();
|
||||
}
|
||||
|
||||
Matrix ProcessMatrix(const Matrix& input_matrix) final {
|
||||
|
||||
@@ -28,16 +28,16 @@ namespace mediapipe {
|
||||
|
||||
class BasicTimeSeriesCalculatorBase : public CalculatorBase {
|
||||
public:
|
||||
static ::mediapipe::Status GetContract(CalculatorContract* cc);
|
||||
::mediapipe::Status Open(CalculatorContext* cc) override;
|
||||
::mediapipe::Status Process(CalculatorContext* cc) override;
|
||||
static absl::Status GetContract(CalculatorContract* cc);
|
||||
absl::Status Open(CalculatorContext* cc) final;
|
||||
absl::Status Process(CalculatorContext* cc) final;
|
||||
|
||||
protected:
|
||||
// Open() calls this method to mutate the output stream header. The input
|
||||
// to this function will contain a copy of the input stream header, so
|
||||
// subclasses that do not need to mutate the header do not need to override
|
||||
// it.
|
||||
virtual ::mediapipe::Status MutateHeader(TimeSeriesHeader* output_header);
|
||||
virtual absl::Status MutateHeader(TimeSeriesHeader* output_header);
|
||||
|
||||
// Process() calls this method on each packet to compute the output matrix.
|
||||
virtual Matrix ProcessMatrix(const Matrix& input_matrix) = 0;
|
||||
|
||||
@@ -66,7 +66,7 @@ std::string PortableDebugString(const TimeSeriesHeader& header) {
|
||||
// rows corresponding to the new feature space).
|
||||
class FramewiseTransformCalculatorBase : public CalculatorBase {
|
||||
public:
|
||||
static ::mediapipe::Status GetContract(CalculatorContract* cc) {
|
||||
static absl::Status GetContract(CalculatorContract* cc) {
|
||||
cc->Inputs().Index(0).Set<Matrix>(
|
||||
// Sequence of Matrices, each column describing a particular time frame,
|
||||
// each row a feature dimension, with TimeSeriesHeader.
|
||||
@@ -75,11 +75,11 @@ class FramewiseTransformCalculatorBase : public CalculatorBase {
|
||||
// Sequence of Matrices, each column describing a particular time frame,
|
||||
// each row a feature dimension, with TimeSeriesHeader.
|
||||
);
|
||||
return ::mediapipe::OkStatus();
|
||||
return absl::OkStatus();
|
||||
}
|
||||
|
||||
::mediapipe::Status Open(CalculatorContext* cc) override;
|
||||
::mediapipe::Status Process(CalculatorContext* cc) override;
|
||||
absl::Status Open(CalculatorContext* cc) final;
|
||||
absl::Status Process(CalculatorContext* cc) final;
|
||||
|
||||
int num_output_channels(void) { return num_output_channels_; }
|
||||
|
||||
@@ -90,8 +90,8 @@ class FramewiseTransformCalculatorBase : public CalculatorBase {
|
||||
private:
|
||||
// Takes header and options, and sets up state including calling
|
||||
// set_num_output_channels() on the base object.
|
||||
virtual ::mediapipe::Status ConfigureTransform(const TimeSeriesHeader& header,
|
||||
CalculatorContext* cc) = 0;
|
||||
virtual absl::Status ConfigureTransform(const TimeSeriesHeader& header,
|
||||
CalculatorContext* cc) = 0;
|
||||
|
||||
// Takes a vector<double> corresponding to an input frame, and
|
||||
// perform the specific transformation to produce an output frame.
|
||||
@@ -102,23 +102,23 @@ class FramewiseTransformCalculatorBase : public CalculatorBase {
|
||||
int num_output_channels_;
|
||||
};
|
||||
|
||||
::mediapipe::Status FramewiseTransformCalculatorBase::Open(
|
||||
CalculatorContext* cc) {
|
||||
absl::Status FramewiseTransformCalculatorBase::Open(CalculatorContext* cc) {
|
||||
TimeSeriesHeader input_header;
|
||||
MP_RETURN_IF_ERROR(time_series_util::FillTimeSeriesHeaderIfValid(
|
||||
cc->Inputs().Index(0).Header(), &input_header));
|
||||
|
||||
::mediapipe::Status status = ConfigureTransform(input_header, cc);
|
||||
absl::Status status = ConfigureTransform(input_header, cc);
|
||||
|
||||
auto output_header = new TimeSeriesHeader(input_header);
|
||||
output_header->set_num_channels(num_output_channels_);
|
||||
cc->Outputs().Index(0).SetHeader(Adopt(output_header));
|
||||
|
||||
cc->SetOffset(0);
|
||||
|
||||
return status;
|
||||
}
|
||||
|
||||
::mediapipe::Status FramewiseTransformCalculatorBase::Process(
|
||||
CalculatorContext* cc) {
|
||||
absl::Status FramewiseTransformCalculatorBase::Process(CalculatorContext* cc) {
|
||||
const Matrix& input = cc->Inputs().Index(0).Get<Matrix>();
|
||||
const int num_frames = input.cols();
|
||||
std::unique_ptr<Matrix> output(new Matrix(num_output_channels_, num_frames));
|
||||
@@ -145,7 +145,7 @@ class FramewiseTransformCalculatorBase : public CalculatorBase {
|
||||
}
|
||||
cc->Outputs().Index(0).Add(output.release(), cc->InputTimestamp());
|
||||
|
||||
return ::mediapipe::OkStatus();
|
||||
return absl::OkStatus();
|
||||
}
|
||||
|
||||
// Calculator wrapper around the dsp/mfcc/mfcc.cc routine.
|
||||
@@ -170,13 +170,13 @@ class FramewiseTransformCalculatorBase : public CalculatorBase {
|
||||
// }
|
||||
class MfccCalculator : public FramewiseTransformCalculatorBase {
|
||||
public:
|
||||
static ::mediapipe::Status GetContract(CalculatorContract* cc) {
|
||||
static absl::Status GetContract(CalculatorContract* cc) {
|
||||
return FramewiseTransformCalculatorBase::GetContract(cc);
|
||||
}
|
||||
|
||||
private:
|
||||
::mediapipe::Status ConfigureTransform(const TimeSeriesHeader& header,
|
||||
CalculatorContext* cc) override {
|
||||
absl::Status ConfigureTransform(const TimeSeriesHeader& header,
|
||||
CalculatorContext* cc) override {
|
||||
MfccCalculatorOptions mfcc_options = cc->Options<MfccCalculatorOptions>();
|
||||
mfcc_.reset(new audio_dsp::Mfcc());
|
||||
int input_length = header.num_channels();
|
||||
@@ -194,7 +194,7 @@ class MfccCalculator : public FramewiseTransformCalculatorBase {
|
||||
// audio_dsp::MelFilterBank needs to know this to
|
||||
// correctly interpret the spectrogram bins.
|
||||
if (!header.has_audio_sample_rate()) {
|
||||
return ::mediapipe::InvalidArgumentError(
|
||||
return absl::InvalidArgumentError(
|
||||
absl::StrCat("No audio_sample_rate in input TimeSeriesHeader ",
|
||||
PortableDebugString(header)));
|
||||
}
|
||||
@@ -203,10 +203,10 @@ class MfccCalculator : public FramewiseTransformCalculatorBase {
|
||||
mfcc_->Initialize(input_length, header.audio_sample_rate());
|
||||
|
||||
if (initialized) {
|
||||
return ::mediapipe::OkStatus();
|
||||
return absl::OkStatus();
|
||||
} else {
|
||||
return ::mediapipe::Status(mediapipe::StatusCode::kInternal,
|
||||
"Mfcc::Initialize returned uninitialized");
|
||||
return absl::Status(absl::StatusCode::kInternal,
|
||||
"Mfcc::Initialize returned uninitialized");
|
||||
}
|
||||
}
|
||||
|
||||
@@ -228,13 +228,13 @@ REGISTER_CALCULATOR(MfccCalculator);
|
||||
// if you ask for too many channels.
|
||||
class MelSpectrumCalculator : public FramewiseTransformCalculatorBase {
|
||||
public:
|
||||
static ::mediapipe::Status GetContract(CalculatorContract* cc) {
|
||||
static absl::Status GetContract(CalculatorContract* cc) {
|
||||
return FramewiseTransformCalculatorBase::GetContract(cc);
|
||||
}
|
||||
|
||||
private:
|
||||
::mediapipe::Status ConfigureTransform(const TimeSeriesHeader& header,
|
||||
CalculatorContext* cc) override {
|
||||
absl::Status ConfigureTransform(const TimeSeriesHeader& header,
|
||||
CalculatorContext* cc) override {
|
||||
MelSpectrumCalculatorOptions mel_spectrum_options =
|
||||
cc->Options<MelSpectrumCalculatorOptions>();
|
||||
mel_filterbank_.reset(new audio_dsp::MelFilterbank());
|
||||
@@ -245,7 +245,7 @@ class MelSpectrumCalculator : public FramewiseTransformCalculatorBase {
|
||||
// audio_dsp::MelFilterBank needs to know this to
|
||||
// correctly interpret the spectrogram bins.
|
||||
if (!header.has_audio_sample_rate()) {
|
||||
return ::mediapipe::InvalidArgumentError(
|
||||
return absl::InvalidArgumentError(
|
||||
absl::StrCat("No audio_sample_rate in input TimeSeriesHeader ",
|
||||
PortableDebugString(header)));
|
||||
}
|
||||
@@ -255,10 +255,10 @@ class MelSpectrumCalculator : public FramewiseTransformCalculatorBase {
|
||||
mel_spectrum_options.max_frequency_hertz());
|
||||
|
||||
if (initialized) {
|
||||
return ::mediapipe::OkStatus();
|
||||
return absl::OkStatus();
|
||||
} else {
|
||||
return ::mediapipe::Status(mediapipe::StatusCode::kInternal,
|
||||
"mfcc::Initialize returned uninitialized");
|
||||
return absl::Status(absl::StatusCode::kInternal,
|
||||
"mfcc::Initialize returned uninitialized");
|
||||
}
|
||||
}
|
||||
|
||||
|
||||
@@ -84,7 +84,7 @@ class FramewiseTransformCalculatorTest
|
||||
num_samples_per_packet_ = GenerateRandomNonnegInputStream(kNumPackets);
|
||||
}
|
||||
|
||||
::mediapipe::Status Run() { return this->RunGraph(); }
|
||||
absl::Status Run() { return this->RunGraph(); }
|
||||
|
||||
void CheckResults(int expected_num_channels) {
|
||||
const auto& output_header =
|
||||
|
||||
@@ -1,4 +1,4 @@
|
||||
// Copyright 2019 The MediaPipe Authors.
|
||||
// Copyright 2019, 2021 The MediaPipe Authors.
|
||||
//
|
||||
// Licensed under the Apache License, Version 2.0 (the "License");
|
||||
// you may not use this file except in compliance with the License.
|
||||
@@ -16,22 +16,18 @@
|
||||
|
||||
#include "mediapipe/calculators/audio/rational_factor_resample_calculator.h"
|
||||
|
||||
#include "audio/dsp/resampler_rational_factor.h"
|
||||
#include "audio/dsp/resampler_q.h"
|
||||
|
||||
using audio_dsp::DefaultResamplingKernel;
|
||||
using audio_dsp::RationalFactorResampler;
|
||||
using audio_dsp::Resampler;
|
||||
|
||||
namespace mediapipe {
|
||||
::mediapipe::Status RationalFactorResampleCalculator::Process(
|
||||
CalculatorContext* cc) {
|
||||
absl::Status RationalFactorResampleCalculator::Process(CalculatorContext* cc) {
|
||||
return ProcessInternal(cc->Inputs().Index(0).Get<Matrix>(), false, cc);
|
||||
}
|
||||
|
||||
::mediapipe::Status RationalFactorResampleCalculator::Close(
|
||||
CalculatorContext* cc) {
|
||||
absl::Status RationalFactorResampleCalculator::Close(CalculatorContext* cc) {
|
||||
if (initial_timestamp_ == Timestamp::Unstarted()) {
|
||||
return ::mediapipe::OkStatus();
|
||||
return absl::OkStatus();
|
||||
}
|
||||
Matrix empty_input_frame(num_channels_, 0);
|
||||
return ProcessInternal(empty_input_frame, true, cc);
|
||||
@@ -40,11 +36,8 @@ namespace mediapipe {
|
||||
namespace {
|
||||
void CopyChannelToVector(const Matrix& matrix, int channel,
|
||||
std::vector<float>* vec) {
|
||||
vec->clear();
|
||||
vec->reserve(matrix.cols());
|
||||
for (int sample = 0; sample < matrix.cols(); ++sample) {
|
||||
vec->push_back(matrix(channel, sample));
|
||||
}
|
||||
vec->resize(matrix.cols());
|
||||
Eigen::Map<Eigen::ArrayXf>(vec->data(), vec->size()) = matrix.row(channel);
|
||||
}
|
||||
|
||||
void CopyVectorToChannel(const std::vector<float>& vec, Matrix* matrix,
|
||||
@@ -53,17 +46,14 @@ void CopyVectorToChannel(const std::vector<float>& vec, Matrix* matrix,
|
||||
matrix->resize(matrix->rows(), vec.size());
|
||||
} else {
|
||||
CHECK_EQ(vec.size(), matrix->cols());
|
||||
CHECK_LT(channel, matrix->rows());
|
||||
}
|
||||
for (int sample = 0; sample < matrix->cols(); ++sample) {
|
||||
(*matrix)(channel, sample) = vec[sample];
|
||||
}
|
||||
CHECK_LT(channel, matrix->rows());
|
||||
matrix->row(channel) =
|
||||
Eigen::Map<const Eigen::ArrayXf>(vec.data(), vec.size());
|
||||
}
|
||||
|
||||
} // namespace
|
||||
|
||||
::mediapipe::Status RationalFactorResampleCalculator::Open(
|
||||
CalculatorContext* cc) {
|
||||
absl::Status RationalFactorResampleCalculator::Open(CalculatorContext* cc) {
|
||||
RationalFactorResampleCalculatorOptions resample_options =
|
||||
cc->Options<RationalFactorResampleCalculatorOptions>();
|
||||
|
||||
@@ -88,7 +78,7 @@ void CopyVectorToChannel(const std::vector<float>& vec, Matrix* matrix,
|
||||
resample_options);
|
||||
if (!r) {
|
||||
LOG(ERROR) << "Failed to initialize resampler.";
|
||||
return ::mediapipe::UnknownError("Failed to initialize resampler.");
|
||||
return absl::UnknownError("Failed to initialize resampler.");
|
||||
}
|
||||
}
|
||||
}
|
||||
@@ -106,10 +96,10 @@ void CopyVectorToChannel(const std::vector<float>& vec, Matrix* matrix,
|
||||
initial_timestamp_ = Timestamp::Unstarted();
|
||||
check_inconsistent_timestamps_ =
|
||||
resample_options.check_inconsistent_timestamps();
|
||||
return ::mediapipe::OkStatus();
|
||||
return absl::OkStatus();
|
||||
}
|
||||
|
||||
::mediapipe::Status RationalFactorResampleCalculator::ProcessInternal(
|
||||
absl::Status RationalFactorResampleCalculator::ProcessInternal(
|
||||
const Matrix& input_frame, bool should_flush, CalculatorContext* cc) {
|
||||
if (initial_timestamp_ == Timestamp::Unstarted()) {
|
||||
initial_timestamp_ = cc->InputTimestamp();
|
||||
@@ -131,7 +121,7 @@ void CopyVectorToChannel(const std::vector<float>& vec, Matrix* matrix,
|
||||
*output_frame = input_frame;
|
||||
} else {
|
||||
if (!Resample(input_frame, output_frame.get(), should_flush)) {
|
||||
return ::mediapipe::UnknownError("Resample() failed.");
|
||||
return absl::UnknownError("Resample() failed.");
|
||||
}
|
||||
}
|
||||
cumulative_output_samples_ += output_frame->cols();
|
||||
@@ -139,7 +129,7 @@ void CopyVectorToChannel(const std::vector<float>& vec, Matrix* matrix,
|
||||
if (output_frame->cols() > 0) {
|
||||
cc->Outputs().Index(0).Add(output_frame.release(), output_timestamp);
|
||||
}
|
||||
return ::mediapipe::OkStatus();
|
||||
return absl::OkStatus();
|
||||
}
|
||||
|
||||
bool RationalFactorResampleCalculator::Resample(const Matrix& input_frame,
|
||||
@@ -167,25 +157,28 @@ RationalFactorResampleCalculator::ResamplerFromOptions(
|
||||
std::unique_ptr<Resampler<float>> resampler;
|
||||
const auto& rational_factor_options =
|
||||
options.resampler_rational_factor_options();
|
||||
std::unique_ptr<DefaultResamplingKernel> kernel;
|
||||
audio_dsp::QResamplerParams params;
|
||||
if (rational_factor_options.has_radius() &&
|
||||
rational_factor_options.has_cutoff() &&
|
||||
rational_factor_options.has_kaiser_beta()) {
|
||||
kernel = absl::make_unique<DefaultResamplingKernel>(
|
||||
source_sample_rate, target_sample_rate,
|
||||
rational_factor_options.radius(), rational_factor_options.cutoff(),
|
||||
rational_factor_options.kaiser_beta());
|
||||
} else {
|
||||
kernel = absl::make_unique<DefaultResamplingKernel>(source_sample_rate,
|
||||
target_sample_rate);
|
||||
// Convert RationalFactorResampler kernel parameters to QResampler
|
||||
// settings.
|
||||
params.filter_radius_factor =
|
||||
rational_factor_options.radius() *
|
||||
std::min(1.0, target_sample_rate / source_sample_rate);
|
||||
params.cutoff_proportion = 2 * rational_factor_options.cutoff() /
|
||||
std::min(source_sample_rate, target_sample_rate);
|
||||
params.kaiser_beta = rational_factor_options.kaiser_beta();
|
||||
}
|
||||
|
||||
// Set large enough so that the resampling factor between common sample
|
||||
// rates (e.g. 8kHz, 16kHz, 22.05kHz, 32kHz, 44.1kHz, 48kHz) is exact, and
|
||||
// that any factor is represented with error less than 0.025%.
|
||||
const int kMaxDenominator = 2000;
|
||||
resampler = absl::make_unique<RationalFactorResampler<float>>(
|
||||
*kernel, kMaxDenominator);
|
||||
params.max_denominator = 2000;
|
||||
|
||||
// NOTE: QResampler supports multichannel resampling, so the code might be
|
||||
// simplified using a single instance rather than one per channel.
|
||||
resampler = absl::make_unique<audio_dsp::QResampler<float>>(
|
||||
source_sample_rate, target_sample_rate, /*num_channels=*/1, params);
|
||||
if (resampler != nullptr && !resampler->Valid()) {
|
||||
resampler = std::unique_ptr<Resampler<float>>();
|
||||
}
|
||||
|
||||
@@ -1,4 +1,4 @@
|
||||
// Copyright 2019 The MediaPipe Authors.
|
||||
// Copyright 2019, 2021 The MediaPipe Authors.
|
||||
//
|
||||
// Licensed under the Apache License, Version 2.0 (the "License");
|
||||
// you may not use this file except in compliance with the License.
|
||||
@@ -36,28 +36,31 @@ namespace mediapipe {
|
||||
// stream's sampling rate is specified by target_sample_rate in the
|
||||
// RationalFactorResampleCalculatorOptions. The output time series may have
|
||||
// a varying number of samples per frame.
|
||||
//
|
||||
// NOTE: This calculator uses QResampler, despite the name, which supersedes
|
||||
// RationalFactorResampler.
|
||||
class RationalFactorResampleCalculator : public CalculatorBase {
|
||||
public:
|
||||
struct TestAccess;
|
||||
|
||||
static ::mediapipe::Status GetContract(CalculatorContract* cc) {
|
||||
static absl::Status GetContract(CalculatorContract* cc) {
|
||||
cc->Inputs().Index(0).Set<Matrix>(
|
||||
// Single input stream with TimeSeriesHeader.
|
||||
);
|
||||
cc->Outputs().Index(0).Set<Matrix>(
|
||||
// Resampled stream with TimeSeriesHeader.
|
||||
);
|
||||
return ::mediapipe::OkStatus();
|
||||
return absl::OkStatus();
|
||||
}
|
||||
// Returns FAIL if the input stream header is invalid or if the
|
||||
// resampler cannot be initialized.
|
||||
::mediapipe::Status Open(CalculatorContext* cc) override;
|
||||
absl::Status Open(CalculatorContext* cc) override;
|
||||
// Resamples a packet of TimeSeries data. Returns FAIL if the
|
||||
// resampler state becomes inconsistent.
|
||||
::mediapipe::Status Process(CalculatorContext* cc) override;
|
||||
absl::Status Process(CalculatorContext* cc) override;
|
||||
// Flushes any remaining state. Returns FAIL if the resampler state
|
||||
// becomes inconsistent.
|
||||
::mediapipe::Status Close(CalculatorContext* cc) override;
|
||||
absl::Status Close(CalculatorContext* cc) override;
|
||||
|
||||
protected:
|
||||
typedef audio_dsp::Resampler<float> ResamplerType;
|
||||
@@ -72,8 +75,8 @@ class RationalFactorResampleCalculator : public CalculatorBase {
|
||||
// Does Timestamp bookkeeping and resampling common to Process() and
|
||||
// Close(). Returns FAIL if the resampler state becomes
|
||||
// inconsistent.
|
||||
::mediapipe::Status ProcessInternal(const Matrix& input_frame,
|
||||
bool should_flush, CalculatorContext* cc);
|
||||
absl::Status ProcessInternal(const Matrix& input_frame, bool should_flush,
|
||||
CalculatorContext* cc);
|
||||
|
||||
// Uses the internal resampler_ objects to actually resample each
|
||||
// row of the input TimeSeries. Returns false if the resampler
|
||||
|
||||
@@ -1,4 +1,4 @@
|
||||
// Copyright 2019 The MediaPipe Authors.
|
||||
// Copyright 2019, 2021 The MediaPipe Authors.
|
||||
//
|
||||
// Licensed under the Apache License, Version 2.0 (the "License");
|
||||
// you may not use this file except in compliance with the License.
|
||||
@@ -18,6 +18,8 @@ package mediapipe;
|
||||
|
||||
import "mediapipe/framework/calculator.proto";
|
||||
|
||||
// NOTE: This calculator uses QResampler, despite the name, which supersedes
|
||||
// RationalFactorResampler.
|
||||
message RationalFactorResampleCalculatorOptions {
|
||||
extend CalculatorOptions {
|
||||
optional RationalFactorResampleCalculatorOptions ext = 259760074;
|
||||
@@ -27,8 +29,7 @@ message RationalFactorResampleCalculatorOptions {
|
||||
// stream. Required. Must be greater than 0.
|
||||
optional double target_sample_rate = 1;
|
||||
|
||||
// Parameters for initializing the RationalFactorResampler. See
|
||||
// RationalFactorResampler for more details.
|
||||
// Parameters for initializing QResampler. See QResampler for more details.
|
||||
message ResamplerRationalFactorOptions {
|
||||
// Kernel radius in units of input samples.
|
||||
optional double radius = 1;
|
||||
|
||||
@@ -80,7 +80,7 @@ class RationalFactorResampleCalculatorTest
|
||||
}
|
||||
|
||||
// Initializes and runs the test graph.
|
||||
::mediapipe::Status Run(double output_sample_rate) {
|
||||
absl::Status Run(double output_sample_rate) {
|
||||
options_.set_target_sample_rate(output_sample_rate);
|
||||
InitializeGraph();
|
||||
|
||||
@@ -120,7 +120,6 @@ class RationalFactorResampleCalculatorTest
|
||||
|
||||
// The exact number of expected samples may vary based on the implementation
|
||||
// of the resampler since the exact value is not an integer.
|
||||
// TODO: Reduce this offset to + 1 once cl/185829520 is submitted.
|
||||
const double expected_num_output_samples = num_input_samples_ * factor;
|
||||
EXPECT_LE(ceil(expected_num_output_samples), num_output_samples);
|
||||
EXPECT_GE(ceil(expected_num_output_samples) + 11, num_output_samples);
|
||||
|
||||
@@ -20,24 +20,22 @@
|
||||
#include <memory>
|
||||
#include <string>
|
||||
|
||||
#include "Eigen/Core"
|
||||
#include "absl/strings/string_view.h"
|
||||
#include "audio/dsp/spectrogram/spectrogram.h"
|
||||
#include "audio/dsp/window_functions.h"
|
||||
#include "mediapipe/calculators/audio/spectrogram_calculator.pb.h"
|
||||
#include "mediapipe/framework/calculator_framework.h"
|
||||
#include "mediapipe/framework/formats/matrix.h"
|
||||
#include "mediapipe/framework/formats/time_series_header.pb.h"
|
||||
#include "mediapipe/framework/port/core_proto_inc.h"
|
||||
#include "mediapipe/framework/port/integral_types.h"
|
||||
#include "mediapipe/framework/port/logging.h"
|
||||
#include "mediapipe/framework/port/ret_check.h"
|
||||
#include "mediapipe/framework/port/source_location.h"
|
||||
#include "mediapipe/framework/port/status_builder.h"
|
||||
#include "mediapipe/util/time_series_util.h"
|
||||
|
||||
namespace mediapipe {
|
||||
|
||||
namespace {
|
||||
constexpr char kFrameDurationTag[] = "FRAME_DURATION";
|
||||
constexpr char kFrameOverlapTag[] = "FRAME_OVERLAP";
|
||||
} // namespace
|
||||
// MediaPipe Calculator for computing the "spectrogram" (short-time Fourier
|
||||
// transform squared-magnitude, by default) of a multichannel input
|
||||
// time series, including optionally overlapping frames. Options are
|
||||
@@ -46,11 +44,14 @@ namespace mediapipe {
|
||||
//
|
||||
// Result is a MatrixData record (for single channel input and when the
|
||||
// allow_multichannel_input flag is false), or a vector of MatrixData records,
|
||||
// one for each channel (when the allow_multichannel_input flag is set). The
|
||||
// rows of each spectrogram matrix correspond to the n_fft/2+1 unique complex
|
||||
// values, or squared/linear/dB magnitudes, depending on the output_type option.
|
||||
// Each input packet will result in zero or one output packets, each containing
|
||||
// one Matrix for each channel of the input, where each Matrix has one or more
|
||||
// one for each channel (when the allow_multichannel_input flag is set). Each
|
||||
// waveform frame is converted to frequency by a fast Fourier transform whose
|
||||
// size, n_fft, is the smallest power of two large enough to enclose the frame
|
||||
// length of round(frame_duration_seconds * sample_rate).The rows of each
|
||||
// spectrogram matrix(result) correspond to the n_fft/2+1 unique complex values,
|
||||
// or squared/linear/dB magnitudes, depending on the output_type option. Each
|
||||
// input packet will result in zero or one output packets, each containing one
|
||||
// Matrix for each channel of the input, where each Matrix has one or more
|
||||
// columns of spectral values, one for each complete frame of input samples. If
|
||||
// the input packet contains too few samples to trigger a new output frame, no
|
||||
// output packet is generated (since zero-length packets are not legal since
|
||||
@@ -66,11 +67,27 @@ namespace mediapipe {
|
||||
// analysis frame will advance from its predecessor by the same time step.
|
||||
class SpectrogramCalculator : public CalculatorBase {
|
||||
public:
|
||||
static ::mediapipe::Status GetContract(CalculatorContract* cc) {
|
||||
static absl::Status GetContract(CalculatorContract* cc) {
|
||||
cc->Inputs().Index(0).Set<Matrix>(
|
||||
// Input stream with TimeSeriesHeader.
|
||||
);
|
||||
|
||||
if (cc->InputSidePackets().HasTag(kFrameDurationTag)) {
|
||||
cc->InputSidePackets()
|
||||
.Tag(kFrameDurationTag)
|
||||
.Set<double>(
|
||||
// Optional side packet for frame_duration_seconds if provided.
|
||||
);
|
||||
}
|
||||
|
||||
if (cc->InputSidePackets().HasTag(kFrameOverlapTag)) {
|
||||
cc->InputSidePackets()
|
||||
.Tag(kFrameOverlapTag)
|
||||
.Set<double>(
|
||||
// Optional side packet for frame_overlap_seconds if provided.
|
||||
);
|
||||
}
|
||||
|
||||
SpectrogramCalculatorOptions spectrogram_options =
|
||||
cc->Options<SpectrogramCalculatorOptions>();
|
||||
if (!spectrogram_options.allow_multichannel_input()) {
|
||||
@@ -96,26 +113,34 @@ class SpectrogramCalculator : public CalculatorBase {
|
||||
);
|
||||
}
|
||||
}
|
||||
return ::mediapipe::OkStatus();
|
||||
return absl::OkStatus();
|
||||
}
|
||||
|
||||
// Returns FAIL if the input stream header is invalid.
|
||||
::mediapipe::Status Open(CalculatorContext* cc) override;
|
||||
absl::Status Open(CalculatorContext* cc) override;
|
||||
|
||||
// Outputs at most one packet consisting of a single Matrix with one or
|
||||
// more columns containing the spectral values from as many input frames
|
||||
// as are completed by the input samples. Always returns OK.
|
||||
::mediapipe::Status Process(CalculatorContext* cc) override;
|
||||
absl::Status Process(CalculatorContext* cc) override;
|
||||
|
||||
// Performs zero-padding and processing of any remaining samples
|
||||
// if pad_final_packet is set.
|
||||
// Returns OK.
|
||||
::mediapipe::Status Close(CalculatorContext* cc) override;
|
||||
absl::Status Close(CalculatorContext* cc) override;
|
||||
|
||||
private:
|
||||
Timestamp CurrentOutputTimestamp(CalculatorContext* cc) {
|
||||
if (use_local_timestamp_) {
|
||||
return cc->InputTimestamp();
|
||||
const Timestamp now = cc->InputTimestamp();
|
||||
if (now == Timestamp::Done()) {
|
||||
// During Close the timestamp is not available, send an estimate.
|
||||
return last_local_output_timestamp_ +
|
||||
round(last_completed_frames_ * frame_step_samples() *
|
||||
Timestamp::kTimestampUnitsPerSecond / input_sample_rate_);
|
||||
}
|
||||
last_local_output_timestamp_ = now;
|
||||
return now;
|
||||
}
|
||||
return CumulativeOutputTimestamp();
|
||||
}
|
||||
@@ -138,17 +163,20 @@ class SpectrogramCalculator : public CalculatorBase {
|
||||
// Convert the output of the spectrogram object into a Matrix (or an
|
||||
// Eigen::MatrixXcf if complex-valued output is requested) and pass to
|
||||
// MediaPipe output.
|
||||
::mediapipe::Status ProcessVector(const Matrix& input_stream,
|
||||
CalculatorContext* cc);
|
||||
absl::Status ProcessVector(const Matrix& input_stream, CalculatorContext* cc);
|
||||
|
||||
// Templated function to process either real- or complex-output spectrogram.
|
||||
template <class OutputMatrixType>
|
||||
::mediapipe::Status ProcessVectorToOutput(
|
||||
absl::Status ProcessVectorToOutput(
|
||||
const Matrix& input_stream,
|
||||
const OutputMatrixType postprocess_output_fn(const OutputMatrixType&),
|
||||
CalculatorContext* cc);
|
||||
|
||||
// Use the MediaPipe timestamp instead of the estimated one. Useful when the
|
||||
// data is intermittent.
|
||||
bool use_local_timestamp_;
|
||||
Timestamp last_local_output_timestamp_;
|
||||
|
||||
double input_sample_rate_;
|
||||
bool pad_final_packet_;
|
||||
int frame_duration_samples_;
|
||||
@@ -157,6 +185,9 @@ class SpectrogramCalculator : public CalculatorBase {
|
||||
int64 cumulative_input_samples_;
|
||||
// How many frames we've emitted, used for calculating output time stamps.
|
||||
int64 cumulative_completed_frames_;
|
||||
// How many frames were emitted last, used for estimating the timestamp on
|
||||
// Close when use_local_timestamp_ is true;
|
||||
int64 last_completed_frames_;
|
||||
Timestamp initial_input_timestamp_;
|
||||
int num_input_channels_;
|
||||
// How many frequency bins we emit (=N_FFT/2 + 1).
|
||||
@@ -170,37 +201,48 @@ class SpectrogramCalculator : public CalculatorBase {
|
||||
// Fixed scale factor applied to output values (regardless of type).
|
||||
double output_scale_;
|
||||
|
||||
static const float kLnPowerToDb;
|
||||
static const float kLnSquaredMagnitudeToDb;
|
||||
};
|
||||
REGISTER_CALCULATOR(SpectrogramCalculator);
|
||||
|
||||
// Factor to convert ln(magnitude_squared) to deciBels = 10.0/ln(10.0).
|
||||
const float SpectrogramCalculator::kLnPowerToDb = 4.342944819032518;
|
||||
// DECIBELS = 20*log10(LINEAR_MAGNITUDE) = 10*Log10(SQUARED_MAGNITUDE)
|
||||
// =10/ln(10)*ln(SQUARED_MAGNITUDE).
|
||||
// Factor to convert ln(SQUARED_MAGNITUDE) to deciBels = 10.0/ln(10.0).
|
||||
const float SpectrogramCalculator::kLnSquaredMagnitudeToDb = 4.342944819032518;
|
||||
|
||||
::mediapipe::Status SpectrogramCalculator::Open(CalculatorContext* cc) {
|
||||
absl::Status SpectrogramCalculator::Open(CalculatorContext* cc) {
|
||||
SpectrogramCalculatorOptions spectrogram_options =
|
||||
cc->Options<SpectrogramCalculatorOptions>();
|
||||
// Provide frame_duration_seconds and frame_overlap_seconds either from static
|
||||
// options, or dynamically from a side packet, the side packet one will
|
||||
// override the options one if provided.
|
||||
|
||||
double frame_duration_seconds = 0;
|
||||
double frame_overlap_seconds = 0;
|
||||
if (cc->InputSidePackets().HasTag(kFrameDurationTag)) {
|
||||
frame_duration_seconds =
|
||||
cc->InputSidePackets().Tag(kFrameDurationTag).Get<double>();
|
||||
} else {
|
||||
frame_duration_seconds = spectrogram_options.frame_duration_seconds();
|
||||
}
|
||||
|
||||
if (cc->InputSidePackets().HasTag(kFrameOverlapTag)) {
|
||||
frame_overlap_seconds =
|
||||
cc->InputSidePackets().Tag(kFrameOverlapTag).Get<double>();
|
||||
} else {
|
||||
frame_overlap_seconds = spectrogram_options.frame_overlap_seconds();
|
||||
}
|
||||
|
||||
use_local_timestamp_ = spectrogram_options.use_local_timestamp();
|
||||
|
||||
if (spectrogram_options.frame_duration_seconds() <= 0.0) {
|
||||
::mediapipe::InvalidArgumentErrorBuilder(MEDIAPIPE_LOC)
|
||||
<< "Invalid or missing frame_duration_seconds.\n"
|
||||
"frame_duration_seconds: "
|
||||
<< spectrogram_options.frame_overlap_seconds();
|
||||
if (frame_duration_seconds <= 0.0) {
|
||||
// TODO: return an error.
|
||||
}
|
||||
if (spectrogram_options.frame_overlap_seconds() >=
|
||||
spectrogram_options.frame_duration_seconds()) {
|
||||
::mediapipe::InvalidArgumentErrorBuilder(MEDIAPIPE_LOC)
|
||||
<< "Invalid frame_overlap_seconds.\nframe_overlap_seconds: "
|
||||
<< spectrogram_options.frame_overlap_seconds()
|
||||
<< "\nframe_duration_seconds: "
|
||||
<< spectrogram_options.frame_duration_seconds();
|
||||
if (frame_overlap_seconds >= frame_duration_seconds) {
|
||||
// TODO: return an error.
|
||||
}
|
||||
if (spectrogram_options.frame_overlap_seconds() < 0.0) {
|
||||
::mediapipe::InvalidArgumentErrorBuilder(MEDIAPIPE_LOC)
|
||||
<< "Frame_overlap_seconds is < 0.0.\nframe_overlap_seconds: "
|
||||
<< spectrogram_options.frame_overlap_seconds();
|
||||
if (frame_overlap_seconds < 0.0) {
|
||||
// TODO: return an error.
|
||||
}
|
||||
|
||||
TimeSeriesHeader input_header;
|
||||
@@ -212,15 +254,11 @@ const float SpectrogramCalculator::kLnPowerToDb = 4.342944819032518;
|
||||
|
||||
if (!spectrogram_options.allow_multichannel_input() &&
|
||||
num_input_channels_ != 1) {
|
||||
::mediapipe::InvalidArgumentErrorBuilder(MEDIAPIPE_LOC)
|
||||
<< "The current setting only supports single-channel input. Please set "
|
||||
"allow_multichannel_input.\n";
|
||||
// TODO: return an error.
|
||||
}
|
||||
|
||||
frame_duration_samples_ =
|
||||
round(spectrogram_options.frame_duration_seconds() * input_sample_rate_);
|
||||
frame_overlap_samples_ =
|
||||
round(spectrogram_options.frame_overlap_seconds() * input_sample_rate_);
|
||||
frame_duration_samples_ = round(frame_duration_seconds * input_sample_rate_);
|
||||
frame_overlap_samples_ = round(frame_overlap_seconds * input_sample_rate_);
|
||||
|
||||
pad_final_packet_ = spectrogram_options.pad_final_packet();
|
||||
output_type_ = spectrogram_options.output_type();
|
||||
@@ -282,21 +320,27 @@ const float SpectrogramCalculator::kLnPowerToDb = 4.342944819032518;
|
||||
Adopt(multichannel_output_header.release()));
|
||||
}
|
||||
cumulative_completed_frames_ = 0;
|
||||
last_completed_frames_ = 0;
|
||||
initial_input_timestamp_ = Timestamp::Unstarted();
|
||||
return ::mediapipe::OkStatus();
|
||||
if (use_local_timestamp_) {
|
||||
// Inform the framework that the calculator will output packets at the same
|
||||
// timestamps as input packets to enable packet queueing optimizations. The
|
||||
// final packet (emitted from Close()) does not follow this rule but it's
|
||||
// sufficient that its timestamp is strictly greater than the timestamp of
|
||||
// the previous packet.
|
||||
cc->SetOffset(0);
|
||||
}
|
||||
return absl::OkStatus();
|
||||
}
|
||||
|
||||
::mediapipe::Status SpectrogramCalculator::Process(CalculatorContext* cc) {
|
||||
absl::Status SpectrogramCalculator::Process(CalculatorContext* cc) {
|
||||
if (initial_input_timestamp_ == Timestamp::Unstarted()) {
|
||||
initial_input_timestamp_ = cc->InputTimestamp();
|
||||
}
|
||||
|
||||
const Matrix& input_stream = cc->Inputs().Index(0).Get<Matrix>();
|
||||
if (input_stream.rows() != num_input_channels_) {
|
||||
::mediapipe::InvalidArgumentErrorBuilder(MEDIAPIPE_LOC)
|
||||
<< "Number of input channels do not correspond to the number of rows "
|
||||
<< "in the input matrix: " << num_input_channels_ << "channels vs "
|
||||
<< input_stream.rows() << " rows";
|
||||
// TODO: return an error.
|
||||
}
|
||||
|
||||
cumulative_input_samples_ += input_stream.cols();
|
||||
@@ -305,7 +349,7 @@ const float SpectrogramCalculator::kLnPowerToDb = 4.342944819032518;
|
||||
}
|
||||
|
||||
template <class OutputMatrixType>
|
||||
::mediapipe::Status SpectrogramCalculator::ProcessVectorToOutput(
|
||||
absl::Status SpectrogramCalculator::ProcessVectorToOutput(
|
||||
const Matrix& input_stream,
|
||||
const OutputMatrixType postprocess_output_fn(const OutputMatrixType&),
|
||||
CalculatorContext* cc) {
|
||||
@@ -325,8 +369,8 @@ template <class OutputMatrixType>
|
||||
|
||||
if (!spectrogram_generators_[channel]->ComputeSpectrogram(
|
||||
input_vector, &output_vectors)) {
|
||||
return ::mediapipe::Status(mediapipe::StatusCode::kInternal,
|
||||
"Spectrogram returned failure");
|
||||
return absl::Status(absl::StatusCode::kInternal,
|
||||
"Spectrogram returned failure");
|
||||
}
|
||||
if (channel == 0) {
|
||||
// Record the number of time frames we expect from each channel.
|
||||
@@ -368,12 +412,19 @@ template <class OutputMatrixType>
|
||||
CurrentOutputTimestamp(cc));
|
||||
}
|
||||
cumulative_completed_frames_ += output_vectors.size();
|
||||
last_completed_frames_ = output_vectors.size();
|
||||
if (!use_local_timestamp_) {
|
||||
// In non-local timestamp mode the timestamp of the next packet will be
|
||||
// equal to CumulativeOutputTimestamp(). Inform the framework about this
|
||||
// fact to enable packet queueing optimizations.
|
||||
cc->Outputs().Index(0).SetNextTimestampBound(CumulativeOutputTimestamp());
|
||||
}
|
||||
}
|
||||
return ::mediapipe::OkStatus();
|
||||
return absl::OkStatus();
|
||||
}
|
||||
|
||||
::mediapipe::Status SpectrogramCalculator::ProcessVector(
|
||||
const Matrix& input_stream, CalculatorContext* cc) {
|
||||
absl::Status SpectrogramCalculator::ProcessVector(const Matrix& input_stream,
|
||||
CalculatorContext* cc) {
|
||||
switch (output_type_) {
|
||||
// These blocks deliberately ignore clang-format to preserve the
|
||||
// "silhouette" of the different cases.
|
||||
@@ -403,18 +454,18 @@ template <class OutputMatrixType>
|
||||
return ProcessVectorToOutput(
|
||||
input_stream,
|
||||
+[](const Matrix& col) -> const Matrix {
|
||||
return kLnPowerToDb * col.array().log().matrix();
|
||||
return kLnSquaredMagnitudeToDb * col.array().log().matrix();
|
||||
}, cc);
|
||||
}
|
||||
// clang-format on
|
||||
default: {
|
||||
return ::mediapipe::Status(mediapipe::StatusCode::kInvalidArgument,
|
||||
"Unrecognized spectrogram output type.");
|
||||
return absl::Status(absl::StatusCode::kInvalidArgument,
|
||||
"Unrecognized spectrogram output type.");
|
||||
}
|
||||
}
|
||||
}
|
||||
|
||||
::mediapipe::Status SpectrogramCalculator::Close(CalculatorContext* cc) {
|
||||
absl::Status SpectrogramCalculator::Close(CalculatorContext* cc) {
|
||||
if (cumulative_input_samples_ > 0 && pad_final_packet_) {
|
||||
// We can flush any remaining samples by sending frame_step_samples - 1
|
||||
// zeros to the Process method, and letting it do its thing,
|
||||
@@ -430,7 +481,7 @@ template <class OutputMatrixType>
|
||||
Matrix::Zero(num_input_channels_, required_padding_samples), cc);
|
||||
}
|
||||
|
||||
return ::mediapipe::OkStatus();
|
||||
return absl::OkStatus();
|
||||
}
|
||||
|
||||
} // namespace mediapipe
|
||||
|
||||
@@ -32,7 +32,11 @@ message SpectrogramCalculatorOptions {
|
||||
|
||||
// Duration of overlap between adjacent windows.
|
||||
// Hence, frame_rate = 1/(frame_duration_seconds - frame_overlap_seconds).
|
||||
// Required that 0 <= frame_overlap_seconds < frame_duration_seconds.
|
||||
// Note the frame_rate here is not the MediaPipe packet rate, the frame here
|
||||
// means each Fourier transform analysis waveform frame, the output MediaPipe
|
||||
// packet rate will the the same as input, if frame rate is lower than input
|
||||
// packet rate, will result in intermittent empty output packets. Required
|
||||
// that 0 <= frame_overlap_seconds < frame_duration_seconds.
|
||||
optional double frame_overlap_seconds = 2 [default = 0.0];
|
||||
|
||||
// Whether to pad the final packet with zeros. If true, guarantees that
|
||||
@@ -42,6 +46,11 @@ message SpectrogramCalculatorOptions {
|
||||
|
||||
// Output value type can be squared-magnitude, linear-magnitude,
|
||||
// deciBels (dB, = 20*log10(linear_magnitude)), or std::complex.
|
||||
// Their relationship:
|
||||
// COMPLEX c = Re + Im*i;
|
||||
// SQUARED_MAGNITUDE = Re^2 + Im^2;
|
||||
// LINEAR_MAGNITUDE = sqrt(SQUARED_MAGNITUDE);
|
||||
// DECIBELS = 20*log10(LINEAR_MAGNITUDE) = 10*log10(SQUARED_MAGNITUDE);
|
||||
enum OutputType {
|
||||
SQUARED_MAGNITUDE = 0;
|
||||
LINEAR_MAGNITUDE = 1;
|
||||
|
||||
@@ -50,7 +50,7 @@ class SpectrogramCalculatorTest
|
||||
}
|
||||
|
||||
// Initializes and runs the test graph.
|
||||
::mediapipe::Status Run() {
|
||||
absl::Status Run() {
|
||||
// Now that options are set, we can set up some internal constants.
|
||||
frame_duration_samples_ =
|
||||
round(options_.frame_duration_seconds() * input_sample_rate_);
|
||||
|
||||
@@ -41,17 +41,17 @@ namespace mediapipe {
|
||||
// }
|
||||
class StabilizedLogCalculator : public CalculatorBase {
|
||||
public:
|
||||
static ::mediapipe::Status GetContract(CalculatorContract* cc) {
|
||||
static absl::Status GetContract(CalculatorContract* cc) {
|
||||
cc->Inputs().Index(0).Set<Matrix>(
|
||||
// Input stream with TimeSeriesHeader.
|
||||
);
|
||||
cc->Outputs().Index(0).Set<Matrix>(
|
||||
// Output stabilized log stream with TimeSeriesHeader.
|
||||
);
|
||||
return ::mediapipe::OkStatus();
|
||||
return absl::OkStatus();
|
||||
}
|
||||
|
||||
::mediapipe::Status Open(CalculatorContext* cc) override {
|
||||
absl::Status Open(CalculatorContext* cc) override {
|
||||
StabilizedLogCalculatorOptions stabilized_log_calculator_options =
|
||||
cc->Options<StabilizedLogCalculatorOptions>();
|
||||
|
||||
@@ -70,23 +70,23 @@ class StabilizedLogCalculator : public CalculatorBase {
|
||||
cc->Outputs().Index(0).SetHeader(
|
||||
Adopt(new TimeSeriesHeader(input_header)));
|
||||
}
|
||||
return ::mediapipe::OkStatus();
|
||||
return absl::OkStatus();
|
||||
}
|
||||
|
||||
::mediapipe::Status Process(CalculatorContext* cc) override {
|
||||
absl::Status Process(CalculatorContext* cc) override {
|
||||
auto input_matrix = cc->Inputs().Index(0).Get<Matrix>();
|
||||
if (input_matrix.array().isNaN().any()) {
|
||||
return ::mediapipe::InvalidArgumentError("NaN input to log operation.");
|
||||
return absl::InvalidArgumentError("NaN input to log operation.");
|
||||
}
|
||||
if (check_nonnegativity_) {
|
||||
if (input_matrix.minCoeff() < 0.0) {
|
||||
return ::mediapipe::OutOfRangeError("Negative input to log operation.");
|
||||
return absl::OutOfRangeError("Negative input to log operation.");
|
||||
}
|
||||
}
|
||||
std::unique_ptr<Matrix> output_frame(new Matrix(
|
||||
output_scale_ * (input_matrix.array() + stabilizer_).log().matrix()));
|
||||
cc->Outputs().Index(0).Add(output_frame.release(), cc->InputTimestamp());
|
||||
return ::mediapipe::OkStatus();
|
||||
return absl::OkStatus();
|
||||
}
|
||||
|
||||
private:
|
||||
|
||||
+1
-1
@@ -13,7 +13,7 @@
|
||||
# limitations under the License.
|
||||
#
|
||||
|
||||
licenses(["notice"]) # Apache 2.0
|
||||
licenses(["notice"])
|
||||
|
||||
filegroup(
|
||||
name = "test_audios",
|
||||
|
||||
@@ -66,26 +66,26 @@ namespace mediapipe {
|
||||
// cumulative_completed_samples / sample_rate_.
|
||||
class TimeSeriesFramerCalculator : public CalculatorBase {
|
||||
public:
|
||||
static ::mediapipe::Status GetContract(CalculatorContract* cc) {
|
||||
static absl::Status GetContract(CalculatorContract* cc) {
|
||||
cc->Inputs().Index(0).Set<Matrix>(
|
||||
// Input stream with TimeSeriesHeader.
|
||||
);
|
||||
cc->Outputs().Index(0).Set<Matrix>(
|
||||
// Fixed length time series Packets with TimeSeriesHeader.
|
||||
);
|
||||
return ::mediapipe::OkStatus();
|
||||
return absl::OkStatus();
|
||||
}
|
||||
|
||||
// Returns FAIL if the input stream header is invalid.
|
||||
::mediapipe::Status Open(CalculatorContext* cc) override;
|
||||
absl::Status Open(CalculatorContext* cc) override;
|
||||
|
||||
// Outputs as many framed packets as possible given the accumulated
|
||||
// input. Always returns OK.
|
||||
::mediapipe::Status Process(CalculatorContext* cc) override;
|
||||
absl::Status Process(CalculatorContext* cc) override;
|
||||
|
||||
// Flushes any remaining samples in a zero-padded packet. Always
|
||||
// returns OK.
|
||||
::mediapipe::Status Close(CalculatorContext* cc) override;
|
||||
absl::Status Close(CalculatorContext* cc) override;
|
||||
|
||||
private:
|
||||
// Adds input data to the internal buffer.
|
||||
@@ -134,7 +134,6 @@ class TimeSeriesFramerCalculator : public CalculatorBase {
|
||||
// emulate_fractional_frame_overlap is true.
|
||||
double average_frame_step_samples_;
|
||||
int samples_still_to_drop_;
|
||||
int64 cumulative_input_samples_;
|
||||
int64 cumulative_output_frames_;
|
||||
// "Completed" samples are samples that are no longer needed because
|
||||
// the framer has completely stepped past them (taking into account
|
||||
@@ -163,8 +162,6 @@ void TimeSeriesFramerCalculator::EnqueueInput(CalculatorContext* cc) {
|
||||
sample_buffer_.emplace_back(std::make_pair(
|
||||
input_frame.col(i), CurrentSampleTimestamp(cc->InputTimestamp(), i)));
|
||||
}
|
||||
|
||||
cumulative_input_samples_ += input_frame.cols();
|
||||
}
|
||||
|
||||
void TimeSeriesFramerCalculator::FrameOutput(CalculatorContext* cc) {
|
||||
@@ -203,9 +200,15 @@ void TimeSeriesFramerCalculator::FrameOutput(CalculatorContext* cc) {
|
||||
++cumulative_output_frames_;
|
||||
cumulative_completed_samples_ += frame_step_samples;
|
||||
}
|
||||
if (!use_local_timestamp_) {
|
||||
// In non-local timestamp mode the timestamp of the next packet will be
|
||||
// equal to CumulativeOutputTimestamp(). Inform the framework about this
|
||||
// fact to enable packet queueing optimizations.
|
||||
cc->Outputs().Index(0).SetNextTimestampBound(CumulativeOutputTimestamp());
|
||||
}
|
||||
}
|
||||
|
||||
::mediapipe::Status TimeSeriesFramerCalculator::Process(CalculatorContext* cc) {
|
||||
absl::Status TimeSeriesFramerCalculator::Process(CalculatorContext* cc) {
|
||||
if (initial_input_timestamp_ == Timestamp::Unstarted()) {
|
||||
initial_input_timestamp_ = cc->InputTimestamp();
|
||||
current_timestamp_ = initial_input_timestamp_;
|
||||
@@ -214,10 +217,10 @@ void TimeSeriesFramerCalculator::FrameOutput(CalculatorContext* cc) {
|
||||
EnqueueInput(cc);
|
||||
FrameOutput(cc);
|
||||
|
||||
return ::mediapipe::OkStatus();
|
||||
return absl::OkStatus();
|
||||
}
|
||||
|
||||
::mediapipe::Status TimeSeriesFramerCalculator::Close(CalculatorContext* cc) {
|
||||
absl::Status TimeSeriesFramerCalculator::Close(CalculatorContext* cc) {
|
||||
while (samples_still_to_drop_ > 0 && !sample_buffer_.empty()) {
|
||||
sample_buffer_.pop_front();
|
||||
--samples_still_to_drop_;
|
||||
@@ -234,10 +237,10 @@ void TimeSeriesFramerCalculator::FrameOutput(CalculatorContext* cc) {
|
||||
CurrentOutputTimestamp());
|
||||
}
|
||||
|
||||
return ::mediapipe::OkStatus();
|
||||
return absl::OkStatus();
|
||||
}
|
||||
|
||||
::mediapipe::Status TimeSeriesFramerCalculator::Open(CalculatorContext* cc) {
|
||||
absl::Status TimeSeriesFramerCalculator::Open(CalculatorContext* cc) {
|
||||
TimeSeriesFramerCalculatorOptions framer_options =
|
||||
cc->Options<TimeSeriesFramerCalculatorOptions>();
|
||||
|
||||
@@ -286,7 +289,6 @@ void TimeSeriesFramerCalculator::FrameOutput(CalculatorContext* cc) {
|
||||
}
|
||||
cc->Outputs().Index(0).SetHeader(Adopt(output_header));
|
||||
cumulative_completed_samples_ = 0;
|
||||
cumulative_input_samples_ = 0;
|
||||
cumulative_output_frames_ = 0;
|
||||
samples_still_to_drop_ = 0;
|
||||
initial_input_timestamp_ = Timestamp::Unstarted();
|
||||
@@ -317,7 +319,7 @@ void TimeSeriesFramerCalculator::FrameOutput(CalculatorContext* cc) {
|
||||
}
|
||||
use_local_timestamp_ = framer_options.use_local_timestamp();
|
||||
|
||||
return ::mediapipe::OkStatus();
|
||||
return absl::OkStatus();
|
||||
}
|
||||
|
||||
} // namespace mediapipe
|
||||
|
||||
@@ -69,7 +69,7 @@ class TimeSeriesFramerCalculatorTest
|
||||
}
|
||||
|
||||
// Initializes and runs the test graph.
|
||||
::mediapipe::Status Run() {
|
||||
absl::Status Run() {
|
||||
InitializeGraph();
|
||||
|
||||
FillInputHeader();
|
||||
@@ -441,7 +441,7 @@ class TimeSeriesFramerCalculatorTimestampingTest
|
||||
}
|
||||
}
|
||||
|
||||
::mediapipe::Status RunTimestampTest() {
|
||||
absl::Status RunTimestampTest() {
|
||||
InitializeGraph();
|
||||
InitializeInputForTimeStampingTest();
|
||||
FillInputHeader();
|
||||
|
||||
+473
-116
@@ -13,181 +13,152 @@
|
||||
# limitations under the License.
|
||||
#
|
||||
|
||||
load("//mediapipe/framework/port:build_config.bzl", "mediapipe_cc_proto_library")
|
||||
load("//mediapipe/framework/port:build_config.bzl", "mediapipe_proto_library")
|
||||
|
||||
licenses(["notice"]) # Apache 2.0
|
||||
licenses(["notice"])
|
||||
|
||||
package(default_visibility = ["//visibility:private"])
|
||||
|
||||
proto_library(
|
||||
mediapipe_proto_library(
|
||||
name = "concatenate_vector_calculator_proto",
|
||||
srcs = ["concatenate_vector_calculator.proto"],
|
||||
visibility = ["//visibility:public"],
|
||||
deps = ["//mediapipe/framework:calculator_proto"],
|
||||
deps = [
|
||||
"//mediapipe/framework:calculator_options_proto",
|
||||
"//mediapipe/framework:calculator_proto",
|
||||
],
|
||||
)
|
||||
|
||||
proto_library(
|
||||
mediapipe_proto_library(
|
||||
name = "dequantize_byte_array_calculator_proto",
|
||||
srcs = ["dequantize_byte_array_calculator.proto"],
|
||||
visibility = ["//visibility:public"],
|
||||
deps = ["//mediapipe/framework:calculator_proto"],
|
||||
deps = [
|
||||
"//mediapipe/framework:calculator_options_proto",
|
||||
"//mediapipe/framework:calculator_proto",
|
||||
],
|
||||
)
|
||||
|
||||
proto_library(
|
||||
mediapipe_proto_library(
|
||||
name = "packet_cloner_calculator_proto",
|
||||
srcs = ["packet_cloner_calculator.proto"],
|
||||
visibility = ["//visibility:public"],
|
||||
deps = ["//mediapipe/framework:calculator_proto"],
|
||||
deps = [
|
||||
"//mediapipe/framework:calculator_options_proto",
|
||||
"//mediapipe/framework:calculator_proto",
|
||||
],
|
||||
)
|
||||
|
||||
proto_library(
|
||||
mediapipe_proto_library(
|
||||
name = "packet_resampler_calculator_proto",
|
||||
srcs = ["packet_resampler_calculator.proto"],
|
||||
visibility = ["//visibility:public"],
|
||||
deps = ["//mediapipe/framework:calculator_proto"],
|
||||
deps = [
|
||||
"//mediapipe/framework:calculator_options_proto",
|
||||
"//mediapipe/framework:calculator_proto",
|
||||
],
|
||||
)
|
||||
|
||||
proto_library(
|
||||
mediapipe_proto_library(
|
||||
name = "packet_thinner_calculator_proto",
|
||||
srcs = ["packet_thinner_calculator.proto"],
|
||||
visibility = ["//visibility:public"],
|
||||
deps = ["//mediapipe/framework:calculator_proto"],
|
||||
deps = [
|
||||
"//mediapipe/framework:calculator_options_proto",
|
||||
"//mediapipe/framework:calculator_proto",
|
||||
],
|
||||
)
|
||||
|
||||
proto_library(
|
||||
mediapipe_proto_library(
|
||||
name = "split_vector_calculator_proto",
|
||||
srcs = ["split_vector_calculator.proto"],
|
||||
visibility = ["//visibility:public"],
|
||||
deps = ["//mediapipe/framework:calculator_proto"],
|
||||
deps = [
|
||||
"//mediapipe/framework:calculator_options_proto",
|
||||
"//mediapipe/framework:calculator_proto",
|
||||
],
|
||||
)
|
||||
|
||||
proto_library(
|
||||
mediapipe_proto_library(
|
||||
name = "quantize_float_vector_calculator_proto",
|
||||
srcs = ["quantize_float_vector_calculator.proto"],
|
||||
visibility = ["//visibility:public"],
|
||||
deps = ["//mediapipe/framework:calculator_proto"],
|
||||
deps = [
|
||||
"//mediapipe/framework:calculator_options_proto",
|
||||
"//mediapipe/framework:calculator_proto",
|
||||
],
|
||||
)
|
||||
|
||||
proto_library(
|
||||
mediapipe_proto_library(
|
||||
name = "sequence_shift_calculator_proto",
|
||||
srcs = ["sequence_shift_calculator.proto"],
|
||||
visibility = ["//visibility:public"],
|
||||
deps = [
|
||||
"//mediapipe/framework:calculator_options_proto",
|
||||
"//mediapipe/framework:calculator_proto",
|
||||
],
|
||||
)
|
||||
|
||||
proto_library(
|
||||
mediapipe_proto_library(
|
||||
name = "gate_calculator_proto",
|
||||
srcs = ["gate_calculator.proto"],
|
||||
visibility = ["//visibility:public"],
|
||||
deps = [
|
||||
"//mediapipe/framework:calculator_options_proto",
|
||||
"//mediapipe/framework:calculator_proto",
|
||||
],
|
||||
)
|
||||
|
||||
proto_library(
|
||||
mediapipe_proto_library(
|
||||
name = "constant_side_packet_calculator_proto",
|
||||
srcs = ["constant_side_packet_calculator.proto"],
|
||||
visibility = ["//visibility:public"],
|
||||
deps = [
|
||||
"//mediapipe/framework:calculator_options_proto",
|
||||
"//mediapipe/framework:calculator_proto",
|
||||
"//mediapipe/framework/formats:classification_proto",
|
||||
"//mediapipe/framework/formats:landmark_proto",
|
||||
],
|
||||
)
|
||||
|
||||
mediapipe_proto_library(
|
||||
name = "clip_vector_size_calculator_proto",
|
||||
srcs = ["clip_vector_size_calculator.proto"],
|
||||
visibility = ["//visibility:public"],
|
||||
deps = [
|
||||
"//mediapipe/framework:calculator_options_proto",
|
||||
"//mediapipe/framework:calculator_proto",
|
||||
],
|
||||
)
|
||||
|
||||
proto_library(
|
||||
name = "clip_vector_size_calculator_proto",
|
||||
srcs = ["clip_vector_size_calculator.proto"],
|
||||
mediapipe_proto_library(
|
||||
name = "flow_limiter_calculator_proto",
|
||||
srcs = ["flow_limiter_calculator.proto"],
|
||||
visibility = ["//visibility:public"],
|
||||
deps = ["//mediapipe/framework:calculator_proto"],
|
||||
deps = [
|
||||
"//mediapipe/framework:calculator_options_proto",
|
||||
"//mediapipe/framework:calculator_proto",
|
||||
],
|
||||
)
|
||||
|
||||
mediapipe_cc_proto_library(
|
||||
name = "packet_cloner_calculator_cc_proto",
|
||||
srcs = ["packet_cloner_calculator.proto"],
|
||||
cc_deps = ["//mediapipe/framework:calculator_cc_proto"],
|
||||
mediapipe_proto_library(
|
||||
name = "graph_profile_calculator_proto",
|
||||
srcs = ["graph_profile_calculator.proto"],
|
||||
visibility = ["//visibility:public"],
|
||||
deps = [":packet_cloner_calculator_proto"],
|
||||
deps = [
|
||||
"//mediapipe/framework:calculator_options_proto",
|
||||
"//mediapipe/framework:calculator_proto",
|
||||
],
|
||||
)
|
||||
|
||||
mediapipe_cc_proto_library(
|
||||
name = "packet_resampler_calculator_cc_proto",
|
||||
srcs = ["packet_resampler_calculator.proto"],
|
||||
cc_deps = ["//mediapipe/framework:calculator_cc_proto"],
|
||||
mediapipe_proto_library(
|
||||
name = "get_vector_item_calculator_proto",
|
||||
srcs = ["get_vector_item_calculator.proto"],
|
||||
visibility = ["//visibility:public"],
|
||||
deps = [":packet_resampler_calculator_proto"],
|
||||
)
|
||||
|
||||
mediapipe_cc_proto_library(
|
||||
name = "packet_thinner_calculator_cc_proto",
|
||||
srcs = ["packet_thinner_calculator.proto"],
|
||||
cc_deps = ["//mediapipe/framework:calculator_cc_proto"],
|
||||
visibility = ["//visibility:public"],
|
||||
deps = [":packet_thinner_calculator_proto"],
|
||||
)
|
||||
|
||||
mediapipe_cc_proto_library(
|
||||
name = "split_vector_calculator_cc_proto",
|
||||
srcs = ["split_vector_calculator.proto"],
|
||||
cc_deps = ["//mediapipe/framework:calculator_cc_proto"],
|
||||
visibility = ["//visibility:public"],
|
||||
deps = [":split_vector_calculator_proto"],
|
||||
)
|
||||
|
||||
mediapipe_cc_proto_library(
|
||||
name = "concatenate_vector_calculator_cc_proto",
|
||||
srcs = ["concatenate_vector_calculator.proto"],
|
||||
cc_deps = ["//mediapipe/framework:calculator_cc_proto"],
|
||||
visibility = ["//visibility:public"],
|
||||
deps = [":concatenate_vector_calculator_proto"],
|
||||
)
|
||||
|
||||
mediapipe_cc_proto_library(
|
||||
name = "clip_vector_size_calculator_cc_proto",
|
||||
srcs = ["clip_vector_size_calculator.proto"],
|
||||
cc_deps = ["//mediapipe/framework:calculator_cc_proto"],
|
||||
visibility = ["//visibility:public"],
|
||||
deps = [":clip_vector_size_calculator_proto"],
|
||||
)
|
||||
|
||||
mediapipe_cc_proto_library(
|
||||
name = "dequantize_byte_array_calculator_cc_proto",
|
||||
srcs = ["dequantize_byte_array_calculator.proto"],
|
||||
cc_deps = ["//mediapipe/framework:calculator_cc_proto"],
|
||||
visibility = ["//visibility:public"],
|
||||
deps = [":dequantize_byte_array_calculator_proto"],
|
||||
)
|
||||
|
||||
mediapipe_cc_proto_library(
|
||||
name = "quantize_float_vector_calculator_cc_proto",
|
||||
srcs = ["quantize_float_vector_calculator.proto"],
|
||||
cc_deps = ["//mediapipe/framework:calculator_cc_proto"],
|
||||
visibility = ["//visibility:public"],
|
||||
deps = [":quantize_float_vector_calculator_proto"],
|
||||
)
|
||||
|
||||
mediapipe_cc_proto_library(
|
||||
name = "sequence_shift_calculator_cc_proto",
|
||||
srcs = ["sequence_shift_calculator.proto"],
|
||||
cc_deps = ["//mediapipe/framework:calculator_cc_proto"],
|
||||
visibility = ["//visibility:public"],
|
||||
deps = [":sequence_shift_calculator_proto"],
|
||||
)
|
||||
|
||||
mediapipe_cc_proto_library(
|
||||
name = "gate_calculator_cc_proto",
|
||||
srcs = ["gate_calculator.proto"],
|
||||
cc_deps = ["//mediapipe/framework:calculator_cc_proto"],
|
||||
visibility = ["//visibility:public"],
|
||||
deps = [":gate_calculator_proto"],
|
||||
)
|
||||
|
||||
mediapipe_cc_proto_library(
|
||||
name = "constant_side_packet_calculator_cc_proto",
|
||||
srcs = ["constant_side_packet_calculator.proto"],
|
||||
cc_deps = ["//mediapipe/framework:calculator_cc_proto"],
|
||||
visibility = ["//visibility:public"],
|
||||
deps = [":constant_side_packet_calculator_proto"],
|
||||
deps = [
|
||||
"//mediapipe/framework:calculator_options_proto",
|
||||
"//mediapipe/framework:calculator_proto",
|
||||
],
|
||||
)
|
||||
|
||||
cc_library(
|
||||
@@ -196,6 +167,7 @@ cc_library(
|
||||
visibility = ["//visibility:public"],
|
||||
deps = [
|
||||
"//mediapipe/framework:calculator_framework",
|
||||
"//mediapipe/framework/api2:node",
|
||||
"//mediapipe/framework/port:logging",
|
||||
"//mediapipe/framework/port:status",
|
||||
],
|
||||
@@ -230,6 +202,7 @@ cc_library(
|
||||
"//mediapipe/framework:packet",
|
||||
"//mediapipe/framework/formats:detection_cc_proto",
|
||||
"//mediapipe/framework/formats:landmark_cc_proto",
|
||||
"//mediapipe/framework/formats:matrix",
|
||||
"//mediapipe/framework/formats:rect_cc_proto",
|
||||
"//mediapipe/framework/port:integral_types",
|
||||
"//mediapipe/framework/port:ret_check",
|
||||
@@ -251,12 +224,14 @@ cc_library(
|
||||
"//mediapipe/framework:collection_item_id",
|
||||
"//mediapipe/framework:packet",
|
||||
"//mediapipe/framework/formats:classification_cc_proto",
|
||||
"//mediapipe/framework/formats:detection_cc_proto",
|
||||
"//mediapipe/framework/formats:landmark_cc_proto",
|
||||
"//mediapipe/framework/formats:rect_cc_proto",
|
||||
"//mediapipe/framework/port:integral_types",
|
||||
"//mediapipe/framework/port:ret_check",
|
||||
"//mediapipe/framework/port:status",
|
||||
"//mediapipe/util:render_data_cc_proto",
|
||||
"@org_tensorflow//tensorflow/lite:framework",
|
||||
],
|
||||
alwayslink = 1,
|
||||
)
|
||||
@@ -281,16 +256,47 @@ cc_test(
|
||||
)
|
||||
|
||||
cc_library(
|
||||
name = "concatenate_vector_calculator",
|
||||
srcs = ["concatenate_vector_calculator.cc"],
|
||||
name = "concatenate_vector_calculator_hdr",
|
||||
hdrs = ["concatenate_vector_calculator.h"],
|
||||
visibility = ["//visibility:public"],
|
||||
deps = [
|
||||
":concatenate_vector_calculator_cc_proto",
|
||||
"//mediapipe/framework:calculator_framework",
|
||||
"//mediapipe/framework/formats:landmark_cc_proto",
|
||||
"//mediapipe/framework/api2:node",
|
||||
"//mediapipe/framework/api2:port",
|
||||
"//mediapipe/framework/port:integral_types",
|
||||
"//mediapipe/framework/port:ret_check",
|
||||
"//mediapipe/framework/port:status",
|
||||
],
|
||||
alwayslink = 1,
|
||||
)
|
||||
|
||||
cc_library(
|
||||
name = "concatenate_vector_calculator",
|
||||
srcs = ["concatenate_vector_calculator.cc"],
|
||||
hdrs = ["concatenate_vector_calculator.h"],
|
||||
copts = select({
|
||||
# Needed for "//mediapipe/framework/formats:tensor" compatibility on Apple
|
||||
# platforms for Metal pulled in via the tensor.h header.
|
||||
"//mediapipe:apple": [
|
||||
"-x objective-c++",
|
||||
"-fobjc-arc", # enable reference-counting
|
||||
],
|
||||
"//conditions:default": [],
|
||||
}),
|
||||
visibility = ["//visibility:public"],
|
||||
deps = [
|
||||
":concatenate_vector_calculator_cc_proto",
|
||||
"//mediapipe/framework/api2:node",
|
||||
"//mediapipe/framework/api2:port",
|
||||
"//mediapipe/framework/formats:classification_cc_proto",
|
||||
"//mediapipe/framework/formats:landmark_cc_proto",
|
||||
"//mediapipe/framework/formats:tensor",
|
||||
"//mediapipe/framework/port:integral_types",
|
||||
"//mediapipe/framework/port:ret_check",
|
||||
"//mediapipe/framework/port:status",
|
||||
"//mediapipe/framework:calculator_framework",
|
||||
"//mediapipe/util:render_data_cc_proto",
|
||||
"@org_tensorflow//tensorflow/lite:framework",
|
||||
] + select({
|
||||
"//mediapipe/gpu:disable_gpu": [],
|
||||
@@ -314,6 +320,38 @@ cc_library(
|
||||
alwayslink = 1,
|
||||
)
|
||||
|
||||
cc_library(
|
||||
name = "concatenate_proto_list_calculator",
|
||||
srcs = ["concatenate_proto_list_calculator.cc"],
|
||||
visibility = ["//visibility:public"],
|
||||
deps = [
|
||||
":concatenate_vector_calculator_cc_proto",
|
||||
"//mediapipe/framework:calculator_framework",
|
||||
"//mediapipe/framework/api2:node",
|
||||
"//mediapipe/framework/formats:landmark_cc_proto",
|
||||
"//mediapipe/framework/port:ret_check",
|
||||
"//mediapipe/framework/port:status",
|
||||
],
|
||||
alwayslink = 1,
|
||||
)
|
||||
|
||||
cc_test(
|
||||
name = "concatenate_proto_list_calculator_test",
|
||||
srcs = ["concatenate_proto_list_calculator_test.cc"],
|
||||
deps = [
|
||||
":concatenate_proto_list_calculator",
|
||||
":concatenate_vector_calculator_cc_proto",
|
||||
"//mediapipe/framework:calculator_framework",
|
||||
"//mediapipe/framework:calculator_runner",
|
||||
"//mediapipe/framework:timestamp",
|
||||
"//mediapipe/framework/formats:landmark_cc_proto",
|
||||
"//mediapipe/framework/port:gtest_main",
|
||||
"//mediapipe/framework/port:parse_text_proto",
|
||||
"//mediapipe/framework/port:status",
|
||||
"@com_google_absl//absl/strings",
|
||||
],
|
||||
)
|
||||
|
||||
cc_test(
|
||||
name = "concatenate_vector_calculator_test",
|
||||
srcs = ["concatenate_vector_calculator_test.cc"],
|
||||
@@ -397,11 +435,29 @@ cc_library(
|
||||
],
|
||||
deps = [
|
||||
"//mediapipe/framework:calculator_framework",
|
||||
"//mediapipe/framework/api2:node",
|
||||
"//mediapipe/framework/port:status",
|
||||
],
|
||||
alwayslink = 1,
|
||||
)
|
||||
|
||||
cc_test(
|
||||
name = "make_pair_calculator_test",
|
||||
size = "small",
|
||||
srcs = ["make_pair_calculator_test.cc"],
|
||||
deps = [
|
||||
":make_pair_calculator",
|
||||
"//mediapipe/framework:calculator_framework",
|
||||
"//mediapipe/framework:calculator_runner",
|
||||
"//mediapipe/framework:timestamp",
|
||||
"//mediapipe/framework/port:gtest_main",
|
||||
"//mediapipe/framework/port:status",
|
||||
"//mediapipe/framework/tool:validate_type",
|
||||
"//mediapipe/util:packet_test_util",
|
||||
"//mediapipe/util:time_series_test_util",
|
||||
],
|
||||
)
|
||||
|
||||
cc_library(
|
||||
name = "matrix_multiply_calculator",
|
||||
srcs = ["matrix_multiply_calculator.cc"],
|
||||
@@ -410,10 +466,10 @@ cc_library(
|
||||
],
|
||||
deps = [
|
||||
"//mediapipe/framework:calculator_framework",
|
||||
"//mediapipe/framework:timestamp",
|
||||
"//mediapipe/framework/api2:node",
|
||||
"//mediapipe/framework/formats:matrix",
|
||||
"//mediapipe/framework/port:status",
|
||||
"@eigen_archive//:eigen",
|
||||
"@eigen_archive//:eigen3",
|
||||
],
|
||||
alwayslink = 1,
|
||||
)
|
||||
@@ -426,10 +482,10 @@ cc_library(
|
||||
],
|
||||
deps = [
|
||||
"//mediapipe/framework:calculator_framework",
|
||||
"//mediapipe/framework:timestamp",
|
||||
"//mediapipe/framework/api2:node",
|
||||
"//mediapipe/framework/formats:matrix",
|
||||
"//mediapipe/framework/port:status",
|
||||
"@eigen_archive//:eigen",
|
||||
"@eigen_archive//:eigen3",
|
||||
],
|
||||
alwayslink = 1,
|
||||
)
|
||||
@@ -442,12 +498,61 @@ cc_library(
|
||||
],
|
||||
deps = [
|
||||
"//mediapipe/framework:calculator_framework",
|
||||
"//mediapipe/framework/api2:node",
|
||||
"//mediapipe/framework/port:ret_check",
|
||||
"//mediapipe/framework/stream_handler:mux_input_stream_handler",
|
||||
],
|
||||
alwayslink = 1,
|
||||
)
|
||||
|
||||
cc_library(
|
||||
name = "non_zero_calculator",
|
||||
srcs = ["non_zero_calculator.cc"],
|
||||
visibility = [
|
||||
"//visibility:public",
|
||||
],
|
||||
deps = [
|
||||
"//mediapipe/framework:calculator_framework",
|
||||
"//mediapipe/framework/api2:node",
|
||||
"//mediapipe/framework/port:ret_check",
|
||||
],
|
||||
alwayslink = 1,
|
||||
)
|
||||
|
||||
cc_test(
|
||||
name = "non_zero_calculator_test",
|
||||
size = "small",
|
||||
srcs = ["non_zero_calculator_test.cc"],
|
||||
deps = [
|
||||
":non_zero_calculator",
|
||||
"//mediapipe/framework:calculator_framework",
|
||||
"//mediapipe/framework:calculator_runner",
|
||||
"//mediapipe/framework:timestamp",
|
||||
"//mediapipe/framework/port:gtest_main",
|
||||
"//mediapipe/framework/port:status",
|
||||
"//mediapipe/framework/tool:validate_type",
|
||||
],
|
||||
)
|
||||
|
||||
cc_test(
|
||||
name = "mux_calculator_test",
|
||||
srcs = ["mux_calculator_test.cc"],
|
||||
deps = [
|
||||
":mux_calculator",
|
||||
":round_robin_demux_calculator",
|
||||
":split_vector_calculator",
|
||||
"//mediapipe/framework:calculator_framework",
|
||||
"//mediapipe/framework:calculator_runner",
|
||||
"//mediapipe/framework/api2:node",
|
||||
"//mediapipe/framework/api2:port",
|
||||
"//mediapipe/framework/port:gtest_main",
|
||||
"//mediapipe/framework/port:parse_text_proto",
|
||||
"//mediapipe/framework/port:status",
|
||||
"@com_google_absl//absl/status",
|
||||
"@com_google_absl//absl/types:optional",
|
||||
],
|
||||
)
|
||||
|
||||
cc_library(
|
||||
name = "packet_cloner_calculator",
|
||||
srcs = ["packet_cloner_calculator.cc"],
|
||||
@@ -462,6 +567,23 @@ cc_library(
|
||||
alwayslink = 1,
|
||||
)
|
||||
|
||||
cc_test(
|
||||
name = "packet_cloner_calculator_test",
|
||||
srcs = ["packet_cloner_calculator_test.cc"],
|
||||
deps = [
|
||||
":gate_calculator",
|
||||
":packet_cloner_calculator",
|
||||
"//mediapipe/framework:calculator_framework",
|
||||
"//mediapipe/framework:timestamp",
|
||||
"//mediapipe/framework/port:gtest_main",
|
||||
"//mediapipe/framework/port:parse_text_proto",
|
||||
"//mediapipe/framework/port:status",
|
||||
"//mediapipe/framework/stream_handler:immediate_input_stream_handler",
|
||||
"//mediapipe/framework/tool:sink",
|
||||
"@com_google_absl//absl/strings",
|
||||
],
|
||||
)
|
||||
|
||||
cc_library(
|
||||
name = "packet_inner_join_calculator",
|
||||
srcs = ["packet_inner_join_calculator.cc"],
|
||||
@@ -498,6 +620,7 @@ cc_library(
|
||||
"//mediapipe/framework/port:integral_types",
|
||||
"//mediapipe/framework/port:logging",
|
||||
"//mediapipe/framework/port:status",
|
||||
"//mediapipe/framework/tool:options_util",
|
||||
],
|
||||
alwayslink = 1,
|
||||
)
|
||||
@@ -538,6 +661,7 @@ cc_library(
|
||||
],
|
||||
deps = [
|
||||
"//mediapipe/framework:calculator_framework",
|
||||
"//mediapipe/framework/api2:node",
|
||||
"//mediapipe/framework/port:ret_check",
|
||||
],
|
||||
alwayslink = 1,
|
||||
@@ -557,6 +681,35 @@ cc_library(
|
||||
alwayslink = 1,
|
||||
)
|
||||
|
||||
cc_library(
|
||||
name = "packet_presence_calculator",
|
||||
srcs = ["packet_presence_calculator.cc"],
|
||||
visibility = ["//visibility:public"],
|
||||
deps = [
|
||||
"//mediapipe/framework:calculator_framework",
|
||||
"//mediapipe/framework:packet",
|
||||
"//mediapipe/framework:timestamp",
|
||||
"//mediapipe/framework/port:status",
|
||||
],
|
||||
alwayslink = 1,
|
||||
)
|
||||
|
||||
cc_test(
|
||||
name = "packet_presence_calculator_test",
|
||||
srcs = ["packet_presence_calculator_test.cc"],
|
||||
deps = [
|
||||
":gate_calculator",
|
||||
":packet_presence_calculator",
|
||||
"//mediapipe/framework:calculator_framework",
|
||||
"//mediapipe/framework:calculator_runner",
|
||||
"//mediapipe/framework:timestamp",
|
||||
"//mediapipe/framework/port:gtest_main",
|
||||
"//mediapipe/framework/port:parse_text_proto",
|
||||
"//mediapipe/framework/port:status",
|
||||
"//mediapipe/framework/tool:sink",
|
||||
],
|
||||
)
|
||||
|
||||
cc_library(
|
||||
name = "previous_loopback_calculator",
|
||||
srcs = ["previous_loopback_calculator.cc"],
|
||||
@@ -565,6 +718,7 @@ cc_library(
|
||||
"//mediapipe/framework:calculator_framework",
|
||||
"//mediapipe/framework:packet",
|
||||
"//mediapipe/framework:timestamp",
|
||||
"//mediapipe/framework/api2:node",
|
||||
"//mediapipe/framework/port:ret_check",
|
||||
"//mediapipe/framework/port:status",
|
||||
"//mediapipe/framework/stream_handler:immediate_input_stream_handler",
|
||||
@@ -577,6 +731,7 @@ cc_library(
|
||||
srcs = ["flow_limiter_calculator.cc"],
|
||||
visibility = ["//visibility:public"],
|
||||
deps = [
|
||||
":flow_limiter_calculator_cc_proto",
|
||||
"//mediapipe/framework:calculator_framework",
|
||||
"//mediapipe/framework:packet",
|
||||
"//mediapipe/framework:timestamp",
|
||||
@@ -601,6 +756,18 @@ cc_library(
|
||||
alwayslink = 1,
|
||||
)
|
||||
|
||||
cc_library(
|
||||
name = "default_side_packet_calculator",
|
||||
srcs = ["default_side_packet_calculator.cc"],
|
||||
visibility = ["//visibility:public"],
|
||||
deps = [
|
||||
"//mediapipe/framework:calculator_framework",
|
||||
"//mediapipe/framework/port:ret_check",
|
||||
"//mediapipe/framework/port:status",
|
||||
],
|
||||
alwayslink = 1,
|
||||
)
|
||||
|
||||
cc_library(
|
||||
name = "side_packet_to_stream_calculator",
|
||||
srcs = ["side_packet_to_stream_calculator.cc"],
|
||||
@@ -726,7 +893,7 @@ cc_test(
|
||||
"//mediapipe/framework/port:gtest_main",
|
||||
"//mediapipe/framework/port:logging",
|
||||
"//mediapipe/framework/tool:validate_type",
|
||||
"@eigen_archive//:eigen",
|
||||
"@eigen_archive//:eigen3",
|
||||
],
|
||||
)
|
||||
|
||||
@@ -743,7 +910,7 @@ cc_test(
|
||||
"//mediapipe/framework/port:logging",
|
||||
"//mediapipe/framework/port:parse_text_proto",
|
||||
"//mediapipe/framework/tool:validate_type",
|
||||
"@eigen_archive//:eigen",
|
||||
"@eigen_archive//:eigen3",
|
||||
],
|
||||
)
|
||||
|
||||
@@ -752,6 +919,7 @@ cc_test(
|
||||
srcs = ["flow_limiter_calculator_test.cc"],
|
||||
deps = [
|
||||
":flow_limiter_calculator",
|
||||
":flow_limiter_calculator_cc_proto",
|
||||
"//mediapipe/calculators/core:counting_source_calculator",
|
||||
"//mediapipe/calculators/core:pass_through_calculator",
|
||||
"//mediapipe/framework:calculator_framework",
|
||||
@@ -763,6 +931,8 @@ cc_test(
|
||||
"//mediapipe/framework/port:integral_types",
|
||||
"//mediapipe/framework/port:parse_text_proto",
|
||||
"//mediapipe/framework/stream_handler:immediate_input_stream_handler",
|
||||
"//mediapipe/framework/tool:simulation_clock",
|
||||
"//mediapipe/framework/tool:simulation_clock_executor",
|
||||
"//mediapipe/framework/tool:sink",
|
||||
"@com_google_absl//absl/time",
|
||||
],
|
||||
@@ -772,13 +942,23 @@ cc_library(
|
||||
name = "split_vector_calculator",
|
||||
srcs = ["split_vector_calculator.cc"],
|
||||
hdrs = ["split_vector_calculator.h"],
|
||||
copts = select({
|
||||
"//mediapipe:apple": [
|
||||
"-x objective-c++",
|
||||
"-fobjc-arc", # enable reference-counting
|
||||
],
|
||||
"//conditions:default": [],
|
||||
}),
|
||||
visibility = ["//visibility:public"],
|
||||
deps = [
|
||||
":split_vector_calculator_cc_proto",
|
||||
"//mediapipe/framework/formats:detection_cc_proto",
|
||||
"//mediapipe/framework:calculator_framework",
|
||||
"//mediapipe/framework/formats:landmark_cc_proto",
|
||||
"//mediapipe/framework/formats:classification_cc_proto",
|
||||
"//mediapipe/framework/formats:rect_cc_proto",
|
||||
"//mediapipe/framework/formats:matrix",
|
||||
"//mediapipe/framework/formats:tensor",
|
||||
"//mediapipe/framework/port:ret_check",
|
||||
"//mediapipe/framework/port:status",
|
||||
"//mediapipe/util:resource_util",
|
||||
@@ -812,6 +992,38 @@ cc_test(
|
||||
],
|
||||
)
|
||||
|
||||
cc_library(
|
||||
name = "split_proto_list_calculator",
|
||||
srcs = ["split_proto_list_calculator.cc"],
|
||||
visibility = ["//visibility:public"],
|
||||
deps = [
|
||||
":split_vector_calculator_cc_proto",
|
||||
"//mediapipe/framework:calculator_framework",
|
||||
"//mediapipe/framework/formats:landmark_cc_proto",
|
||||
"//mediapipe/framework/port:ret_check",
|
||||
"//mediapipe/framework/port:status",
|
||||
"//mediapipe/util:resource_util",
|
||||
],
|
||||
alwayslink = 1,
|
||||
)
|
||||
|
||||
cc_test(
|
||||
name = "split_proto_list_calculator_test",
|
||||
srcs = ["split_proto_list_calculator_test.cc"],
|
||||
deps = [
|
||||
":split_proto_list_calculator",
|
||||
":split_vector_calculator_cc_proto",
|
||||
"//mediapipe/framework:calculator_framework",
|
||||
"//mediapipe/framework:calculator_runner",
|
||||
"//mediapipe/framework/deps:file_path",
|
||||
"//mediapipe/framework/formats:landmark_cc_proto",
|
||||
"//mediapipe/framework/port:gtest_main",
|
||||
"//mediapipe/framework/port:integral_types",
|
||||
"//mediapipe/framework/port:parse_text_proto",
|
||||
"//mediapipe/framework/tool:validate_type",
|
||||
],
|
||||
)
|
||||
|
||||
cc_library(
|
||||
name = "dequantize_byte_array_calculator",
|
||||
srcs = ["dequantize_byte_array_calculator.cc"],
|
||||
@@ -871,6 +1083,7 @@ cc_library(
|
||||
deps = [
|
||||
":sequence_shift_calculator_cc_proto",
|
||||
"//mediapipe/framework:calculator_framework",
|
||||
"//mediapipe/framework/api2:node",
|
||||
"//mediapipe/framework/port:status",
|
||||
],
|
||||
alwayslink = 1,
|
||||
@@ -911,7 +1124,6 @@ cc_test(
|
||||
"//mediapipe/framework:calculator_runner",
|
||||
"//mediapipe/framework/port:gtest_main",
|
||||
"//mediapipe/framework/port:parse_text_proto",
|
||||
"//mediapipe/framework/port:status",
|
||||
],
|
||||
)
|
||||
|
||||
@@ -921,6 +1133,7 @@ cc_library(
|
||||
visibility = ["//visibility:public"],
|
||||
deps = [
|
||||
"//mediapipe/framework:calculator_framework",
|
||||
"//mediapipe/framework/api2:node",
|
||||
"//mediapipe/framework/formats:matrix",
|
||||
"//mediapipe/framework/port:integral_types",
|
||||
"//mediapipe/framework/port:logging",
|
||||
@@ -928,7 +1141,7 @@ cc_library(
|
||||
"//mediapipe/framework/tool:status_util",
|
||||
"//mediapipe/util:time_series_util",
|
||||
"@com_google_absl//absl/memory",
|
||||
"@eigen_archive//:eigen",
|
||||
"@eigen_archive//:eigen3",
|
||||
],
|
||||
alwayslink = 1,
|
||||
)
|
||||
@@ -956,6 +1169,7 @@ cc_library(
|
||||
visibility = ["//visibility:public"],
|
||||
deps = [
|
||||
"//mediapipe/framework:calculator_framework",
|
||||
"//mediapipe/framework/api2:node",
|
||||
"//mediapipe/framework/port:ret_check",
|
||||
"//mediapipe/framework/port:status",
|
||||
],
|
||||
@@ -1009,6 +1223,9 @@ cc_library(
|
||||
":constant_side_packet_calculator_cc_proto",
|
||||
"//mediapipe/framework:calculator_framework",
|
||||
"//mediapipe/framework:collection_item_id",
|
||||
"//mediapipe/framework/formats:classification_cc_proto",
|
||||
"//mediapipe/framework/formats:landmark_cc_proto",
|
||||
"//mediapipe/framework/port:integral_types",
|
||||
"//mediapipe/framework/port:ret_check",
|
||||
"//mediapipe/framework/port:status",
|
||||
],
|
||||
@@ -1027,3 +1244,143 @@ cc_test(
|
||||
"@com_google_absl//absl/strings",
|
||||
],
|
||||
)
|
||||
|
||||
cc_library(
|
||||
name = "graph_profile_calculator",
|
||||
srcs = ["graph_profile_calculator.cc"],
|
||||
visibility = ["//visibility:public"],
|
||||
deps = [
|
||||
":graph_profile_calculator_cc_proto",
|
||||
"//mediapipe/framework:calculator_framework",
|
||||
"//mediapipe/framework:calculator_profile_cc_proto",
|
||||
"//mediapipe/framework/api2:node",
|
||||
"//mediapipe/framework/api2:packet",
|
||||
"//mediapipe/framework/api2:port",
|
||||
"//mediapipe/framework/port:ret_check",
|
||||
"//mediapipe/framework/port:status",
|
||||
],
|
||||
alwayslink = 1,
|
||||
)
|
||||
|
||||
cc_test(
|
||||
name = "graph_profile_calculator_test",
|
||||
srcs = ["graph_profile_calculator_test.cc"],
|
||||
deps = [
|
||||
":graph_profile_calculator",
|
||||
"//mediapipe/framework:calculator_cc_proto",
|
||||
"//mediapipe/framework:calculator_framework",
|
||||
"//mediapipe/framework:calculator_profile_cc_proto",
|
||||
"//mediapipe/framework:test_calculators",
|
||||
"//mediapipe/framework/deps:clock",
|
||||
"//mediapipe/framework/port:core_proto",
|
||||
"//mediapipe/framework/port:gtest_main",
|
||||
"//mediapipe/framework/port:integral_types",
|
||||
"//mediapipe/framework/port:logging",
|
||||
"//mediapipe/framework/port:parse_text_proto",
|
||||
"//mediapipe/framework/port:threadpool",
|
||||
"//mediapipe/framework/tool:simulation_clock_executor",
|
||||
"//mediapipe/framework/tool:sink",
|
||||
"@com_google_absl//absl/status",
|
||||
"@com_google_absl//absl/strings",
|
||||
"@com_google_absl//absl/time",
|
||||
],
|
||||
)
|
||||
|
||||
cc_library(
|
||||
name = "get_vector_item_calculator",
|
||||
srcs = ["get_vector_item_calculator.cc"],
|
||||
hdrs = ["get_vector_item_calculator.h"],
|
||||
visibility = ["//visibility:public"],
|
||||
deps = [
|
||||
":get_vector_item_calculator_cc_proto",
|
||||
"//mediapipe/framework:calculator_framework",
|
||||
"//mediapipe/framework:packet",
|
||||
"//mediapipe/framework/api2:node",
|
||||
"//mediapipe/framework/api2:port",
|
||||
"//mediapipe/framework/formats:classification_cc_proto",
|
||||
"//mediapipe/framework/formats:landmark_cc_proto",
|
||||
"//mediapipe/framework/port:ret_check",
|
||||
"//mediapipe/framework/port:status",
|
||||
],
|
||||
alwayslink = 1,
|
||||
)
|
||||
|
||||
cc_test(
|
||||
name = "get_vector_item_calculator_test",
|
||||
srcs = ["get_vector_item_calculator_test.cc"],
|
||||
deps = [
|
||||
":get_vector_item_calculator",
|
||||
"//mediapipe/framework:calculator_framework",
|
||||
"//mediapipe/framework:calculator_runner",
|
||||
"//mediapipe/framework/port:gtest_main",
|
||||
"//mediapipe/framework/port:parse_text_proto",
|
||||
"@com_google_absl//absl/strings:str_format",
|
||||
"@com_google_googletest//:gtest_main",
|
||||
],
|
||||
)
|
||||
|
||||
cc_library(
|
||||
name = "vector_size_calculator",
|
||||
srcs = ["vector_size_calculator.cc"],
|
||||
hdrs = ["vector_size_calculator.h"],
|
||||
visibility = ["//visibility:public"],
|
||||
deps = [
|
||||
"//mediapipe/framework:calculator_framework",
|
||||
"//mediapipe/framework/api2:node",
|
||||
"//mediapipe/framework/formats:classification_cc_proto",
|
||||
"//mediapipe/framework/formats:landmark_cc_proto",
|
||||
"//mediapipe/framework/port:status",
|
||||
],
|
||||
alwayslink = 1,
|
||||
)
|
||||
|
||||
cc_library(
|
||||
name = "packet_sequencer_calculator",
|
||||
srcs = ["packet_sequencer_calculator.cc"],
|
||||
visibility = [
|
||||
"//visibility:public",
|
||||
],
|
||||
deps = [
|
||||
"//mediapipe/framework:calculator_framework",
|
||||
"//mediapipe/framework/api2:contract",
|
||||
"//mediapipe/framework/api2:node",
|
||||
"//mediapipe/framework/api2:packet",
|
||||
"//mediapipe/framework/api2:port",
|
||||
"//mediapipe/framework/port:status",
|
||||
"//mediapipe/framework/stream_handler:immediate_input_stream_handler",
|
||||
],
|
||||
alwayslink = 1,
|
||||
)
|
||||
|
||||
cc_test(
|
||||
name = "packet_sequencer_calculator_test",
|
||||
srcs = ["packet_sequencer_calculator_test.cc"],
|
||||
deps = [
|
||||
":packet_sequencer_calculator",
|
||||
"//mediapipe/calculators/core:pass_through_calculator",
|
||||
"//mediapipe/framework:calculator_cc_proto",
|
||||
"//mediapipe/framework:calculator_framework",
|
||||
"//mediapipe/framework:subgraph",
|
||||
"//mediapipe/framework/port:gtest_main",
|
||||
"//mediapipe/framework/port:logging",
|
||||
"//mediapipe/framework/port:parse_text_proto",
|
||||
"//mediapipe/framework/port:ret_check",
|
||||
"//mediapipe/framework/port:status",
|
||||
"@com_google_absl//absl/strings",
|
||||
],
|
||||
)
|
||||
|
||||
cc_library(
|
||||
name = "merge_to_vector_calculator",
|
||||
srcs = ["merge_to_vector_calculator.cc"],
|
||||
hdrs = ["merge_to_vector_calculator.h"],
|
||||
visibility = ["//visibility:public"],
|
||||
deps = [
|
||||
"//mediapipe/framework:calculator_framework",
|
||||
"//mediapipe/framework/api2:node",
|
||||
"//mediapipe/framework/api2:port",
|
||||
"//mediapipe/framework/formats:image",
|
||||
"@com_google_absl//absl/status",
|
||||
],
|
||||
alwayslink = 1,
|
||||
)
|
||||
|
||||
@@ -12,11 +12,13 @@
|
||||
// See the License for the specific language governing permissions and
|
||||
// limitations under the License.
|
||||
|
||||
#include "mediapipe/framework/api2/node.h"
|
||||
#include "mediapipe/framework/calculator_framework.h"
|
||||
#include "mediapipe/framework/port/canonical_errors.h"
|
||||
#include "mediapipe/framework/port/logging.h"
|
||||
|
||||
namespace mediapipe {
|
||||
namespace api2 {
|
||||
|
||||
// Attach the header from a stream or side input to another stream.
|
||||
//
|
||||
@@ -42,49 +44,41 @@ namespace mediapipe {
|
||||
// output_stream: "audio_with_header"
|
||||
// }
|
||||
//
|
||||
class AddHeaderCalculator : public CalculatorBase {
|
||||
class AddHeaderCalculator : public Node {
|
||||
public:
|
||||
static ::mediapipe::Status GetContract(CalculatorContract* cc) {
|
||||
bool has_side_input = false;
|
||||
bool has_header_stream = false;
|
||||
if (cc->InputSidePackets().HasTag("HEADER")) {
|
||||
cc->InputSidePackets().Tag("HEADER").SetAny();
|
||||
has_side_input = true;
|
||||
}
|
||||
if (cc->Inputs().HasTag("HEADER")) {
|
||||
cc->Inputs().Tag("HEADER").SetNone();
|
||||
has_header_stream = true;
|
||||
}
|
||||
if (has_side_input == has_header_stream) {
|
||||
return mediapipe::InvalidArgumentError(
|
||||
static constexpr Input<NoneType>::Optional kHeader{"HEADER"};
|
||||
static constexpr SideInput<AnyType>::Optional kHeaderSide{"HEADER"};
|
||||
static constexpr Input<AnyType> kData{"DATA"};
|
||||
static constexpr Output<SameType<kData>> kOut{""};
|
||||
|
||||
MEDIAPIPE_NODE_CONTRACT(kHeader, kHeaderSide, kData, kOut);
|
||||
|
||||
static absl::Status UpdateContract(CalculatorContract* cc) {
|
||||
if (kHeader(cc).IsConnected() == kHeaderSide(cc).IsConnected()) {
|
||||
return absl::InvalidArgumentError(
|
||||
"Header must be provided via exactly one of side input and input "
|
||||
"stream");
|
||||
}
|
||||
cc->Inputs().Tag("DATA").SetAny();
|
||||
cc->Outputs().Index(0).SetSameAs(&cc->Inputs().Tag("DATA"));
|
||||
return ::mediapipe::OkStatus();
|
||||
return absl::OkStatus();
|
||||
}
|
||||
|
||||
::mediapipe::Status Open(CalculatorContext* cc) override {
|
||||
Packet header;
|
||||
if (cc->InputSidePackets().HasTag("HEADER")) {
|
||||
header = cc->InputSidePackets().Tag("HEADER");
|
||||
}
|
||||
if (cc->Inputs().HasTag("HEADER")) {
|
||||
header = cc->Inputs().Tag("HEADER").Header();
|
||||
}
|
||||
absl::Status Open(CalculatorContext* cc) override {
|
||||
const PacketBase& header =
|
||||
kHeader(cc).IsConnected() ? kHeader(cc).Header() : kHeaderSide(cc);
|
||||
if (!header.IsEmpty()) {
|
||||
cc->Outputs().Index(0).SetHeader(header);
|
||||
kOut(cc).SetHeader(header);
|
||||
}
|
||||
cc->SetOffset(TimestampDiff(0));
|
||||
return ::mediapipe::OkStatus();
|
||||
cc->SetOffset(0);
|
||||
return absl::OkStatus();
|
||||
}
|
||||
|
||||
::mediapipe::Status Process(CalculatorContext* cc) override {
|
||||
cc->Outputs().Index(0).AddPacket(cc->Inputs().Tag("DATA").Value());
|
||||
return ::mediapipe::OkStatus();
|
||||
absl::Status Process(CalculatorContext* cc) override {
|
||||
kOut(cc).Send(kData(cc).packet());
|
||||
return absl::OkStatus();
|
||||
}
|
||||
};
|
||||
|
||||
REGISTER_CALCULATOR(AddHeaderCalculator);
|
||||
MEDIAPIPE_REGISTER_NODE(AddHeaderCalculator);
|
||||
|
||||
} // namespace api2
|
||||
} // namespace mediapipe
|
||||
|
||||
@@ -24,6 +24,9 @@
|
||||
|
||||
namespace mediapipe {
|
||||
|
||||
constexpr char kDataTag[] = "DATA";
|
||||
constexpr char kHeaderTag[] = "HEADER";
|
||||
|
||||
class AddHeaderCalculatorTest : public ::testing::Test {};
|
||||
|
||||
TEST_F(AddHeaderCalculatorTest, HeaderStream) {
|
||||
@@ -36,11 +39,11 @@ TEST_F(AddHeaderCalculatorTest, HeaderStream) {
|
||||
CalculatorRunner runner(node);
|
||||
|
||||
// Set header and add 5 packets.
|
||||
runner.MutableInputs()->Tag("HEADER").header =
|
||||
runner.MutableInputs()->Tag(kHeaderTag).header =
|
||||
Adopt(new std::string("my_header"));
|
||||
for (int i = 0; i < 5; ++i) {
|
||||
Packet packet = Adopt(new int(i)).At(Timestamp(i * 1000));
|
||||
runner.MutableInputs()->Tag("DATA").packets.push_back(packet);
|
||||
runner.MutableInputs()->Tag(kDataTag).packets.push_back(packet);
|
||||
}
|
||||
|
||||
// Run calculator.
|
||||
@@ -85,13 +88,14 @@ TEST_F(AddHeaderCalculatorTest, NoPacketsOnHeaderStream) {
|
||||
CalculatorRunner runner(node);
|
||||
|
||||
// Set header and add 5 packets.
|
||||
runner.MutableInputs()->Tag("HEADER").header =
|
||||
runner.MutableInputs()->Tag(kHeaderTag).header =
|
||||
Adopt(new std::string("my_header"));
|
||||
runner.MutableInputs()->Tag("HEADER").packets.push_back(
|
||||
Adopt(new std::string("not allowed")));
|
||||
runner.MutableInputs()
|
||||
->Tag(kHeaderTag)
|
||||
.packets.push_back(Adopt(new std::string("not allowed")));
|
||||
for (int i = 0; i < 5; ++i) {
|
||||
Packet packet = Adopt(new int(i)).At(Timestamp(i * 1000));
|
||||
runner.MutableInputs()->Tag("DATA").packets.push_back(packet);
|
||||
runner.MutableInputs()->Tag(kDataTag).packets.push_back(packet);
|
||||
}
|
||||
|
||||
// Run calculator.
|
||||
@@ -108,11 +112,11 @@ TEST_F(AddHeaderCalculatorTest, InputSidePacket) {
|
||||
CalculatorRunner runner(node);
|
||||
|
||||
// Set header and add 5 packets.
|
||||
runner.MutableSidePackets()->Tag("HEADER") =
|
||||
runner.MutableSidePackets()->Tag(kHeaderTag) =
|
||||
Adopt(new std::string("my_header"));
|
||||
for (int i = 0; i < 5; ++i) {
|
||||
Packet packet = Adopt(new int(i)).At(Timestamp(i * 1000));
|
||||
runner.MutableInputs()->Tag("DATA").packets.push_back(packet);
|
||||
runner.MutableInputs()->Tag(kDataTag).packets.push_back(packet);
|
||||
}
|
||||
|
||||
// Run calculator.
|
||||
@@ -143,17 +147,17 @@ TEST_F(AddHeaderCalculatorTest, UsingBothSideInputAndStream) {
|
||||
CalculatorRunner runner(node);
|
||||
|
||||
// Set both headers and add 5 packets.
|
||||
runner.MutableSidePackets()->Tag("HEADER") =
|
||||
runner.MutableSidePackets()->Tag(kHeaderTag) =
|
||||
Adopt(new std::string("my_header"));
|
||||
runner.MutableSidePackets()->Tag("HEADER") =
|
||||
runner.MutableSidePackets()->Tag(kHeaderTag) =
|
||||
Adopt(new std::string("my_header"));
|
||||
for (int i = 0; i < 5; ++i) {
|
||||
Packet packet = Adopt(new int(i)).At(Timestamp(i * 1000));
|
||||
runner.MutableInputs()->Tag("DATA").packets.push_back(packet);
|
||||
runner.MutableInputs()->Tag(kDataTag).packets.push_back(packet);
|
||||
}
|
||||
|
||||
// Run should fail because header can only be provided one way.
|
||||
EXPECT_EQ(runner.Run().code(), ::mediapipe::InvalidArgumentError("").code());
|
||||
EXPECT_EQ(runner.Run().code(), absl::InvalidArgumentError("").code());
|
||||
}
|
||||
|
||||
} // namespace mediapipe
|
||||
|
||||
Some files were not shown because too many files have changed in this diff Show More
Reference in New Issue
Block a user